Heart Happiness Valentine PP380

by Joanne James11. February 2018 09:00

It's Sunday and time for this week's new challenge over at The Paper Players! It's the turn of the wonderful Laurie to host this week and she has a fun colour challenge for you to work with:


I debated about where to take these colours and when I saw the current inspiration photo over at Inspired By All The Little Things I decided another Valentine's card was in order. All those red and white hearts, the love and even the bicycle against the neutral background - take a look:


Here's the low-down on today's card:

Heart Happiness - Today's card like last week's features hearts-a-plenty: I stamped a whole bunch of hearts from the 'Hearts Happiness' stamp set in Real Red onto Whisper White cardstock, diecut them with the Sweet & Sassy Framleits, along with a few additional red glimmer ones, and arranged them across my cardfront, along with a couple of doilies and some linen thread.

Love(ly Words) - Whilst I didn't use a bicycle on my card, I was inspired by the bike in the Inspired By photo to add my 'love' sentiment in black amongst my plethora of hearts. The thin frame of my love heart, like the thin frame of the bicycle, was made using the 'lovely' diecut from the Lovely Words framelits set - I snipped the sentiment between the 'e' and the 'ly' to make 'love' and tucked it in between my other hearts so that only 'love' was visible. 

A Custom Sentiment - Whilst this card could be used as a Valentine, it is also my wedding anniversary next week and so I actually made this card for my husband with that in mind. Inside I stamped two of the sentiments from the Petal Palette stamp set, but customised one of them with another stamp in the same set to change the meaning - take a look:


I altered the wording from 'you' to 'us' on the sentiment in the bottom right-hand corner  - a great way to make this sentiment appropriate for a partner rather than another couple; I used the 'US' from the sentiment I used in the centre of my card. Here are the stamps circled so you can see how they look before they were altered:


I hope you like my clever trick - yet another way to make the most of this fabulous set!

Here is the visual summary of the key products used on today's project for you to pin for easy reference:


You can see all of my Product and 'How To' summaries on my 'How To - Tips and Techniques' Pinterest board in case you've missed any.  I'm also linking up today's card with the team over at CAS-ual Fridays - it is after all hearts, hearts and more hearts!

Before you reach for your ink and papers, check out what our amazing team has created to inspire you this week:

Here's a quick recap of our challenge rules:
 
1.  Create a new paper project
2.  Upload your creation to your blog with a link back to us and provide a direct link to the post featuring your challenge submission.
3.  Please link your card to no more than four challenges, TOTAL.
4.  Have FUN!

I can't wait to see what you create with this week's colours and look forward to visiting your blogs this week! Enjoy the rest of your weekend as it will be over all too quickly. I'm off to the swimming pool today for the County Championships with one of my James Juniors - wish us luck! I'll be back tomorrow with another project; until then, happy stampin'!


Stampin' Up! Supplies Used: 

Table built using Product Table Builder by The Crafty Owl - Independent Stampin' Up! Demonstrator.

Painted With Love Hearts Valentine Card and Co-ordinating Fold Flat Top Heart Box

by Joanne James4. February 2018 09:00

It's Sunday and time for this week's new challenge over at The Paper Players! It's the turn of my lovely and talented friend Claire to host this week and she has a rather timely theme challenge for you to work with:


February at last and Valentine's is on the way! I have both a card and gift box to share with you this week and hearts were definitely on my mind when I started creating - take a look:


Here's the low-down on today's card:

Painted With Love - Whilst I used this week's sketch over at As you See It as the inspiration for the layout for my card today, the Painted With Love papers are most certainly the inspiration for my colour scheme. I couldn't wait to use these colourful papers with their gold foil accents on my project, and carried through the shades of purple and pink to the rest of my card design. Here's my colour palette in case you would like to save it for your future inspiration:


Hearts A Plenty - Both the teams over at CAS-ual Fridays and SUO Challenges are looking for hearts, hearts and more hearts this week. I've used a combination of hearts in all different sizes stamped from the 'Heart Happiness' stamp set and some diecuts using the Sweet and Sassy Framelit Dies, along with a sprinkling of gold metallic heart shapes for my full heart quota.

Love You - My sentiment is a combination of a 'love' diecut from the Sunshine Wishes Framelits and 'YOU' from the Sale-A-Bration 'Celebrate You Thinlits' - I love being able to play around and take bits and pieces from my collection to create the perfect combination. I also added a little stamping to the inside - this lovely stamp from the 'Petal Passion' set: 

I also created a co-ordinating box with a heart fold flat closure in the same paper, perfect to enclose a Valentine's treat - here it is with my card: 


I may well do another blog post on the box - it's very pretty and turned out even better than I hoped it would! Here is the visual summary of the key products used on today's project for you to pin for easy reference:


You can see all of my Product and 'How To' summaries on my 'How To - Tips and Techniques' Pinterest board in case you've missed any. 

Before you reach for your ink and papers, check out what our amazing team has created to inspire you this week:

Here's a quick recap of our challenge rules:
 
1.  Create a new paper project
2.  Upload your creation to your blog with a link back to us and provide a direct link to the post featuring your challenge submission.
3.  Please link your card to no more than four challenges, TOTAL.
4.  Have FUN!

I can't wait to see how you interpret this week's theme and look forward to visiting your blogs this week! Blogland has lots of challenges with love in mind so I think this could be something of a theme around here in coming days! Enjoy the rest of your weekend as it will be over all too quickly. We were out at a swimming gala yesterday and Ben has a basketball tournament today, so it's all go here. I'll be back tomorrow with another project; until then, happy stampin'!


Stampin' Up! Supplies Used: 

Table built using Product Table Builder by The Crafty Owl - Independent Stampin' Up! Demonstrator.

Clean And Simple Panda Love Notes For The Paper Players PP377

by Joanne James21. January 2018 09:00

It's Sunday and time for this week's new challenge over at The Paper Players! It's my turn to host this week and I have a topical clean and simple challenge for you to work with:


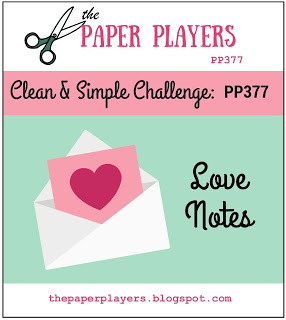
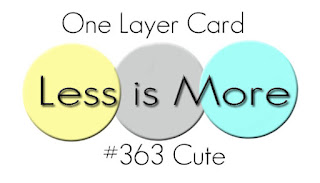
It's almost February and with Valentine's Day around the corner love is definitely in the air, so what better time to send a little love note or two to the one you love? I have a super clean-and-simple card to share with you this week that is also perfect for this week's challenge over at Less Is More - take a look:


Here's the low-down on today's card:

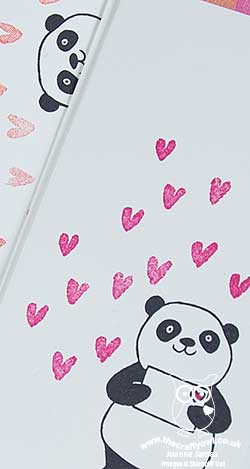
Love You Panda - I couldn't resist using another of these cute little pandas on my card today - this time it had to be the one proudly holding his own little love note, perfect for my theme! I simply stamped him in black, coloured in the heart on his envelope and surrounded him with bright pink love hearts, from the Heart Happiness set. Inside I stamped my sentiment, also from the 'Party Pandas' stamp set, along with another spray of hearts:

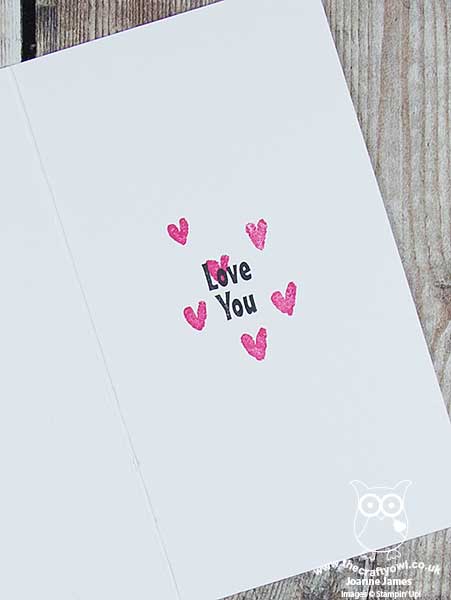
And that's it - super simple, super cute!

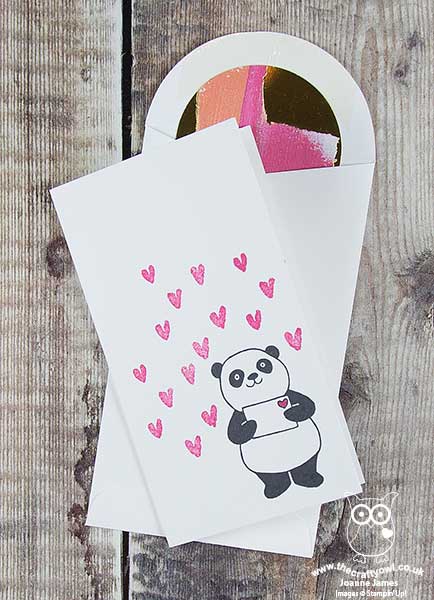
The Perfect Note - I used one of the new Whisper White Narrow Note Cards for my one-layer love note today - they measure 6.4cm x 11.4cm, small and narrow and the perfect size for a note to tuck into a pocket, lunch box or gift package. 

Painted With Love Envelope Liners - My little note card was so quick and easy to put together, I decided to add another surprise pop of colour with an envelope liner on the flap of my envelopes. I simply punched a whole bunch of circles out of the Painted With Love Specialty Designer Series Paper using my 2" circle punch and adhered them to the inner flap of my envelope. 

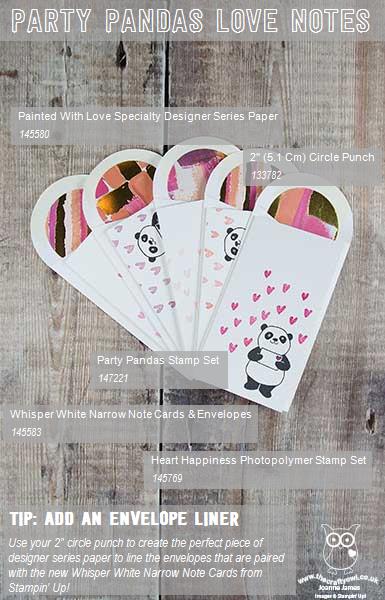
I love my little note card so much, I made a whole bunch of them - I used a selection of papers and stamped my pandas both horizontally and vertically, with hearts in each of the colours that feature in the Painted With Love paper - here's a shot of a bunch of them together:


These are perfect for me to slip into the James Juniors' blazer pockets for a surprise note at school; we are also going to make a whole bunch more for the children to share with their friends too - it's nice to let your besties know they are loved too! They really are so simple to make - it's taken me longer to write this blog post that to actually make all of these cards!

Here is the visual summary of the key products used on today's project for you to pin for easy reference:


You can see all of my Product and 'How To' summaries on my 'How To - Tips and Techniques' Pinterest board in case you've missed any. 

Before you reach for your ink and papers, check out what our amazing team has created to inspire you this week:

Here's a quick recap of our challenge rules:
 
1.  Create a new paper project
2.  Upload your creation to your blog with a link back to us and provide a direct link to the post featuring your challenge submission.
3.  Please link your card to no more than four challenges, TOTAL.
4.  Have FUN!

Don't forget the theme is clean and simple this week - so minimal layers and embellishments and lots of white space. I can't wait to see what you create and look forward to visiting your blogs this week! Enjoy the rest of your weekend as it will be over all too quickly. I'll be back tomorrow with another project; until then, happy stampin'!


Stampin' Up! Supplies Used: 

Table built using Product Table Builder by The Crafty Owl - Independent Stampin' Up! Demonstrator.

Mini Catalogue

BROWSE THE CATALOGUE

The mini catalogue is now live! Read and download your copy here.

Shop Online

Access my online shop 24 x 7, 365 days of the year:

Current April hostess code:

VDKNV7BH

Shop Online

Join My Team

It's always a great time to join Stampin’ Up! New team members can get £130 worth of products for only £99 + free business supplies + free shipping + all the fun being a part of Stampin’ Up! Stampin' Up! has something for everyone: join my growing team and benefit from my support to enjoy Stampin' Up! however you choose.

If you're interested, call me for a chat to understand how I can help you realise your goals. Alternatively, if you have already decided to sign up and you just can't wait, please click here for the link to the online form where you can sign up and order your starter kit right away! 

Latest Kit!

Stampin Cut and Emboss

The Rock Legend Kit has all you need to make 8 cards with coordinating envelopes. Along with the new Panda Friends Kit, both are available from January 4th for just £14 each - get yours here!

2023-24 Annual Catalogue

BROWSE THE CATALOGUE

Click on the catalogue for a full list of current SU! supplies - if you would like to order any of the items featured, please drop me a line at [email protected] or give me a call on 07773 421446 - I'd be happy to help.

New Online Exclusives

There are new products available exclusively in the online store from 5 March - check them out here.

About Me

Hi I'm Joanne and live in Northampton and when I'm not looking after my husband and two beautiful children, am an avid crafter with a passion for all things Stampin' Up!

I must confess that I have never been a big rubber stamper - until I discovered Stampin' Up! that is. I love the fact that I can get such great results with co-ordinating stamps, inks, papers and punches - the possibilities are endless! Join me on my stamping journey as I share the things I love and be inspired to create amazing things yourself!

Follow Me

Monthly Newsletter

Box Builder

Click the button above to use Box Buster to create your custom box design using the Envelope Punch Board!

Kits Collection Now Available!

Stampin Cut and Emboss

The new Kits Collection from Stampin' Up! is now available!

Click here to see the current kits available and order yours online today.

I Design For


Stampin' Up Stuff

This is my personal blog and is not endorsed by Stampin’ Up! I hope you find it a plentiful source of ideas and personal inspiration but please don't copy my designs for contest submission or use for classes, publication or sale without express permission.