Envelope Punch Board Daisy Easter Basket

by Joanne James28. March 2018 17:30

It's the week before Easter already and so today I'm sharing a couple of really simple 3D projects that I made with a group of wonderful ladies last month that are perfect for holding Easter treats and also fit with the challenge over at Global Design Project this week:

The first one is an super easy Easter basket made with one of my most favourite tools EVER, the Envelope Punch Board  - take a look:


I love the Envelope Punch Board - my Envelope Expert and Box Buster tools are testament to that! - but it's great for lots more fun projects besides. Here I made my basket out of one of the Delightful Daisy DSP papers, decorated with some stamped and punched daisies and some faceted gems - a rather grown-up Easter basket, if you will, given the absence of bunnies! These little baskets are so easy to make and will hold a small full size egg or a collection of smaller ones. Here are the instructions in case you would like to make one too: 

  • Take a sheet of paper measuring 6” x 6”
  • Punch and score using your Envelope Punch Board at 1 ½” on all four sides
  • Turn over the sheet and repeat the step above on the reverse
  • Cut the flaps on each side to the first score line
  • Fold flaps either inside or outside to create your side panel and decorate with daisies or your chosen embellishment
  • Trim centre ends if desired (as I've done here) or adhere to the outside of the basket
  • Cut handle 15cm x 1.5cm and attach to sides

You can see more of these baskets in lots of other colours over on my Facebook page here, including some pictures of the ladies crafting 'in action'.

We also made some of the smaller egg carrier baskets, again using a piece of 6" x 6" paper and the Envelope Punch Board, this time using some of the Petal Garden DSP and some of the lovely free Sale-A-Bration Calypso Coral Shimmer Ribbon (only 4 more days to get your hands on this!) and a sweet Easter tag:


Instructions for this basket are as follows:

  • Take a sheet of paper measuring 6” x 6”
  • Punch and score using your Envelope Punch Board at 1¾” and 4” on the first side then use the score lines and guide to punch and score the remaining sides
  • Use a 3/4" circle punch to create the handles on the inner pieces and bring these up on the inside, adhering your flaps on the outside of these 

I'm mindful the instructions are not the easiest to follow without a video - watch this space and I'll see if I can make a quick one later! 

I had such a fun evening with my hostess Jane and her family and friends making these projects, and, having placed their orders, enabling Jane to earn rewards and free product, further boosted by the current Sale-A-Bration promotion. Whilst Sale-A-Bration is coming to an end in 4 days time, I am still taking party bookings into April, May and beyond, so if you would like a fun evening in with friends, crafting fun projects and earning some free Stampin' Up! product into the bargain, do get in touch.

Here are the visual summaries of the key products used on today's projects for you to pin for easy reference:

You can see all of my 'How To' summaries on my 'How To - Tips and Techniques' Pinterest board in case you've missed any. 

Enjoy the rest of your day and I'll be back tomorrow with another project. Until then, happy stampin'!


Stampin' Up! Supplies Used:

Table built using Product Table Builder by The Crafty Owl - Independent Stampin' Up! Demonstrator.
 
 
Table built using Product Table Builder by The Crafty Owl - Independent Stampin' Up! Demonstrator.

Tags: , , , , , , ,

3D Projects | Boxes | Envelope Punch Board

New Sale-A-Bration Items Added And Color Me Happy Card Kit

by Joanne James21. March 2018 12:00

I am a little behind in sharing this one (life seems to be getting in the way of blogging lately!) but I wanted to make sure that you were all aware that new products have been added to the Sale-A-Bration gift list for the final two weeks of this fabulous promotion. You all know that this year's Sale-A-Bration promotion will end on 31st March and in addition to hosting and joining benefits (you can read about those here) you also earn a free product for every £45/90 spend - you can see the existing items here and here.

Good news: from now until the 31st March, you will also be able to choose from the catalogue items below (you must use the special code as detailed as opposed to the usual item code to get one of these items free with a £45/90 spend):


To make things easier for you, I've created a table linking each of the products directly to the promotional item in my online store - just click on the links below:

Table built using Product Table Builder by The Crafty Owl - Independent Stampin' Up! Demonstrator.

Remember, if you aren't placing your order via the above links, you need to use the special Sale-A-Bration item code for each product - these are different to the standard product codes for these items, which are still available to purchase in the annual catalogue.

One of the new products available free with a £45 spend is the Color Me Happy Project Kit - designed to be used with the Color Me Happy stamp set and launched to celebrate the release of our new Stampin' Blends alcohol markers and as it isn't a set that you can see in either of the current catalogues, I though this would be a good day to share mine here with you so that you can get a closer look. As with so many of Stampin' Up!'s kits, the kit is choc-full of embellishments and high-quality pre-printed card bases, along with foiled envelopes, so that you can stamp and colour to complete 16 gorgeous cards, 4 each of 4 designs - take a look:

Here's the first one, along with its co-ordinating envelope:

Here's the second one - a fun little card to brighten someone's day:

The third design:


And finally the fourth design - some of my customers will be receiving this card this month as a token of my appreciation:


And finally here's a shot of all four card designs together:


Whether you use in conjunction with the Color Me Happy stamp set or substitute with other stamps from your collection, the kit is definitely worth getting your hands on - especially if you pick it up for FREE!

Both the stamp set and card kit are still available to purchase too, at a 10% discount if you buy together as a bundle, whilst stocks last - the links for these are included below. Better still, why not purchase the stamp set and markers that you need and pick up the kit as a Sale-A-Bration item for free? This would also make for a fun crafty evening with friends - please get in touch if you'd like to talk to me about hosting one of these in either April or May - my diary is booking up fast!

If you have your eye on any of the other Sale-A-Bration items, do bear in mind that they will only be available whilst stocks last - it is possible that they could run out before the end of the promotion, so don't leave it to late to place your order. 

I'll be back soon with another project. Until then, happy stampin'!


Stampin' Up! Supplies Used:


Table built using Product Table Builder by The Crafty Owl - Independent Stampin' Up! Demonstrator.

Host A Party And Get Tranquil Tulips For Free PP383

by Joanne James4. March 2018 09:00

It's Sunday and time for this week's new challenge over at The Paper Players! It's the turn of the delightful Jaydee to host this week and she has a rather timely theme challenge for you to work with:


My card was totally inspired by the lovely inspiration photo Nance chose for Jaydee's challenge badge this week: those red tulips are just lovely so I had to feature some on my card today. We have been experiencing sub-zero temperatures here in the UK for the past week, along with significant snowfall and I for one am ready for Spring, even if only with my card today - take a look:


Here's the low-down on today's card:

Get Tranquil Tulips For Free - Tranquil Tulips is one of the hostess sets in the annual catalogue, that is available exclusive to those that host a Stampin’ Up! party or place a personal order of £150 or more. A gorgeous set with blooms that can be stamped directly or fussy cut and layered as I’ve done here. Sale-A-Bration is the best time of year to host a Stampin’ Up! party, as with qualifying sales you can earn an extra £20 in rewards on top of the usual levels. I’ve had lots of customers take advantage of this and earn this sets and lots of other free produc, whilst having a fun evening with friends into the bargain. If you would like to earn this set for free, then talk to me about hosting your own party - I still have a few slots left this month if you would like to squeeze one in before the end of the month, but you’ll have to be quick!

A Tutti Frutti Pattern - I paired my red tulips with some blue grape hyacinths and that inspired the colour scheme for the rest of my card. The background paper is from the Tutti Frutti paper stack - lots of bold fruit patterns here, but if these are not your thing there are some great patterns such as the one I’ve used today on the reverse of each sheet too.

A Spring Banner - I took the wording for my banner from the current ‘Hello Easter’ set and paired it with the banner from the Bunch of Banners set to fit my theme. Some navy crinkle seam binging ribbon finishes my card.

Here is the visual summary of the key products used on today's project for you to pin for easy reference:


You can see all of my Product and 'How To' summaries on my 'How To - Tips and Techniques' Pinterest board in case you've missed any. 

Before you reach for your ink and papers, check out what our amazing team has created to inspire you this week:

Here's a quick recap of our challenge rules:
 
1.  Create a new paper project
2.  Upload your creation to your blog with a link back to us and provide a direct link to the post featuring your challenge submission.
3.  Please link your card to no more than four challenges, TOTAL.
4.  Have FUN!

I can't wait to see how you interpret this week's theme and look forward to visiting your blogs this week! Enjoy the rest of your weekend as it will be over all too quickly.

I am spending today with a bunch of lovely ladies who braved the British weather to join me for my first residential luxury crafting retreat. Yesterday was a craft-packed day and theres just as much fun in store today. Wish you were here to join in the fun too!

I'll be back tomorrow with another project; until then, happy stampin'!


Stampin' Up! Supplies Used: 

Table built using Product Table Builder by The Crafty Owl - Independent Stampin' Up! Demonstrator.

Happy Birthday Wishes Ombre Card

by Joanne James27. February 2018 22:00

Having a busy few days putting the final touches to my craft retreat this weekend, so a quick post from me to share a card that is perfect for the challenge over at Just Add Ink this week:

For my 'h' I had to go with 'h for happy' as in the 'Happy Wishes' Sale-A-Bration set - take a look:


Here's the low-down on today's card:

Happy Birthday Wishes - The 'Happy Wishes' stamp set is one of three items available with a £90 purchase during the current Sale-A-Bration promotion - a great sentiment set with so many possibilities. Two large floral words and 14 additional stamps with words and phrases that can be combined to create a wide variety of sentiments. Useful and pretty too!

Easy Ombre - I made a version of this card in my recent Sale-A-Bration class and wanted to teach those present how to create an easy ombre effect by inking a stamp in a single, light colour (here I inked my 'happy' in Powder Pink) and then add ink in a complimentary darker colour, such as Berry Burst, with my sponger dauber to the lower portion of the stamp. A fun technique that is easy to achieve - always a winner. Once stamped, I added a little more Powder Pink to the florals on the stamped image with my blender pen for a little added detail. 

Love The In-Colours - My card features a little Powder Pink but is otherwise all about the Berry Burst - ink, some in-colour patterned designer series paper and a bow in that lovely, soft Berry Burst crinkle ribbon. In case you couldn't tell, I just love this in-colour - I think it might be my current favourite! 

Here is the visual summary of the key products used on today's project for you to pin for easy reference:


You can see all of my 'How To' summaries on my 'How To - Tips and Techniques' Pinterest board in case you've missed any. 

That's all from me today; I'll be back tomorrow with another project. Until then, happy stampin'!


Stampin' Up! Supplies Used:

Table built using Product Table Builder by The Crafty Owl - Independent Stampin' Up! Demonstrator.

New 2018 Sale-A-Bration Products Added!

by Joanne James16. February 2018 07:00

So much for a back to normal week of blogging! I had all good intentions this week, then had issues with my blog for the past few days that left me unable to access it at all. With the kids off on their half-term break too, I was a little limited in what I All sorted now (fingers crossed!) so hopefully I will be back on track from today.

I know how much you've all been enjoying the benefits of the Sale-A-Bration promotion; as if it couldn't get any better I just wanted to let you know that there are some new items being added to the selection of products that can be earned free, both with a £45 order and a bundle that can be earned free with a purchase of £90 or more, take a look:


A fun stamp set and some of the most gorgeous foil-embossed paper, and then a stamp set and embossing folder bundle:


The lovely team at the Stampin' Up! head office have also put together a short video that shows you the bundle items in more detail - you can see that by clicking on the link below:

Like the other items in the Sale-A-Bration catalogue, these items will be available from now until the end of the Sale-A-Bration period, 31st March. You can see full details for each of the new product on the new Sale-A-Bration flyer here.

If you would like more information or to place an order, either go here to purchase from my online store (don't forget to add this month's hostess code 64XZCB29) or you can email me or telephone me if you would prefer. Back shortly with a new creative project; until then, happy shopping!

Bubble And Fizz - To Fussy Cut Or Not?

by Joanne James12. February 2018 06:00

Happy Monday everyone! The James Juniors are on their half-term holiday from school this week so whilst they are likely to be enjoying some much-needed R&R, I will be juggling as usual! I did manage to grab some time over the weekend to write up a ton of blog posts, so hopefully a more regular blogging service is about to resume. Today I'm sharing a card for this week's challenge over at CAS(E) This Sketch - take a look:


I haven't managed to play along here for a little while, so was super-happy to see this sketch as I immediately knew how I was going to tackle it! Now clean and simple my card might be, but it does include a fair bit of fussy cutting - take a look:

Here's the low-down on today's card:

Bubbles And Fizz - When I saw the sketch, I immediately thought of those mini bottles on the Bubbles and Fizz Designer Series Paper that can be yours free with a purchase of £45 or more during the current Sale-A-Bration promotion. These papers are designed to co-ordinate with the Bubble Over bundle in the seasonal catalogue - more on that another day! Whilst the paper really makes the most of the stamp set, it also stands up on its own: fabulous bright colours, with both bottle and alternative patterns in the set. 

To Fussy Cut Or Not - Three of the papers in the Bubbles and Fizz pack have patterns that can be cut out using the co-ordinating Bottles and Bubbles Framelit dies - the design I chose to use for my card is not one of them though! Undeterred, I grabbed my paper snips and set to work. I love a bit of fussy cutting, I actually find it quite theraputic - but I know it's not everyone's thing. We had a lively debate on my Facebook page where I shared my work-in-progress at the weekend; the jury was split 50:50 between the lovers and the haters - which side of the fence would you be on? Do leave me a comment below - I'd love to know! 

A Custom Banner - I played about with lots of backgrounds, colours and sentiment banners before finally deciding in white embossed on a Bermuda Bay banner for a bright pop of colour, courtesy of the Large Number Framelits. The sentiment is from the 'Colour Me Happy' stamp set.

Here is the visual summary of the key products used on today's project for you to pin for easy reference:


You can see all of my 'How To' summaries on my 'How To - Tips and Techniques' Pinterest board in case you've missed any. 

I haven't featured the 'Bubble Over' stamp set on my blog yet, despite having a ton of projects made with it as I was lucky enough to present this set at Onstage last November. I think this may be the week I put that right - look out for a ton of bottle projects to follow, including some 3D pieces.

Enjoy your day and I'll be back tomorrow with another project. Until then, happy stampin'!


Stampin' Up! Supplies Used:

Table built using Product Table Builder by The Crafty Owl - Independent Stampin' Up! Demonstrator.

Party Panda Spinner Card For Fab Friday

by Joanne James17. January 2018 23:00


Another late one I'm afraid as I've been tied (figuratively, not literally!) to my desk all day pushing paperwork. Just time to share a card for the current challenge over at Fab Friday where they have a super-bright colour combo to work with:

I love brights so was really keen to play along with one of my favourite challenges. I figured the best way to use this trio of bold colours was to ensure that I also incorporated plenty of white. I decided to get out my Party Pandas Sale-A-Bration stamp set again and do something I haven't done in a while - take a look:


Yes, it's a fun spinner card - isn't that party panda just the cutest?! I made this card over a week ago but delayed sharing it with you as I made a video tutorial to go with it. I still need to finish editing so will post it here once complete but in the meantime I couldn't not share this cutie! Here's the low-down on today's card:

Get Spinning - Everyone loves the fun element created by adding a spinner - young and old alike! I've made my Sale-A-Bration Party Panda the spinning star of today's card, but this technique works with lots of other stamps too. The panda looks like he was meant to cartwheel though I think! To make the panda spin, you simply attach him to two penny coins (or a dime, or a washer - you get the idea) separated by a dimensional, with the pennies sitting either side of the track. If I've lost you already, come back when I upload the video - all will become clear! 

Creating The Track - I used the Classic Label Punch to create the track for my spinning panda, by repeatedly punching along my cardfront in order to get an extended gap. This is one of the easiest ways to create a spinner track. The key to getting a freely-spinning panda though is to use Stampin' Up!'s foam strips to adhere your front panel to your card base. This ensures the gap is deep enough for the panda to spin freely.

Let's Celebrate - I pulled my sentiment from another of my free Sale-A-Bration sets, Amazing You, and inked up the words in contrasting colours. Such a great sentiment that allows this card to work for all kinds of celebrations, not just birthdays. In fact, I am going to dedicate this one to one of the Fab Friday design team members, the awesome Brian King, who at the time of posting this challenge had announced the day before that he is also joining the design team over at CAS(E) this Sketch, another great challenge blog favourite of mine - way to go Brian! 

I love these bright colours, so perfect for this fun card. Do check out the design team cards over at Fab Friday and the gallery, where there are some amazing and varied entries that will provide great inspiration.

Here is the visual summary of the key products used on today's project for you to pin for easy reference:


You can see all of my 'How To' summaries on my 'How To - Tips and Techniques' Pinterest board in case you've missed any. 

I'll be back tomorrow with another project. Until then, happy stampin'!


Stampin' Up! Supplies Used:

Table built using Product Table Builder by The Crafty Owl - Independent Stampin' Up! Demonstrator.

Epic Celebration Meets Bubble And Fizz Bright Birthday Card

by Joanne James17. January 2018 22:00

Today I'm sharing another card made using some of the items you can earn for free with a purchase of £45 or more during Stampin' Up!'s Sale-A-Bration promotion that I made with the ladies in my card class last week - take a look:


My card uses 3 of the currently available Sale-A-Bration items - can you spot them all? Here's the low-down on today's card:

An Epic Celebration - The trainers or 'sneakers' on my card today come from the Epic Celebration stamp set - perfect for discerning teens, both male and female. I stamped mine in Archival Grey ink and highlighted areas of my shoes and the sentiment with a chalk marker to accentuate some of the detail against the Bermuda Bay background. 

Bubbles and Fizz, Stars and Stripes - My background paper is another Sale-A-Bration freebie, the Bubbles and Fizz designer series paper. It has some great bottle patterns, but also great neutral patterns in bold, bright colours. I used one piece and cut a strip that I flipped over to give a fun 'stars and stripes' combination. 

Shimmer Ribbon - I covered the join of my two papers with some shiny satin Basic Grey ribbon - yes, my third free gift! This pack of three ribbons in different widths on page 9 of the Sale-A-Bration catalogue is easily overlooked, yet the gorgeous shimmer makes them worth a second glance, not to mention the fact that they co-ordinate so beautifully with the designer series paper! 

My card was inspired by this one made by Amy Koenders, with a few subtle differences - thanks for the inspiration Amy! Here is the visual summary of the key products used on today's project for you to pin for easy reference:


You can see all of my 'How To' summaries on my 'How To - Tips and Techniques' Pinterest board in case you've missed any. 

Enjoy your day and I'll be back tomorrow with another project. Until then, happy stampin'!


Stampin' Up! Supplies Used:

Table built using Product Table Builder by The Crafty Owl - Independent Stampin' Up! Demonstrator.

Celebrate With The Party Pandas!

by Joanne James10. January 2018 21:30

Just popping in this evening with a quick and simple card that I made to go out with my catalogues using two of the great sets that you can get for free with a qualifying purchase during Sale-A-bration - take a look:


I needed a card that would be good for mass production so the key is to keep things simple - a panda from the 'Party Pandas' set that is free with a £45 purchase during Sale-A-Bration, with the balloon coloured in with my Calypso Coral Stampin' Blends markers to co-ordinate with the Celebrate diecut from the 'Celebrate You' Thinlit Dies set - it's a Stampin' Up! first to have these fabulous thinlits as a Sale-A-Bration item and these can be yours free with a £90 purchase. A sprinkle of rhinestones completes my card. I adore both of these items and am thrilled I managed to get them for free with my Stampin' Up! purchases - bonus! You can look forward to lots more projects featuring these items. They can be yours too - just follow the links below to place an online order or get in touch if you are local.

Here is the visual summary of the key products used on today's project for you to pin for easy reference:


You can see all of my 'How To' summaries on my 'How To - Tips and Techniques' Pinterest board in case you've missed any. 

I'll be back tomorrow with another project. Until then, happy stampin'!


Stampin' Up! Supplies Used:

Table built using Product Table Builder by The Crafty Owl - Independent Stampin' Up! Demonstrator.

Sale-A-Bration 2018 And The New Spring-Summer Catalogue Is Here!

by Joanne James3. January 2018 08:00


It's time to shake off the January blues, today is THE day - yes, the highlight of the Stampin' Up! calendar, Sale-A-Bration is here! No more sneak peeks - the catalogue is available, the shop is live and from now until 31st March the benefits are yours for the taking. You can click on the catalogue on the right hand side of my blog page to access the Sale-A-Bration leaflet to download a copy or click on the icon above or on the right to go directly to my online shop to place an order - we are LIVE!


So what is Sale-A-Bration? For anyone who hasn't come across it before, it's Stampin' Up!'s annual promotion that is loaded with offers whether you shop, join or host:


Earn a free Sale-A-Bration product for every £45 you spend between 3 January and 31 March. This year for the first time there is also the opportunity to earn even bigger rewards with a £90 purchase. It's the perfect time to purchase those products you've had on your wish list and earn more products for free! 


It’s the best time of year to join Stampin’ Up! During Sale-A-Bration, you can become a demonstrator for just £99 and choose £30 more of FREE products for your Starter Kit. Plus, the kit ships for free! There is plenty of choice and flexibility, whether you want to be a hobby demonstrator and just use your discount to enable you to purchase craft supplies more cheaply, or alternatively would like to build a flourishing direct sales business and sell supplies to others - it's entirely up to you. In addition, you can choose two free stamp sets of your choice (except for bundles, kits or Sale-A-Bration items) - that could be worth as much as another £90 to you!


Earn an additional £20 in hostess credits when you host a party and have party sales of £200 or more (this also applies to individual orders). So for party sales of £200, that makes a whopping £40 of Stampin' Rewards - more freebies! What's more, you can even apply your Stampin' Rewards to a Starter Kit and become a demonstrator yourself - I would love to welcome you to my team!

If you would like to host a party, real or virtual, please do get in touch; my diary is filling up but there are still lots of slots available and I would love to share these great benefits with you. If you've ever thought about becoming an SU! demonstrator, now is a great time to do so - I would love to have a no-obligation chat with you about joining my team and the benefits.

As if that wasn't enough, today also sees the launch of the new Spring-Summer catalogue - full of gorgeous new products:
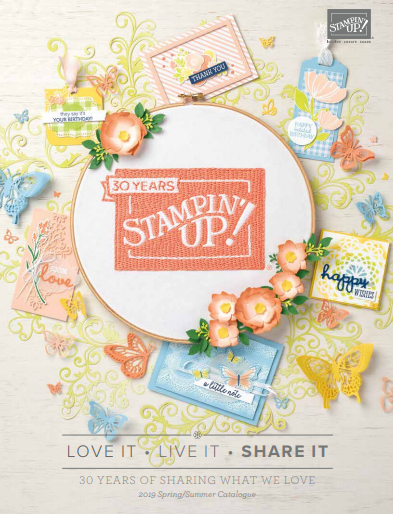
 

Just click on the image above or in the sidebar on the right to browse the catalogue online, or contact me on 07773 421446 if you would like a paper copy posted out to you and you don't already have a demonstrator. If you are as excited as me and just can't wait, here's the link to my online store - everything is available to purchase from today!

Here's a fun little video too that showcases some of the excitement that lies within:

If you would like more information on any of the above, please don't hesitate to get in touch! 

Thanks so much for popping by - it's always nice to share good news! Back tomorrow with a project showcasing some of the products from the new catalogue. Until then, happy shopping!

Mini Catalogue

BROWSE THE CATALOGUE

The mini catalogue is now live! Read and download your copy here.

Shop Online

Access my online shop 24 x 7, 365 days of the year:

Current March hostess code:

S9F2XJJW

Shop Online

Join My Team

It's always a great time to join Stampin’ Up! New team members can get £130 worth of products for only £99 + free business supplies + free shipping + all the fun being a part of Stampin’ Up! Stampin' Up! has something for everyone: join my growing team and benefit from my support to enjoy Stampin' Up! however you choose.

If you're interested, call me for a chat to understand how I can help you realise your goals. Alternatively, if you have already decided to sign up and you just can't wait, please click here for the link to the online form where you can sign up and order your starter kit right away! 

Latest Kit!

Stampin Cut and Emboss

The Rock Legend Kit has all you need to make 8 cards with coordinating envelopes. Along with the new Panda Friends Kit, both are available from January 4th for just £14 each - get yours here!

2023-24 Annual Catalogue

BROWSE THE CATALOGUE

Click on the catalogue for a full list of current SU! supplies - if you would like to order any of the items featured, please drop me a line at [email protected] or give me a call on 07773 421446 - I'd be happy to help.

New Online Exclusives

There will be new products available exclusively in the online store from 5 March - check them out here.

About Me

Hi I'm Joanne and live in Northampton and when I'm not looking after my husband and two beautiful children, am an avid crafter with a passion for all things Stampin' Up!

I must confess that I have never been a big rubber stamper - until I discovered Stampin' Up! that is. I love the fact that I can get such great results with co-ordinating stamps, inks, papers and punches - the possibilities are endless! Join me on my stamping journey as I share the things I love and be inspired to create amazing things yourself!

Follow Me

Monthly Newsletter

Box Builder

Click the button above to use Box Buster to create your custom box design using the Envelope Punch Board!

Kits Collection Now Available!

Stampin Cut and Emboss

The new Kits Collection from Stampin' Up! is now available!

Click here to see the current kits available and order yours online today.

I Design For


Stampin' Up Stuff

This is my personal blog and is not endorsed by Stampin’ Up! I hope you find it a plentiful source of ideas and personal inspiration but please don't copy my designs for contest submission or use for classes, publication or sale without express permission.