A Clean and Simple Dandelion Trio For The Final CAS(E) This Sketch CTS#405

by Joanne James3. February 2021 07:00

Today I'm sharing a card for the final challenge over at CAS(E) This Sketch:

I'm so sad this challenge is ending! I thought this sketch was a tricky one, and I did take quite a liberal interpretation, but since it was the very last one I couldn't not play along. After much consideration, I decided to go with dandelions for my card - take a look:
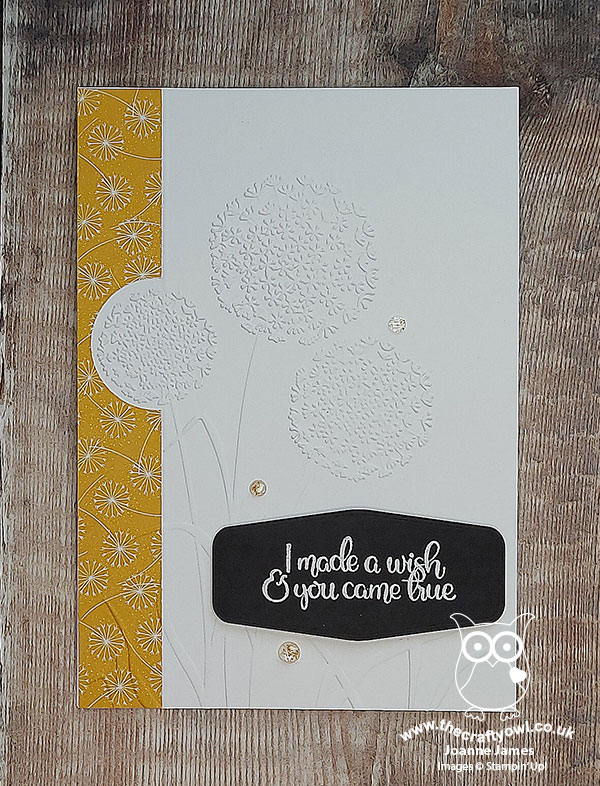
 

Here's the low-down on today's card:

A Dandelion Trio - I've both a trio of dandelions and a trio of dandelion products on today's card! The first is the beautiful Dandelions 3D embossing folder from the main catalogue. This embossing folder is the makings of a card in itself and I thought the positioning of the dandelion seed heads worked really well for the tag elements of the sketch - just check out the detail:
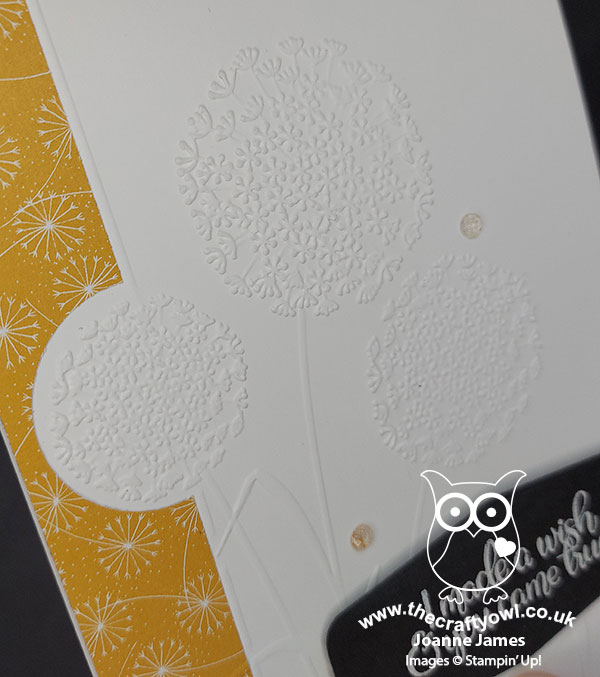
 

I addition to the embossed dandelions, Once I'd added my strip of DSP (more on that in a moment) I added a scored line at the edge of the paper to tie it into my embossed design, which you can just see on the photo above. A small and subtle detail, but it really adds to the finished appearance of the card.

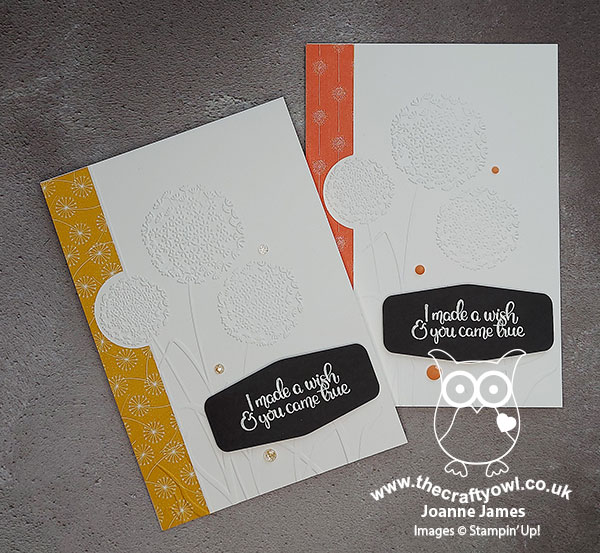
Dandy Garden - I decided I needed something to represent the vertical element of the sketch, so decided that some of the dandelion-patterned paper from the Dandy Garden DSP pack in the current mini catalogue woould do the trick. I used a strip of white and Bumblebee for my first card, then I also made a second card and used a strip of the Calypso Coral design. On both cards I used a circle punch to remove a semi-circle so that my strip fit around my embossed dandelion head:
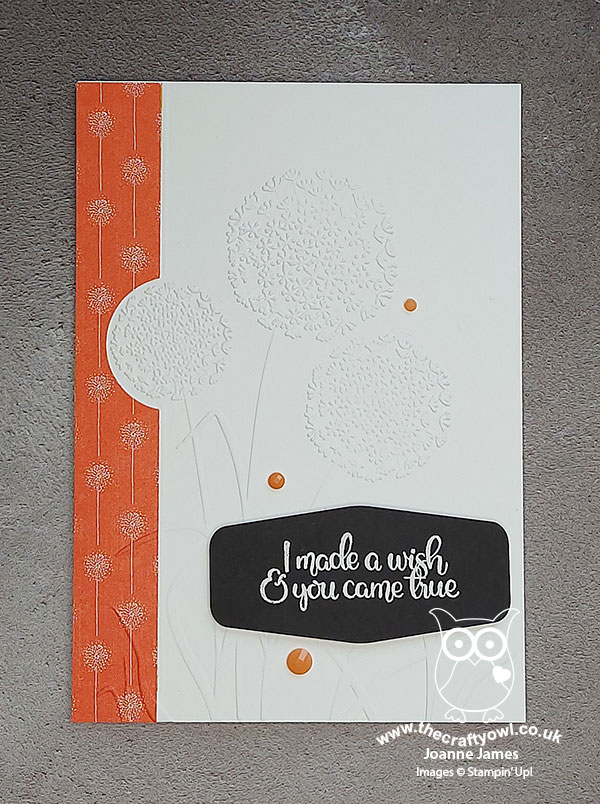
 

My customes and team know how much I have a love-hate relationship with the dandelion designs in the Dandy Garden DSP pack; I am not keen on the bold designs of proper yellow dandelions in this pack (they realy are just weeds, right?!) but I do love the reverse patterns that depict the more whispy dandelion seed heads that I've used here. Here's a shot of each of the cards together - which one do you prefer?
 

Dandelion Wishes - Finally, I paired my embossed design and DSP border with a heat-embossed sentiment from the 'Dandelion Wishes' stamp set - the third dandelion element. I also used the dandelion stamp in this set to add some decoration to the inside of my card:
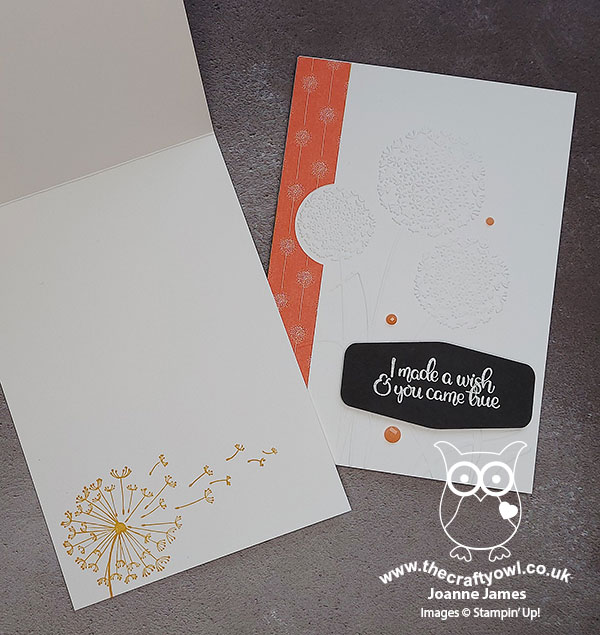
 

I added a trio of faceted gems to the front to complete my card. So what do you think - did I do the final CAS(E) This Sketch justice? I hope so.

Here is the visual summary of the key products used on today's project for you to pin for easy reference:
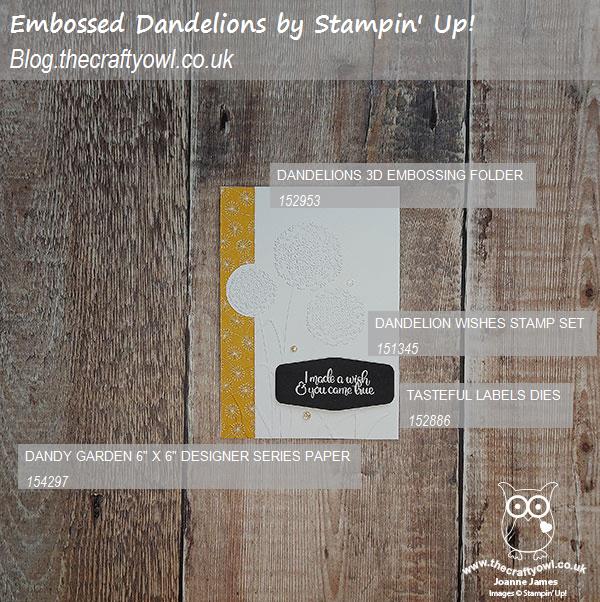
 

You can see all of my 'How To' summaries on my 'How To - Tips and Techniques' Pinterest board in case you've missed any. 

Enjoy your day and I'll be back tomorrow with another project. Until then, happy stampin'!


Stampin' Up! Supplies Used:
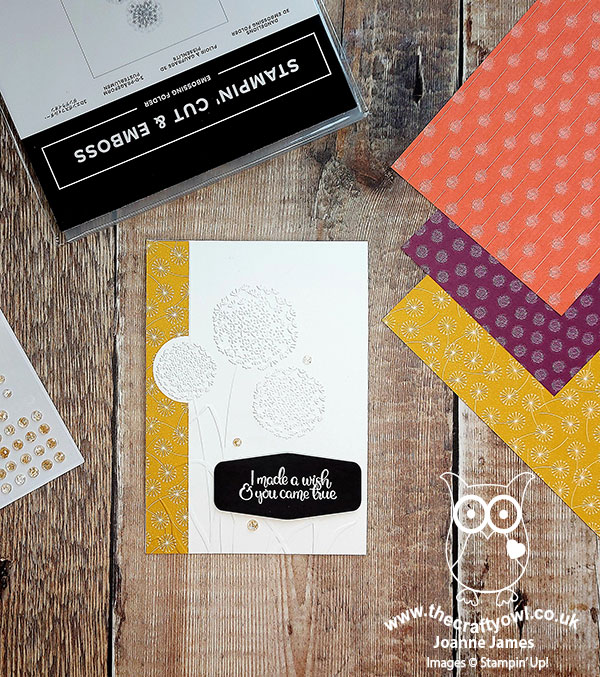
Table built using Product Table Builder by The Crafty Owl - Independent Stampin' Up! Demonstrator.


Pressed Petals Spring Florals For PP483

by Joanne James22. March 2020 09:00

Today it's Sunday and time for this week's new challenge over at The Paper Players! It's the turn of the fabulous Claire to host this week and she has my favourite, a sketch challenge for you to work with:


I had an idea in my head as to what I was going to do with this sketch until I pulled my DSP box off the shelf and saw something that inspired me to go in a completely different direction! I ended up making three cards in one go, two using Claire's sketch. They are all different but do have one thing in common - Pressed Petals Specialty Designer Series Paper. Here's my first card:


The Pressed Petals Specialty Designer Series Paper has photographic images of real pressed petals on one side and one of the sheets in the pack has distinct sectional designs to cut out and use on card fronts, and two of the sections feature floral ovals which I thought would work for Claire's sketch. They also reminded me of Laurel's pretty Inspired By badge this week which comprised of pressed florals so I'm linking my first card up there. I stamped my sentiment in the centre of the wreath (I needed a get well card so used this one from the 'Dandelion Wishes' stampset) and fussy cut it out, mounted it on a panel of Mossy Meadow wrapped with the Magnolia Lane linen ribbon and twine and paired this with a Rococco Rose card base and added a trio of faceted dots to finish.

I decided to make another card using another of the sections, this time switching out the ribbon and adding a stamped and diecut sentiment combo to make an Easter card that is great for the current Just Us Girls challenge where the challenge is to feature shades of blue, green and yellow on your card:


I'm also linking my Easter card up to SUO Challenges where the current theme is Spring.

I created one last card to use up the strip of daisies. I inset it within a split Rococco Rose panel that I popped up on dimensionals and paired it with a sentiment from 'Peaceful Moments', this time using the current InspireCreate sketch rather than Claire's - it was ideal to save this piece from wallowing in my snippets box:


Here is the visual summary of the key products used on today's projects for you to pin for easy reference:


You can see all of my Product and 'How To' summaries on my 'How To - Tips and Techniques' Pinterest board in case you've missed any. 

Before you reach for your ink and papers, check out what our amazing team has created to inspire you this week:

Here's a quick recap of our challenge rules:
 
1.  Create a new paper project
2.  Upload your creation to your blog with a link back to us and provide a direct link to the post featuring your challenge submission.
3.  Please link your card to no more than four challenges, TOTAL.
4.  Have FUN!

Enjoy your day; it's Mother's Day here in the UK but due to our social distancing everyone will be at home in their own houses, which will feel strange. I'm looking forward to being waited on by the James Juniors and Skype calls with the other Mums in our extended family, maybe with some quality jigsaw time too! I'll be back tomorrow with another project. Until then, happy stampin'!


Stampin' Up! Supplies Used: 

Table built using Product Table Builder by The Crafty Owl - Independent Stampin' Up! Demonstrator.

Dandelion Wishes Blue Bokeh Dots Card

by Joanne James13. September 2018 21:00

I'm sorry this week has been a little less blog-filled than anticipated; I am getting back into a routine now that the James Juniors are back at school, however I'm still playing catch-up. I've had two classes this week and lots more going on besides, and can't quite believe it's Thursday before I've managed a post - eek!

Anyway, today I'm sharing a card that I made with the ladies in my stamp class earlier this week that was inspired by the challenges over at As You See It  and Less Is More


My class featured the Dandelion Wishes stamp set and we looked at different techniques to create interesting backgrounds. The Dandelion Wishes set is perfect for clean and simple cards - take a look:


Here's the low-down on today's card:

Back To Basics - The theme over at As you See It this week is 'Back To Basics', creating cards using little more than stamps. ink and paper. I love clean creations, although they aren't always basic in this sense. There is something liberating though about creating with just stamps, ink and paper and it is fun to be able to share creations from time to time like this. They can be quick(er!) to create and show that it's still possible to create something pretty without needing a ton of supplies. My card uses only two ink colours and two colours of cardstock - basic supplies indeed!

Layer Images for Interest - One of the ways to create interest on a basic card is to layer images to create interest. In addition the basic card layers, with a little tone-on-tone stamping on the base, I used the bokeh dots stamp as a 'background' for my dandelion seed heads and positioned both them and my sentiment across the edges in order to create the illusion of an extra layer.

A Drop of Frost - I could have just left my card there as it looked pretty enough to be fair. I often add a little something to a CAS card for extra interest and in this instance decided to add a trio of the new frosted epoxy droplets from the seasonal catalogue. I love the frosted finish they have and am a sucker for something shiny! I'm hoping the ladies at AYSI approve - my justification is that it's less fussy than ribbon ;-)

Here is the visual summary of the key products used on today's project for you to pin for easy reference:


You can see all of my 'How To' summaries on my 'How To - Tips and Techniques' Pinterest board in case you've missed any. 

I'll be back tomorrow with another project for you. Until then, happy stampin'!


Stampin' Up! Supplies Used:

Table built using Product Table Builder by The Crafty Owl - Independent Stampin' Up! Demonstrator.

Mini Catalogue

BROWSE THE CATALOGUE

The mini catalogue is now live! Read and download your copy here.

Shop Online

Access my online shop 24 x 7, 365 days of the year:

Current April hostess code:

VDKNV7BH

Shop Online

Join My Team

It's always a great time to join Stampin’ Up! New team members can get £130 worth of products for only £99 + free business supplies + free shipping + all the fun being a part of Stampin’ Up! Stampin' Up! has something for everyone: join my growing team and benefit from my support to enjoy Stampin' Up! however you choose.

If you're interested, call me for a chat to understand how I can help you realise your goals. Alternatively, if you have already decided to sign up and you just can't wait, please click here for the link to the online form where you can sign up and order your starter kit right away! 

Latest Kit!

Stampin Cut and Emboss

The Rock Legend Kit has all you need to make 8 cards with coordinating envelopes. Along with the new Panda Friends Kit, both are available from January 4th for just £14 each - get yours here!

2023-24 Annual Catalogue

BROWSE THE CATALOGUE

Click on the catalogue for a full list of current SU! supplies - if you would like to order any of the items featured, please drop me a line at [email protected] or give me a call on 07773 421446 - I'd be happy to help.

New Online Exclusives

There are new products available exclusively in the online store from 5 March - check them out here.

About Me

Hi I'm Joanne and live in Northampton and when I'm not looking after my husband and two beautiful children, am an avid crafter with a passion for all things Stampin' Up!

I must confess that I have never been a big rubber stamper - until I discovered Stampin' Up! that is. I love the fact that I can get such great results with co-ordinating stamps, inks, papers and punches - the possibilities are endless! Join me on my stamping journey as I share the things I love and be inspired to create amazing things yourself!

Follow Me

Monthly Newsletter

Box Builder

Click the button above to use Box Buster to create your custom box design using the Envelope Punch Board!

Kits Collection Now Available!

Stampin Cut and Emboss

The new Kits Collection from Stampin' Up! is now available!

Click here to see the current kits available and order yours online today.

I Design For


Stampin' Up Stuff

This is my personal blog and is not endorsed by Stampin’ Up! I hope you find it a plentiful source of ideas and personal inspiration but please don't copy my designs for contest submission or use for classes, publication or sale without express permission.