Brightly Lit Christmas 3 Ways From Simple To Stepped Up - Part 2

by Joanne James20. December 2017 22:00

I've been away for a few days with my family to experience the delights of the German Christmas markets and enjoy some much-needed pre-Christmas R&R, but have just managed to squeeze in a post for you this evening amidst some last-minute card writing to share the second part of my Brightly Lit Christmas set and possibly one of my favourite cards of the season - take a look:


 Here's the low-down on today's card:

A Framed Christmas Lampost - I created my delightful snowy lampost scene and use the crossbar lampost framelit to create a gorgeous frame for my mini focal point, something I picked up from a wonderful crafty friend of mine, the talented Amanda Bates over at The Craft Spa; thanks for the inspiration, Amanda!

Light The Lamps - The best bit of this stepped-up card? The lamps light up! I used a Chibi circuit kit to create a circuit behind the main panel and when you press the presents, the lamps light as you can see on this zoomed-in photo below:


How cool is that?! These circuits are easy to create although with three bulbs on this card, a little pricey and only really suitable for a special card, but a fun way to step up a card with the Christmas Lampost Thinlits Dies for sure.

Pick A Piece Of Paper - The only stamping on my card is the little 'Merry' banner across my wreath; the wreath itself and the presents were diecut from the Christmas Around The World Designer Series Paper. This paper is the one I initially found the most difficult to work with, yet in reality have used most - it's amazing how creative you can be when challenged! 

Here is the visual summary of the key products used on today's project for you to pin for easy reference:


You can see all of my 'How To' summaries on my 'How To - Tips and Techniques' Pinterest board in case you've missed any. 

Enjoy your day and I'll be back soon with another project. Until then, happy stampin'!


Stampin' Up! Supplies Used:

Table built using Product Table Builder by The Crafty Owl - Independent Stampin' Up! Demonstrator.

Brightly Lit Christmas 3 Ways From Simple To Stepped Up - Part 1

by Joanne James11. December 2017 22:09

It's a little while since I shared a 'one stamp set, three ways' post with you showing you three cards using one suite and how to use the products within that suite to create cards that range from simple to stepped up. Today is the first of two posts that will do just that - this time featuring the Christmas Around The World Suite and the Brightly Lit Christmas Bundle that you can find on pages 28-29 of the 2017 Autumn-Winter seasonal Stampin' Up! catalogue that I used in a class a couple of months ago.

The Brightly Lit Christmas stamp set has a fun collection of festive banners that co-ordinate with a basic lamppost design and when paired with the co-ordinating Christmas Lamppost Thinlits Dies can be used to make the most ornate and detailed 3D traditional lamppost designs. The set is great for quick and easy and more complex cards with a real 'wow' factor.  

Clean and Simple - Quick And Easy - If you're short on time or new to crafting, this set is great for a simple card like this one:


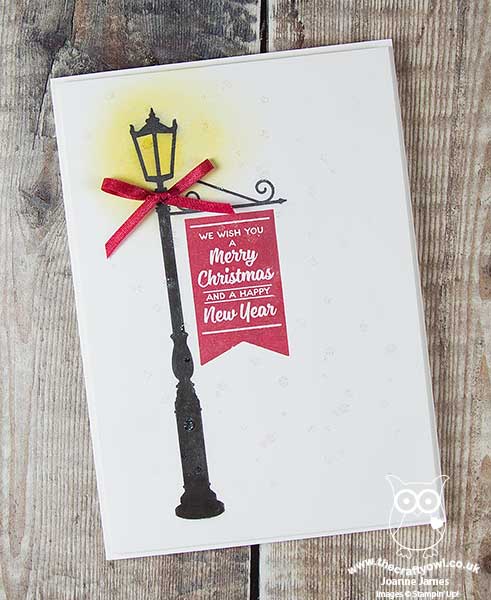
All you need to do is take a sheet of Extra Thick Whisper White for your card base and mat layer, stamp your lamppost and hanging banner directly onto the card front and sponge a little yellow ink for lamp light, use the wreath bauble stamp to add some snowflakes (stamp in Versamark and add Dazzling Diamonds glitter) and a red ribbon bow and your card is done. Festive red and the subtle sparkling snowflakes help this simple card to have a big impact.

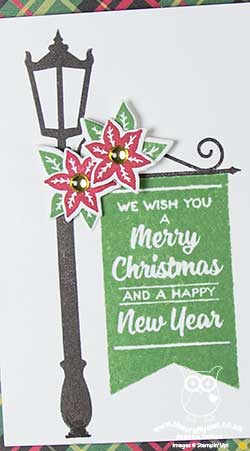
Step It Up - If you have a bit more time and are feeling more adventurous, using a few extra tools and embellishments will allow you to 'step up' your card and create something with a little more depth and detail, whilst still relatively easy to make:


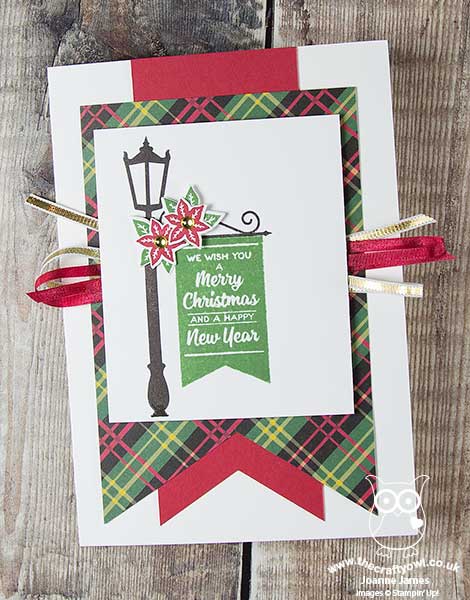
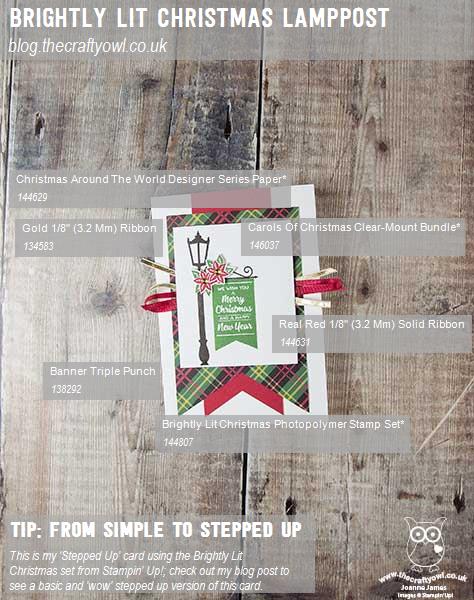
My second card follows the same basic layout as the first, still using just the stamps from the Brightly Lit Christmas set, however this time I've stamped only the top portion of the lamppost and masked off the lower portion and used the Carols of Christmas stamp set and co-ordinating Card Front Builder Dies to cut out some festive poinsettia flowers to adorn the lamppost, centred with some gold enamel shapes, added a couple of twists of red and gold ribbon behind and a couple of background banners using the Triple Banner Punch, one of which is a contemporary tartan to add a bold splash of colour. 

My third card is a real 'wow' - but you'll have to come back for Part 2 for that one!

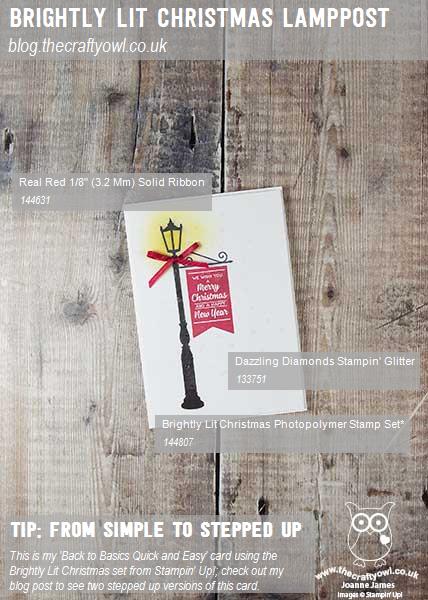
Here are the visual summaries of the key products used on today's projects for you to pin for easy reference:

Card 1:


Card 2:


You can see all of my 'How To' summaries on my 'How To - Tips and Techniques' Pinterest board in case you've missed any. 

I'll be back soon with the third card in this set, which is my absolute favourite. Until then, happy stampin'!


Stampin' Up! Supplies Used:

Card 1:

Table built using Product Table Builder by The Crafty Owl - Independent Stampin' Up! Demonstrator.


Card 2:

Table built using Product Table Builder by The Crafty Owl - Independent Stampin' Up! Demonstrator.

Mini Catalogue

BROWSE THE CATALOGUE

The mini catalogue is now live! Read and download your copy here.

Shop Online

Access my online shop 24 x 7, 365 days of the year:

Current March hostess code:

S9F2XJJW

Shop Online

Join My Team

It's always a great time to join Stampin’ Up! New team members can get £130 worth of products for only £99 + free business supplies + free shipping + all the fun being a part of Stampin’ Up! Stampin' Up! has something for everyone: join my growing team and benefit from my support to enjoy Stampin' Up! however you choose.

If you're interested, call me for a chat to understand how I can help you realise your goals. Alternatively, if you have already decided to sign up and you just can't wait, please click here for the link to the online form where you can sign up and order your starter kit right away! 

Latest Kit!

Stampin Cut and Emboss

The Rock Legend Kit has all you need to make 8 cards with coordinating envelopes. Along with the new Panda Friends Kit, both are available from January 4th for just £14 each - get yours here!

2023-24 Annual Catalogue

BROWSE THE CATALOGUE

Click on the catalogue for a full list of current SU! supplies - if you would like to order any of the items featured, please drop me a line at [email protected] or give me a call on 07773 421446 - I'd be happy to help.

New Online Exclusives

There will be new products available exclusively in the online store from 5 March - check them out here.

About Me

Hi I'm Joanne and live in Northampton and when I'm not looking after my husband and two beautiful children, am an avid crafter with a passion for all things Stampin' Up!

I must confess that I have never been a big rubber stamper - until I discovered Stampin' Up! that is. I love the fact that I can get such great results with co-ordinating stamps, inks, papers and punches - the possibilities are endless! Join me on my stamping journey as I share the things I love and be inspired to create amazing things yourself!

Follow Me

Monthly Newsletter

Box Builder

Click the button above to use Box Buster to create your custom box design using the Envelope Punch Board!

Kits Collection Now Available!

Stampin Cut and Emboss

The new Kits Collection from Stampin' Up! is now available!

Click here to see the current kits available and order yours online today.

I Design For


Stampin' Up Stuff

This is my personal blog and is not endorsed by Stampin’ Up! I hope you find it a plentiful source of ideas and personal inspiration but please don't copy my designs for contest submission or use for classes, publication or sale without express permission.