Have A Holly Jolly Christmas FF128

by Joanne James17. February 2023 09:00

Today I have my card for the new challenge over at Festive Friday Card Making and Paper Crafting Challenge


The challenge that we are celebrating this week is 'World Music Therapy Day' which is on March 2nd. Remember the fun thing is that at Festive Friday you do not need to actually celebrate the occasion; your goal is to simply use three or more items from the inspiration list on your project. This week I used the layout over at Sketch Saturday and notes, lyrics and twine from the inspo list and this is what I came up with:


Here's the low-down on today's card:

I went with a Christmas card for today's theme - I know it's February, but you can never start too early with festive preparations! I used the Merry Melody Embossing Folder for my background and continued my musical theme with the lyrics to a seasonal tune (apologies now if you end up singing along to Michael Buble for the rest of the day!), embellished with some stamped holly:


I finished the inside with a little additional co-ordinated stamping:

I think this might be my first Christmas card of 2023 - let's hope I can keep it up!

Here is the visual summary of the key products used on today's project for you to pin for easy reference:


You can see all of my 'How To' summaries on my 'How To - Tips and Techniques' Pinterest board in case you've missed any. 

How does our board inspire you? I can’t wait to see what YOU create! For more inspiration, be sure to visit the rest of the Festive Friday Card Making and Paper Crafting Challenge Design team:


Enjoy your day and I'll be back tomorrow with another project. Until then, happy stampin'!


Stampin' Up! Supplies Used:

Table built using Product Table Builder by The Crafty Owl - Independent Stampin' Up! Demonstrator.

Christmas Pinecones Clean and Simple CCS 496

by Joanne James15. November 2022 13:00

It's Tuesday and time for a new challenge over at CAS Colours & Sketches. Cecile is hosting this month and she has our second colour challenge of November: 


I usually struggle with colour challenges, but Cecile has chosen some great ones this month - I love them all! For my card today I decided these colours were perfect for another Christmas card - take a look:


Here's the low-down on today's card:

Masked Blending - I started by adding a couple of strips of masking tape to my white card base and using a blending brush, blended my Soft Succulent ink from the corner across my card, fading at the edges. I then removed the masking tape to give a nice border to frame my main focal image. 

Christmas Pinecones and A Blending Trick - I decided these colours would be perfect for some pine needles and pinecones, so I cut some using my Christmas Pinecone Dies and snipped out a section that could be used to fit my corner. I created two-tone colours by adding the same colour ink to deepen the colour on one of the layers - this is a useful trick to create two tones of the same colour easily. I added some puffy snow and some iridescent gems for a little extra detail:


Christmas To Remember - The sentiment on the front of my card comes from the 'Christmas To Remember' stamp set, and I used another from the same set on the inside of my card. I stamped it in Early Espresso to compliment my pinecone detail.

This card does have more detail than I usually choose for a CC&S card, however it is still clean and simple with some clean, white space. 

Here is the visual summary of the key products used on today's project for you to pin for easy reference:


You can see all of my 'How To' summaries on my 'How To - Tips and Techniques' Pinterest board in case you've missed any. 

As a reminder, for our colour challenges, you must use all of the stated challenge colours. You may also use neutral colours; however, the challenge colours should be the most noticeable ones featured on your card. We use Stampin' Up! color names for reference, but you are welcome to use any other companies' products as long as you match the challenge colours as closely as possible.

Enjoy your day. I am spending today with one of my dear crafty friends that I don't get to see often face-to-face and we have lots to catch up on, so I'm really looking forward to it! I'll be back tomorrow with another project. Until then, happy stampin'!


Stampin' Up! Supplies Used:

Table built using Product Table Builder by The Crafty Owl - Independent Stampin' Up! Demonstrator.

Merriest Moments Christmas Card For A Friend CCS 489

by Joanne James27. September 2022 12:00

It's Tuesday and time for a new challenge over at CAS Colours & Sketches. Today we have Valerie's final sketch challenge: 


Feel free to flip or rotate the sketch when making your card. I thought this was a great sketch and perfect to enable me to play along with a few other challenges too: the ladies over at Just Add Ink have a 'Choose 2' challenge this week, at Less is More the theme is 'friendship' and since over at CAS on Friday the theme is Christmas, I am playing there too! So - to my card:


Here's the low-down on today's card:

Masked Merriest Moments - I decided to properly rise to the challenge over at Just Add Ink this week and would use not just two but all three of their options! For my foliage and masking, I used the Merriest Moments stamp set - one of my all-time Christmas festive favourites. I used a circle framelit to cut a circle of masking paper, then stamped a selection of festive foliage around the edge, masking the individual pieces too to create a sense of depth and dimension. Once the masking paper was removed, I stamped my sentiment in the clear circle in the centre and used a thin (retired) gold hoop embellishment to outline the edge of my masked circle, then added some diecut red berries and a poinsettia to the front of the hoop - I like the subtle depth that this gives and pop of additional colour amongst the greens of the foliage:


Words of Friendship - My festive friendship sentiment comes from the 'Christmas To Remember' stamp set - a set of sayings perfect for this time of year. I used another two to add detail to the inside of my card, along with a little more festive foliage decoration:

Simple as that! I wish in hindsight I'd taken step by step photos of the construction process for this card, because whilst easy to explain contained a fair number of steps to achieve the desired effect. I really like the finished card though and I know that when one of my oldest, dear friends who I don't see often, but is always in my thoughts, receives this card she will love it too!

Here is the visual summary of the key products used on today's project for you to pin for easy reference:


You can see all of my 'How To' summaries on my 'How To - Tips and Techniques' Pinterest board in case you've missed any. 

Enjoy your day and I'll be back tomorrow with another project. Until then, happy stampin'!


Stampin' Up! Supplies Used:

Table built using Product Table Builder by The Crafty Owl - Independent Stampin' Up! Demonstrator.

Peaceful Place Evergreen Winter Wonderland PP570

by Joanne James5. December 2021 08:00

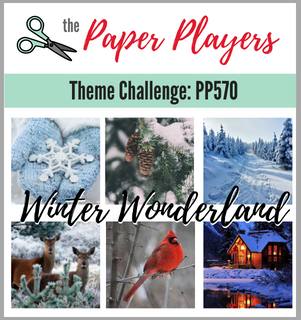
Today it's Sunday and time for this week's new challenge over at The Paper Players! It's the turn of the fabulous Jaydee to host this week and she has a festive theme challenge for us to work with:
    

We've had snow twice this week in my part of the world and the current freezing temperatures are definitely showing early signs of a winter wonderland! I decided to make another card using the current colours over at The Color Throwdown and decided to get creative with my Peaceful Place designer series papers and create my own idyllic winter wonderland - take a look:
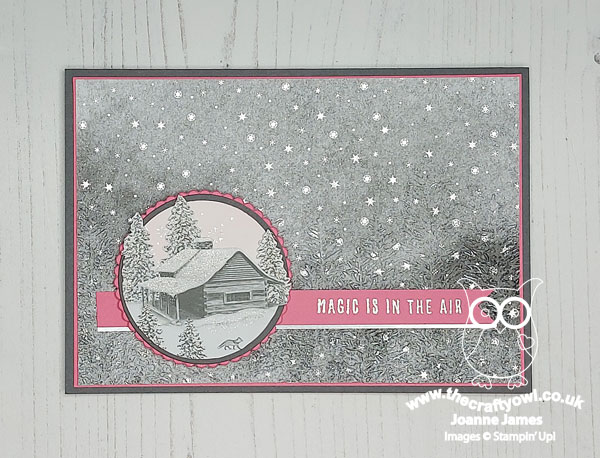
 

Here's the low-down on today's card:

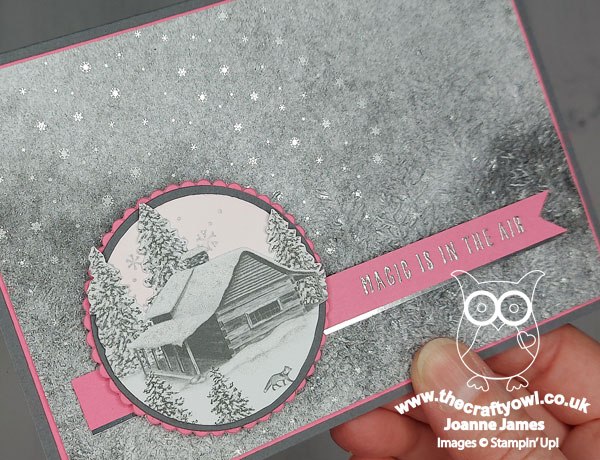
Peaceful Place - I decided to fussy cut one of the log cabins from the Peaceful Place designer paper, across the upper horizon including some trees, and added this to a precut white circle, that I had added Polished Pink ink to with a blending brush and stamped on some snowflakes in Encore silver. I allowed the trees to overhang the circle border and liberally brushed the snowy areas of the scene with clear Wink of Stella. It's difficult to see on the photos, but this card is so sparkly in real life!

Evergreen Forest - I used another sheet of Peaceful Place designer series paper for my background, this time the sparkly silver snowflakes on a mottled grey background. I ran this panel through the Evergreen Forest Embossing folder to add a row of embossed fir trees to the background for added interest. Again, it's easier to see in real life - the texture adds subtle additional detail. I used the pink for my sentiment banner and borders for a pop of colour against the silver and grey:
 

Don't Forget The Inside - I carried the winter wonderland theme over to the inside of my card, adding a strip of the sparkly snowflake paper along with a couple of fussy-cut trees and a sentiment from the 'Snowflake Wishes' stamp set:
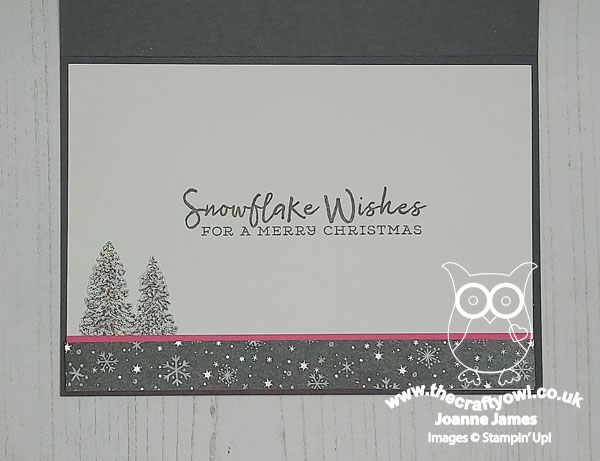
 

Doesn't that cosy log cabin look inviting? I could totally hole myself up there with my craft supplies and a roaring log fire for a week or two! 

Here is the visual summary of the key products used on today's project for you to pin for easy reference:
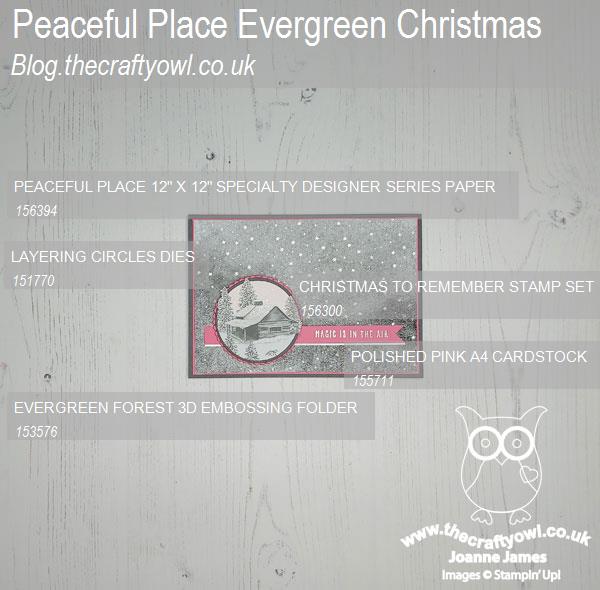
 

You can see all of my Product and 'How To' summaries on my 'How To - Tips and Techniques' Pinterest board in case you've missed any. 

Before you reach for your ink and papers, check out what our amazing team has created to inspire you this week:

Here's a quick recap of our challenge rules:
 
1.  Create a new paper project
2.  Upload your creation to your blog with a link back to us and provide a direct link to the post featuring your challenge submission.
3.  Please link your card to no more than four challenges, TOTAL.
4.  Have FUN!

You can see all of my 'How To' summaries on my 'How To - Tips and Techniques' Pinterest board in case you've missed any. 

Enjoy your day; I'll be back tomorrow with another project. Until then, happy stampin'!


Stampin' Up! Supplies Used: 

Table built using Product Table Builder by The Crafty Owl - Independent Stampin' Up! Demonstrator.


New Online Exclusives

There are new products available exclusively in the online store from 5 November - check them out here.

Latest Kits!

Stampin Cut and Emboss

The Perpetual Beauty Calendar Kit and Cherry Blossoms Treat Boxes Kit are the latest kits in the online store - get yours here!

Shop Online

Access my online shop 24 x 7, 365 days of the year:

Current December hostess code:

9NKXDTTR

Shop Online

Mini Catalogue

BROWSE THE CATALOGUE

'Tis The Season - the new Stampin' Up! Mini Catalogue is here! For more details and to download your copy click here

Scrapbooking

Stampin' Up! has introduced a new range of 12x12" scrapbooking product and kit - the full range is now available to purchase online. To download a copy of the new digital Scrapbooking Catalogue click here.

2024-25 Annual Catalogue

BROWSE THE CATALOGUE

Click on the image to download your copy of the 2024-25 annual catalogue. For a full list of current SU! supplies, go to my online store. If you would like any help or advice, please drop me a line at joanne@thecraftyowl.co.uk or give me a call on 07773 421446 - I'd be happy to help.

Join My Team

It's always a great time to join Stampin’ Up! New team members can get £130 worth of products for only £99 + free business supplies + free shipping + all the fun being a part of Stampin’ Up! Stampin' Up! has something for everyone: join my growing team and benefit from my support to enjoy Stampin' Up! however you choose.

If you're interested, call me for a chat to understand how I can help you realise your goals. Alternatively, if you have already decided to sign up and you just can't wait, please click here for the link to the online form where you can sign up and order your starter kit right away! 

About Me

Hi I'm Joanne and live in Northampton and when I'm not looking after my husband and two beautiful children, am an avid crafter with a passion for all things Stampin' Up!

I must confess that I have never been a big rubber stamper - until I discovered Stampin' Up! that is. I love the fact that I can get such great results with co-ordinating stamps, inks, papers and punches - the possibilities are endless! Join me on my stamping journey as I share the things I love and be inspired to create amazing things yourself!

Follow Me

Monthly Newsletter

Box Builder

Click the button above to use Box Buster to create your custom box design using the Envelope Punch Board!

Kits Collection Now Available!

Stampin Cut and Emboss

The new Kits Collection from Stampin' Up! is now available!

Click here to see the current kits available and order yours online today.

I Design For


Stampin' Up Stuff

This is my personal blog and is not endorsed by Stampin’ Up! I hope you find it a plentiful source of ideas and personal inspiration but please don't copy my designs for contest submission or use for classes, publication or sale without express permission.

DSP Special Release

Check out 3 popular designer series paper designs in fresh new colourways! Available exclusively in the online store from 3 December - check them out here

Last Chance Products

Last Chance Products will now be updated every other month - check them out here.