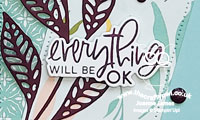
You Are Amazing Slimline Birthday Card

by Joanne James19. April 2023 19:00

I've a late post today but as promised I'm sharing a card that uses the same layout as yesterday's, this time using a trio of colours from the current Sunday Stamps palette:


I chose the two pinks and Starry Sky as my co-ordinating dark blue for a bright slimline birthday card - take a look:


Here's the low-down on today's card:

The card has a few more layers than yesterday and is all about the colour! I used the fabulous large floral die as my focal point then overlaid with the other diecut sentiment in the Amazing Thanks set, having combined this with a stamped sentiment from the Art Gallery set for a colourful birthday card:

This card is still easy to pull together and impactful with the hot pink! I thought this card might work with the addition of a sparkly diecut number as I have lots of friends and family celebrating milestone birthdays in the next few months. I need a card for an 18th birthday, so consulted with the James Juniors for their thoughts and was told in no uncertain terms that this was a card more suitable to older (much older!!) ladies! Oh well - clearly I might be the mother of two teenagers, but what do I know?! Back to the drawing board on that one!

Here is the visual summary of the key products used on today's project for you to pin for easy reference:


You can see all of my 'How To' summaries on my 'How To - Tips and Techniques' Pinterest board in case you've missed any. 

Enjoy your evening and I'll be back tomorrow with another project. Until then, happy stampin'!


Stampin' Up! Supplies Used:

Table built using Product Table Builder by The Crafty Owl - Independent Stampin' Up! Demonstrator.

Artistic Leaves with Design A Daydream And A Tribute To Her Majesty The Queen PP608

by Joanne James11. September 2022 08:00

Today it's Sunday and time for this week's new challenge over at The Paper Players! It's my turn to host this week and I've a colour challenge for you to work with:
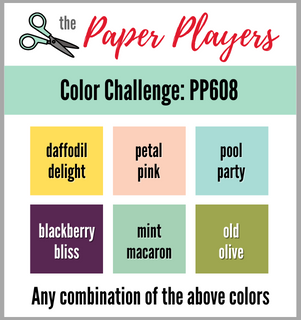
    

I decided to change things up for this week's challenge and instead of providing a restricted palette, I would choose 6 complimentary colours that you could choose any combination of on your project. Once again I used Jen B's sketch over at Freshly Made Sketches for my layout this week and ended up creating a card that was completely different to the one I originally had in mind. Take a look and I'll explain:
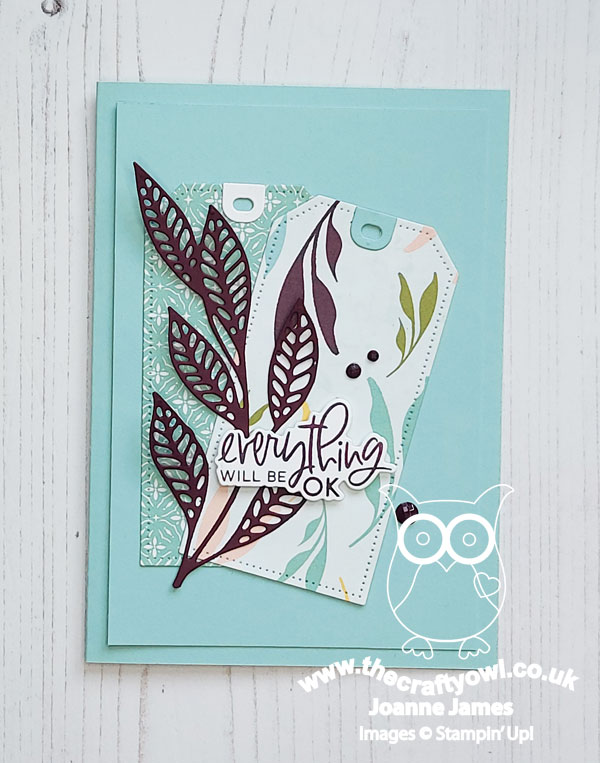
 

Here's the low-down on today's card:

Design A Daydream - The eagle-eyed amongst you will notice that the colours I chose for our challenge this week can all be found in Stampin' Up!'s 'Design A Daydream' designer series paper pack. This is a bumper paper pack at 48 sheets of 12" x 12" (the number quoted in the catalogue is a misprint) for just £17 - and it can be yours when you place an order that qualifies for Host Rewards. It contains many beautiful prints and patterns and I knew immediately that this paper would feature somewhere on my card today. I was originally going to use the floral pattern that is probably my favourite in the set, however when I came to make my a few days ago, the death of Her Majesty Queen Elizabeth II had just been announced and I found myself in a more sombre mood,and was drawn towards the more tranquil Pool Party blue patterns, so changed tack.

A Sentiment Shift - I decided to use the simple leaf patterned paper and the two sketch panels enabled me to also showcase the reverse of this sheet for my second tag panel. I needed a sentiment and was drawn to this one from the 'Charming Sentiments' bundle; whilst not entirely unexpected, the death of the Queen was still a shock and has left us a nation mourning the loss of a unique and selfless monarch. Whilst this period of respect will continue for days to come, I thought this sentiment, with its implied acknowledgement of both a sense of loss along with the suggestion of hope seemed perfect to sum up the country's mood.

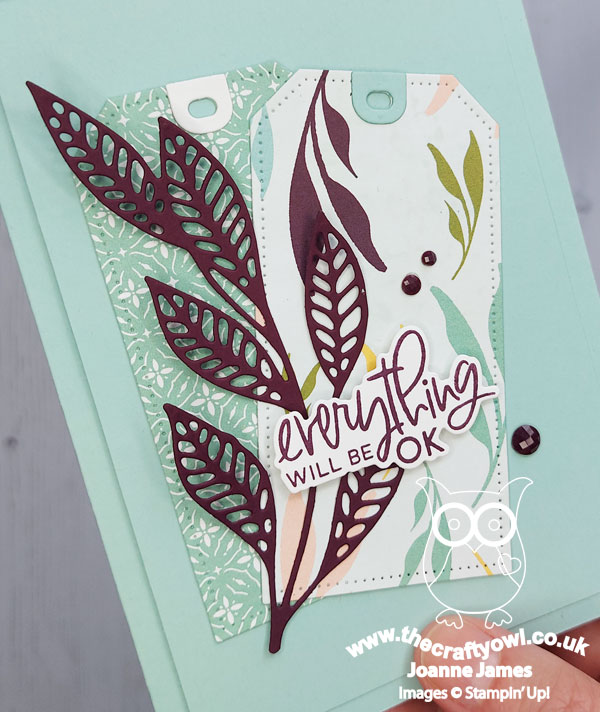
A Trio of Diecuts - Today's card is more diecuts than stamping: I used the Tailor Made Tags for my two panels and along with the die used to cut my sentiment (this is a great feature of the Charming Sentiments bundle) I used the detailed leaf branch from the Artistic Dies to add a simple accent and focal point. Just a few enamel dots as accents as I wanted to preserve the clean feel of my card:
I'm also linking today's card up with the team over at SUO Challenges where the current theme is 'Diecutting' and at The Alphabet Blog where they are at 'L is for Leaves'. 

I never had the opportunity to meet the Queen, however feel privileged to have lived through her reign and witnessed the selfless devotion with which she served this country. She was an amazing female role model and certainly an example of a life well lived. She will be much missed - rest in peace, your Majesty.

Here is the visual summary of the key products used on today's project for you to pin for easy reference:
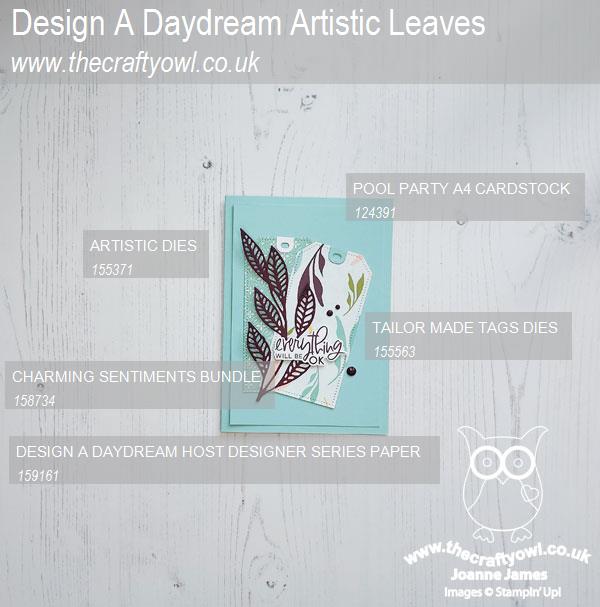
 

You can see all of my Product and 'How To' summaries on my 'How To - Tips and Techniques' Pinterest board in case you've missed any. 

Before you reach for your ink and papers, check out what our amazing team has created to inspire you this week:

Here's a quick recap of our challenge rules:
 
1.  Create a new paper project
2.  Upload your creation to your blog with a link back to us and provide a direct link to the post featuring your challenge submission.
3.  Please link your card to no more than four challenges, TOTAL.
4.  Have FUN!

Enjoy your day; we are out to lunch to quietly celebrate the second James family birthday of the month - lots of us are September babies - but are otherwise having an uneventful day. I'll be back soon with another project. Until then, happy stampin'!


Stampin' Up! Supplies Used: 
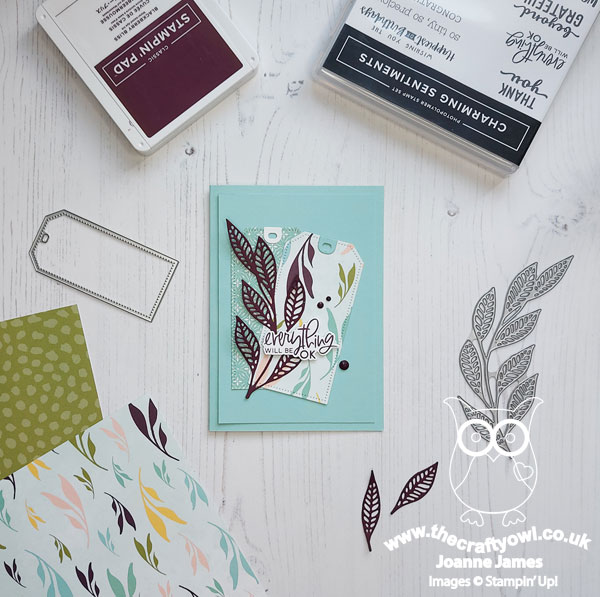
Table built using Product Table Builder by The Crafty Owl - Independent Stampin' Up! Demonstrator.

Artistically Inked CAS Hello Card TTT122

by Joanne James15. July 2021 17:00

It's Thursday and time for a new challenge over at TicTacToe! It's the turn of Team X to host this week and the lovely Betty is our featured designer this week. This is the fun board that we are playing along with: 


I went across the middle with diecut/sentiment/metallic for my card today and decided to use my Artistic Dies to create a pretty and clean card - take a look:


Here's the low-down on today's card:

Artistic Dies - This main diecut from the Artistic Dies is so very pretty! I decided to go white-on-white today with a pop of colour peeking through beneath:


Artistically Inked - There was an experimental element to my card today, in that I wanted to see if I could get the floral stamps in the Artistically Inked to line up with the detail of the dies. So pleased to discover that this was quite easy to do and I’m looking forward to sharing how I did this, along with some tips and tricks, with the ladies that are attending my Artistically Inked class next week as we are going to do something similar.

A Trio of Metallics - For my trio of metallics, I heat embossed my sentiment in silver, and added some silver thread and a trio of sparkly rhinestones. Just enough to add a touch of metallic for a little extra detail.

Here is the visual summary of the key products used on today's project for you to pin for easy reference:


You can see all of my Product and 'How To' summaries on my 'How To - Tips and Techniques' Pinterest board in case you've missed any. 

i really like today’s card; lots of the cards I’ve made to date using this suite have included lots of elements and I think this pared back look is much more in keeping with my go-to style. That makes it a great card to link up with the girls over at SUO Challenges where they have a ‘Designer’s Choice’ challenge this week.

A tictactoe board offers so many creative possibilities - how does this week's board inspire you? Why not have a go? We would love to see you in the gallery and who knows - you might be selected for Designer's Choice and be eligible to be a guest designer on a future challenge. 

Enjoy your day; the James Juniors and I have been to the beach today which was a lot of fun - I’m sure we will sleep well tonight! I'll be back tomorrow with another project. Until then, happy stampin'!

Stampin' Up! Supplies Used: 

Table built using Product Table Builder by The Crafty Owl - Independent Stampin' Up! Demonstrator.

Expressions In Ink Gold Glimmer Birthday Card AYSI 251

by Joanne James28. May 2021 13:00

Today I'm sharing my design team card for our new challenge over at As you See It where it's time for a recipe challenge:


I'm afraid I couldn't resist dipping into my Expressions in Ink Suite again for the third time this week to find my ingredients to meet the recipe criteria for this challenge - take a look:


Here's the low-down on today's card:

Expressions In Ink - Today's card uses another of the beautiful alcohol-ink inspired backgrounds that feature in the Expressions in Ink designer series paper. This one features a loose floral pattern that I deliberately chose for today's card because it is a great match for the large floral die. 

All About The Die - Today's card really is all about showcasing the gorgeous large floral die. I cut it out of (retired) gold glimmer paper as I wanted it to make a real focal point on my card; can you see how the pattern of the florals behind align with the florals on the diecut? I'm not sure if this is by design, but I was rather pleased when I discovered it:


The Remaining Ingredients - So that is DSP and diecut sorted; I heat embossed my birthday sentiment in gold onto a Tasteful Label banner and added a simple gold twine bow so as not to detract from the diecut to complete the other elements of our recipe this week.

I am truly in love with this suite - so very pretty and easy to use. I can promise you haven't seen the last of this yet!

Here is the visual summary of the key products used on today's project for you to pin for easy reference:


You can see all of my 'How To' summaries on my 'How To - Tips and Techniques' Pinterest board in case you've missed any. 

Here's a summary of our challenge rules:

  • Create any card, scrapbooking page, 3D project or packaging project that fits the challenge.
  • Please include the challenge graphic and link back to the challenge in your blog post. Turn off word verification so we can leave you lots of lovely comments. Make sure you link the post not the whole blog to the Linky. Use #AYSIXXX when uploading to a public gallery.
  • If you’re unsure about ‘the rules’, check the details under the Challenge Guidelines tab on the As You See It Challenge homepage.
We look forward to seeing your creations in the AYSI gallery.

Enjoy your day and I'll be back tomorrow with another project. Until then, happy stampin'!


Stampin' Up! Supplies Used:

Table built using Product Table Builder by The Crafty Owl - Independent Stampin' Up! Demonstrator.

Artistically Inked CAS Thank You Card CCS421

by Joanne James25. May 2021 13:00

It's Tuesday and time for a new challenge over at CAS Colours & Sketches. This week's challenge is a sketch challenge and Samantha has asked that we feature a non-geometrical shape on our cards: 


Feel free to flip or rotate the sketch when making your card.

For my card today I had to make another card using items from the 'Expressions In Ink' Suite - take a look:


Here's the low-down on today's card:

Artistically Inked - The main feature on today's card is a gold foil leaf branch cut with my Artistic Dies and a trio of Polished Pink blooms that I've stamped and diecut and tucked in amongst the leaves.  The flowers in this set are so pretty and they are so easy to stamp - perfect for clean and simple cards.

A Distinktive Inking Tip - As beautiful as they are, there is no patterned paper from the suite on today's card. Instead, I added a 'hint of pink' both behind my floral stem and in the opposing corner beneath my sentiment. Instead of inking the stamp directly, or even stamping off, I added ink to the stamp using my blending brush; this gave perfect coverage with no harsh lines and allowed the detail of the distinktive stamp to show through, but with just a hint of colour:


I really like this effect, so soft and subtle.

Finishing Touches - A gold heat-embossed sentiment and a trio of gold gilded gems finish today's card. Just enough bling to make it special without breaking too many CAS rules!

Here is the visual summary of the key products used on today's project for you to pin for easy reference:


You can see all of my 'How To' summaries on my 'How To - Tips and Techniques' Pinterest board in case you've missed any. 

It's still freezing cold and blowing a gail here in the UK today, although mercifully the torrential rain has stopped for the time being. Summer, oh summer - where are you??!

Enjoy your day and I'll be back tomorrow with another project. Until then, happy stampin'!


Stampin' Up! Supplies Used:

Table built using Product Table Builder by The Crafty Owl - Independent Stampin' Up! Demonstrator.

Expressions In Ink Best Wishes PP542

by Joanne James23. May 2021 09:00

Today it's Sunday and time for this week's new challenge over at The Paper Players! It's the turn of the fabulous Jaydee to host this week and she has my favourite, a sketch challenge for you to work with:


I decided that Jaydee's sketch was the perfect opportunity to get to work with my Expressions in Ink suite. As is often the way, the first card that I make when I open a new suite for the first time ends up including a bit of everything, and today's card is no exception - take a look:


Here's the low-down on today's card:

Expressions In Ink - The starting point for today's card was the beautiful 'Expressions In Ink' specialty designer series paper that is the cornerstone of the suite of the same name and that features on the front cover of the new annual catalogue. Full of patterns made from alcohol inked backgrounds with gold embossed detail, these papers are stunning! I chose a heavily patterned floral design with gold embossed detail and added it to the top portion of my card.

Artistically Inked - I used the 'Artistically Inked' stamp set to stamp a Magenta Madness flower and two pairs of leaves, along with a heat-embossed sentiment on the front of my card. These are distinktive stamps that also have that watercoloured or alcohol-inked effect. I die cut these elements with the co-ordinating Artistic Dies. I also added a sentiment and another stamped flower to the inside of my card:


Touches of Gold - I added lots of additional touches to my floral focal point to make this a rather special card - gold foil diecut leaves, Pale Papaya ribbon (cut in half lengthways), gold twine and gilded gems for an added touch of luxury:


I just adore this suite - I think it is my favourite of all of the new suites in the catalogue. If it's a favourite of yours too, you are going to want to come back again this week as I have made lots more cards that I will be sharing with you. So much so, I am already running out of this paper - I will be needing to order more of that this week!!

Here is the visual summary of the key products used on today's project for you to pin for easy reference:


You can see all of my Product and 'How To' summaries on my 'How To - Tips and Techniques' Pinterest board in case you've missed any. 

Before you reach for your ink and papers, check out what our amazing team has created to inspire you this week:

Here's a quick recap of our challenge rules:
 
1.  Create a new paper project
2.  Upload your creation to your blog with a link back to us and provide a direct link to the post featuring your challenge submission.
3.  Please link your card to no more than four challenges, TOTAL.
4.  Have FUN!

You can see all of my 'How To' summaries on my 'How To - Tips and Techniques' Pinterest board in case you've missed any. 

Enjoy your day; mine is a going to be a busy one as Sundays go. There is swim squad training for both James Juniors and then Master James has a football-themed birthday party to attend in the afternoon too. I'm just hoping it stays dry - cricket was cancelled again yesterday - and for once not because it was raining, but this time because we have had so much rain so far this last week and in May as a whole that the cricket pitches were saturated. The poor boy has yet to wear his new cricket kit this year - at this rate he will have grown out of it before he gets the chance!

I'll be back tomorrow with another project. Until then, happy stampin'!


Stampin' Up! Supplies Used:

Table built using Product Table Builder by The Crafty Owl - Independent Stampin' Up! Demonstrator.

Current Promotions

Stampin Cut and Emboss

Save up to 30% off on all your favourite kits from 1 to 31 October! 

Click here to see the current kits available and order yours online today.

Join My Team

It's always a great time to join Stampin’ Up! During October you can get even more in your starter kit! New team members can get £160 worth of products for only £99 + free business supplies + free shipping + all the fun being a part of Stampin’ Up! Stampin' Up! has something for everyone: join my growing team and benefit from my support to enjoy Stampin' Up! however you choose.

If you're interested, call me for a chat to understand how I can help you realise your goals. Alternatively, if you have already decided to sign up and you just can't wait, please click here for the link to the online form where you can sign up and order your starter kit right away! 

Shop Online

Access my online shop 24 x 7, 365 days of the year:

Current October hostess code:

4XPEYCB9

Shop Online

Scrapbooking

Stampin' Up! has introduced a new range of 12x12" scrapbooking product and kit - the full range is now available to purchase online. To download a copy of the new digital Scrapbooking Catalogue click here.

Mini Catalogue

BROWSE THE CATALOGUE

'Tis The Season - the new Stampin' Up! Mini Catalogue is here! For more details and to download your copy click here

2024-25 Annual Catalogue

BROWSE THE CATALOGUE

Click on the image to download your copy of the 2024-25 annual catalogue. For a full list of current SU! supplies, go to my online store. If you would like any help or advice, please drop me a line at joanne@thecraftyowl.co.uk or give me a call on 07773 421446 - I'd be happy to help.

Latest Kits!

Stampin Cut and Emboss

The Christmas Ornaments Kit and Card Keeper Kit are the latest kits in the online store - get yours here!

New Online Exclusives

There are new products available exclusively in the online store from 5 November - check them out here.

About Me

Hi I'm Joanne and live in Northampton and when I'm not looking after my husband and two beautiful children, am an avid crafter with a passion for all things Stampin' Up!

I must confess that I have never been a big rubber stamper - until I discovered Stampin' Up! that is. I love the fact that I can get such great results with co-ordinating stamps, inks, papers and punches - the possibilities are endless! Join me on my stamping journey as I share the things I love and be inspired to create amazing things yourself!

Follow Me

Monthly Newsletter

Box Builder

Click the button above to use Box Buster to create your custom box design using the Envelope Punch Board!

Kits Collection Now Available!

Stampin Cut and Emboss

The new Kits Collection from Stampin' Up! is now available!

Click here to see the current kits available and order yours online today.

I Design For


Stampin' Up Stuff

This is my personal blog and is not endorsed by Stampin’ Up! I hope you find it a plentiful source of ideas and personal inspiration but please don't copy my designs for contest submission or use for classes, publication or sale without express permission.