Bloom Where You're Planted Thank You Card

by Joanne James23. August 2021 09:00

Today I'm sharing a card that uses Lou's fabulous sketch over at Just Add Ink this week and is also my entry for the current challenge over at SUO Challenges titled 'plant life':


Before I show you my card, I need to say a big thank you to the team over at Just Add Ink for choosing my Dahlia card as their Top Pick last week - thank you ladies! If you missed that card, you can see it here. For this week's card, I was tempted to go with something clean and simple but instead decided that the ribbon divider on the sketch would give me the perfect focal point for a row of leafy plants - take a look:


Here's the low-down on today's card:

I've been wanting to fussy cut some of the plants from the 'Bloom Where You're Planted' designer paper for ages, so added a brick wall bottom border edged with some (retired) green ribbon, then added a selection of fussy cut, leafy pot plants:


I added a simple thank you sentiment from the 'Art Gallery' stamp set to complete my card - you can never have enough thank you cards!

Here is the visual summary of the key products used on today's project for you to pin for easy reference:


You can see all of my 'How To' summaries on my 'How To - Tips and Techniques' Pinterest board in case you've missed any. 

We are shopping for new school shoes amongst other things today - that can only mean one thing, the start of term is drawing near! Enjoy your day and I'll be back tomorrow with another project. Until then, happy stampin'!


Stampin' Up! Supplies Used:

Table built using Product Table Builder by The Crafty Owl - Independent Stampin' Up! Demonstrator.

Suite Sampler Fine Art Florals Just To Say CCS424

by Joanne James15. June 2021 12:00

It's Tuesday and time for a new challenge over at CAS Colours & Sketches. Shannon is hosting this month and this week we have another colour challenge: 


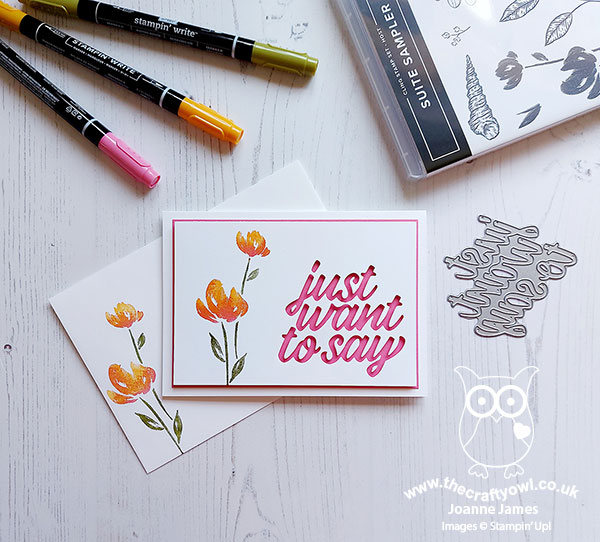
For my card today I decided to highlight a stamp set that will soon be leaving us, but you might not have even noticed in the January-June mini catalogue. Do you recognise this flower?
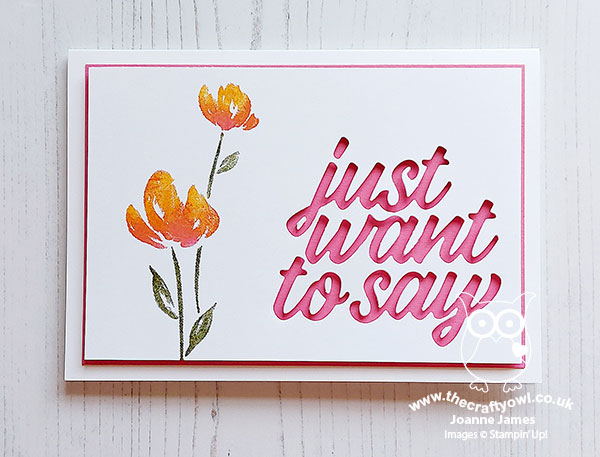
 

Here's the low-down on today's card:

Suite Sampler - The flower stem on today's card looks like the flowers in the Art Gallery stamp set that is part of the Fine Art Florals Suite, and don't worry - those stamps have been carried over to the annual catalogue so they're not leaving anytime soon! - but it actually comes from the exclusive host set, Suite Sampler. This stamp set has a selection of images, each of which co-ordinates with one or other of the suites that feature in the mini catalogue. I really like this double-blossomed stem; not only does it give more mileage to my Art Gallery set, but it is also great for clean and simple cards. This set will retire at the end of the month, so if you like it you still have time to put in a big order or gather some orders between friends and earn the hostess rewards needed to be able to add it to your shopping basket. 

Ink Blending - I loved Shannon's colour choices this week and I thought the Mango Melody and Polished pink would make a lovely two-tone flower, so I used a combination of ink, Stampin' Write markers direct to stamp and a sponge dauber to gently apply the ink and blend the colour. I loved the effect so much, I cleaned my stamp and repeated the stamping, both on my envelope and the inside of my card:
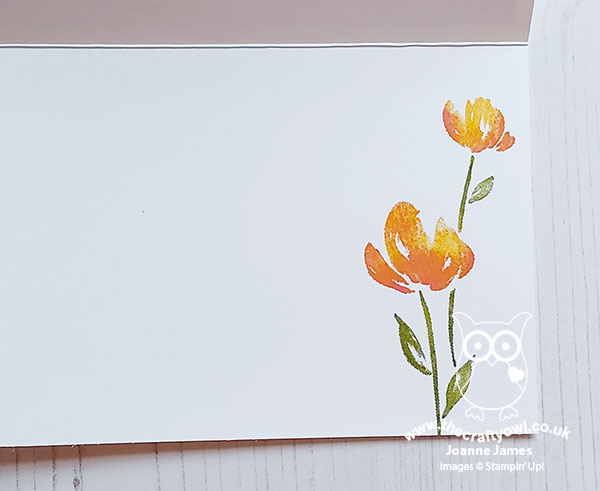
 

Just To Say - I paired my flower with a negative 'just to say' cut using the large single die in the Floral Gallery Dies set. I will pair it with a stamped sentiment on the inside of my card from the Art Gallery set but for the time being I have left it blank so that I can stamp it to suit when my card is needed. Don't you just love that Polished Pink peeking through?
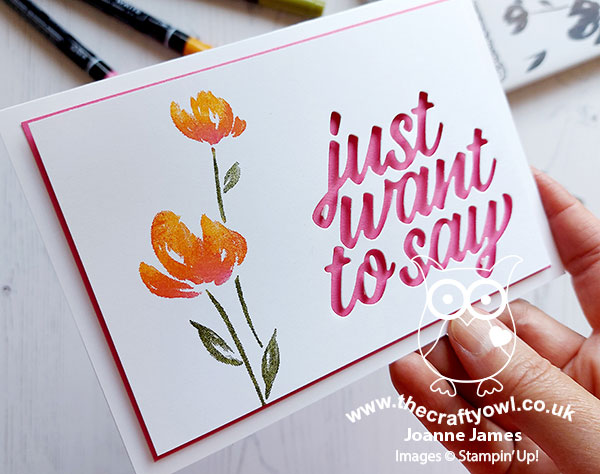
I really like the simplicity of this card - if I can find the time I'm going to make a few more in alternative colours. It's a great one to have on standby so that the greeting can be adapted as needed.

Here is the visual summary of the key products used on today's project for you to pin for easy reference:
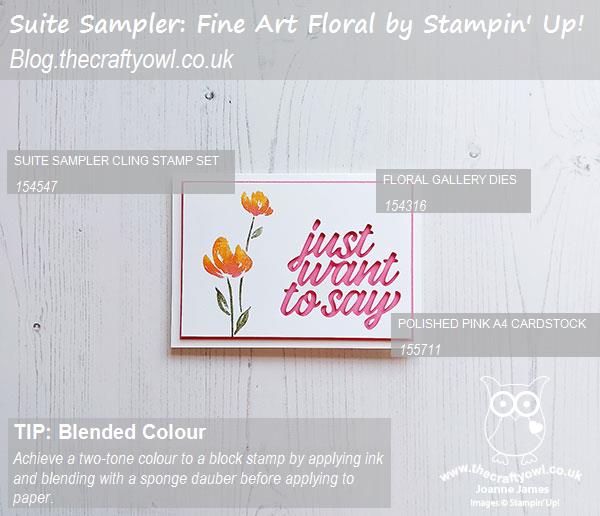
 

You can see all of my 'How To' summaries on my 'How To - Tips and Techniques' Pinterest board in case you've missed any. 

As a reminder, for our colour challenges, you must use all of the stated challenge colours. You may also use neutral colours; however, the challenge colours should be the most noticeable ones featured on your card. We use Stampin' Up! color names for reference, but you are welcome to use any other companies' products as long as you match the challenge colours as closely as possible.

Enjoy your day and I'll be back tomorrow with another project. Until then, happy stampin'! 
Stampin' Up! Supplies Used:

Table built using Product Table Builder by The Crafty Owl - Independent Stampin' Up! Demonstrator.

#SimpleStamping Art Gallery One Layer Floral Birthday Card CCS409

by Joanne James2. March 2021 13:00

It's Tuesday and time for a new challenge over at CAS Colours & Sketches. YoonYoung is hosting this month and our first challenge of March is a colour challenge: 


Feel free to flip or rotate the sketch when making your card. For my card today I thought I would take the opportunity to use these colours for an oh-so-simple CAS card and embrace this week's Less Is More ongoing celebrations too with a one layer floral - take a look:


Here's the low-down on today's card:

Today's card uses just 5 items: the Art Gallery stamp set, 3 ink pads and some Basic White thick cardstock - #SimpleStamping at its best. The Art Gallery stamp set is perfect for beginners and experienced crafters alike; the double-layered florals are very forgiving in terms of needing to be stamped accurately and the two-step stamping adds interest and the illusion of texture.  Having recently re-inked my Calypso Coral ink pad, it was stamping quite dark but you can see the contrast between it and the Terracotta Tile overlay more clearly below:


Whilst I was making this card, I also experimented with adding in some gold leaf; I stamped an identical card and added some gold leaf detail to the Terracotta Tile layer and I added a trio of gold gilded gems:


I discounted it as my main card today as it obscured too much of the Teracotta Tile colour, even though I tried to add a little more in with some stamens:


I thought I would share it with you as it shows a quick way to step up my original card. Here are both cards together:


Which one do you prefer? After much playing around, I think actaully 'less is more' and the most basic card is my favourite. 

Here is the visual summary of the key products used on today's project for you to pin for easy reference:


You can see all of my 'How To' summaries on my 'How To - Tips and Techniques' Pinterest board in case you've missed any. 

As a reminder, for our colour challenges, you must use all of the stated challenge colours. You may also use neutral colours; however, the challenge colours should be the most noticeable ones featured on your card. We use Stampin' Up! color names for reference, but you are welcome to use any other companies' products as long as you match the challenge colours as closely as possible.

Enjoy your day and I'll be back tomorrow with another project. Until then, happy stampin'!


Stampin' Up! Supplies Used:

Table built using Product Table Builder by The Crafty Owl - Independent Stampin' Up! Demonstrator.


Happy Birthday Snail CCS 402

by Joanne James12. January 2021 13:00

It's Tuesday and time for a new challenge over at CAS Colours & Sketches. Today we have a sketch challenge and Jeanne has asked that we use any non-geometric shape. Feel free to flip or rotate the sketch when making your card.


For my card today I decided to make another card using the 'Snailed It' set. I know I used this set last week for my CC&S card too, but I just couldn't resist another outing (don't worry, if you're not a snail fan I have something different in store for my challenge card next week!) These snails are just perfect for a clean and simple card - take a look:


Here's the low-down on today's card:

Snailed It - For today's card, I used the alternative snail in the 'Snailed It' set, who instead of bearing snail mail comes bearing gifts - of the birthday kind! I coloured him using my Stampin' Blends markers and took the inspiration for my colours from the other elements of the suite.

Snail Mail - I decided to create a recessed panel from the horizontal line of the sketch that is both spanned by my birth!day snail and home to a narrow strip of Snail Mail designer paper on the panel below. It's a rare thing to use designer series paper on a clean-and-simple card, but used sparingly and to accentuate a specific design element, such as the recess, and with a clear pattern element, it can be used to great effect (as I've shown here, even if I say so myself ;-) ) 

Art Gallery Birthday - Lastly, the sentiment from today's comes from the Art Gallery stamp set. This set is so, so beautiful and contain some of the most amazing florals, but is also home to some fabulous basic block-type greetings, which are perfect for clean and simple cards.

And that's it - clean and simple, done!

Here is the visual summary of the key products used on today's project for you to pin for easy reference:


You can see all of my 'How To' summaries on my 'How To - Tips and Techniques' Pinterest board in case you've missed any. 

Enjoy your day; today both James Juniors are officially 'back to (virtual) school. I was fully anticipating getting some of my desk jobs ticked off, but so far I have had a steady stream of interruptions from each of them, who are both on breaks at different times and are requiring attention of one form or another, even if it's just real-life human interaction. Something tells me home-schooling is not a route to peace and quiet ... or productivity, or at least not for me anyway! Sanity aside, all being well I'll be back tomorrow with another project. Until then, happy stampin'!


Stampin' Up! Supplies Used:

Table built using Product Table Builder by The Crafty Owl - Independent Stampin' Up! Demonstrator.

Shop Online

Access my online shop 24 x 7, 365 days of the year:

Current May hostess code:

VDKNV7BH

Shop Online

2024-25 Annual Catalogue

BROWSE THE CATALOGUE

Click on the image to download your copy of the 2024-25 annual catalogue. For a full list of current SU! supplies, go to my online store. If you would like any help or advice, please drop me a line at [email protected] or give me a call on 07773 421446 - I'd be happy to help.

Join My Team

It's always a great time to join Stampin’ Up but during May it's even better! New team members can get £78.25 of new In Color products for FREE! That's in addition to another £130 worth of products of your choice for only £99 + free business supplies + free shipping + all the fun being a part of Stampin’ Up! Stampin' Up! has something for everyone: join my growing team and benefit from my support to enjoy Stampin' Up! however you choose.

If you're interested, call me for a chat to understand how I can help you realise your goals. Alternatively, if you have already decided to sign up and you just can't wait, please click here for the link to the online form where you can sign up and order your starter kit right away! 

Latest Kits!

Stampin Cut and Emboss

The City Sights Kit has all you need to make 8 cards with coordinating envelopes for £20. Along with the new Happy Hollyhocks Kit, a no stamping kit including 9 cards for just £14, both are available from May 1st - get yours here!

New Online Exclusives

There are new products available exclusively in the online store from 5 March - check them out here.

About Me

Hi I'm Joanne and live in Northampton and when I'm not looking after my husband and two beautiful children, am an avid crafter with a passion for all things Stampin' Up!

I must confess that I have never been a big rubber stamper - until I discovered Stampin' Up! that is. I love the fact that I can get such great results with co-ordinating stamps, inks, papers and punches - the possibilities are endless! Join me on my stamping journey as I share the things I love and be inspired to create amazing things yourself!

Follow Me

Monthly Newsletter

Box Builder

Click the button above to use Box Buster to create your custom box design using the Envelope Punch Board!

Kits Collection Now Available!

Stampin Cut and Emboss

The new Kits Collection from Stampin' Up! is now available!

Click here to see the current kits available and order yours online today.

I Design For


Mini Catalogue


The next mini catalogue will be live in September! 

Stampin' Up Stuff

This is my personal blog and is not endorsed by Stampin’ Up! I hope you find it a plentiful source of ideas and personal inspiration but please don't copy my designs for contest submission or use for classes, publication or sale without express permission.