Stampin’ Up! 2022-2023 Annual Catalogue & January-April 2023 Mini Catalogue Retiring Lists Are Here - And A Colour Refresh!

by Joanne James3. April 2023 09:00
 
Stampin’ Up! 2022-2023 Annual Catalogue & January-April 2023 Mini Catalogue Retiring Lists are here – Products Available While Supplies Last!
 
Last Chance Product Details are as follows:
  • All products are available while supplies last, and there are no purchase limits.
  • The discounted prices will not start on any products until Tuesday, April 4.
  • Stamp sets are not guaranteed during this promotion and are while supplies last.
  • The Stamparatus and its accessories are part of this Last Chance promotion, but these are only available while supplies last. If there is leftover product at the end of this promotion, the Stamparatus and its accessories will move into the Online Exclusive category.
  • ONLINE ORDER DEADLINES:  May 1, 2023 at 10.50PM 

Click here to go right to the the online store to shop your favourite retiring items now!

These are the Last Chance Retiring Products lists updated by Stampin’ Up! on March 31.

Click here to see the retired items list for the 2022-2023 Annual Catalogue in PDF format, including the discounts that will apply beginning on April 4:


You can click here to download the retiring list for the 2022-2023 Annual Catalogue in Excel format so that you can modify and edit it.

Click here to see the retired items list for the January-April 2023 Mini Catalogue in PDF format, including the discounts that will apply beginning on April 4:


You can click here to download the retiring list for the January-April 2023 Mini Catalog in Excel format so that you can modify and edit it.

Stampin’ Up! has put together a quick video showing you the colours that are leaving and the new colours coming in, including the new In Colours!  You can see it here:

Here's a quick list of those colours that are retiring:

  • Blushing Bride
  • Pear Pizzazz
  • Mint Macaron
  • Rich Razzleberry
  • So Saffron
  • Merry Merlot
  • Pacific Point
  • Mango Melody
  • Soft Suede
  • Sahara Sand
  • Bermuday Bay

I'll have more news with regard to the new in colours in a separate post, but for now - I'll be placing an order first thing tomorrow so if you'd like to take advantage of the bargains on the retiring list, then do get in touch.

Let me know if you have any questions. Back tomorrow with another post; until then, happy shopping!

Easter Bunnies Are Not Just For Easter PP634

by Joanne James2. April 2023 08:00

Today it's Sunday and time for this week's new challenge over at The Paper Players! It's the turn of the fabulous Jaydee to host this week and she has a theme challenge for us to work with:


The animals came in two by two - feature two animals on your card, how fun! I actually have two cards to share with you today: I made my Paper Players card after I made the first one, so I'll share that one first so that the second one makes a bit more sense! My first card is an Easter card using Jen T's layout over at Freshly Made Sketches and the current Colour Inkspiration colour palette:

    May be an image of text

I thought the oval layout would be perfect for two bunnies and the colour palette would be just the ticket for a dark chocolate brown bunny and some floral decoration courtesy of the Dainty Delight Dies - take a look:


Whilst the layout worked beautifully for one bunny, two were definitely a squeeze, so having added some soft clouds and grass to surround my single bunny, I decided to add an Easter sentiment from the retired set 'Crazy About You'. This is such a pretty colour combo and I love the embossed detail on the Dainty Delight flowers and leaves too:


I then moved on to card two. I punched another bunny so that I had another pair and also had the country gingham oval left over from my first card that I still wanted to use up, so this time I switched to the current Sketch Saturday layout and decided to play along with the challenge over at TGIF Challenges and look at what other scraps and offcuts I had that would co-ordinate with my gingham oval.


I actually had quite a few! A strip of Country Floral designer paper leftover from a previous project, an offcut of Mint Macaron and some offcut strips of Wisper White that were just wide enough to cut a couple of borders with my Penned Flowers Dies and a scrap of Poppy Parade. This is what I came up with:


I used a Petal Pink card base and this time positioned my bunnies mirroring each other, with a punched heart between them. I really wanted a 'Some bunny loves you' sentiment but alas, I don't have one in my collection so went with this one from the retired Sale-A-Bration set 'Thanks A Bunch' instead:


I think this would make a sweet anniversary card;. It actually came together quite quickly by collecting up a bunch of leftover bits and pieces and more importantly - I managed to accommodate my two bunnies this time!

Here is the visual summary of the key products used on today's projects for you to pin for easy reference:


You can see all of my Product and 'How To' summaries on my 'How To - Tips and Techniques' Pinterest board in case you've missed any. 

Before you reach for your ink and papers, check out what our amazing team has created to inspire you this week:

Here's a quick recap of our challenge rules:
 
1.  Create a new paper project
2.  Upload your creation to your blog with a link back to us and provide a direct link to the post featuring your challenge submission.
3.  Please link your card to no more than four challenges, TOTAL.
4.  Have FUN!

Enjoy your day; I am off to an extra hockey game today and then we have the start of the Easter holidays, which for us means the start of serious revision season in the James household - not much in the way of excitement here! I'll be back tomorrow with another project. Until then, happy stampin'!


Stampin' Up! Supplies Used: 

Table built using Product Table Builder by The Crafty Owl - Independent Stampin' Up! Demonstrator.


Crumb Cake Dainty Delight for JUGS673

by Joanne James1. April 2023 05:00

Today I'm nice and early with today's post and with good reason: following my pick as Chic of the Week over at Just Us Girls with this card for challenge #664, I was delighted to be asked by the lovely Vicki to be their guest designer for the month of April. I'm taking over from the equally lovely Michele Ferguson of I Card Everyone, so big shoes to fill (if you've never visited her blog, you really should!) For the next 5 weeks I will be guesting along with these lovely ladies bright and early on a Saturday morning! Our first challenge for the month of April is a colour challenge:


I interpreted these colours ass Crumb Cake and Mossy Meadow, which is not a colour combo I would ordinarily be drawn to, yet the minute I saw this pairing I had an idea - I love it when that happens! Using the sketch layout over at Try Stamping on Tuesday I grabbed my Dainty Delight stamp set and this is what I came up with:


Here's the low-down on today's card:

I went with a clean, white base and added a panel wrapped in Crumb Cake burlap ribbon, before adding my layered Crumb Cake Panel. I stamped my florals in Mossy Meadow directly onto the Crumb Cake cardstock, and coloured the leaves in with Mossy Meadow ink and a blender pen and colouring the flowers with a white watercolour pencil. I just love the fine detail of these florals - they are so delicate:

I added a heat embossed sentiment from the same set that I stamped and heat embossed in white, then punched out using a retired punch and finished with a trio of green enamel dots from my stash. I did some additional stamping on the inside and added a co-ordinating envelope to complete my card.

I don't often stamp on a neutral other than white before colouring, but I really like the finished effect on this card. What do you think? How would you choose to play with these colours? Check out the cards by the JUGS team over on the blog and why not have a go and link yours there too?

Here is the visual summary of the key products used on today's project for you to pin for easy reference:
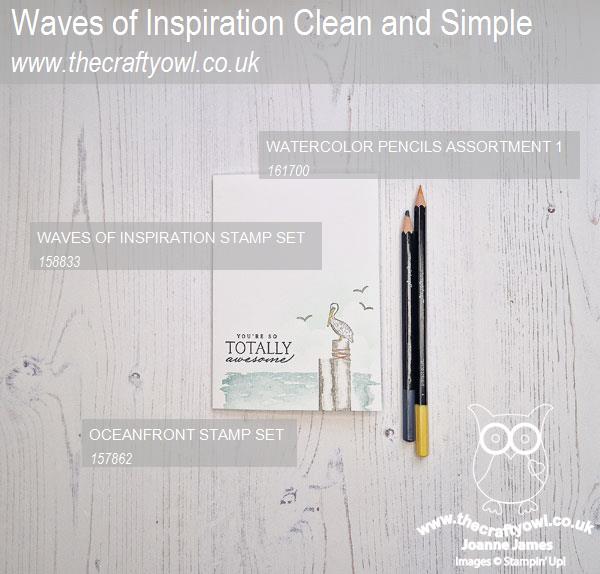
 

You can see all of my 'How To' summaries on my 'How To - Tips and Techniques' Pinterest board in case you've missed any. 

Enjoy your day; it's Saturday so I'm off to the hockey pitch. I'll be back tomorrow with another project. Until then, happy stampin'!


Stampin' Up! Supplies Used:
Table built using Product Table Builder by The Crafty Owl - Independent Stampin' Up! Demonstrator.

A Fish And A Wish Rainbow Thank You FF131

by Joanne James31. March 2023 09:00

Today I have my card for the new challenge over at Festive Friday Card Making and Paper Crafting Challenge


The challenge that we are celebrating this week is 'National Pet Day' which is on 11th April. Remember the fun thing is that at Festive Friday you do not need to actually celebrate the occasion; your goal is to simply use three or more items from the inspiration list on your project. I am not much of a pet person, but that didn't stop me perusing my stamp collection for a starting point for today's challenge. This week I used twine, fish and embossing folder and this is what I came up with:


Here's the low-down on today's card:

I paired one of the fishes from the stamp set 'A Fish and a Wish' with the rainbow macaron colours of the current Inkspirational mood board and created a vertical rainbow of fishes, reversing the stamp each time I stamped it. I added a simple thank you sentiment, co-ordinating Starry Sky twine and a few clear gems, along with a little extra stamping on the inside and outside envelope of my card. I added an embossed layer to my cardfront using the (retired) Seabed 3D Embossing Folder - you can see the detail on the close up below:

This is such a versatile set and so easy to use. Both the stamp set and the co-ordinating fish builder punch are retiring when the annual catalogue finishes at the end of April; the stamp set will also be 30% from next Tuesday, so time to pick up a bargain, perhaps? I'm also linking up today's card with the team over at The Alphabet Challenge Blog where they are celebrating reaching the end of the alphabet with 'Z is for Zodiac' and all things related; these fish are perfect for Pisces, the twelfth sign of the zodiac. Did you know that Pisces is actually the Latin word for 'fish'? Obvious when you think about it, but as a linguist the origin of words fascinates me!

Here is the visual summary of the key products used on today's project for you to pin for easy reference:


You can see all of my 'How To' summaries on my 'How To - Tips and Techniques' Pinterest board in case you've missed any. 

How does our board inspire you? I can’t wait to see what YOU create! For more inspiration, be sure to visit the rest of the Festive Friday Card Making and Paper Crafting Challenge Design team:


Enjoy your day and I'll be back tomorrow with another project and a special announcement too. Until then, happy stampin'!


Stampin' Up! Supplies Used:

Table built using Product Table Builder by The Crafty Owl - Independent Stampin' Up! Demonstrator.

Ink Blended Penned Flowers Easter Card TTT202

by Joanne James30. March 2023 15:00

It's Thursday and time for a new challenge over at TicTacToe! It's the turn of Team X to host this week and the lovely Betty is our featured designer this week. This is the fun board that we are playing along with: 


I took the third column of diecuts, pastel colours and Easter and using the colour palette over at Hand Stamped Sentiments I created an Easter card for the theme at Global Design Project #GDP387 - take a look:


Here's the low-down on today's card:

The design of my card was inspired by a summer-themed card I'd seen on Pinterest that featured a modern block sentiment when I was looking for ink blending inspiration. I wanted my sentiment to fit inside a square, so used my (retired) Playful Alphabet Dies as they were just the right shape and size. I blended all three colours using blending brushes onto a sheet of white cardstock - once in defined rows (I cut my sentiment square from this piece) and then on randomly on a larger area; I used this piece to diecut my two flower elements using the Penned Flowers Dies. I recommend you colour your cardstock before you diecut the pieces rather than afterwards, as this helps you avoid dark edges. Once I'd coloured my square and cut it out using the Stylish Shapes Dies, I diecut out the letters, then cut the same letters again in white and inset them into the negative space:


 I backed the whole thing onto a panel of neutral Smoky Slate grey and added a few iridescent rhinestones for a little extra sparkle. The letters I diecut from the outside square panel didn't go to waste; I used them for the sentiment on the inside of my card, with an extra diecut piece for decoration:


I also decorated the envelope with the stamp from the Hand Painted Petals stamp set for a little extra detail. Not a bunny, chick or Easter egg in sight, but I think this is a pretty Easter card nonetheless and I'm really pleased with the way it turned out. It just goes to show you don't always need to have themed supplies in order to make a card for a particular occasion - you just have to get creative with what you have in your stash!

Here is the visual summary of the key products used on today's project for you to pin for easy reference:


You can see all of my Product and 'How To' summaries on my 'How To - Tips and Techniques' Pinterest board in case you've missed any. 

A tictactoe board offers so many creative possibilities - how does this week's board inspire you? Why not have a go? We would love to see you in the gallery and who knows - you might be selected for Designer's Choice and be eligible to be a guest designer on a future challenge. 

Apologies that it's been a little quiet around here; I've been single parenting this week and so have had very little opportunity to get in my craft room and when I have, my creative mojo has been struggling to craft under pressure! I still feel like I'm catching up on that lost hour from the clocks going back on Sunday; the James Juniors break up for the Easter holidays tomorrow and I have to say, the end of term can't come soon enough! I'll be back tomorrow with another project for our new challenge over at Festive Friday. Until then, happy stampin'!


Stampin' Up! Supplies Used: 

Table built using Product Table Builder by The Crafty Owl - Independent Stampin' Up! Demonstrator.

Rain or Shine Brighten Your Day With A Turtle PP633

by Joanne James26. March 2023 08:00

Today it's Sunday and time for this week's new challenge over at The Paper Players! It's the turn of the fabulous Anne Marie to host this week and she has a sketch challenge for us to work with:


I love a good sketch and had a few ideas as to how I was going to work with this one, but in the end I kept things pretty simple. I thought I would run with the theme over at Time Out of the changing weather so typical of March days, courtesy of the Dickens quote on their challenge badge  - take a look:


Here's the low-down on today's card:

I used two patterns from the Rain and Shine Specialty designer series paper pack for my two vertical panels - one featuring grey skies and driving rain (it's difficult to see in the photos, but this sheet has a fabulous clear embossed rain detail) and the other featuring a sunny spring day and accented my card with a sweet flower-bearing turtle also fussy cut from another sheet in this pack:

I stamped my sentiment, from the retired set 'Special Moments' onto a layered banner cut with the Stylish Shapes Dies. That's all there is to it - pretty straightforward but hopefully the perfect mix of sunshine and showers to brighten someone's day.

Here is the visual summary of the key products used on today's project for you to pin for easy reference:


You can see all of my Product and 'How To' summaries on my 'How To - Tips and Techniques' Pinterest board in case you've missed any. 

Before you reach for your ink and papers, check out what our amazing team has created to inspire you this week:

Here's a quick recap of our challenge rules:
 
1.  Create a new paper project
2.  Upload your creation to your blog with a link back to us and provide a direct link to the post featuring your challenge submission.
3.  Please link your card to no more than four challenges, TOTAL.
4.  Have FUN!

Enjoy your day; hopefully if you're in the UK you remembered to turn the clocks forward last night - another sign that lighter evenings are on the way! I'll be back tomorrow with another project. Until then, happy stampin'!


Stampin' Up! Supplies Used: 

Table built using Product Table Builder by The Crafty Owl - Independent Stampin' Up! Demonstrator.

Singing In The Rain Clean and Simple

by Joanne James25. March 2023 09:00

Today I'm sharing a super quick and easy clean and simple card for the current theme over at AAA Cards:

Make a card inspired by a movie, song or book - how fun! Here's my CAS card:


Here's the low-down on today's card:

Ever since I saw the cute animals splashing in the puddles on the Rain or Shine designer series paper, I thought this sweet little rabbit looked like it was dancing and ...singing in the rain! I know Gene Kelly has an umbrella when he sings the title song to this iconic movie, but the fox with the umbrella on this paper doesn't look anywhere near as cheery as the sweet bunny, so I snipped a bunny and his puddle from the designer paper, then added some raindrops around him with my Balmy Blue watercolour pencil and accented these with some (retired) clear epoxy raindrops over the top. Cute, right?!


I don't have the co-ordinating stamp set from the Rain or Shine Suite Collection, so I used a sentiment from the (retired) set 'Yippee Skippee' that I thought matched the rabbit's demeanour. And that's all there is to it!

Here is the visual summary of the key products used on today's project for you to pin for easy reference:


You can see all of my 'How To' summaries on my 'How To - Tips and Techniques' Pinterest board in case you've missed any. 

Enjoy your day. Mine will be spent at the hockey pitch as I'm covering all games today. If you like today's card do pop back tomorrow to see a more involved card using more of the Rain Or Shine papers for my Paper Players team card. Until then, happy stampin'!


Stampin' Up! Supplies Used:

Table built using Product Table Builder by The Crafty Owl - Independent Stampin' Up! Demonstrator.

Beside Me Quick Father's Day Card AYSI295

by Joanne James24. March 2023 12:00

Today I'm sharing my design team card for our new challenge over at As you See It where it's time for our monthly speed challenge, this time with a theme chosen by Jan - I also used one of the current Try Stamping On Tuesday sketches for my layout and the fresh colour palette over at Sunday Stamps ( I used dark blue, light blue and red):


The great outdoors! I decided I didn't want to go with anything floral or scenic for my card, so my mind wandered to sport and outdoor pursuits and I decided to ink up a new and as yet unused stamp set called 'Beside Me' and make a Father's Day card; I know Father's Day is still some time away here in the UK (it falls on 18th June) but the 'Beside Me' stamp set has such great images and if not carried over will be retired by then, so I'm getting in on the action now. Here's the card I came up with:


Here's the low-down on today's card:

It's All In The Preparation - As we always say when we have a speed challenge, the key is to be prepared. Gather all your supplies up front and plan what you are going to do - this can all be done before the stopwatch starts. I decided on my design and colour scheme and got everything ready, including my cardstock, paper, twine, embellishments, Stampin' Blends, ink pads and tools such as mu Stamparatus. My cardbase was already cut as I keep a stack of white ones ready as these are the ones I use most and the large piece of DSP was already cut to size as I had this cut for a previous project but didn't use it. I worked out the sizes needed for my other two layers, mounted my stamps on my platform, then started my stopwatch!

A False Start - The first thing I planned to do was stamp and colour my image. I thought my design would allow me time to roughly colour this small image, but alas - my timer went off just as I finished colouring. Here's the first image I coloured - this alone took me 10 minutes:


I know colouring can be time-consuming, but I clearly under-estimated this one! So I set that image aside, thought about how I could use way less time, got a new piece of black white cardstock and reset the timer. Take two!

Back To The Drawing - or Colouring - Board - I decided that the key to speedy colouring would rely on focusing on the outline of the image along, rather than colouring it, so I changed up the colours and stamped it in Starry Sky instead of black and stamped the sentiment in Sweet Sorbet. This was so quick, I decided to then just add some rough highlighting to the image and scribbled my lightest Balmy Blue Blend around the image to highlight it. No blending, just a rough colour - I think it works though, what do you think?


I then quickly rounded the corners and put the whole thing together, adding my baker's twine and two trios of heart embellishments to finish. I quickly stopped my timer - 9 minutes and 58 seconds, get in! Most of the time was spent trying to get the hearts straight!! This is such a simple way to use a line image designed for colouring and it's perfect for a quick card or if you're just not a fan of colouring with markers or pencils. 

I so love the images in this set - this one reminds me of when my husband was teaching Ben to ride his bike, so I just had to have it!

Here is the visual summary of the key products used on today's project for you to pin for easy reference:


You can see all of my 'How To' summaries on my 'How To - Tips and Techniques' Pinterest board in case you've missed any. 

Here's a summary of our challenge rules:

  • Create any card, scrapbooking page, 3D project or packaging project that fits the challenge.
  • Please include the challenge graphic and link back to the challenge in your blog post. Turn off word verification so we can leave you lots of lovely comments. Make sure you link the post not the whole blog to the Linky. Use #AYSIXXX when uploading to a public gallery.
  • If you’re unsure about ‘the rules’, check the details under the Challenge Guidelines tab on the As You See It Challenge homepage.
  • In a speed stamping challenge, please time yourself and say in your post how long your card took to complete
We look forward to seeing your creations in the AYSI gallery.

Enjoy your day and I'll be back tomorrow with another super clean and simple project. Until then, happy stampin'!


Stampin' Up! Supplies Used:

Table built using Product Table Builder by The Crafty Owl - Independent Stampin' Up! Demonstrator.

Sending A Big Squeeze With Tea Boutique

by Joanne James23. March 2023 14:42

Today I'm sharing a card that uses one of the current Try Stamping on Tuesday layouts (love the layering on this one!) that was inspired by the fabulous mood board over at Just Us Girls this week:


Yellow is one of my favourite colours and I couldn't pass up that sunny, sunshine-filled board! I decided to go with the lemons as my inspiration, but I really liked the green and yellow chalks in the photo next to it too, so decided that instead of another Sweet Citrus creation, I would showcase some of the lovely white, green and yellow lemon paper from the Tea Boutique pack - take a look:


Here's the low-down on today's card:

These papers were great for the split panels and I combined a partial stamped sentiment from the 'Sweet Citrus' stamp set with the large diecut from the Sending Dies:


I did add a lemon segment and flower that I stamped, diecut and embossed with the 'Sweet Citrus' bundle (well, I couldn't not use it at all!!) and a ribbon tied with twine for a final embellishment. 

Here is the visual summary of the key products used on today's project for you to pin for easy reference:


You can see all of my 'How To' summaries on my 'How To - Tips and Techniques' Pinterest board in case you've missed any. 

Enjoy your day; I have the youngest of the James Juniors at home today having been blessed with a stinker of a cold from a generous classmate, so some of are feeling very sorry for ourselves! He definitely needs a squeeze or two and some hot lemon today! Me? I'm cracking on with some crafting in the peace and quiet and hoping he isn't quite as generous in sharing his germs with me! I'll be back tomorrow with another project. Until then, happy stampin'!


Stampin' Up! Supplies Used:

Table built using Product Table Builder by The Crafty Owl - Independent Stampin' Up! Demonstrator.

Charming Sentiments Clean and Simple Birthday Candles CCS 507

by Joanne James21. March 2023 13:00

It's Tuesday and time for a new challenge over at CAS Colours & SketchesThis week's challenge is a sketch challenge and YoonYoung has asked that we feature repeating verticals and a sentiment beneath. Feel free to flip or rotate the sketch when making your card.


For my card today I decided to go with a collection of diecut candles courtesy of the Sentiment Silhouette Dies and a simple birthday sentiment from the co-ordinating Charming Sentiments stamp set:


Here's the low-down on today's card:

Today's card features the 2022-24 In Colours - I just love this set of colours, as a collection they work so well together, in addition to complimenting other colours too. I added in some Mango Melody for my flames and the diecut 'glow' behind - super simple and much cleaner this week too!


COLOUR REFRESH - Whilst I used the 2022-24 In Colours on today's card, today's post serves as another reminder that the 2021-23 In Colours will shortly retire, so now is the time to stock up on any supplies in those colours that you need or any co-ordinating products, such as designer papers that feature those colours. Since Stampin' Up! have confirmed that we are having a full colour refresh this year, you should apply the same principle to all of your favourite colours in the Stampin' up! range. many colours are already showing low inventory or are already out of stock, and as soon as the full details of the refresh have been announced to demonstrators on 29th March, this situation will undoubtedly be exacerbated and stocks will disappear long before the catalogues change over in May. The full retiring list will go live to customers on 4th April - but I strongly advise you to make sure you have placed any orders before then, as those bargains will be snapped up so quickly it is likely to lead to many disappointed customers. Public service announcement over - you are now fully informed!

Here is the visual summary of the key products used on today's project for you to pin for easy reference:


You can see all of my 'How To' summaries on my 'How To - Tips and Techniques' Pinterest board in case you've missed any. 

As a reminder, for our colour challenges, you must use all of the stated challenge colours. You may also use neutral colours; however, the challenge colours should be the most noticeable ones featured on your card. We use Stampin' Up! color names for reference, but you are welcome to use any other companies' products as long as you match the challenge colours as closely as possible.

Enjoy your day and I'll hopefully be back tomorrow with another project. Until then, happy stampin'!


Stampin' Up! Supplies Used:

Table built using Product Table Builder by The Crafty Owl - Independent Stampin' Up! Demonstrator.

New Online Exclusives

There are new products available exclusively in the online store from 5 November - check them out here.

Latest Kits!

Stampin Cut and Emboss

The Perpetual Beauty Calendar Kit and Cherry Blossoms Treat Boxes Kit are the latest kits in the online store - get yours here!

Shop Online

Access my online shop 24 x 7, 365 days of the year:

Current December hostess code:

9NKXDTTR

Shop Online

Mini Catalogue

BROWSE THE CATALOGUE

'Tis The Season - the new Stampin' Up! Mini Catalogue is here! For more details and to download your copy click here

Scrapbooking

Stampin' Up! has introduced a new range of 12x12" scrapbooking product and kit - the full range is now available to purchase online. To download a copy of the new digital Scrapbooking Catalogue click here.

2024-25 Annual Catalogue

BROWSE THE CATALOGUE

Click on the image to download your copy of the 2024-25 annual catalogue. For a full list of current SU! supplies, go to my online store. If you would like any help or advice, please drop me a line at joanne@thecraftyowl.co.uk or give me a call on 07773 421446 - I'd be happy to help.

Join My Team

It's always a great time to join Stampin’ Up! New team members can get £130 worth of products for only £99 + free business supplies + free shipping + all the fun being a part of Stampin’ Up! Stampin' Up! has something for everyone: join my growing team and benefit from my support to enjoy Stampin' Up! however you choose.

If you're interested, call me for a chat to understand how I can help you realise your goals. Alternatively, if you have already decided to sign up and you just can't wait, please click here for the link to the online form where you can sign up and order your starter kit right away! 

About Me

Hi I'm Joanne and live in Northampton and when I'm not looking after my husband and two beautiful children, am an avid crafter with a passion for all things Stampin' Up!

I must confess that I have never been a big rubber stamper - until I discovered Stampin' Up! that is. I love the fact that I can get such great results with co-ordinating stamps, inks, papers and punches - the possibilities are endless! Join me on my stamping journey as I share the things I love and be inspired to create amazing things yourself!

Follow Me

Monthly Newsletter

Box Builder

Click the button above to use Box Buster to create your custom box design using the Envelope Punch Board!

Kits Collection Now Available!

Stampin Cut and Emboss

The new Kits Collection from Stampin' Up! is now available!

Click here to see the current kits available and order yours online today.

I Design For


Stampin' Up Stuff

This is my personal blog and is not endorsed by Stampin’ Up! I hope you find it a plentiful source of ideas and personal inspiration but please don't copy my designs for contest submission or use for classes, publication or sale without express permission.

DSP Special Release

Check out 3 popular designer series paper designs in fresh new colourways! Available exclusively in the online store from 3 December - check them out here

Last Chance Products

Last Chance Products will now be updated every other month - check them out here.