Magical Mermaid for CTS268

by Joanne James25. April 2018 20:30

Another busy day today catching up on household admin today, but just time to share a card for this week's challenge over at CAS(E) This Sketch:

For some reason I had lots of ideas for this sketch, which is a pretty good job since the first card I made featured a couple of pens from the Crafting Forever set and a 'Just a Note' sentiment and my lovely Paper Players teamie and friend LeAnne posted one that was almost identical! You can see her card here; I decided that instead of posting my card that was so similar, I would work up one of my other ideas and got out my Magical Mermaid stamp set for some aquatic fun - take a look:


I stamped the seaweed twice and added my sentiment below as per the sketch, creating an ombre effect by sponging the sentiment stamp with Melon Mambo, Bermuda Bay and Tranquil Tide before stamping and fussy cutting a gold embossed starfish. The real star of this card though is the mermaid: I stamped her in Versamark and heat embossed in gold, then coloured her by sponging ink and blending lots of pinks and aquas to create her tail, before covering with a liberal does of clear Wink of Stella, fussy cutting and popping her on some dimensionals for extra lift. I also allowed her to sit slightly off the edge of the card for added interest.

This really is one of those cards where the photo doesn't do my card justice - it is so shimmery and sparkly in real life and the blended tail colour so pretty. Try as I might though I could capture the effect on film, so you'll just have to take my word for it! I did take a quick picture of the inside too, with its seaside border:


I think this is the first time I've blogged a card using this set, but it is actually getting lots of use as I've recently decorated Rebecca's room and one of her bed sets has mermaids on it, so we are in the process of using this set to create some fun wall art and home decor pieces. 

Here is the visual summary of the key products used on today's project for you to pin for easy reference:


You can see all of my 'How To' summaries on my 'How To - Tips and Techniques' Pinterest board in case you've missed any. 

I'll be back tomorrow with another project. Until then, happy stampin'!


Stampin' Up! Supplies Used:

Table built using Product Table Builder by The Crafty Owl - Independent Stampin' Up! Demonstrator.

One Of A Kind Magical Day Rainbow Unicorn CAS Card

by Joanne James17. April 2018 20:50

Today I have another card that I made with this week's challenge over at The Paper Players in mind. 


I love the card that I used as my design team entry on Sunday, but wanted to try another idea that I had for that lovely magical unicorn that was a little more clean and simple - take a look: 


Here's the low-down on today's card:

Keep It CAS - Whilst still not entirely 'white space', I created a subtle repeating pattern of pale grey outline unicorns to add enough detail to allow me to highlight my unique 'one of a kind' unicorn and sentiment.

One Of A Kind Unicorn - I stamped and coloured another unicorn to anchor my sentiment, adding a rainbow mane and tail, a liberal dose of clear Wink of Stella and a sparkling gold unicorn horn. This unicorn is all about standing out from the crowd!

Rainbow Highlights - My unicorn anchors my rainbow sentiment, coloured with Stampin' Write markers in the same colours as my unicorn mane and backed with some gold glimmer paper. A pop of colour on my clean and simple card, created with just one stamp set and some inks - truly clean and simple.

Here is the visual summary of the key products used on today's project for you to pin for easy reference:


You can see all of my Product and 'How To' summaries on my 'How To - Tips and Techniques' Pinterest board in case you've missed any. 

Remember, you have until Friday to join our magical Clean and Simple challenge over at The Paper Players - we look forward to receiving your entries!

I'll be back tomorrow with another project; until then, happy stampin'!


Stampin' Up! Supplies Used: 

Table built using Product Table Builder by The Crafty Owl - Independent Stampin' Up! Demonstrator.

Unicorns Myths and Magic For The Paper Players PP389

by Joanne James15. April 2018 09:00

It's Sunday and time for this week's new challenge over at The Paper Players! It's the awesomely artistic Sandy's turn to host this week and she has a clean and simple challenge for you to work with and a fun 'magical' theme:


I used this week's sketch from Freshly Made Sketches again (Karren definitely came up trumps with this one!) and just had to go with unicorns for my card today - take a look:


Here's the low-down on today's card:

Myths And Magic - So I broke one of my 'clean and simple' rules with today's card in my use of designer series paper across the whole of my card front; this Myths and Magic DSP is to good to cut down though. I am happy to pass up my 'white space' for these sweet, sparkly unicorns - I love them! Each and every one of them shimmers with glitter. 

A Magical Unicorn Day - I stamped and coloured another unicorn to anchor my sentiment and covered the body of this one in Dazzling Diamonds glitter too - Wink of Stella wasn't enough for this one! I also added a trio of pearls that I coloured with my Pool Party Stampin' Blends. My unicorn had to be pink - this is headed for a girly girl, so nothing else would do.

Fairy Words - I added a solid banner of Melon Mambo to back my skinny sentiment, taken from the 'Fairy Celebration' set, as this suited the sketch better than those in Magical Day. 

Here is the visual summary of the key products used on today's project for you to pin for easy reference:


You can see all of my Product and 'How To' summaries on my 'How To - Tips and Techniques' Pinterest board in case you've missed any. 

I am so sad that this set is retiring at the end of May - it's one of my favourites in the current seasonal catalogue and I haven't used it nearly enough! Rebecca is obsessed with mermaids and unicorns, so I know I will get plenty more use from it yet; I definitely won't be parting with it anytime soon, for sure.

Before you reach for your ink and papers, check out what our amazing team has created to inspire you this week:

Here's a quick recap of our challenge rules:
 
1.  Create a new paper project
2.  Upload your creation to your blog with a link back to us and provide a direct link to the post featuring your challenge submission.
3.  Please link your card to no more than four challenges, TOTAL.
4.  Have FUN!

Don't forget the theme is clean and simple this week - so minimal layers and embellishments and aim for lots of white space. I can't wait to see what you create and look forward to visiting your blogs this week! Enjoy the rest of your weekend as it will be over all too quickly. We are finally getting some nice weather here in the UK so I will be aiming to spend as much time outdoors as possible; I think Spring may finally be on its way. I'll be back tomorrow with another project; until then, happy stampin'!


Stampin' Up! Supplies Used: 

Table built using Product Table Builder by The Crafty Owl - Independent Stampin' Up! Demonstrator.

Sunshine and Rainbows For The Paper Players PP385

by Joanne James18. March 2018 09:00

It's Sunday and time for this week's new challenge over at The Paper Players! It's Nance's turn to host this week and she has a clean and simple challenge for you to work with:
 

I decided to take Nance's challenge literally and have a clean-and-simple rainbow card to share with you this week - take a look:


Here's the low-down on today's card:

Build A Rainbow The Easy Way - Today's card features a fun rainbow made using the Rainbow Builder Framelits Dies - these really do make building a rainbow super quick and easy. I ran all 7 pieces through the Big Shot at the same time and held them together with some washi tape across the back.

Myths and Magic - I don't usually use designer paper on a clean and simple card, but I couldn't resist a background of clouds and sky courtesy of this fun pattern fro the Myths and Magic Specialty DSP Pack. It makes the perfect backdrop for my bright rainbow and layered clouds.

Sunshine and Rainbows -  My card is mostly made up of diecuts and has very little stamping - just the sunshine and the sentiment. I decided to continue the rainbow theme into my sentiment stamp and coloured it with the colours of my rainbow using sponge daubers for a fun variegated effect.

Whilst my card is a little more layered than I usually go with for clean and simple, this card is really straightforward and super quick to put together and I love the pop of bright colour that the rainbow gives. Here is the visual summary of the key products used on today's project for you to pin for easy reference:
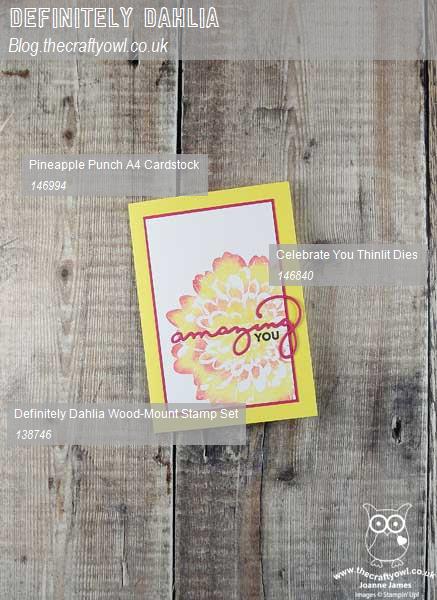
 

You can see all of my Product and 'How To' summaries on my 'How To - Tips and Techniques' Pinterest board in case you've missed any. 

Before you reach for your ink and papers, check out what our amazing team has created to inspire you this week:

Here's a quick recap of our challenge rules:
 
1.  Create a new paper project
2.  Upload your creation to your blog with a link back to us and provide a direct link to the post featuring your challenge submission.
3.  Please link your card to no more than four challenges, TOTAL.
4.  Have FUN!

Don't forget the theme is clean and simple this week - so minimal layers and embellishments and lots of white space. I can't wait to see what you create and look forward to visiting your blogs this week! Enjoy the rest of your weekend as it will be over all too quickly. I'm meeting an old school friend today and we are going on a course to brush up on our Copperplate Calligraphy skills, assuming the snow we are expecting here in the UK (again!) doesn't scupper our plans.

I'll be back tomorrow with another project; until then, happy stampin'!


Stampin' Up! Supplies Used: 

Table built using Product Table Builder by The Crafty Owl - Independent Stampin' Up! Demonstrator.

Host A Party And Get Tranquil Tulips For Free PP383

by Joanne James4. March 2018 09:00

It's Sunday and time for this week's new challenge over at The Paper Players! It's the turn of the delightful Jaydee to host this week and she has a rather timely theme challenge for you to work with:


My card was totally inspired by the lovely inspiration photo Nance chose for Jaydee's challenge badge this week: those red tulips are just lovely so I had to feature some on my card today. We have been experiencing sub-zero temperatures here in the UK for the past week, along with significant snowfall and I for one am ready for Spring, even if only with my card today - take a look:


Here's the low-down on today's card:

Get Tranquil Tulips For Free - Tranquil Tulips is one of the hostess sets in the annual catalogue, that is available exclusive to those that host a Stampin’ Up! party or place a personal order of £150 or more. A gorgeous set with blooms that can be stamped directly or fussy cut and layered as I’ve done here. Sale-A-Bration is the best time of year to host a Stampin’ Up! party, as with qualifying sales you can earn an extra £20 in rewards on top of the usual levels. I’ve had lots of customers take advantage of this and earn this sets and lots of other free produc, whilst having a fun evening with friends into the bargain. If you would like to earn this set for free, then talk to me about hosting your own party - I still have a few slots left this month if you would like to squeeze one in before the end of the month, but you’ll have to be quick!

A Tutti Frutti Pattern - I paired my red tulips with some blue grape hyacinths and that inspired the colour scheme for the rest of my card. The background paper is from the Tutti Frutti paper stack - lots of bold fruit patterns here, but if these are not your thing there are some great patterns such as the one I’ve used today on the reverse of each sheet too.

A Spring Banner - I took the wording for my banner from the current ‘Hello Easter’ set and paired it with the banner from the Bunch of Banners set to fit my theme. Some navy crinkle seam binging ribbon finishes my card.

Here is the visual summary of the key products used on today's project for you to pin for easy reference:
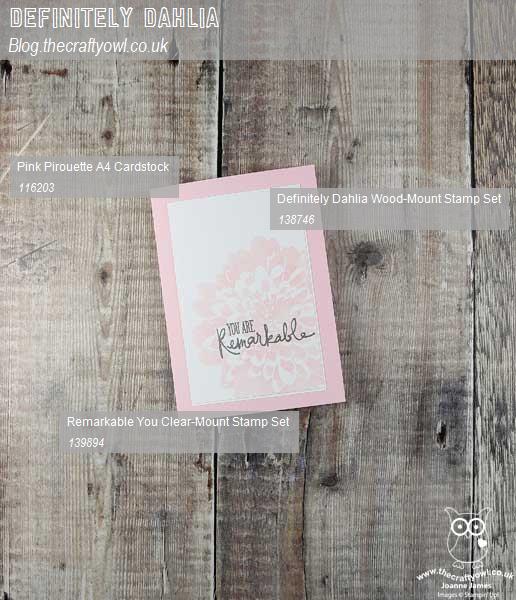
 

You can see all of my Product and 'How To' summaries on my 'How To - Tips and Techniques' Pinterest board in case you've missed any. 

Before you reach for your ink and papers, check out what our amazing team has created to inspire you this week:

Here's a quick recap of our challenge rules:
 
1.  Create a new paper project
2.  Upload your creation to your blog with a link back to us and provide a direct link to the post featuring your challenge submission.
3.  Please link your card to no more than four challenges, TOTAL.
4.  Have FUN!

I can't wait to see how you interpret this week's theme and look forward to visiting your blogs this week! Enjoy the rest of your weekend as it will be over all too quickly.

I am spending today with a bunch of lovely ladies who braved the British weather to join me for my first residential luxury crafting retreat. Yesterday was a craft-packed day and theres just as much fun in store today. Wish you were here to join in the fun too!

I'll be back tomorrow with another project; until then, happy stampin'!


Stampin' Up! Supplies Used: 

Table built using Product Table Builder by The Crafty Owl - Independent Stampin' Up! Demonstrator.

Retro Hoop La La Mini Embroidery Hoop Clean and Simple Card PP381

by Joanne James18. February 2018 09:00

It's Sunday and time for this week's new challenge over at The Paper Players! It's my fabulous friend LeAnne's turn to host this week and she has a clean and simple challenge for you to work with:


This week's challenge was indeed 'sew' much fun and I have not one but two super clean-and-simple cards to share with you this week! This is also something of a 'something old, something new' post for me and perfect for the current challenge over at As You See It where they are asking us to remember the first tool or stamp set we bought or the one that made us fall in love with stamping, so I have a story for you today! First things first though - here is card number one:


Here's the low-down on today's card:

Take A Hoop - I've been wanting to use these cute little mini embroidery hoops in the seasonal catalogue and today gave me the perfect opportunity. Perfect for framing miniature works of art, they are just like the real thing. 

Cross Stitch With Hoop La La - The stamp set I've used today is an old set called 'Hoop La La'. It isn't the first stamp set I ever bought (that was called 'Sweetheart' I think and you could make treat cup cards with it - I still have it somewhere but couldn't find it anywhere when I looked this week!) but this was one of the first. I chose it because it combined two of my favourite hobbies: my love of cross stitch and my new passion for card making - I just had to have it and haven't been able to part with it since. On this card I used the house, coloured with my Stampin' Write markers in Pool Party and Bermuda Bay and added a red enamel heart. Another 'new home' card - I seem to be needing a lot of these lately! The stamp set includes a stamp of an embroidery hoop, but I love the dimension that the little wooden hoops give to the card.

Get Stitching - To continue the stitching theme, I used my stitched circle framelits to cut out my circle to sit inside the hoop (I popped it up on dimensionals). I also added a diecut needle from last season's Quilt Builder Framelits and threaded it with some Pool Party baker's twine. I also added a twine bow to the top of my hoop for decoration. 

Here's the second of my cards, this time using the smaller size embroidery hoop and adhering my stitched circle to the top of the frame for an alternative mount:


This one shows up a little better with the darker purple colour against the white - here is a close up of the hoop so that you can see the alternative mount on the smaller embroidery hoop:


I like this mix of old and new so much I think I'm going to have to get another pack of hoops and make up some more of these cards! 

Here is the visual summaries of the key products used on today's project for you to pin for easy reference:


You can see all of my Product and 'How To' summaries on my 'How To - Tips and Techniques' Pinterest board in case you've missed any. 

Before you reach for your ink and papers, check out what our amazing team has created to inspire you this week:

Here's a quick recap of our challenge rules:
 
1.  Create a new paper project
2.  Upload your creation to your blog with a link back to us and provide a direct link to the post featuring your challenge submission.
3.  Please link your card to no more than four challenges, TOTAL.
4.  Have FUN!

Don't forget the theme is clean and simple this week - so minimal layers and embellishments and lots of white space. I can't wait to see what you create and look forward to visiting your blogs this week! Enjoy the rest of your weekend as it will be over all too quickly. I'll be back tomorrow with another project; until then, happy stampin'!


Stampin' Up! Supplies Used: 

Table built using Product Table Builder by The Crafty Owl - Independent Stampin' Up! Demonstrator.

Bubble Over - Clean and Simple Birthday Card

by Joanne James16. February 2018 20:00

Today I'm sharing one of my Onstage stamper projects from last November when I had the pleasure of presenting the Bubble Over Bundle to the demonstrators that attended the UK event in Solihull. Onstage events are such fun and I love having the opportunity to create with new sets and share the possibilities with other like-minded demonstrators. Here are a couple of photos of me in action, courtesy of my lovely downline Helen - this is me as I took the stage (as you can see we are sat a long way back!): 


Then a slightly better shot of me in action, talking through the features of this suite:


Lastly, one more of me sharing the first of my projects - the one I'm going to share with you today:


The Bubble Over Bundle is great fun, with lots of bits and pieces and is also a set with universal appeal - a great set for teens and adults alike with a mix of sentiments for lots of different occasions. 

Here's the first of my cards, a clean and simple card that requires minimal stamping and no diecutting - take a look:


I simply stamped the bottles in a variety of bold, bright colours across the bottom of my card front - the stamps are photopolymer, so super easy to align (I used the edges of the labels as a guide) then filled the upper portion of my card with bubbles stamped in co-ordinating colours. I added a simple sentiment banner which I cut by hand and stepped up the decoration slightly by adding a sprinkling of the Glitter & Clear Epoxy Shapes to the bubbles on my card - they are quite difficult to see on my card as they fit the stamped bubbles exactly, but add a lovely hint of sparkle to the bubbles - if you look really closely you can see them more easily in this close-up shot:


Here is the visual summary of the key products used on today's project for you to pin for easy reference:


You can see all of my 'How To' summaries on my 'How To - Tips and Techniques' Pinterest board in case you've missed any. 

A super simple card to start off my Bubble Over suite of projects. So one last photo to share with you - this one is of me and just some of my lovely team who attended Onstage with me:

Image may contain: 5 people, people smiling, people sitting, table and indoor

Love these girls! Onstage events are just one of the ways that we spend time together enjoying everything that we love about Stampin' Up!. If you love to craft or are looking for a business opportunity that offers fun, friendship and the ability to earn an income doing something you love, then I would love to chat to you about joining my team and sharing these experiences with you too. If you would like to understand more, there's no better time than during Sale-A-Bration to consider joining. You can read more about the current offer here, call me for a chat or if you are reading this and know it's for you, then simply click here to complete the paperwork.

Enjoy your day and I'll be back tomorrow with another project. Until then, happy stampin'!


Stampin' Up! Supplies Used:

Table built using Product Table Builder by The Crafty Owl - Independent Stampin' Up! Demonstrator.

Mediterranean Moments Cafe Card

by Joanne James29. January 2018 21:00

Today I'm back with an annual catalogue faithful and sharing a card I made using a set that has been sitting on my shelf rather neglected for a little while, so I thought I would remedy that and enter a couple of online challenges at the same time:


I love the CAS Colours and Sketches sketch this week and then surprised myself by choosing the colours over at Just Add Ink to go with it - take a look:


Here's the low-down on today's card:

Mediterranean Moments - Mediterranean Moments first appeared in last year's Spring-Summer seasonal catalogue and fortunately carried over into the annual catalogue. I love these sketched images, inspired by Million Sales Achiever Susan Nygaard - the one I've used today though is the only one in my set that I've never used before. When I saw this colour combination I wasn't sure what to make of it, despite the lovely design team cards, and then I was flicking through my catalogue looking for something else and suddenly there it was - I could see the green metal cafe chairs and I knew this stamp would be perfect! 

A Little Watercolouring - I decided to stamp my image in Versamark and heat emboss it in white, and ring the changes with a Crumb Cake card base, then give the whole thing a wash of white craft ink before watercolouring with my greens and a little more Crumb Cake ink. This was a good way to incorporate my neutral and allow my greens to blend with each other. I hand-doodled my border using my white gel pen.

A Sentiment Combination - My sentiment combination is a trimmed stamped 'hello' from the 'oh hello' stamp in the Colour Me Happy set, along with the word 'friend' snipped from the Lovely Word Thinlits. A fun pairing that is just right for the intended recipient of my card. 

Here is the visual summary of the key products used on today's project for you to pin for easy reference:


You can see all of my 'How To' summaries on my 'How To - Tips and Techniques' Pinterest board in case you've missed any. 

This post was really meant for tomorrow but I'm putting it live early as I want to catch the CAS Colours and Sketches link up. So for Tuesday - enjoy your day and I'll be back tomorrow with another project. Until then, happy stampin'!


Stampin' Up! Supplies Used:

Table built using Product Table Builder by The Crafty Owl - Independent Stampin' Up! Demonstrator.

Clean And Simple Panda Love Notes For The Paper Players PP377

by Joanne James21. January 2018 09:00

It's Sunday and time for this week's new challenge over at The Paper Players! It's my turn to host this week and I have a topical clean and simple challenge for you to work with:


It's almost February and with Valentine's Day around the corner love is definitely in the air, so what better time to send a little love note or two to the one you love? I have a super clean-and-simple card to share with you this week that is also perfect for this week's challenge over at Less Is More - take a look:


Here's the low-down on today's card:

Love You Panda - I couldn't resist using another of these cute little pandas on my card today - this time it had to be the one proudly holding his own little love note, perfect for my theme! I simply stamped him in black, coloured in the heart on his envelope and surrounded him with bright pink love hearts, from the Heart Happiness set. Inside I stamped my sentiment, also from the 'Party Pandas' stamp set, along with another spray of hearts:

And that's it - super simple, super cute!

The Perfect Note - I used one of the new Whisper White Narrow Note Cards for my one-layer love note today - they measure 6.4cm x 11.4cm, small and narrow and the perfect size for a note to tuck into a pocket, lunch box or gift package. 

Painted With Love Envelope Liners - My little note card was so quick and easy to put together, I decided to add another surprise pop of colour with an envelope liner on the flap of my envelopes. I simply punched a whole bunch of circles out of the Painted With Love Specialty Designer Series Paper using my 2" circle punch and adhered them to the inner flap of my envelope. 

I love my little note card so much, I made a whole bunch of them - I used a selection of papers and stamped my pandas both horizontally and vertically, with hearts in each of the colours that feature in the Painted With Love paper - here's a shot of a bunch of them together:


These are perfect for me to slip into the James Juniors' blazer pockets for a surprise note at school; we are also going to make a whole bunch more for the children to share with their friends too - it's nice to let your besties know they are loved too! They really are so simple to make - it's taken me longer to write this blog post that to actually make all of these cards!

Here is the visual summary of the key products used on today's project for you to pin for easy reference:


You can see all of my Product and 'How To' summaries on my 'How To - Tips and Techniques' Pinterest board in case you've missed any. 

Before you reach for your ink and papers, check out what our amazing team has created to inspire you this week:

Here's a quick recap of our challenge rules:
 
1.  Create a new paper project
2.  Upload your creation to your blog with a link back to us and provide a direct link to the post featuring your challenge submission.
3.  Please link your card to no more than four challenges, TOTAL.
4.  Have FUN!

Don't forget the theme is clean and simple this week - so minimal layers and embellishments and lots of white space. I can't wait to see what you create and look forward to visiting your blogs this week! Enjoy the rest of your weekend as it will be over all too quickly. I'll be back tomorrow with another project; until then, happy stampin'!


Stampin' Up! Supplies Used: 

Table built using Product Table Builder by The Crafty Owl - Independent Stampin' Up! Demonstrator.

Warm and Cozy Clean And Simple Christmas Sweater PP371 GDP113

by Joanne James19. November 2017 09:00

It's Sunday and time for this week's new challenge over at The Paper Players! It's the turn of the super-talented Sandy, to host this week and she has a fun clean and simple challenge for us to work with:


I'm a little late with my post today - I am still struggling to keep up with everything as I am so very busy at the moment - but I couldn't miss the opportunity to join in with Sandy's clean and simple 'warm and cozy' challenge in this week's Global Design Project challenge colours - take a look:


Here's the low-down on today's card:

Warm and Cozy - When I think of cold winter days, I think of mittens, gingerbread latte and woolly jumpers; so what better than a Christmas jumper to fit with the 'warm and cozy' theme? There are some fun sweaters in the 'Christmas Sweaters' stamp set; I decided to go with the simple striped one with a snowflake centrepiece for my clean and simple card. With a nod to the lovely Sandy who is such an expert colourer, I decided to get out my new Stampin' Blends to colour my sweater. I'm not sure I'm as good as Sandy when it comes to colouring, but it sure is fun and allowed me a peaceful 10 minutes in my otherwise hectic day!

Deck The Halls - I knew I wanted to use a few simple embellishments and I didn't want to add too many layers to my clean and simple card, so I decided to create a little patterned background with my sentiment to sit behind my sweater. I used my stamp-a-ma-jig to line up my sentiment and just stamped it repeatedly in Cherry Cobbler ink. Keeping this detail to one area of the card allows me to preserve the 'white space' that is a key feature of a clean and simple card.

All Good Things Come In Threes - Along with the trio of festive colours that feature on my sweater, I have also used a trio of embellishments: a (retired) wooden snowflake, a Pool party twine bow and some Pool Party enamel shapes for some added fun detail. I tried to keep my embellishments to a minimum given this week's theme but couldn't resist these additional touches to complete my warm and cozy card.

Here is the visual summary of the key products used on today's project for you to pin for easy reference:


You can see all of my Product and 'How To' summaries on my 'How To - Tips and Techniques' Pinterest board in case you've missed any. 

Before you reach for your ink and papers, check out what our amazing team has created to inspire you this week:

The Paper Players Design Team
 
 
Here's a quick recap of our challenge rules:
 
1.  Create a new paper project
2.  Upload your creation to your blog with a link back to us and provide a direct link to the post featuring your challenge submission.
3.  Please link your card to no more than four challenges, TOTAL.
4.  Have FUN!

Don't forget the theme is clean and simple this week - so minimal layers and embellishments and lots of white space. I can't wait to see what you create and look forward to visiting your blogs this week! Enjoy the rest of your weekend as it will be over all too quickly; I'll be back later with news of a fantastic week of promotions that will be starting tomorrow and hope to resume something like normal blogging service this week. Until then, happy stampin'!


Stampin' Up! Supplies Used: 

Table built using Product Table Builder by The Crafty Owl - Independent Stampin' Up! Demonstrator.

Promotions

BROWSE THE CATALOGUE

Bonus Days are here! Shop between 3-31 July and spend £45 and earn a £4.50 coupon to be redeemed during August! Shop online with me here.

Shop Online

Access my online shop 24 x 7, 365 days of the year:

Current July hostess code:

3NR3FB9W

Shop Online

2024-25 Annual Catalogue

BROWSE THE CATALOGUE

Click on the image to download your copy of the 2024-25 annual catalogue. For a full list of current SU! supplies, go to my online store. If you would like any help or advice, please drop me a line at [email protected] or give me a call on 07773 421446 - I'd be happy to help.

Join My Team

t's always a great time to join Stampin’ Up! New team members can get £130 worth of products for only £99 + free business supplies + free shipping + all the fun being a part of Stampin’ Up! Stampin' Up! has something for everyone: join my growing team and benefit from my support to enjoy Stampin' Up! however you choose.

If you're interested, call me for a chat to understand how I can help you realise your goals. Alternatively, if you have already decided to sign up and you just can't wait, please click here for the link to the online form where you can sign up and order your starter kit right away! 

Latest Kits!

Stampin Cut and Emboss

The fabulous Scenic Route Travel Journal Kit is perfect for summer and costs £21; the new Garden of Thanks kit costs £22 for 9 cards and both are available now - get yours here!

New Online Exclusives

There are new products available exclusively in the online store from 3 July - check them out here.

About Me

Hi I'm Joanne and live in Northampton and when I'm not looking after my husband and two beautiful children, am an avid crafter with a passion for all things Stampin' Up!

I must confess that I have never been a big rubber stamper - until I discovered Stampin' Up! that is. I love the fact that I can get such great results with co-ordinating stamps, inks, papers and punches - the possibilities are endless! Join me on my stamping journey as I share the things I love and be inspired to create amazing things yourself!

Follow Me

Monthly Newsletter

Box Builder

Click the button above to use Box Buster to create your custom box design using the Envelope Punch Board!

Kits Collection Now Available!

Stampin Cut and Emboss

The new Kits Collection from Stampin' Up! is now available!

Click here to see the current kits available and order yours online today.

I Design For


Stampin' Up Stuff

This is my personal blog and is not endorsed by Stampin’ Up! I hope you find it a plentiful source of ideas and personal inspiration but please don't copy my designs for contest submission or use for classes, publication or sale without express permission.