Northampton Saints-Inspired Clean and Simple Birthday Card

by Joanne James16. September 2018 09:00

Today it's Sunday and time for this week's new challenge over at The Paper Players - yay! It's the turn of my good friend Claire to host this week and she has a clean and simple challenge for you to work with:
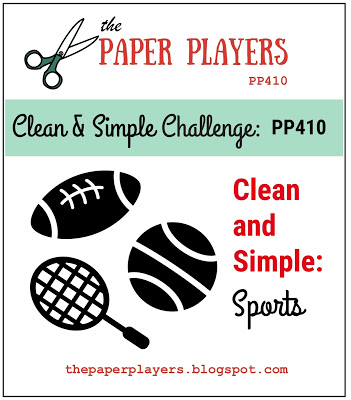
    

Remember in addition to the theme of "sports/favourite team/team colours", this week is a Clean-and-Simple (CAS) challenge!  What do we mean by CAS?

  • Minimal layers and embellishments
  • Plenty of open space, aka "white" space
  • Simple and uncluttered

As my regular readers will now, the James household is big into sport: the James Juniors both swim competitively, Rebecca is a keen hockey player and also plays netball and cricket for her school teams, whilst Ben plays basketball, rugby football and cricket. We also enjoy sport as a family and are keen cyclists and scuba divers. Our weekends are often filled with one sporting activity or another and my life seems to revolve around fixtures, matches, galas and competitions. So I was rather spoilt for choice this week! In the end, as I needed something clean and simple I took my inspiration from a birthday gift that Ben received from one of his cousins recently - a drinks bottle bearing the colours and badge of our local town rugby team, the Northampton Saints. Here's a picture of the drink bottle: 


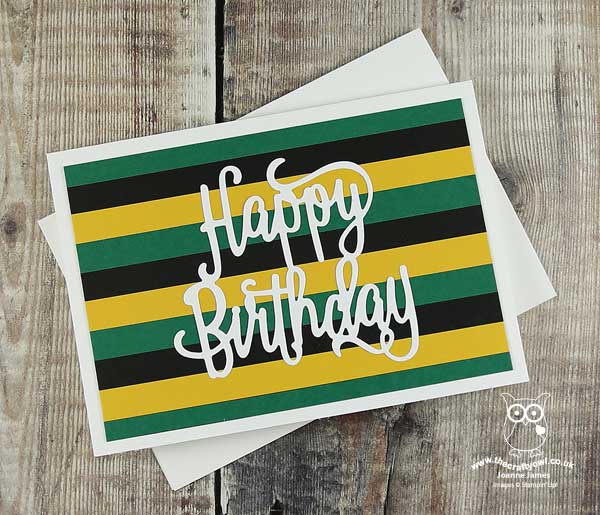
And here is the card it inspired that also works perfectly for this week's challenge over at Stamp Ink Paper which is all about large sentiments:


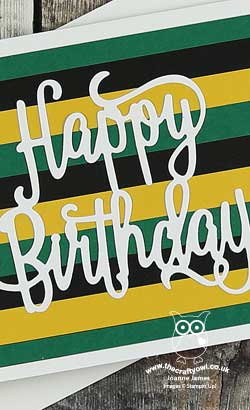
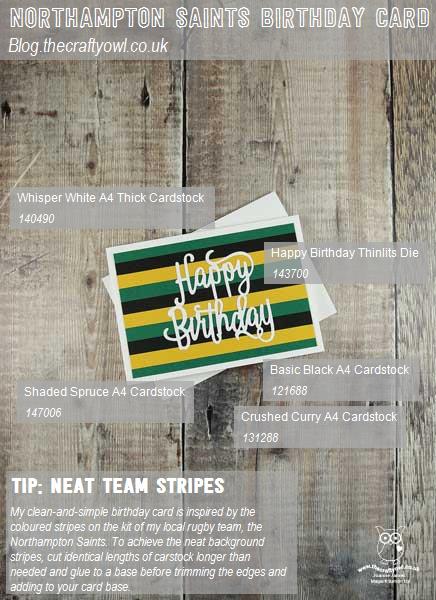
I used the stripes for my background and added a diecut sentiment in white - and that's it! Really not much explanation required for my card this week, no stamping and super clean and simple. I do have a tip for you though if you want to create a neat background using strips of cardstock: I cut my cardstock into 1cm strips that were longer than I needed, then glued them to a base piece of black cardstock that I then trimmed neatly to size before adhering to my white card base.

Here is the visual summary of the key products used on today's project for you to pin for easy reference:


You can see all of my Product and 'How To' summaries on my 'How To - Tips and Techniques' Pinterest board in case you've missed any. 

My 16 year-old nephew plays rugby for the Northampton Saints Junior Academy and is one of the official ball boys for the first team on match days, so it's fair to say is Saints-mad. Ben has already decided this card should be for William; given that his next birthday is in November and this card is made already, I suddenly appear to be very organised for once - it will never last!

Before you reach for your ink and papers, check out what our amazing team has created to inspire you this week:

Here's a quick recap of our challenge rules:
 
1.  Create a new paper project
2.  Upload your creation to your blog with a link back to us and provide a direct link to the post featuring your challenge submission.
3.  Please link your card to no more than four challenges, TOTAL.
4.  Have FUN!

You can see all of my 'How To' summaries on my 'How To - Tips and Techniques' Pinterest board in case you've missed any. 

Enjoy your day; we have a second day of hockey and a birthday party to look forward to. I'll be back tomorrow with another project. Until then, happy stampin'!


Stampin' Up! Supplies Used: 

Table built using Product Table Builder by The Crafty Owl - Independent Stampin' Up! Demonstrator.

Wishing You Well Purple Notecard

by Joanne James3. September 2018 10:00

Happy Monday everyone! Today is the last full vacation day here in the James household - Ben is back to school for pre-season rugby training tomorrow and then both James Juniors are back to school 'proper' on Wednesday - so we are making the most of it (currently sewing sock puppies and making pizza ready for lunch, amongst other things!) I'm sharing a quick and easy card that I made at the weekend for the challenges over at CAS Colours and Sketches and TGIF Challenges:


I love this sketch layout and was originally planning something different, but when I saw the tictactoe board over at TGIF I couldn't resist the opportunity to create something with my favourite new purples. This is what I came up with:


Here's the low-down on today's card:

Perfectly Paired Purples - I chose to use a combination of two new purples on my card: Highland Heather for the base and bow, and Gorgeous Grape for the flowers and sentiment base. I love how these two colours compliment each other perfectly. I added another new colour, Soft Sea Foam, into the mix for my flower stems - it gives just enough subtle colour and allows my purples to take centre stage. Here's my colour combination in case you would like to save it for future use:


Just A Note - The spray of flowers on my card comes from another new stamp set called 'Wishing You Well' - it's another of Stampin' Up!'s Distinktive Stamps, that allow for great monochromatic ink effects. They allow you to create different ink opacities in a single stamped image for realistic depth and intensity - just check out the detail on that bow, it almost looks like it's been tied on! 

Teeny Tiny Pearls - I went across the top of the tictactoe board - purple, pearls, flowers - so the last thing to do was add a tiny sprinkling of seed pearls to my floral spray. I'm not generally a big user of pearls or rhinestones on my projects, but I actually love this little detail. You can see it better on the close up here:

And that's it - a clean and simple card that would work in lots of other colourways too.

Here is the visual summary of the key products used on today's project for you to pin for easy reference:


You can see all of my 'How To' summaries on my 'How To - Tips and Techniques' Pinterest board in case you've missed any. 

Enjoy your day and I'll be back tomorrow with another project. Until then, happy stampin'!


Stampin' Up! Supplies Used:

Table built using Product Table Builder by The Crafty Owl - Independent Stampin' Up! Demonstrator.

All Is Bright Paper Clip CAS Monochromatic Christmas Card

by Joanne James31. August 2018 07:00

Before I get into my creative post today, I just wanted to remind you that we are nearing the end of the month so today is the final day to take advantage of this month's offers: a free bonus coupon for every £45 spend, redeemable against next month's purchases, and also the limited time Blended Seasons bundle and the second colour assortment pack of watercolor pencils. You can read more about both of these offers here and here.

Don't forget to check out my Creative Escapes Luxury Weekend Creative Retreats post as well - the Bank Holiday booking offer ends today too!

Today I'm sharing a card for the current challenge over at Less Is More where they have a great sketch challenge: 


I haven't managed to play along with these ladies for ages (even though they are now running fortnightly challenges which does make it easier - thank you ladies!) but I had a great clean and simple idea for a Christmas card using this sketch - take a look:


Here's the low-down on today's card:

Four Stitched Squares - There are lots of ways that you could interpret the squares in the sketch; they could be quarters of a whole, or individual entities. I decided that they would be four individual stitched squares, to form a base for my main decoration. 

Take A Paperclip ... or 4 - Another new Autumn-Winter catalogue product are the All is Bright Paper Clips - a collection of gold star and tree-shaped paper clips to accent your festive cards and packaging. I used them as the main decoration on my card today - so simple! I must confess I have a ton of shaped paper clips in my collection - I think I might be making a few more of these cards in different colourways to use some of my paperclip stash up!

Keeping it CAS - I stamped my sentiment and heat embossed it in gold directly onto the base of my card and decided to keep my card base and stitched squares all the same colour to maintain a clean and simple feel. My 'white space' today is of course green - Call Me Clover, the new in-colour green, to be precise. A nice Christmas Tree green and the gold and green combo is a winning festive double act in my book!

Here is the visual summary of the key products used on today's project for you to pin for easy reference:


You can see all of my 'How To' summaries on my 'How To - Tips and Techniques' Pinterest board in case you've missed any. 

Following a visit to a maze yesterday and some overnight camping, we are off to enjoy some watersports and crazy golf today since we are forecast a fine and sunny day. Enjoy your day and I'll be back tomorrow with another project. Until then, happy stampin'!


Stampin' Up! Supplies Used:

Table built using Product Table Builder by The Crafty Owl - Independent Stampin' Up! Demonstrator.

Rooted In Nature - Simply Stamps, Ink And Paper

by Joanne James27. August 2018 20:00

Well, the last of the summer Bank Holiday Mondays here in the UK today and as is often the way, it has been wet, grey and gloomy here and decidedly chilly too! So lots of cooking, board games and even a little crafting here in the James household today as a result.

I have a quick card for you this evening that uses this week's colours over at The Color Throwdown:

I was inspired not only by the colours, but by the duvet cover in the inspiration photo too - take a look:


I used the largest veined leaf in the Rooted In Nature set to stamp a leaf in each of the challenge colours onto an extra thick Whisper White card base, slightly overlapping each other, and added a simple sentiment beneath it. That's it - nothing more than stamps, ink and paper - an absolute 'back to basics' card, easy to execute with minimal supplies needed. 

I actually created two additional cards at the same time, a stepped-up version and a 'bells and whistles' version for the avid crafter and will share both of these with you in another post - of all three though, I think the simplicity of this one makes it my favourite.

Here is the visual summary of the key products used on today's project for you to pin for easy reference:


You can see all of my 'How To' summaries on my 'How To - Tips and Techniques' Pinterest board in case you've missed any. 

That's all from me today; I'll be back tomorrow with another project. Until then, happy stampin'!


Stampin' Up! Supplies Used:

Table built using Product Table Builder by The Crafty Owl - Independent Stampin' Up! Demonstrator.

Fairies and Cherries For The Paper Players PP406

by Joanne James19. August 2018 09:00

Another week of school summer vacation in the James household this week! Today it's Sunday and time for this week's new challenge over at The Paper Players. It's the first challenge for our returning Paper Players designer, the lovely Anne-Marie Hile, this week so be sure to pop by her blog with a friendly 'hello'. It's the turn of the super-talented Sandy to host this week and she has a clean and simple challenge for us to work with:


Remember in addition to the theme of "fruits and vegetables", this week is a Clean-and-Simple (CAS) challenge!  What do we mean by CAS?

  • Minimal layers and embellishments
  • Plenty of open space, aka "white" space
  • Simple and uncluttered

Having trawled through my collection of current stamps, it turns out I have very few with fruit (or veg!) for that matter, so a little creative stamping was called for. I actually found some fruit 'hidden' in the Fairy Celebration stamp set - take a look:


Here's the low-down on today's card:

This little fairy happens to be hanging from a cherry tree, so a little watercolouring using my new watercolour pencils and an aquapainter (I am so happy that we have more of these now, the new colours in the second pack available exclusively this month extend the variety of colours and allow much greater flexibility - don't leave it too late to get yours!) was all I needed to create a focal point for my card. I added some clear Wink of Stella to the fairy wings and some fine tip glue to the cherries to give them a glossy finish - both of which are difficult to see from the photos, but add subtle detail in real life.

I decided to use the sketch over at CAS(E) This Sketch this week for my layout, and used a couple of pieces cut with my Stitched Labels Framelits then trimmed to add interest behind my main image. I have seen these Stitched Labels Framelits used on some fabulous cards elsewhere on the internet and hold my Paper Player team mate LeAnne responsible for me 'needing' to add them to my own collection (check out her blog for some great examples of how to use them!) so thought I would try something a little different with them. The two blocks of colour mirror the colouring on my cherries and leaves and add detail, without encroaching too much into my white space and maintaining my overall clean and simple feel.

And that's all there is to it: clean and simple - done!

Here is the visual summary of the key products used on today's project for you to pin for easy reference:


You can see all of my Product and 'How To' summaries on my 'How To - Tips and Techniques' Pinterest board in case you've missed any. 

Before you reach for your ink and papers, check out what our amazing team has created to inspire you this week:

Here's a quick recap of our challenge rules:
 
1.  Create a new paper project
2.  Upload your creation to your blog with a link back to us and provide a direct link to the post featuring your challenge submission.
3.  Please link your card to no more than four challenges, TOTAL.
4.  Have FUN!

You can see all of my 'How To' summaries on my 'How To - Tips and Techniques' Pinterest board in case you've missed any. 

Enjoy your day and I'll be back tomorrow with another project: a Christmas card featuring some sneak peeks of some great new products from the forthcoming seasonal catalogue. Do come back then, you won't want to miss it. Until then, happy stampin'!


Stampin' Up! Supplies Used: 

Table built using Product Table Builder by The Crafty Owl - Independent Stampin' Up! Demonstrator.

Cancer Support Ribbon CAS Card for PP402

by Joanne James22. July 2018 09:00

It's Sunday and time for this week's new challenge over at The Paper Players! It's the turn of our wonderful leader Nance to host this week and she has a clean and simple challenge for you to work with:


Remember in addition to the theme of "negative space", this week is a Clean-and-Simple (CAS) challenge!  What do we mean by CAS?

  • Minimal layers and embellishments
  • Plenty of open space, aka "white" space
  • Simple and uncluttered

Now I love to use negative space on a card - if you browse my blog you will find tons of examples. Today though I have a card that is super quick and easy to recreate using a thinlit I haven't used before, that also showcases a glimpse of one of the fabulous designer series papers that is on offer as part of this month's 'buy 3, get 1 free' paper promotion - take a look:


Here's the low-down on today's card:

Negative Space - I am a big fan of using dies to create 'negative space' as I think it creates real interest on a clean and simple card. Today I chose to use the largest die in my Support Ribbon Framelits. This die cuts a ribbon shape and in order to retain this shape when you are using the negative, you need to remember to retain and add in the extra piece that forms the centre of the loop. This will be loose once you've made your diecut - the easiest way to ensure you get it in the right place is to place the positive diecut back into the gap to align the centre piece and stick it in place, before the removing the positive diecut once more. 

Impressionist Pinks - I decided to add interest to my ribbon by using designer series paper in my negative space, and chose this gorgeous impressionist pattern of pinks from the Garden Impressions DSP set. I think this is my current favourite paper; good job it's in the 'buy 3, get 1 free' set so that I can stock up and save at the same time! Patterned paper should be used sparingly with lots of white (or in my case pink!) space surrounding it, to ensure a 'CAS' feel is retained.

Hope and Courage - I overlaid my negative space with a stacked diecut of the word 'hope' from the Sunshine Wishes thinlits set, which I felt fitted with the theme of my card. Cancer is such a vicious disease, hope is essential for those diagnosed with it. It also tied in perfectly with the stamped inside of my card (the only stamping on today's card!), courtesy of the Ribbon of Courage stamp set:


I hope this card will be uplifting for the recipient and brighten their day.

Here is the visual summary of the key products used on today's project for you to pin for easy reference:
 

You can see all of my Product and 'How To' summaries on my 'How To - Tips and Techniques' Pinterest board in case you've missed any. 

Before you reach for your ink and papers, check out what our amazing team has created to inspire you this week:

Here's a quick recap of our challenge rules:
 
1.  Create a new paper project
2.  Upload your creation to your blog with a link back to us and provide a direct link to the post featuring your challenge submission.
3.  Please link your card to no more than four challenges, TOTAL.
4.  Have FUN!
 
I can't wait to see your clean and simple creations and look forward to visiting your blogs this week! Enjoy the rest of your weekend - it looks like we are going to enjoy another day of sunshine here in the UK so I will be looking forward to spending some time in my garden, amongst other things. I'll be back tomorrow with another project; until then, happy stampin'!


Stampin' Up! Supplies Used: 

Table built using Product Table Builder by The Crafty Owl - Independent Stampin' Up! Demonstrator.

A Little Elephant As We Continue to Celebrate PP400

by Joanne James8. July 2018 10:00

It's Sunday and time for a reminder that we are still celebrating over at The Paper Players! It's our 400th birthday and our theme challenge is running for two weeks in total, to give you all plenty of time to play along. Some of us are back with some additional mid-theme inspiration for you, where we continue to be all about celebration:


Before I get to my card, a reminder of all of the fabulous prizes you can win - so many prizes!! 40 in fact, from our many generous sponsors across the crafting community - check out our post for more details but here is the full list to whet your appetite:

Listed in alphabetical order:

  1. Altenew - $30 gift card
  2. Atenew Academy - $20 gift card  - compliments of Jaydee
  3. Avery Elle - $20 store credit
  4. Butterfly Reflections - Breathe Rainbows Stamp Set (US only)
  5. CAS-ual Fridays - $25 store credit
  6. Cheery Lynn - $20 gift card  
  7. Cheery Lynn - $20 gift card - compliments of Laurie
  8. Concord & 9th - $25 gift card
  9. Craftin Desert Diva's - $10 store cedit
  10. Dies R Us - $15 gift card
  11. Ellen Hutson -  20 gift cards - compliments of Annie 
  12. Ellen Hutson $20 gift card - compliments of Eliz
  13. Happy Little Stampers - $20 store credit
  14. Heffy Doodle - Sticky Friends Stamp Sets (exclusive - not available for purchase)
  15. Heffy Doodle - Sticky Friends Stamp Set (exclusive - not available for purchase)
  16. Heffy Doodle - Sticky Friends Stamp Set (exclusive - not available for purchase)
  17. Heffy Doodle - Sticky Friends Stamp Set (exclusive - not available for purchase)
  18. Lawn Fawn - $25 gift card
  19. My Favorite Things - $25 store credit
  20. Neat & Tangled - $15 store credit 
  21. Newton's Nook - $20 store credit
  22. Pink & Main - $20 store credit
  23. Power Poppy - $10 store credit
  24. Stampendous - $20 rewards cards (US only)
  25. Stampendous - $20 reward card (US only)
  26. Stampendous - $20 reward card (US only)
  27. Stamplorations - $20 gift certificate
  28. Stampin' Up - $20 gift certificates compliments of Nance (US only)
  29. Stampin' Up! $20 gift certificate - compliments of LeAnne (US only)
  30. Stampin' Up! £20 gift certificate - compliments of Joanne (UK only)
  31. Stampin' Up! $20 gift certificate - compliments of Claire (US only)
  32. Stampin' Up $20 gift certificate - compliments of Jan (NZ only)
  33. Technique Tuesday - $20 gift card
  34. The Foiled Fox - $25 store credit
  35. Trinity Stamps - Let it Grow and Lady Liberty Stamp Sets
  36. Tutti Designs - $15 gift card
  37. Uniko - any in-stock stamp set of winner's choice
  38. Verve Stamps - stamp & accessory bundle - compliments of Sandy (US only)
  39. Verve Stamps - stamp & accessory bundle - compliments of Sandy (US only)
  40. Waffle Flower - $15 gift card

Isn't that fantastic?! All prizes will be awarded randomly between challenge participants - so if you enter, you are in with a chance of winning!

I was fairly short on time this week, having had a class, a bunch of end of term activities for one James Junior and a wedding to attend this weekend, so clean and simple was most definitely the order of the day. Unintentionally I ended up with another card with balloons too - take a look:


How cute is that little elephant?! 

I reached for my new Little Elephant stamp set and along with my co-ordinating Elephant Builder punch and a few favourite colours, I set to work. I punched out the elephant and his ear for added dimension and added some balloons punched with my now retired tiny balloon punch, added some clear Wink of Stella and then done! This is one of those great quick cards that is a simple combination of stamps, ink and paper and can be put together in a jiffy - great when you are short on time!

Here is the visual summary of the key products used on today's project for you to pin for easy reference:


You can see all of my Product and 'How To' summaries on my 'How To - Tips and Techniques' Pinterest board in case you've missed any. 

Before you reach for your ink and papers, check out what our amazing team has created to inspire you this week:

Here's a quick recap of our challenge rules:
 
1.  Create a new paper project specifically for this challenge.
2.  Upload your creation to your blog with a link back to us and provide a direct link to the post featuring your challenge submission.
3.  Please link your card to no more than four challenges, TOTAL.
4.  Please be considerate of our requests; entries that do not follow any of these rules will be deleted without notification and will not be eligible for our prizes.
5.  Have FUN!
 
We also have an additional rule for this challenge only: please do not submit more than TWO cards for this challenge. This is simply so that everyone can have an equal opportunity to win a prize.
 
Remember: PP400 is running for two weeks (the challenge closes on Friday 13th July). All challenge winners will be announced on Saturday, June 14th. All prizes awarded to participants will be drawn from random.org from ALL participants and announced with our reminder post for challenge PP401 on Wednesday 18th July.

There are already some fabulous cards in the gallery but there's still more time for you to enter. Whatever you're celebrating, share it with us! Enjoy the rest of your weekend - I'll be returning from the wedding and spending the day painting before the kitchen fitting begins this week. I'll be back soon with another project; until then, happy stampin'!


Stampin' Up! Supplies Used: 

Table built using Product Table Builder by The Crafty Owl - Independent Stampin' Up! Demonstrator.

Pick A Pennant and Spot The Birdie for PP398

by Joanne James17. June 2018 09:00


Hello everyone! Did you miss me? My extended blogging break wasn't anticipated. I have had a few big things on of late: a girly weekend, a thirteenth birthday to prepare for and celebrate and I was performing in Joseph and his Technicolour Dreamcoat along with the youngest of my James Juniors on Friday evening. Add to that a persistent knee injury from running that finally resulted in me needing an extended course of physiotherapy to put right, along with a spell of single parenting and well, as you can probably tell, family and school life has somewhat got in the way! I still held a couple of wonderful launch parties to welcome the arrival of the new catalogue, my class schedule is uninterrupted and I have been finalising the details for my next 2 retreats (I will blog these another time but meanwhile you can read all about them here) but blogging has had to take something of a back seat.

However, today is Sunday and time for this week's new challenge over at The Paper Players! I'm a little late but here nevertheless! It's the turn of the marvellous Jaydee to host this week and she has a clean and simple challenge for you to work with:


Thank heavens this week was clean and simple - although I must confess I had a couple of aborted attempts in order to achieve today's card - not enough time spent in my craft room, methinks! I eventually settled on a bright and colourful thank you card  - take a look:


I decided to go with a thank you card (we always need those, right?!) and some bright and colourful banners courtesy of the 'Pick a Pennant' stamp set and this week's challenge colours over at Just Add Ink featuring amongst others the new vibrant Granny Apple Green - love it! Now I know the challenge is 'clean and simple - birds' and there's only one feathered friend present amongst all those banners, but he's there and so I'm hoping that counts! I stamped my banners directly onto my one layer card, stamping the backgrounds off once to better highlight the patterns, whilst fussy cutting my bird and bows as I'm still waiting for my framelits to arrive.

Here is the visual summary of the key products used on today's project for you to pin for easy reference:


You can see all of my Product and 'How To' summaries on my 'How To - Tips and Techniques' Pinterest board in case you've missed any. Today's card really is clean and simple - stamps, ink and paper: the 3 things Stampin' Up! do best!

Before you reach for your ink and papers, check out what our amazing team has created to inspire you this week:

Here's a quick recap of our challenge rules:
 
1.  Create a new paper project
2.  Upload your creation to your blog with a link back to us and provide a direct link to the post featuring your challenge submission.
3.  Please link your card to no more than four challenges, TOTAL.
4.  Have FUN!

I can't wait to see your clean and simple creations and look forward to visiting your blogs this week! Enjoy the rest of your weekend as it will be over all too quickly. I'll be back as soon as I can with another project; until then, happy stampin'!


Stampin' Up! Supplies Used: 


Table built using Product Table Builder by The Crafty Owl - Independent Stampin' Up! Demonstrator.

Remarkable You CAS Sympathy Card

by Joanne James21. May 2018 07:30

Good morning and happy Monday everyone! I am up and about and blogging nice and early today as I have a busy day and evening so need to be organised! Today I'm sharing a card using this week's colour challenge over at CAS Colours and Sketches that would also be perfect for our current challenge over at The Paper Players too:


As I had the 'Remarkable You' stamp set out on my desk for the second of my cards yesterday, it struck me that the above colour combo was perfect for those lovely arum lilies so I set about making today's card - take a look:


Here's the low-down on today's card:

Making 'White Space' Blue - One of the principles of clean and simple design is to have plenty of 'white space' visible on your card. White space doesn't have to be white in colour though; in order for my design to work today, I wanted my white lilies to stand out and what better way than to place them against a bright blue Pacific Point coloured background? The blue plays a central role on my card with the other two colours adding just the merest hint of colour, whilst still allowing my card to feel CAS. 

Clean and Simple Paper Piecing - I stamped my lilies directly onto my card base and again onto Whisper White cardstock. I then fussy cut my white lilies, and after colouring the stems in Pear Pizzazz and adding some So Saffron highlights to my blooms with a blender pen, I paper-pieced them in place onto my card base. This is a great way to get all of the detail of the sketch-like outline whilst also ensuring the flowers stood out adequately against the blue background. A simple white embossed sentiment finishes the front of my card.

Words of Sympathy - These lilies make a beautiful sympathy card; one of my go-to sentiment sets for this type of card is 'Flourishing Phrases' -  this set has some wonderful and thoughtful sentiments, and no more so than for those sometimes tricky cards where words are never really enough. Here's the inside of my card - I love how the words fit with the shape of the flowers too:


I always find sympathy cards difficult to make to order so like to have a few on standby for when the need arises. I particularly like to use colour on my sympathy cards too, so this one definitely ticks all the boxes for me and will head to my card box for future use.

Here is the visual summary of the key products used on today's project for you to pin for easy reference:


You can see all of my 'How To' summaries on my 'How To - Tips and Techniques' Pinterest board in case you've missed any. 

Enjoy your day and I'll be back tomorrow with another project. Until then, happy stampin'!


Stampin' Up! Supplies Used:

Table built using Product Table Builder by The Crafty Owl - Independent Stampin' Up! Demonstrator.

Farewell Definitely Dahlia, Hello Pineapple Punch PP394

by Joanne James20. May 2018 09:00

It's Sunday and time for this week's new challenge over at The Paper Players! I'm back following my week off and raring to go. It's the turn of the wonderful Laurie to host this week and she has a clean and simple challenge for you to work with:


Remember in addition to the theme of "blooms", this week is a Clean-and-Simple (CAS) challenge!  What do we mean by CAS?

  • Minimal layers and embellishments
  • Plenty of open space, aka "white" space
  • Simple and uncluttered

I have a couple of cards of cards to share with you today (and another tomorrow!) that fit this week's theme. I decided to use the retiring 'Definitely Dahlia' stamp for my cards today, and was very much inspired by our badge this week created by the oh-so-talented Nance. Here's my single clean and simple bloom:


Here's the low-down on today's card:

Farewell Definitely Dahlia - I will miss the 'Definitely Dahlia' background stamp, as it is so great for CAS cards. Whether you simply stamp 'as is' (see my uber-CAS card below) or do as I have here, where I inked with two colours to create a two-tone effect, this is a stamp that needs little else for a clean and simple card - the stamp really does much of the work.

Hello Pineapple Punch - I used one of the new in-colours, Pineapple Punch, to create the base layer of colour for my dahlia, stamping off once before adding some Melon Mambo pink with a sponge dauber to the petal edges to create a pretty two-tone effect. This adds a little more depth and interest to the final stamped image. I really like the new in-colours this year - they work so well as a collection and compliment many of the other colours in our palette.

Amazing You - I finished my card with a stamped and diecut sentiment from the 'Celebrate You' thinlits set - can't wait for these to become available in the new catalogue, you know how much I love a diecut thinlit :-) 

Here is the visual summary of the key products used on today's project for you to pin for easy reference:


You can see all of my Product and 'How To' summaries on my 'How To - Tips and Techniques' Pinterest board in case you've missed any. 

Before I go, here's another version of the same card, this time super clean-and-simple in style, that I made for the current mix it up challenge over at Sugar Pea Designs, using both sketch and photo inspiration:

Whilst I didn't choose a rose for my flower, I did go with the pale pink and a single bloom, and I used the sketch. Here's my card:


I simply stamped my dahlia in retiring Pink Pirouette ink, stamping off once to get a pale flower, heat embossed my sentiment from another retiring stamp set, Remarkable You, in silver and mounted on a Pink Pirouette card base. 

Here is the visual summary of the key products used on today's project for you to pin for easy reference:

Before you reach for your ink and papers, check out what our amazing team has created to inspire you this week:

Here's a quick recap of our challenge rules:
 
1.  Create a new paper project
2.  Upload your creation to your blog with a link back to us and provide a direct link to the post featuring your challenge submission.
3.  Please link your card to no more than four challenges, TOTAL.
4.  Have FUN!
 
I can't wait to see your clean and simple creations and look forward to visiting your blogs this week! Enjoy the rest of your weekend - it looks like we are going to enjoy another day of sunshine here in the UK so I will be looking forward to spending some time in my garden, amongst other things. I'll be back tomorrow with another project; until then, happy stampin'!


Stampin' Up! Supplies Used: 

Table built using Product Table Builder by The Crafty Owl - Independent Stampin' Up! Demonstrator.

Promotions

BROWSE THE CATALOGUE

Bonus Days are here! Shop between 3-31 July and spend £45 and earn a £4.50 coupon to be redeemed during August! Shop online with me here.

Shop Online

Access my online shop 24 x 7, 365 days of the year:

Current July hostess code:

3NR3FB9W

Shop Online

2024-25 Annual Catalogue

BROWSE THE CATALOGUE

Click on the image to download your copy of the 2024-25 annual catalogue. For a full list of current SU! supplies, go to my online store. If you would like any help or advice, please drop me a line at [email protected] or give me a call on 07773 421446 - I'd be happy to help.

Join My Team

t's always a great time to join Stampin’ Up! New team members can get £130 worth of products for only £99 + free business supplies + free shipping + all the fun being a part of Stampin’ Up! Stampin' Up! has something for everyone: join my growing team and benefit from my support to enjoy Stampin' Up! however you choose.

If you're interested, call me for a chat to understand how I can help you realise your goals. Alternatively, if you have already decided to sign up and you just can't wait, please click here for the link to the online form where you can sign up and order your starter kit right away! 

Latest Kits!

Stampin Cut and Emboss

The fabulous Scenic Route Travel Journal Kit is perfect for summer and costs £21; the new Garden of Thanks kit costs £22 for 9 cards and both are available now - get yours here!

New Online Exclusives

There are new products available exclusively in the online store from 3 July - check them out here.

About Me

Hi I'm Joanne and live in Northampton and when I'm not looking after my husband and two beautiful children, am an avid crafter with a passion for all things Stampin' Up!

I must confess that I have never been a big rubber stamper - until I discovered Stampin' Up! that is. I love the fact that I can get such great results with co-ordinating stamps, inks, papers and punches - the possibilities are endless! Join me on my stamping journey as I share the things I love and be inspired to create amazing things yourself!

Follow Me

Monthly Newsletter

Box Builder

Click the button above to use Box Buster to create your custom box design using the Envelope Punch Board!

Kits Collection Now Available!

Stampin Cut and Emboss

The new Kits Collection from Stampin' Up! is now available!

Click here to see the current kits available and order yours online today.

I Design For


Stampin' Up Stuff

This is my personal blog and is not endorsed by Stampin’ Up! I hope you find it a plentiful source of ideas and personal inspiration but please don't copy my designs for contest submission or use for classes, publication or sale without express permission.