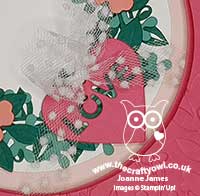
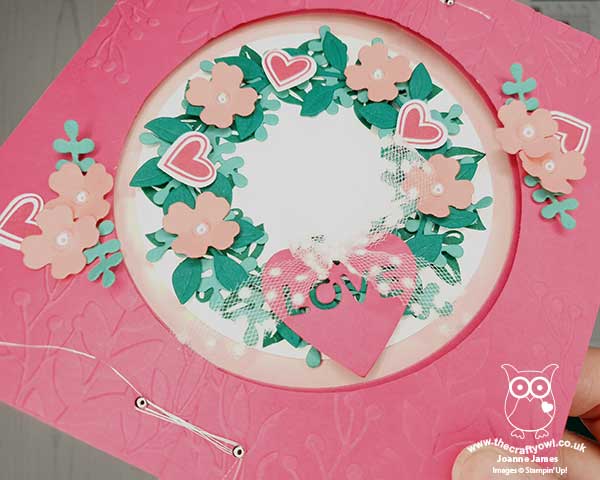
Check You Out Back To School Card PP453

by Joanne James4. August 2019 09:00

Today it's Sunday and time for this week's new challenge over at The Paper Players! It's the turn of my sweet friend Claire to host this week and she has a timely theme challenge for you to work with:


Many schools in the USA have returned or are about to return to school already. Here in the UK we have another 4 weeks of summer vacation, however this week's challenge is ensuring I stay organised and on schedule so my back to school cards will be completed in good time! I paired this week's theme with the colours from Color Throwdown which I thought were perfect for a school theme and used a new stamp set - check it out (literally!): 


Here's the low-down on today's card:

Check You Out - I couldn't wait to snap up the 'Check You Out' stamp set as I knew this set would be perfect for teacher thank yous, back to school cards and lots more besides - and it has an owl, yay! My card uses just this one stamp set and each of the images has been stamped and fussy cut (except for the Crumb Cake library card wallet, which is stamped on the base layer) and then paper-pieced together to create my fun little combo. 

An Apple For The Teacher - I can't make a school-related card or teacher thank you without including an apple at least somewhere on my card. Today I created one using a 1" circle punch, that I cut a notch out of top and bottom and added some leaves courtesy of my leaf punch and a handcut stem. I stamped my sentiment onto it as it was a great way to highlight it on this fun back-to-school card.

#SimpleStamping - Today's card is a great example of #SimpleStamping: just one stamp set and inks and paper. Search the Stampin' Up! hashtag #SimpleStamping for lots of other examples that use minimal products that are great for quick and easy creative makes that are aimed at beginner and experienced crafters alike.

Here is the visual summary of the key products used on today's project for you to pin for easy reference:
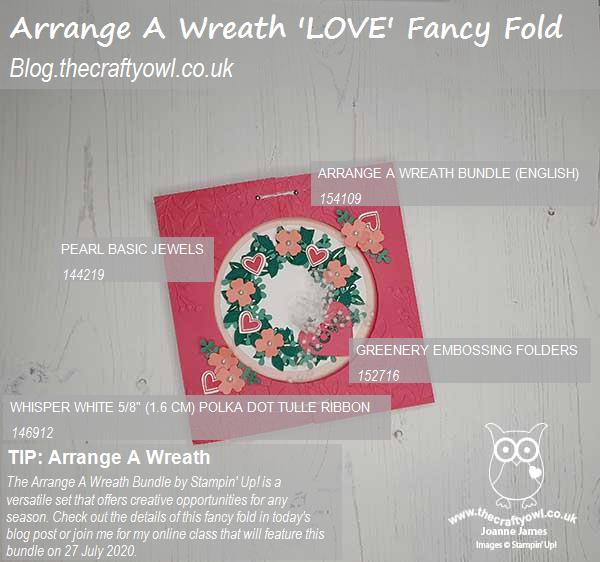
 

You can see all of my Product and 'How To' summaries on my 'How To - Tips and Techniques' Pinterest board in case you've missed any. 
Before you reach for your ink and papers, check out what our amazing team has created to inspire you this week:

Here's a quick recap of our challenge rules:
 
1.  Create a new paper project
2.  Upload your creation to your blog with a link back to us and provide a direct link to the post featuring your challenge submission.
3.  Please link your card to no more than four challenges, TOTAL.
4.  Have FUN!

You can see all of my 'How To' summaries on my 'How To - Tips and Techniques' Pinterest board in case you've missed any. 

Enjoy your day; mine will be a lazy one pottering round the garden and trying to get a few outdoor jobs done before the weather turns this week. I'll be back tomorrow with another project. Until then, happy stampin'!


Stampin' Up! Supplies Used: 

Table built using Product Table Builder by The Crafty Owl - Independent Stampin' Up! Demonstrator.

Magical Mermaid Brights Birthday Card

by Joanne James3. August 2019 20:00

Today I'm sharing a card for the current challenge over at TGIF Challenges where they have a gorgeous bright colour palette this week:


I used these colours for Rebecca's birthday card from Ben as they were perfect for what I had in mind - take a look:


Here's the low-down on today's card:

Magical Mermaid - I bought this set to make a set of pictures for my very own water baby - with her long, blond hair and swimming skills Rebecca could definitely pass for a mermaid! I heat embossed this one in gold onto shimmery white cardstock and fussy cut it, then coloured the tail with a combination of Gorgeous Grape and Melon Mambo, then added another coat of shimmer with my clear Wink of Stella pen - it is so sparkly in real life!

A Watery Scene - My watercolour skills generally leave a lot to be desired, so I stayed simple and watercoloured using Sahara Sand as my neutral for sand and overstamped with some shells for added detail, and used a wash of Coastal Cabana for the sea, with some bubbles stamped in full strength over the top. I also added some strands of seaweed in green for added detail, blending them in at the base.

A Touch of Sparkle - I stamped my sentiment on a stitched circle in Gorgeous Grape and before it was dry, sprinkled it with gold embossing powder and heat set it so that I managed to create gold highlights where the powder stuck. In addition to the sparkly mermaid tail this adds a lovely shimmer - essential for any card destined for Rebecca, that's for sure!

Here is the visual summary of the key products used on today's project for you to pin for easy reference:


You can see all of my 'How To' summaries on my 'How To - Tips and Techniques' Pinterest board in case you've missed any. 

Enjoy your evening and I'll be back tomorrow with another project. Until then, happy stampin'!


Stampin' Up! Supplies Used:

Table built using Product Table Builder by The Crafty Owl - Independent Stampin' Up! Demonstrator.

Daisy Lane Fussy Cut Daisy Friend Card

by Joanne James2. August 2019 20:00

Friday already? Where did this week go?! Today I'm sharing a card that I've been trying to share all week for the current challenge over at Addicted to CAS but time has simply run away with me:


Clean and simple was definitely the name of the game for me this week so I created another simple card using the Daisy Lane stamp set:


This card was super simple: a Coastal Cabana card base embossed with the Subtles embossing folder for a little texture, a stamped daisy stem that I then fussy cut and added to my card base. This took a little longer than stamping directly onto my base, but I do find fussy cutting quite relaxing so it was no hardship. A stamped sentiment from the same set punched out with the new Timeless Label Punch completes my card.

Here is the visual summary of the key products used on today's project for you to pin for easy reference:


You can see all of my 'How To' summaries on my 'How To - Tips and Techniques' Pinterest board in case you've missed any. 

Enjoy your evening and I'll be back tomorrow with another project. Until then, happy stampin'!


Stampin' Up! Supplies Used:

Table built using Product Table Builder by The Crafty Owl - Independent Stampin' Up! Demonstrator.

We Are Cut Out To Be Friends Crafty Card

by Joanne James29. July 2019 20:00

This is really Saturday’s post, which I wasn’t able to put live as I was away, so it has now turned in to Monday! I used last week's theme over at Global Design Project which was 'for the love of craft' for a last-minute entry to this week's Color Throwdown palette and current CAS Colours and Sketches sketch: 


As soon as I saw the sketch, I knew it would give me the opportunity in combination with the other two challenges to create a card that I’ve had percolating for some time - take a look:


Here's the low-down on today's card:

Crafting Forever - ‘Crafting Forever’ is one of those sets that is a firm favourite with crafters, especially if you are making cards for other crafters, as we often do! That said, you don’t need to be a crafter to enjoy this set - the sentiments in this set are fun for anyone.

Ombre, Ombre - I decided to create a background of randomly stamped scissors, that I then heat embossed in white so that I could use my sponge brayer to create my bright ombré background. The scissors bring my card together and by brayering all three colours it makes the people on my card really stand out.

A Play on Words - So I haven’t used the sentiment featured on my card before, but I do love a punny sentiment and this one always makes me think of those chains of paper dolls that I used to make as a child. Anyone else spend hours on end cutting out little people and then dressing them and decorating them with different faces? I couldn’t resist creating two paper chain dolls for the elements of the sketch (I used copy paper so that it would have the same look and feel as my paper dolls I made as a child) and adhered them under the sentiment, which I masked onto my horizontal strip to suit the sketch layout. This funny punny card just makes me smile and I already know who I’m going to send it to! 

Here is the visual summary of the key products used on today's project for you to pin for easy reference:


You can see all of my 'How To' summaries on my 'How To - Tips and Techniques' Pinterest board in case you've missed any. 

Enjoy your evening and I'll be back tomorrow with another project. Until then, happy stampin'!


Stampin' Up! Supplies Used:

Table built using Product Table Builder by The Crafty Owl - Independent Stampin' Up! Demonstrator.

A Beautiful Friendship For PP45

by Joanne James28. July 2019 09:00

Today it's Sunday and time for this week's new challenge over at The Paper Players! It's the turn of the fabulous Anne Marie to host this week and she has my favourite, a sketch challenge for you to work with:


I love all the layers on Anne Marie’s sketch and thought that central panel would be perfect for me to break open a new stamp set and create with florals - take a look:


Here's the low-down on today's card:

A Beautiful Friendship - I must confess the stamp set I used on my card today, ‘Beautiful Friendship’, is one I totally overlooked on my first pass of the catalogue. I always tell myself I don’t need any man re floral stamps, but for this one I just had to make an exception once I’d seen some of the lovely cards others had created with it - it has some great sentiments and a fab collection of florals that are so easy to use to create so many different floral arrangements and in so many different colours - I am officially hooked! 

#SimpleStamping Without The Stitched Rectangle - I stamped my florals (with a little bit of post-it note masking, because I wanted to fit a lot onto my panel) and cut out with a Stitched  Rectangle die as I didn’t want to add another mat to this central piece, however you could just as easily not and this would be perfect for this month’s Stampin’ Up! challenge to create a card using nothing more than stamps, inks, paper and DSP. ‘Beautiful Friendship’ is a great set for #SimpleStamping - it works on a multi-or single layered card and can be easily ‘dressed up’ or used alone to create some fabulous cards. 

Color Collection DSP - I decided on a fresh and summery blue and yellow colour combo for my card today, using a strip of yellow and a base of blue and white gingham for my framed layer. I used a piece of retired gingham paper from the Spring catalogue, but we are so lucky that we now have it in every colour in the in-Color and Color Collection - yay! I’ve linked to the Subtles Color Collection below if you need to stock up! I stamped my sentiment in Night of Navy directly onto my DSP frame, as I didn’t want to use a label. 

Here is the visual summary of the key products used on today's project for you to pin for easy reference:


You can see all of my Product and 'How To' summaries on my 'How To - Tips and Techniques' Pinterest board in case you've missed any. 

Before you reach for your ink and papers, check out what our amazing team has created to inspire you this week:

Here's a quick recap of our challenge rules:
 
1.  Create a new paper project
2.  Upload your creation to your blog with a link back to us and provide a direct link to the post featuring your challenge submission.
3.  Please link your card to no more than four challenges, TOTAL.
4.  Have FUN!

You can see all of my 'How To' summaries on my 'How To - Tips and Techniques' Pinterest board in case you've missed any. 

Enjoy your day; I am spending day 2 at the London Aquatic Centre and the 2012 Olympic pool for the second day of Rebecca’s swimming meet. Yesterday was a good day and not too hot (I am thankful we cut a break in the heatwave here in the UK because poolside would otherwise have been unbearable!). Enjoy the rest of your weekend; I'll be back later with another project. Until then, happy stampin'!


Stampin' Up! Supplies Used: 

Table built using Product Table Builder by The Crafty Owl - Independent Stampin' Up! Demonstrator.

An Ornamental Glittery Christmas Card JAI466

by Joanne James24. July 2019 06:00

Today I'm nice and early with my post as I am out with the James Juniors for a day of watersports with a view to keeping cool in the heatwave we are experiencing here in the UK, which is a good thing as it means I just have time to squeeze in my entry for the challenge at Just Add Ink this week, where I just couldn't resist that photo inspiration, that also works for the Christmas in July theme over at TGIF Challenges:


I went with a clean, white base so that my glittery baubles and sentiment could really shine - take a look:


Here's the low-down on today's card:

I'm afraid I have used some retired bits and pieces on my card today (Pretty Pines Thinlits, Detailed Baubles Thinlits, Red Glimmer Paper, black and white DSP) because there was no other way to capture the elements of inspiration from those lovely festive lanterns, but the fabulous Merry Christmas Dies carried over to the annual catalogue and so will be seeing lots of action this season too and are available if you would like to get your hands on a set.

I am trying to use up a little of my retired stash to create some cards for my box and it feels good to mix in a little old with the new every now and again. Have any of you started Christmas crafting in earnest yet? Do leave me a comment below or even feel free to share your creations here on my Facebook page - I would love to see them!

Here is the visual summary of the key products used on today's project for you to pin for easy reference:

You can see all of my 'How To' summaries on my 'How To - Tips and Techniques' Pinterest board in case you've missed any. 

Enjoy your day and I'll be back tomorrow with another project. Until then, happy stampin'!


Stampin' Up! Supplies Used:

Table built using Product Table Builder by The Crafty Owl - Independent Stampin' Up! Demonstrator.

Silhouette Scenes Anniversary Card

by Joanne James23. July 2019 21:00

Today I'm sharing a card for the current challenge over at Fusion where they have a great sketch and ombre photo inspiration:

This is a great sketch to showcase one of my favourite stamps in the new Silhouette Scenes stamp set - take a look:


I stamped my silhouette image in Rich Razzleberry using my Stamparatus so that I could get a good solid image and used my largest layered oval diecut to cut it out. I overlaid my sentiment and stamped it in Versamark and heat embossed it in gold. 

I used some of my retired Painted With Love specialty designer series paper as a backdrop for this image as the photo inspiration reminded me of it - I love those splashed of gold foil.

Here is the visual summary of the key products used on today's project for you to pin for easy reference:


You can see all of my 'How To' summaries on my 'How To - Tips and Techniques' Pinterest board in case you've missed any. 

Enjoy your day and I'll be back tomorrow with another project. Until then, happy stampin'!


Stampin' Up! Supplies Used:

Table built using Product Table Builder by The Crafty Owl - Independent Stampin' Up! Demonstrator.

True North Ship's Wheels FMS397

by Joanne James22. July 2019 14:00

Today I'm sharing a card using the current sketch over at Freshly Made Sketches that was also inspired by the current Time Out Challenge:


I went with neutrals and masculine today and with those circles on Kim's sketch offering lots of creative possibilities, I saw ship's wheels in their place - take a look:


Here's the low-down on today's card:

Sailing Home - I suddenly realised this week that despite having brought this set home with me from Onstage back in May, with the exception of my Make and Take this is the first card I've made with it (a case of new product overload as usual!) I have an upcoming class with this set and a ton of 'works in progress' on my desk, so will definitely have lots more to share in coming weeks. The only stamp I used on today's card is the sentiment - I think this makes a nice sentiment for a male anniversary card, but would also work for a mentor, teacher or coach I think; anyone who sets direction and motivates others.

Come Sail Away Compasses - I wasn't sure that I would use the paper pattern that I featured on today's card with all of those compasses and measuring instruments (there's always one in a pack that goes to the bottom of the pile, right?) so I pushed myself to cut into it and I think with some black accents it adds just enough detail to work on today's card. The stripey pattern on the reverse will definitely be more popular with me, but for now challenge accomplished! 

Smooth Sailing Ship's Wheels - My trio of ship's wheels were diecut using the Smooth Sailing Dies - check out the embossed detail on these, so lovely. I cut them from a scrap of (retired) brushed silver cardstock from my scrapbox and finished the centre of each with a black faceted dot for a little understated bling.

Here is the visual summary of the key products used on today's project for you to pin for easy reference:

You can see all of my 'How To' summaries on my 'How To - Tips and Techniques' Pinterest board in case you've missed any. 

Enjoy your day and I'll be back tomorrow with another project. Until then, happy stampin'!


Stampin' Up! Supplies Used:

Table built using Product Table Builder by The Crafty Owl - Independent Stampin' Up! Demonstrator.

Happy Birthday Grandpa #SimpleStamping With On To Adventure PP451

by Joanne James21. July 2019 09:00

Today it's Sunday and time for this week's new challenge over at The Paper Players! It's the turn of the fabulous Ann to host this week and she has a CAS challenge for you to work with:


Remember: this is clean and simple week. What do we mean by 'clean and simple' ? Create a card that has:

  • Minimal layers and embellishments
  • Plenty of open space, also known as 'white space'
  • Is simple and uncluttered

There were lots of great options to choose from this week and in the end I decided to use this week's CAS(E) This Sketch layout and the fun golfer in the new 'On To Adventure' set - take a look:


Here's the low-down on today's card:

On To Adventure - As soon as I saw this set in the catalogue, I knew I would have to have it! My Dad is a keen golfer and so I knew this image would give me a lot of mileage. Many of the sentiments in this set are along the theme of retirement (which is also good for me, as I didn't have any retirement sets up to this point) but the images can easily be combined with other sentiments to be used in tons of different ways. I stamped my golfer above my hole-in-one sentiment then brayered in some Granny Apple Green grass to ground him before colouring him with my Stampin' Blends.

In Color Argyle - This card would look fine as a one layer card, however the sketch calls for some vertical stripes and since this month's #SimpleStamping challenge from stamping up is to use stamps, ink and paper along with some designer series paper on your card, I decided that this argyle pattern in the new DSP stack would work perfectly with my golfer - my Dad certainly has many golf sweaters with this pattern!

A Ribbon of Birthdays -  It's my Dad's birthday next month so I thought this would make a perfect 'Happy Birthday Grandpa' card from one of the James Juniors. With this in mind, I overlaid a 'ribbon' of happy birthday sentiments, courtesy of the 'Itty Bitty Birthdays' set and stamped repeatedly on a narrow strip of white cardstock, along my DSP border.

Here is the visual summary of the key products used on today's project for you to pin for easy reference:


You can see all of my Product and 'How To' summaries on my 'How To - Tips and Techniques' Pinterest board in case you've missed any. 

Before you reach for your ink and papers, check out what our amazing team has created to inspire you this week:

Here's a quick recap of our challenge rules:
 
1.  Create a new paper project
2.  Upload your creation to your blog with a link back to us and provide a direct link to the post featuring your challenge submission.
3.  Please link your card to no more than four challenges, TOTAL.
4.  Have FUN!

You can see all of my 'How To' summaries on my 'How To - Tips and Techniques' Pinterest board in case you've missed any. 

Enjoy your day; we are on a belated spring-clean at home so will be spending a little time doing some more sorting out today. We have a movie to watch and hopefully I'll squeeze in a little crafty time too. I'll be back tomorrow with another project. Until then, happy stampin'!


Stampin' Up! Supplies Used:

Table built using Product Table Builder by The Crafty Owl - Independent Stampin' Up! Demonstrator.

Baby We've Grown New Parent Congratulations Card

by Joanne James20. July 2019 22:00

Today I'm sharing a card that I made because it is perfect for the current challenge over at Festive Friday and uses the current Color Throwdown colours:

#festivefridaychallenge, #FF0038, Parent's Day, Watercolor cards   

Using both watercolouring and with Parent's Day in mind (or at least two new parents in particular) and this soft and sweet colour palette, I created this card for some new parents:

Not much to say about my card today! I stamped my image on watercolour paper and then heat embossed it in silver, watercoloured it and added a stitched frame to finish. No product table for this card because it uses a whole bunch of retired bits and pieces: one of my favourite baby-themed retired stamp sets, Baby We've Grown, a retired colour in Pink Pirouette (a perfect baby pink) and some retired co-ordinating ribbon and foil doily. All of these were chosen deliberately though, as they are just perfect for the recipients: a Stampin' Up! demonstrator friend of mine and her husband have finally this week received their much longed-for adopted child, a baby girl, so their family of two has (almost overnight) grown to become three. This stamped image of three owls seemed just so appropriate to celebrate the arrival of Little Miss Wilson as she is affectionately known, and the oh-so girly pink complimented with the pale grey seemed like the perfect palette.

Enjoy your evening; I am typing this having spent the evening at the swimming pool watching the youngest of the James Juniors race with some great race times and a couple of wins, so it's nice to be sat in the cool again. I'll be back tomorrow with another project and this week's post over at The Paper Players. Until then, happy stampin'!


Tags: , , , , , ,

Cards | Shop Online | Shop Stampin' Up! Online | Stamping

New Online Exclusives

There are new products available exclusively in the online store from 5 November - check them out here.

Latest Kits!

Stampin Cut and Emboss

The Layered Landscapes Kit and Nature's Paintings Kit are the latest kits in the online store - get yours here!

Shop Online

Access my online shop 24 x 7, 365 days of the year:

Current November hostess code:

9NKXDTTR

Shop Online

Mini Catalogue

BROWSE THE CATALOGUE

'Tis The Season - the new Stampin' Up! Mini Catalogue is here! For more details and to download your copy click here

Scrapbooking

Stampin' Up! has introduced a new range of 12x12" scrapbooking product and kit - the full range is now available to purchase online. To download a copy of the new digital Scrapbooking Catalogue click here.

2024-25 Annual Catalogue

BROWSE THE CATALOGUE

Click on the image to download your copy of the 2024-25 annual catalogue. For a full list of current SU! supplies, go to my online store. If you would like any help or advice, please drop me a line at joanne@thecraftyowl.co.uk or give me a call on 07773 421446 - I'd be happy to help.

Join My Team

It's always a great time to join Stampin’ Up! New team members can get £130 worth of products for only £99 + free business supplies + free shipping + all the fun being a part of Stampin’ Up! Stampin' Up! has something for everyone: join my growing team and benefit from my support to enjoy Stampin' Up! however you choose.

If you're interested, call me for a chat to understand how I can help you realise your goals. Alternatively, if you have already decided to sign up and you just can't wait, please click here for the link to the online form where you can sign up and order your starter kit right away! 

About Me

Hi I'm Joanne and live in Northampton and when I'm not looking after my husband and two beautiful children, am an avid crafter with a passion for all things Stampin' Up!

I must confess that I have never been a big rubber stamper - until I discovered Stampin' Up! that is. I love the fact that I can get such great results with co-ordinating stamps, inks, papers and punches - the possibilities are endless! Join me on my stamping journey as I share the things I love and be inspired to create amazing things yourself!

Follow Me

Monthly Newsletter

Box Builder

Click the button above to use Box Buster to create your custom box design using the Envelope Punch Board!

Kits Collection Now Available!

Stampin Cut and Emboss

The new Kits Collection from Stampin' Up! is now available!

Click here to see the current kits available and order yours online today.

I Design For


Stampin' Up Stuff

This is my personal blog and is not endorsed by Stampin’ Up! I hope you find it a plentiful source of ideas and personal inspiration but please don't copy my designs for contest submission or use for classes, publication or sale without express permission.