by Joanne James23. June 2017 19:00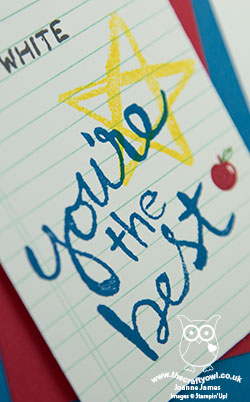
I've had a couple of quiet blog days as I've either been busy in my office creating or single parenting and running around after the James Juniors - there is so much activity with only a few more weeks of this academic year to go. I've finally found time to share: today I've a card I made for this week's challenge over at Less Is More although I'm blogging a little too late to link up. Here's the link though in case it's a theme you'd like more inspiration on:

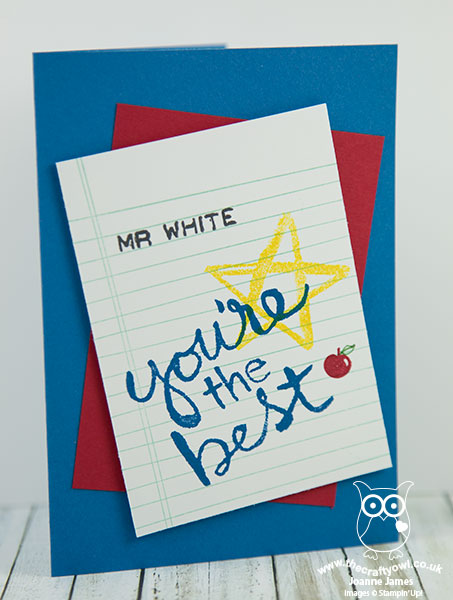
This week's theme is 'personalise it' - I thought this would be perfect for one of the teacher thank you cards that I will be needing in coming weeks:
Here's the low-down on today's card:
To Personalise Or Not - That is the question! We have some quite strong views on this in the James household, largely influenced by a certain member of our family who seems to live by the motto 'if a name will fit, print it on' so we all have many personalised items, ranging from glasses to boot bags and everything in between. Personalisation is a great way to add a special touch and make something unique for the recipient and if you want to personalise a card, the one thing you will need is an alphabet stamp set. I own a few but my absolute 'go to' alphabet set for this kind of custom greeting is definitely the Labeler Alphabet stamp set. With two fonts, it's both easy to stamp as it's made from photopolymer and also very forgiving if it's not 100% straight. It was therefore right and proper that I used it for Ben's teacher's name, Mr White, on my card.
Thank You Teacher - I used my retired 'Writing Notes' background stamp to create my lined paper base and stamped the star and 'you're the best' sentiment from the Watercolour Words stampset on my card. Such a great set for a simple thank you card. I also added these lovely words from another retired set to the inside of my card:

An Apple For The Teacher - I can't resist adding an apple to any school-related thank you cards; I'm sure no-one brings their teacher an apple these days, but I love the tradition. My apple is from the retired 'Thoughtful Branches' set with a hand-drawn leaf - I just love this set and it will forever sit on my shelf!
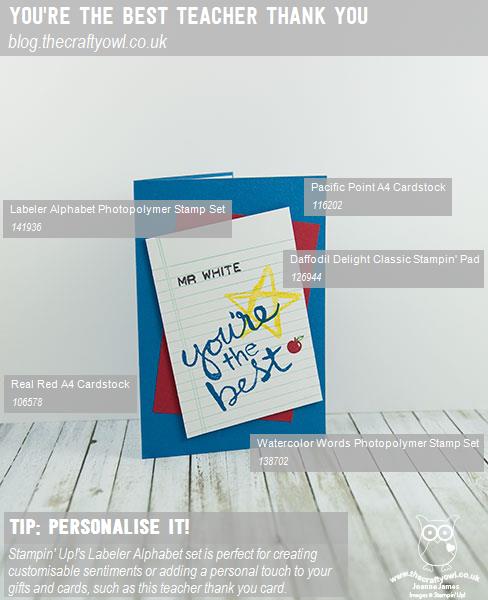
Here is the visual summary of the key products used on today's project for you to pin for easy reference:
You can see all of my 'How To' summaries on my 'How To - Tips and Techniques' Pinterest board in case you've missed any.
We have had a busy day, nicely rounded off with the year 5 class picnic in the park, along with a healthy dose of rounders and football to finish the week. Our weekend is also jam-packed with activity so I'll be back early tomorrow with another project. Until then, happy stampin'!
Stampin' Up! Supplies Used:
by Joanne James23. July 2016 07:00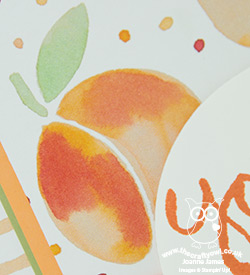
Today I have a card that I made a few weeks ago with a Connie and Mary challenge (you can see my actual challenge card here if you missed it) but didn't use at it was lacking in Cucumber Crush. I still think it's a lovely card though so thought I would share it with you today:
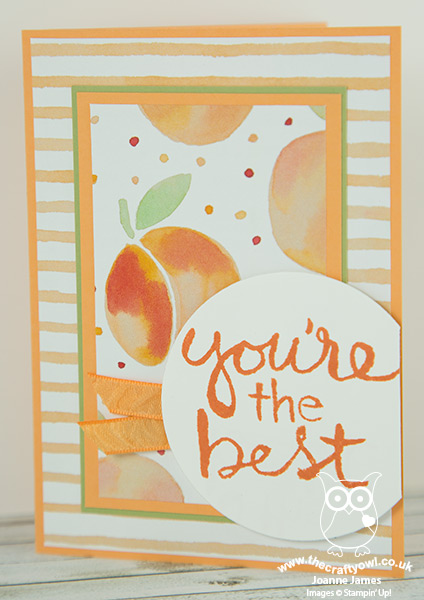
Isn't that just the peachiest?! Here's the low-down on today's card:
The Art of Layering - Today's card is a simple design but one that really works the layers to combine two alternative patterns and produce a colourful card. I used Peekaboo Peach for my card base and mat and interspersed my main panel with a double layer, using the Pear Pizzazz to add a fresh edge.
Watercolour Words - I stamped my bright sentiment in Tangerine Tango using the Watercolour Words stamp set on a circle of Whisper White cut using my Layered Circles Framelits and trimmed to fit the edge of my card - I think this makes a nice thank you card.
You're A Peach - The star of this card is the Fruit Stand Designer Series Paper though - don't those peaches look good enough to eat?! Even without the co-ordinating Fresh Fruit stamp set, this paper adds a burst of fresh, summery fruitfulness. A touch of Peekaboo Peach in-colour ruched ribbon to finish co-ordinates perfectly.
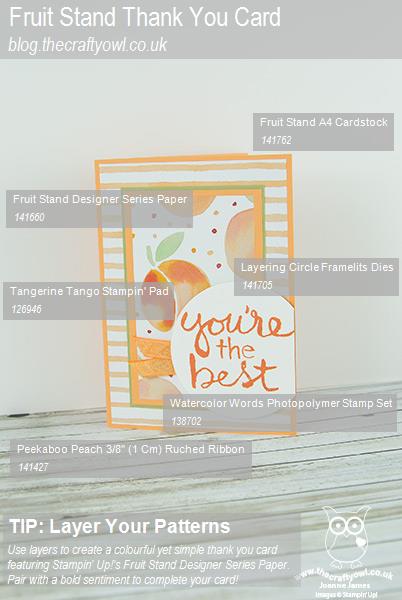
Here is the visual summary of the key products used on today's project for you to pin for easy reference:
You can see all of my 'How To' summaries on my 'How To - Tips and Techniques' Pinterest board in case you've missed any.
Enjoy your day and I'll be back tomorrow with this week's new challenge over at The Paper Players; until then, happy stampin'!
Stampin' Up! Supplies Used:
by Joanne James7. June 2016 07:00
I had a great day yesterday with the first of this month's technique classes, an outside BBQ dinner and an evening bike ride along the canal - not a bad start to the week! Today I have my third-in-a-row masculine card for you, using this week's sketch over at CAS(E) This Sketch:

I decided to have some fun with the idea of the vertical lines and sentiment so combined the two to come up with today's card:
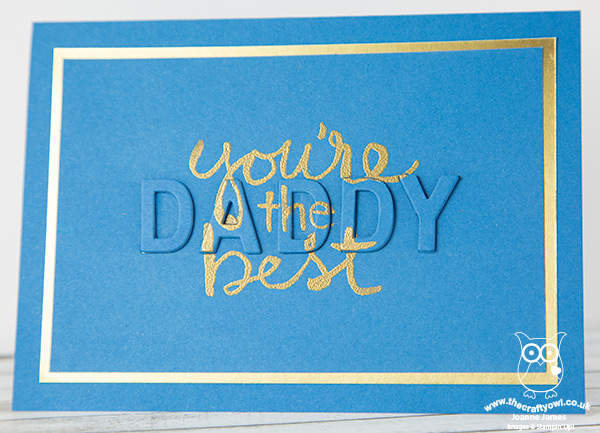
Here's the low-down on today's card:
It's All About Perspective - I was definitely inspired by the sketch, but chose to reverse the perspective of the vertical lines and the sentiment. I stamped the 'you're the best' sentiment from the Watercolour Words stamp set in Versamark and heat embossed it in gold, then diecut my letters using the now retired Little Letters Thinlits. Before adhering the letters to the background, I cut 4 extra sets and glued these each on top of each other to give my 'DADDY' dimension.
A Touch Of Gold - I wanted to preserve the clean-and-simple look and feel of my card so kept to a monochromatic colour scheme with Pacific Point for my 'white space' and added a touch of gold for my lettering and framing mat.
You're The Best - I love the handwritten styling of the sentiments in the 'Watercolour Words' stamp set. This is a great sentiment set with lots of possibilities and it works perfectly to sum up my Father's Day message on this card.
Here is the visual summary of the key products used on today's project for you to pin for easy reference:

You can see all of my 'How To' summaries on my 'How To - Tips and Techniques' Pinterest board in case you've missed any.
Enjoy your day; I have another day of classes and music lessons after school, so mine will be full! I will also be at Bell's in Northampton tomorrow for my fortnightly drop-in Coffee & Card Session if you're local and fancy some crafty respite!
I'll be back tomorrow with another project; until then, happy stampin'!
Stampin' Up! Supplies Used: