Festival Of Trees in Green and Gold Christmas Card

by Joanne James11. September 2015 20:51

Yay it's Friday! This has been a busy week, but a good one nonetheless. Today I'm sharing a card that I made earlier this week for this week's Less Is More challenge but am only just getting the opportunity to share - how does that happen?! Anyway, the LIM girls have a challenge this week to use the colours green and gold on your card (with lots of white space!) and I just couldn't resist. Here's my card:

I decided to use Cucumber Crush as my green as I think it has a real vibrancy with the gold and white for a Christmas card. I heat embossed the pattern on my tree using the Festival of Trees stamp set in gold and combined this with a piece of Cherry on Top check DSP, my sentiment which is a combination of a gold foil 'merry' cut using the new Christmas Greetings thinlits and the stamped 'Christmas' from the Holly Jolly Greetings on a white banner. I added a couple of loops of gold corded trim and a sprinkle of gold star sequins - on offer on weekly deals this week and so easy to adhere with my new fine tip glue pen! - and that's my card done. 

A super modern CAS Christmas card that would be easy to mass-produce and in tradition colours. Maybe this will make the 'shortlist for mass production' pile this holiday season!

That's all from me today; my week has worn me out! Back tomorrow with another project. Until then, happy stampin'!


Stampin' Up! Supplies Used:

Table built using Product Table Builder by The Crafty Owl - Independent Stampin' Up! Demonstrator.


Gift Packaging Made Easy with the Gift Box Punch Board and Banner Framelits

by Joanne James27. December 2014 16:40

Merry Christmas to you all, my lovely blog readers! After a welcome few days break hosting Christmas for my family, today I'm back to the blog! I have a couple of pre-Christmas makes to share still; do you ever find yourself so busy crafting in the run up to the big day that you spend more time 'in the moment' rather than recording it and sharing? Well, this year that was definitely me! Today I am being treated to a day of rest - my seven year old has declared that he is doing the cooking today, from his new boy's cookbook (doing well so far - fresh fruit and pancakes for breakfast, followed by shepherd's pie for lunch) - so whilst he prepares a feast of chicken dippers for tea, I thought I would take the opportunity to get back into my blog. 

Today's share is some lovely gift packaging made with the Gift Box Punch Board, Envelope Punch Board and the Big Shot and Banner Framelits. I decorated some gifts using boxes made with the gorgeous Under the Tree speciality DSP and the Gift Box Punch board and some easy die cut tags to co-ordinate:


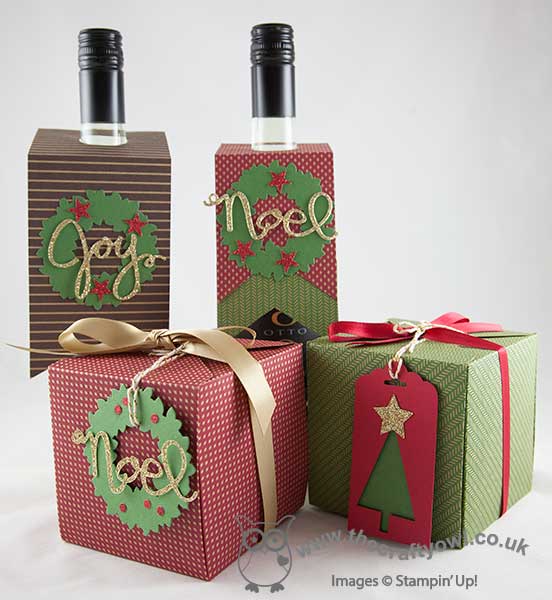
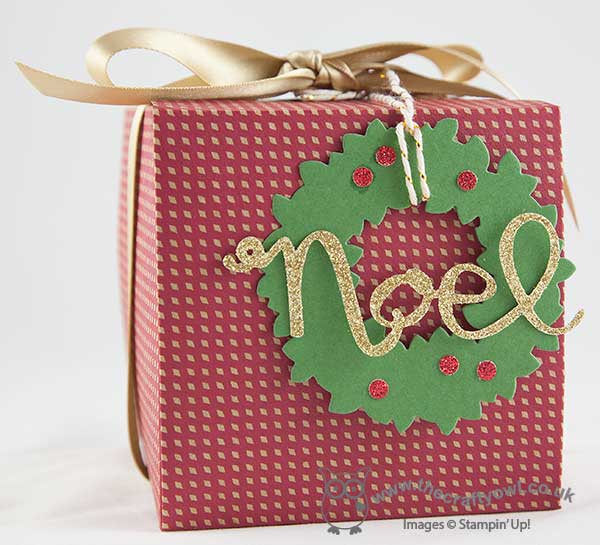
If your gift fits the standard boxes that the Gift Box Punch Board makes, it is a quick and easy 'no glue' packaging solution. With some ribbon and a fancy tag they really look the part:


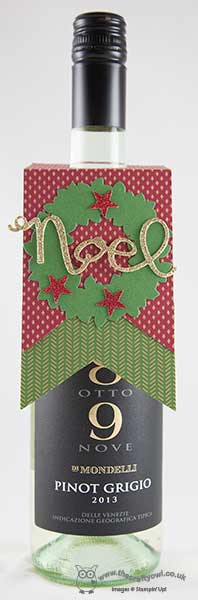
I also made some bottle tags using the Banner framelits and a circle punch, again decorating with some simple wreaths cut with the Wonderful Wreath framelits - here's a close up:


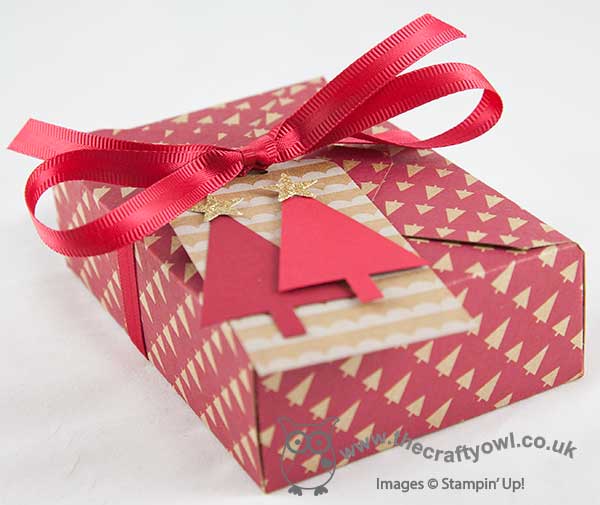
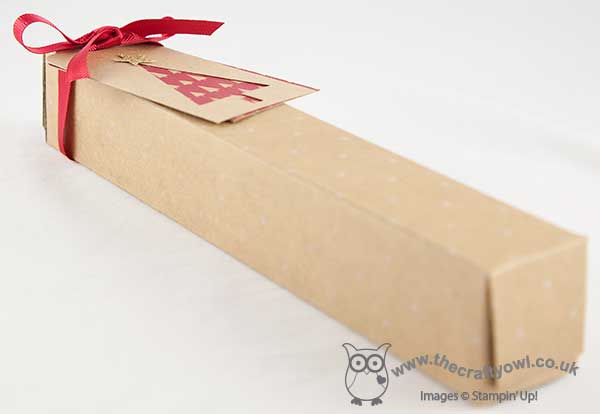
As my regular readers will know, I am a big fan of the Envelope Punch Board and it is still my tool of choice for creating custom boxes - this is so easy to do with my BoxBuster tool - it enables you to create the perfect box size first time with no paper wastage. Here's one I made for my niece's Christmas gift that is the perfect case in point, this time finished with a tag made with the tree punch to co-ordinate with the Under The Tree paper:


If you are a fan of creating easy, attractive gift packaging, you will be pleased to know that the Gift Box Punch Board is carrying over and will still be available when the current Autumn-Winter seasonal catalogue ends. The Envelope Punch Board is always available as a standard annual catalogue item - phew, I don't know what I'd do if this tool was ever discontinued!

Back tomorrow with another of my pre-Christmas makes and a special announcement, so check back then for more crafting lovliness!

Until then, happy stampin'!


Stampin' Up! Supplies Used:

Table built using Product Table Builder by The Crafty Owl - Independent Stampin' Up! Demonstrator.


Framed All is Calm Advent Calendar Using Tiny Treat Boxes

by Joanne James4. November 2014 23:00

A late post from me today as I've spent a lovely day crafting with friends, followed by James family piano lessons this evening (3 out of 4 of us are learning!) so have only just got around to it. Our craft session was fun - we finished off some projects we started a little while ago, which always gives a good sense of achievement. With Christmas creeping ever closer, today I thought I would share with you the advent calendar I made for the James juniors, which is a case of a project by the lovely Julie Kettlewell. I love the Tiny Treat Boxes in this year's Stampin' Up! seasonal catalogue, which are of course perfect for making advent calendars. The sample in the catalogue shows just how easy it is to make something to a basic design, however having seen Julie's project a little while ago - you can see her original project here - I knew I wanted to create something similar. So without further ado, here is my framed advent calendar in all its glory:

Isn't it beautiful?! It is framed in a 20" frame/50cm, so is a substantial piece in terms of size and it makes a real statement. I chose to make mine using the All is Calm Speciality Designer Series Paper, here are some close ups:

This is the central panel, with a sentiment stamped using the Epic Alphabet and some trees punched using the Tree Punch and decorated with some frosted sequins.


Each of the boxes is covered on 5 sides using the All is calm DSP, then a number label made from a layered section using a 1 3/4" scalloped circle punch and a 1 3/8" circle punch, and numbers cut out of Dazzling Diamonds Glimmer Paper using the Perfect Print Numbers Bigz Die and the Big Shot.

This is a great project to showcase all of the lovely papers within the All is Calm DSP stack.

I adhered my boxes so that the flaps would open upwards and put my numbers in order from one through twenty four, however you could 'mix and match' if that's more your style. Each pack of treat boxes contains 25 boxes, so you have one spare to package an extra special treat for Christmas Day if that's your thing. I'm really pleased with how my calendar turned out and am busy acquiring lots of little treats to fill my boxes for the month of December. I can see this project becoming a real heirloom piece that we bring out year after year.

Hope you like today's project; back tomorrow with the new Wednesday Weekly Deals and my Design Team post for this week's challenge over at Colour Me...! Until then, happy stampin'!


Stampin' Up! Supplies Used:

Table built using Product Table Builder by The Crafty Owl - Independent Stampin' Up! Demonstrator.


Decorative Dots Festival of Trees

by Joanne James2. October 2014 21:02

A quick post from me today with one of the cards we made at my card class earlier this week. This month's class featured the Festival of Trees stamp set and co-ordinating punch - without further ado, here's today's card:

I started with a base of Crumb Cake with a mat of Cherry Cobbler, then an additional mat of Crumb Cake which was embossed with the Decorative Dots embossing folder and lightly sponged with white kraft ink to look like snow. I added two Whisper White snow drifts, edged with Dazzling Diamonds, and then stamped and punched three trees in Garden Green on Whisper White and interspersed them between the snow drifts. The tree at the front is also over-stamped with the bauble stamp in Cherry Cobbler and a few pearls coloured with Cherry Cobbler Blendabilities added to give extra dimension. A sentiment added inside and out, and finished!

All of the cards in this month's class were quite different as I was aiming to show my ladies just how versatile this stamp set and punch can be. If you live local to me in Northampton and would like to join me for a future class, do get in touch - newcomes, whether experienced or novice papercrafters, are always welcome!

That's all from me today; back tomorrow with another project. Until then, happy stampin'!


Stampin' Up! Supplies Used:

Table built using Product Table Builder by The Crafty Owl - Independent Stampin' Up! Demonstrator.


Trim The Tree in Gold and Espresso Christmas Card

by Joanne James19. September 2014 18:54

Yay - it's Friday! I've had a productive craft day today, even if no housework managed to get done (ah well, there's always tomorrow for that!) and am finally finding time to write today's blog post. I used this week's sketch over at Retrosketches to make today's Christmas card and broke out my Festival of Trees stamp set for the first time. Here's the sketch I based my card on:

A great layered layout - and here's what I did with it:

I based my card around the graphic Christmas tree design paper from the Trim The Tree DSP stack - these are so great for making cards! - and having layered this piece onto my Early Espresso card base and a mat of Whisper White, I embossed a piece of gold foil with the On Point embossing folder, which looks like little Christmas tree shapes, then followed this with a smaller piece of Whisper White mounted on Early Espresso and stamped with the first part of the sentiment that comes with the Festival of Trees stamp set. I then added my Christmas tree, which I stamped in Early Espresso on Whisper White, then stamped the baubles in Versamark and heat embossed them in gold - in real life they are really shiny and contrast beautiful with the dark brown of the tree. Oh and did I mention how easy it was to punch out with my co-ordinating tree punch? No? Well, it's a doddle!

An unconventional colour scheme for a Christmas card maybe, but I like it! Before I forget - I'm also joining up with the lovely Darnell's NBUS challenge - pretty much everything other than ink and solid colour cardstock that I used today was officially 'Never Before Used Stuff!'


Right - I'm off to catch up on some of the jobs that I should have been doing at home today. Back tomorrow with another Christmas card in an altogether more conventional colour scheme -until then, happy stampin'!


Stampin' Up! Supplies Used:

Table built using Product Table Builder by The Crafty Owl - Independent Stampin' Up! Demonstrator.


Tags: , , , , , , , , ,

Cards | Stamping

Mini Catalogue

BROWSE THE CATALOGUE

The mini catalogue is now live! Read and download your copy here.

Shop Online

Access my online shop 24 x 7, 365 days of the year:

Current March hostess code:

S9F2XJJW

Shop Online

Join My Team

It's always a great time to join Stampin’ Up! New team members can get £130 worth of products for only £99 + free business supplies + free shipping + all the fun being a part of Stampin’ Up! Stampin' Up! has something for everyone: join my growing team and benefit from my support to enjoy Stampin' Up! however you choose.

If you're interested, call me for a chat to understand how I can help you realise your goals. Alternatively, if you have already decided to sign up and you just can't wait, please click here for the link to the online form where you can sign up and order your starter kit right away! 

Latest Kit!

Stampin Cut and Emboss

The Rock Legend Kit has all you need to make 8 cards with coordinating envelopes. Along with the new Panda Friends Kit, both are available from January 4th for just £14 each - get yours here!

2023-24 Annual Catalogue

BROWSE THE CATALOGUE

Click on the catalogue for a full list of current SU! supplies - if you would like to order any of the items featured, please drop me a line at [email protected] or give me a call on 07773 421446 - I'd be happy to help.

New Online Exclusives

There will be new products available exclusively in the online store from 5 March - check them out here.

About Me

Hi I'm Joanne and live in Northampton and when I'm not looking after my husband and two beautiful children, am an avid crafter with a passion for all things Stampin' Up!

I must confess that I have never been a big rubber stamper - until I discovered Stampin' Up! that is. I love the fact that I can get such great results with co-ordinating stamps, inks, papers and punches - the possibilities are endless! Join me on my stamping journey as I share the things I love and be inspired to create amazing things yourself!

Follow Me

Monthly Newsletter

Box Builder

Click the button above to use Box Buster to create your custom box design using the Envelope Punch Board!

Kits Collection Now Available!

Stampin Cut and Emboss

The new Kits Collection from Stampin' Up! is now available!

Click here to see the current kits available and order yours online today.

I Design For


Stampin' Up Stuff

This is my personal blog and is not endorsed by Stampin’ Up! I hope you find it a plentiful source of ideas and personal inspiration but please don't copy my designs for contest submission or use for classes, publication or sale without express permission.