Gorgeous Garden Half Panel Card AYSI322

by Joanne James26. April 2024 12:00

Today I'm sharing my design team card for our new challenge over at As you See It where it's time for an interesting 'fill in the blank' challenge from the lovely Heather H:


The colour I use least in my crafting - intriguing! I used the sketch over at Global Design Project #GDP442 for my layout this week and I made a card that features only two colours; can you guess which one I don't use very often?


Here's the low-down on today's card:

Yes - it's Wild Wheat! I must confess I am not a fan of this one of last year's in-colours and actually don't use it very often at all so for today's card I decided that I would try something different and pair it with one of my most-used colours and all-time favourite, Night of Navy, to see if the colour combo would make Wild Wheat more appealing.

I used a Night of Navy card base and covered it with an entire panel of Wild Wheat - brave! I decided to add a diecut panel using the leaf die from the Gorgeous Garden Dies to the centre of my card. I've used these dies many times before and the eagle-eyed amongst you will realise that the whole die covers an entire card front, so you may be wondering how I managed to halve it to create my panel. It actually wasn't that tricky: I cut my Night of Navy Panel to size then aligned my die at the outside edge and partially diecut it towards the other end. I then removed the die and using a craft knife, I used a metal ruler and carefully cut away the edge of the loose pieces to create a narrow border on the other side of the panel. Yet another way to use these fabulous dies!

I added some Night of Navy twine and a simple gold heat-embossed sentiment from the 'Timeless Arrangements' stamp set, accented with a brass metallic dot to finish:


A piece of co-ordinating Wild Wheat in-colour DSP to decorate the flap of the envelope completes my card. Whilst I'm still not a fan of Wild Wheat, I must confess I do rather like this colour combo!

This is a great opportunity to remind you that the Gorgeous Garden bundle is just one of those featured in the monthly tutorials I create with my AYSI teamie, good friend and fellow demonstrator Jan Clothier. This tutorial contains lots more ideas and ways to use the Gorgeous Garden Dies and is yours for FREE when you purchase the Gorgeous Garden Dies from either Jan or myself. These dies are only available until the end of the month before they retire; they are currently almost half price at £24 for the pair - bargain! 

Here is the visual summary of the key products used on today's project for you to pin for easy reference:


You can see all of my 'How To' summaries on my 'How To - Tips and Techniques' Pinterest board in case you've missed any. 

Here's a summary of our challenge rules:

  • Create any card, scrapbooking page, 3D project or packaging project that fits the challenge.
  • Please include the challenge graphic and link back to the challenge in your blog post. Turn off word verification so we can leave you lots of lovely comments. Make sure you link the post not the whole blog to the Linky. Use #AYSIXXX when uploading to a public gallery.
  • If you’re unsure about ‘the rules’, check the details under the Challenge Guidelines tab on the As You See It Challenge homepage.
  • In a colour challenge, black or other neutral can be used in outlines and sentiments but no other colours should be included. Stampin’ Up colours are used for reference but colours that are a close match are welcome.
We look forward to seeing your creations in the AYSI gallery.

Enjoy your day and I'll be back tomorrow with another project. Until then, happy stampin'!


Stampin' Up! Supplies Used:

Table built using Product Table Builder by The Crafty Owl - Independent Stampin' Up! Demonstrator.

Timeless Arrangements Thank You Card CCS534

by Joanne James2. April 2024 13:00

It's Tuesday and time for a new challenge over at CAS Colours & Sketches. Rachel is hosting for the month of April and our first challenge is a colour challenge: 


For my card today I used the layout over at Sketch Saturday and used Rachel's fresh colour combination for a pretty floral thank you card - take a look:


Here's the low-down on today's card:

I stamped my sentiment from the 'Timeless Arrangements' stamp set onto a label from the same set, and backed it with a selection of diecuts in the challenge colours. I also stamped and coloured a couple of flower stems and added them to the mix. I used diecuts that broadly followed the diagonal shape of the lines on the sketch and added seven scored lines with my scoring tool to my white cardbase - you can see the detail if you look closely below:


The scored lines add a real touch of elegance to the card and are a great way to incorporate the stripes in a more subtle way. A trio of pink pearls was all I needed to complete my card. 

I will so miss the Timeless Arrangements bundle when it retirees - it makes the prettiest thank you cards.

Here is the visual summary of the key products used on today's project for you to pin for easy reference:


You can see all of my 'How To' summaries on my 'How To - Tips and Techniques' Pinterest board in case you've missed any. 

As a reminder, for our colour challenges, you must use all of the stated challenge colours. You may also use neutral colours; however, the challenge colours should be the most noticeable ones featured on your card. We use Stampin' Up! colour names for reference, but you are welcome to use any other companies' products as long as you match the challenge colours as closely as possible.

Enjoy your day and I'll be back tomorrow with another project. Until then, happy stampin'!


Stampin' Up! Supplies Used:

Table built using Product Table Builder by The Crafty Owl - Independent Stampin' Up! Demonstrator.

Flight And Airy Quintet

by Joanne James27. January 2024 19:00

I am currently having a love affair with the pretty Flight and Airy paper that is one of the products that you can get FREE with a £45 order during the current Sale-A-Bration promotion and have another card to share that features it, this time using the sketch layout over at Tuesday Morning Sketches:


I could have taken the easy route and just added a piece of designer paper for the top panel of the card, but instead decided to add a piece of cross-hatched embossed paper and fussy cut a piece of the pattern featuring branches, flowers and a quintet of pretty birds:


Here's the low-down on today's card:

I added my panel to a Petal Pink base, having added a little Petal Pink ink to my hatched panel behind the birds. Here's a close-up of the detail - time consuming, but very theraputic and so worth it for the delicate finished result:

I added a row of diecut flowers with gem centres to echo the detail of the the sketch and finished with a simple sentiment banner from 'Timeless Arrangements'. What do you think? If fussy cutting isn't your thing, you could just use the paper as a flat panel - it's so pretty, it would look great that way too.

Here is the visual summary of the key products used on today's project for you to pin for easy reference:


You can see all of my 'How To' summaries on my 'How To - Tips and Techniques' Pinterest board in case you've missed any. 

Enjoy your evening and I'll be back tomorrow with another project. Until then, happy stampin'!


Stampin' Up! Supplies Used:

Table built using Product Table Builder by The Crafty Owl - Independent Stampin' Up! Demonstrator.

A Big Thanks PP665

by Joanne James5. November 2023 08:00

Today it's Sunday and time for this week's new challenge over at The Paper Players! It's the turn of the fabulous Anne Marie to host this week and she has a great theme challenge for us to work with:


Giving thanks - everyone needs a good supply of thank you cards, right? With Thanksgiving later this month for my American friends, November is often a month more than most when we pause to reflect on the things we are grateful for. I could have gone with a card that was similarly seasonally themed, but I decided instead to go with something bold and bright that made the most of this week's Global Design Project sketch - take a look:


Here's the low-down on today's card:

Bold & Bright, Not Merry - For my vertical stripes, I used a panel of the Merry, Bold & Bright Designer series paper. Part of the Christmas product range, this is a paper pack with designs that really do work all year round and these stripes are perfect for my thank you card.

Many, Many Thanks - I decided to add some tone-on-tone stamping using a selection of the stamps in the 'Timeless Arrangements' stamp set. This set is choc-full of sentiments for all kinds of thank yous; I chose three different sentiments and stamped them repeatedly along the length of the stripes. This is a great way to add interest to a card and using the striped designer paper makes it really easy - no need to stress about accurately cutting your stripes to the same size. 

A Very Big Thanks - I heat-embossed another of the sentiments from the set in (retired) Blueberry Bushel embossing powder onto a vellum circle and decided I had to finish my card with  - a very big thanks, what else?! I added a layered a diecut of the retired thanks die from the Amazing Thanks Dies, slightly offset to reveal some blue beneath my bright green sentiment:


A trio of sparkly enamel dots complete my card. So what do you think? Who would you send today's colourful thank you to? Do leave me a comment below and let me know - I'd love to hear your thoughts.

Here is the visual summary of the key products used on today's project for you to pin for easy reference:


You can see all of my Product and 'How To' summaries on my 'How To - Tips and Techniques' Pinterest board in case you've missed any. 

Before you reach for your ink and papers, check out what our amazing team has created to inspire you this week:

Here's a quick recap of our challenge rules:
 
1.  Create a new paper project
2.  Upload your creation to your blog with a link back to us and provide a direct link to the post featuring your challenge submission.
3.  Please link your card to no more than four challenges, TOTAL.
4.  Have FUN!

Enjoy your day; our house seems super quiet today, with only the youngest of the James juniors and I in residence - the eldest is still enjoying university life and the hubby is on an extended trip to China and Vietnam. I wonder how long it will be before we are bored with each other's company?! I'll be back tomorrow with another project. Until then, happy stampin'!


Stampin' Up! Supplies Used: 

Table built using Product Table Builder by The Crafty Owl - Independent Stampin' Up! Demonstrator.

Winter Meadow Christmas Classics For FF0144

by Joanne James29. September 2023 09:00

Yay it's Friday - almost the weekend!! Today I have my card for the new challenge over at Festive Friday Card Making and Paper Crafting Challenge


The challenge that we are celebrating this week is 'World Mental Health Day' which is on October 10th. Remember the fun thing is that at Festive Friday you do not need to actually celebrate the occasion; your goal is to simply use three or more items from the inspiration list on your project. This week I used blue, green, sparkle and metallic embellishment and this is what I came up with:


I used the sketch layout over at Sketch Saturday and decided to create a Christmas card for my stash! Here's the low-down on today's card:

Winter Meadow - The papers featured on today's card were the starting point for my creation. They are from the Winter meadow designer series paper collection and both the patterns featured are opposite sides of the same sheet. I decided to edge my card with the berry paper to allow that lovely bright blue wash to take centre stage. These papers have pretty water-coloured designs featuring festive winter foliage and are so pretty. 

Timeless Arrangements - I used a sentiment from the 'Christmas Classics' stamp set and paired it with one of the labels and foliage from the Timeless Arrangement Dies - don't be afraid to mix and match your products and sets to give them a whole new look and feel. 

Silver Sparkles - My metallics and sparkle come from the silver-edged ribbon I used to join my papers, the thin strips of silver glimmer paper and those blue rhinestone berries that I added to my diecut foliage to tie in with the border pattern. Check out the sparkle:


 I heat embossed my sentiment in silver and added a trio of matt silver sequins to complete my card.

Here is the visual summary of the key products used on today's project for you to pin for easy reference:


You can see all of my 'How To' summaries on my 'How To - Tips and Techniques' Pinterest board in case you've missed any. 

How does our board inspire you? I can’t wait to see what YOU create! For more inspiration, be sure to visit the rest of the Festive Friday Card Making and Paper Crafting Challenge Design team:

Enjoy your day and I'll be back tomorrow with another project. Until then, happy stampin'!


Stampin' Up! Supplies Used:

Table built using Product Table Builder by The Crafty Owl - Independent Stampin' Up! Demonstrator.

Timeless Arrangements Thank You Card and Envelope Gift Box FF0142

by Joanne James1. September 2023 09:00

Today I have my project for the new challenge over at Festive Friday Card Making and Paper Crafting Challenge


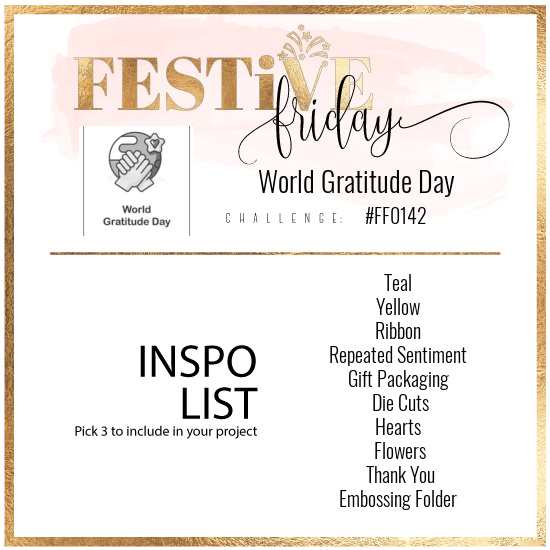
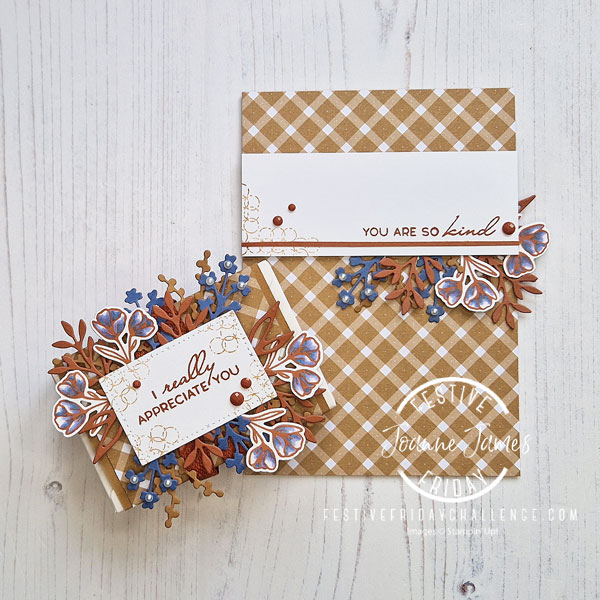
The challenge that we are celebrating this week is 'World Gratitude Day' which is on September 21st. Remember the fun thing is that at Festive Friday you do not need to actually celebrate the occasion; your goal is to simply use three or more items from the inspiration list on your project. This week I did embrace the challenge theme wholeheartedly and used ribbon, gift packaging, die cuts, flowers and thank you and this is what I came up with:


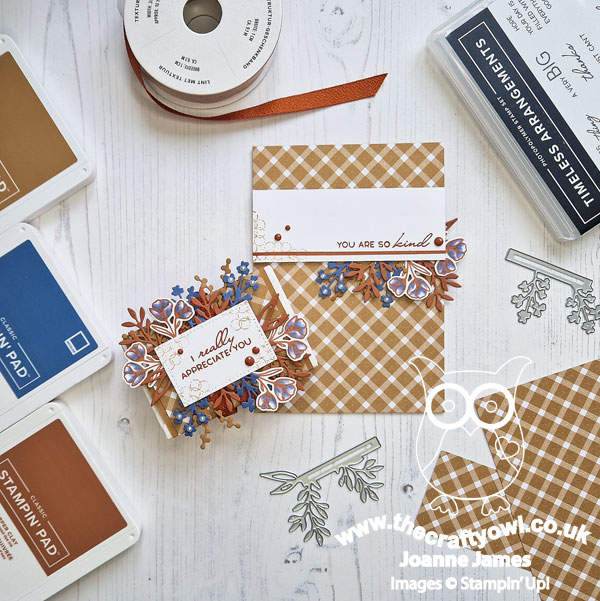
I created both some gift packaging and a co-ordinating card using the lovely autumnal colour palette over at Hand Stamped Sentiments this week. Here's the low-down on today's projects:

Gift Packaging Made Easy - For my gift box, I created a decorative belly band for one of the Envelope Treat Boxes that can be found on page 126 of the Stampin' Up! annual catalogue. Have you seen them? They are white, stampable boxes that measure 2 1/4" x 3 1/2" x 1" when folded and are perfect for packaging little treats. I made my wrap using the Glorious Gingham designer paper in Pecan Pie, then added a label that I decorated with foliage and stamped and coloured flowers and a trio of solid gems:


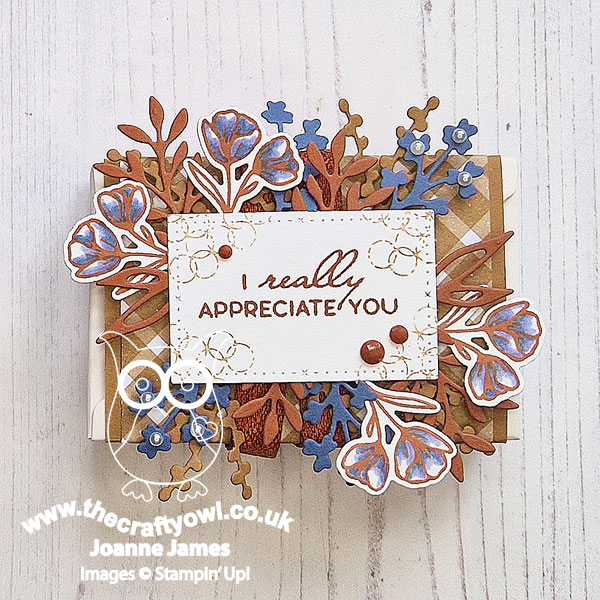
Here's a picture with the belly band removed, so that you can see how the box opens (gold foil stickers are also included with the boxes to seal them, although they are principally decorative - the box will hold itself closed):


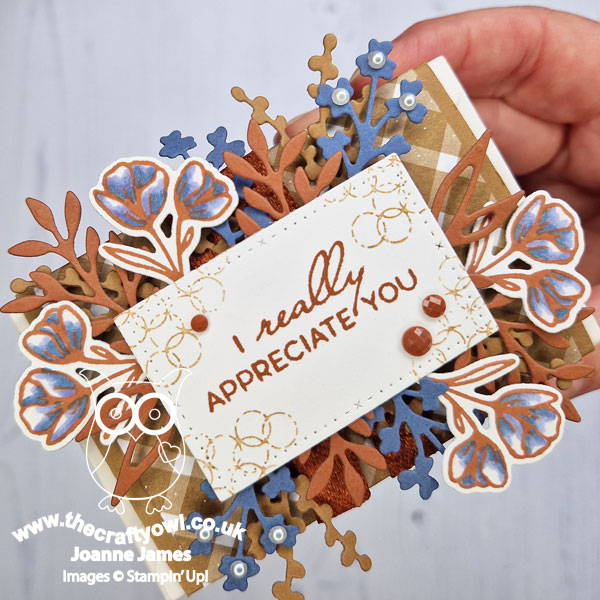
Here's a close up showing the stamping on my label and my coloured flowers - I just love the warm tones of this trio of colours together:


A Co-ordinating Thank You - I decided to create a co-ordinating card to give with my gift; I used elements of my packaging design and carried them into my card, using the simple layout over at Try Stamping on Tuesday as the basis for my design:


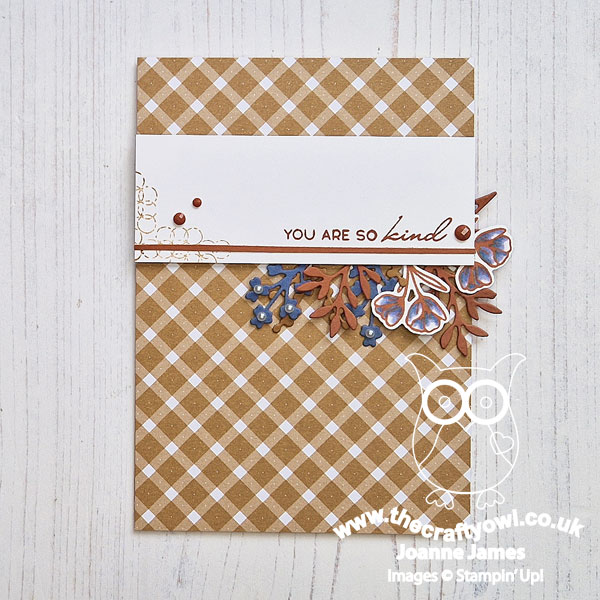
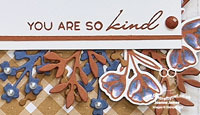
On my card I only added foliage to the bottom portion of the sentiment strip, to mimic the sketch; I also added a thin, solid strip of cardstock to highlight the simple thank you sentiment:


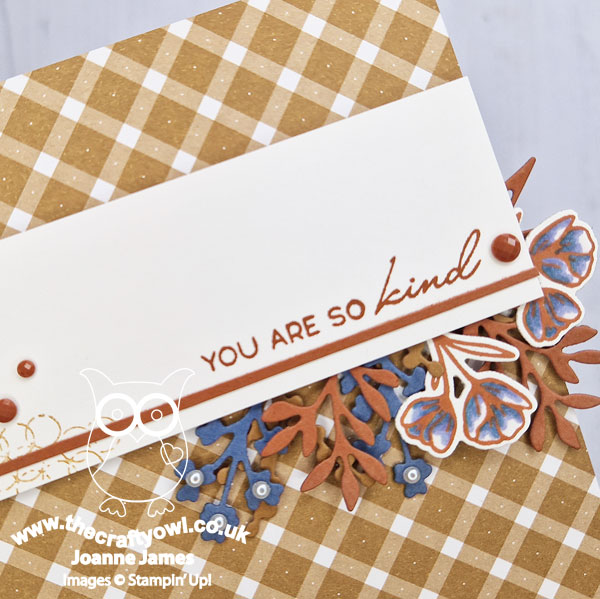
The layering of the foliage diecuts in the Timeless Arrangements bundle adds so much detail to this otherwise clean card and I love the blend of this trio of warm, almost autumnal colours. It's been so chilly here in the UK these past few days, this set fits right in!

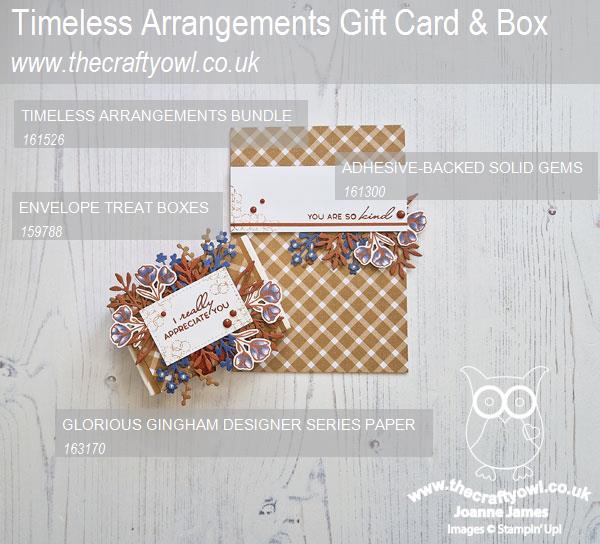
Here is the visual summary of the key products used on today's projects for you to pin for easy reference:


You can see all of my 'How To' summaries on my 'How To - Tips and Techniques' Pinterest board in case you've missed any. 

How does our board inspire you? I can’t wait to see what YOU create! For more inspiration, be sure to visit the rest of the Festive Friday Card Making and Paper Crafting Challenge Design team:

 Enjoy your day and I'll be back tomorrow with another project. Until then, happy stampin'!

A Big Thank You With Timeless Arrangements CCS510

by Joanne James2. May 2023 12:00

It's Tuesday and time for a new challenge over at CAS Colours & Sketches. The super-talented Cecile is hosting this month and our first challenge is a colour challenge: 


I love Cecile's colour choices this week and since today is the official launch of the new annual catalogue, it seemed only right that my card features some new product! I took some inspiration from the sketch over at Inspired By (flipped as I need the boxes to be the other way around to suit my sentiment) and the idea of decorated boxes - although instead of white flowers on coloured boxes, I used my 'boxes' to house my sentiments and accented with coloured foliage - take a look:


Here's the low-down on today's card:

My card features a new bundle called 'Timeless Arrangements' - a lovely set that allows you to build sentiments in one, two or three phrases and decorate them. The die set is truly fabulous - a set of labels with a pretty stitched detail and a selection of dies that both cut out some of the stamped images, and also contain some foliage on horizontal bands, that act as a guide to enable you to align them both with each other for layering and behind the sentiment label perfectly:


I used two sentiments on the front of my card and carried the detail to the inside of my card with a third sentiment and a little extra background stamping too:


This card is for all of you reading this that continue to support my Stampin' Up! business by shopping with me in person and in my online store and comment both here and elsewhere on my social media channels. It means a lot, so a big thank you to you all from the bottom of my heart!

I really love this bundle and know I am going to get so much use out of it, so be prepared to see lots more it over the next 12 months!

Here is the visual summary of the key products used on today's project for you to pin for easy reference:


You can see all of my 'How To' summaries on my 'How To - Tips and Techniques' Pinterest board in case you've missed any. 

As a reminder, for our colour challenges, you must use all of the stated challenge colours. You may also use neutral colours; however, the challenge colours should be the most noticeable ones featured on your card. We use Stampin' Up! color names for reference, but you are welcome to use any other companies' products as long as you match the challenge colours as closely as possible.

Enjoy your day and I'll be back later this week with another project. Until then, happy stampin'!


Stampin' Up! Supplies Used:

Table built using Product Table Builder by The Crafty Owl - Independent Stampin' Up! Demonstrator.

Mini Catalogue

BROWSE THE CATALOGUE

The mini catalogue is now live! Read and download your copy here.

Shop Online

Access my online shop 24 x 7, 365 days of the year:

Current April hostess code:

VDKNV7BH

Shop Online

Join My Team

It's always a great time to join Stampin’ Up! New team members can get £130 worth of products for only £99 + free business supplies + free shipping + all the fun being a part of Stampin’ Up! Stampin' Up! has something for everyone: join my growing team and benefit from my support to enjoy Stampin' Up! however you choose.

If you're interested, call me for a chat to understand how I can help you realise your goals. Alternatively, if you have already decided to sign up and you just can't wait, please click here for the link to the online form where you can sign up and order your starter kit right away! 

Latest Kit!

Stampin Cut and Emboss

The Rock Legend Kit has all you need to make 8 cards with coordinating envelopes. Along with the new Panda Friends Kit, both are available from January 4th for just £14 each - get yours here!

2023-24 Annual Catalogue

BROWSE THE CATALOGUE

Click on the catalogue for a full list of current SU! supplies - if you would like to order any of the items featured, please drop me a line at [email protected] or give me a call on 07773 421446 - I'd be happy to help.

New Online Exclusives

There are new products available exclusively in the online store from 5 March - check them out here.

About Me

Hi I'm Joanne and live in Northampton and when I'm not looking after my husband and two beautiful children, am an avid crafter with a passion for all things Stampin' Up!

I must confess that I have never been a big rubber stamper - until I discovered Stampin' Up! that is. I love the fact that I can get such great results with co-ordinating stamps, inks, papers and punches - the possibilities are endless! Join me on my stamping journey as I share the things I love and be inspired to create amazing things yourself!

Follow Me

Monthly Newsletter

Box Builder

Click the button above to use Box Buster to create your custom box design using the Envelope Punch Board!

Kits Collection Now Available!

Stampin Cut and Emboss

The new Kits Collection from Stampin' Up! is now available!

Click here to see the current kits available and order yours online today.

I Design For


Stampin' Up Stuff

This is my personal blog and is not endorsed by Stampin’ Up! I hope you find it a plentiful source of ideas and personal inspiration but please don't copy my designs for contest submission or use for classes, publication or sale without express permission.