Love Never Melts Spirited Snowmen PP418

by Joanne James11. November 2018 09:00

I've had a busy couple of days with some of my team at Stampin' Up!'s Onstage event in Birmingham to celebrate the launch of the upcoming Spring Summer catalogue. More about that in my later post though as for now it's Sunday and time for this week's new challenge over at The Paper Players! It's the turn of the queen of diecuts, the lovely Laurie, to host this week and she has an unusual colour challenge for you to work with:


When I first saw this colour combination I almost ran a mile and it did have me stumped initially, although a sudden flash of inspiration led to me not only creating with but loving this trio that I used to create another Christmas card to share with you this week  - take a look:


Here's the low-down on today's card:

Love Never Melts - What could be sweeter than this pair of snowmen, all wrapped up in their winter woollies and hats? I coloured their accessories using a combination of my Stampin' Write markers and Stampin' Blends and added a Smoky Slate outline to the snowy areas for a touch of extra definition. I'm hoping Laurie will forgive me the liberty of adding a touch of green to my holly leaves, but I'm afraid it just had to be done! The sentiments in this stamp set are so sweet - the one on today's card is perfect to send festives wishes to your bestie and continues onto the inside of the card:


Another Custom Plaid - When considering what paper to pair with my snowmen, I drew a blank. Instead, I decided to create another custom plaid design using my Buffalo Check stamp set in Smoky Slate and using the thick and thin ends of my Stampin' Write markers in Poppy Parade and So Saffron respectively to customise my pattern. I love the Buffalo Check stamp on its own, yet love how you can create such fun and unique patterns with this stamp. What colour combinations and patterns would you try?

Subtle Sparkle and Shine - Although difficult to see on my photos, all of the snowy areas on my image are brushed with clear Wink of Stella and the red heart the snowmen are holding has been painted using a fine tipped glue pen to give a wonderful glossy shine when dry. The shimmer and gloss are subtle, but they are there and add so much to this clean and simple card.

Here is the visual summary of the key products used on today's project for you to pin for easy reference:


You can see all of my Product and 'How To' summaries on my 'How To - Tips and Techniques' Pinterest board in case you've missed any. 

Before you reach for your ink and papers, check out what our amazing team has created to inspire you this week:

Here's a quick recap of our challenge rules:
 
1.  Create a new paper project
2.  Upload your creation to your blog with a link back to us and provide a direct link to the post featuring your challenge submission.
3.  Please link your card to no more than four challenges, TOTAL.
4.  Have FUN!

I can't wait to see what you create with this week's colours and look forward to visiting your blogs this week! Enjoy the rest of your weekend as it will be over all too quickly. I'll be back tomorrow with another project; until then, happy stampin'!


Stampin' Up! Supplies Used: 

Table built using Product Table Builder by The Crafty Owl - Independent Stampin' Up! Demonstrator.

Frosted Medallions Snowflake

by Joanne James4. December 2016 09:00

It's Sunday and time for a new challenge over at The Paper Players! It's the turn of our fearless leader the wonderful Nance to host this week and she has a fun wintery theme to get your creative juices flowing:
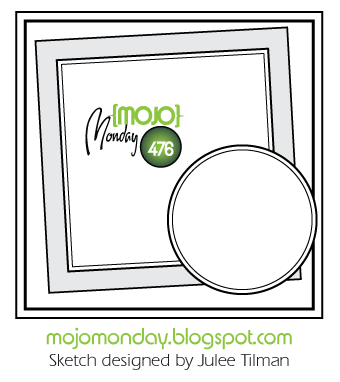
       

Use a snowflake (or two!) on your card. I decided that I wanted to feature the large frosted medallion snowflake from the stamp set of the same name on my card this week and this week's Mojo Monday sketch gave me the perfect layout - here's my card:
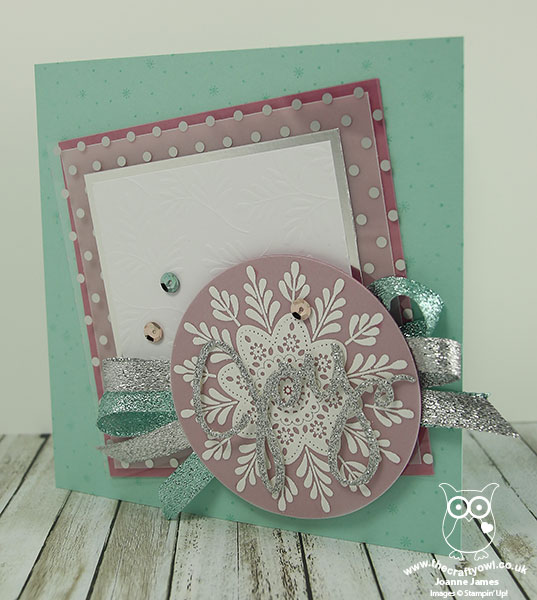
 

Here's the low-down on today's card:

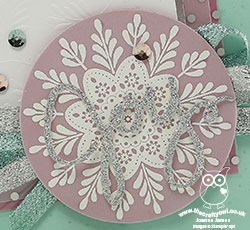
All About The Layers - My card this week has 9 layers in total, rather a lot even by my standards! Can you spot them all? They are, in order: Pool Party card base, Sugarplum square panel, vellum square, Fabulous Foil Designer Acetate, silver foil, Fancy Frost Specialty DSP, Sweet Sugarplum circle, a vellum circle with the frosted medallion stamped in Versamark and heat embossed in white and lastly the word 'joy' cut out of silver glimmer paper with my Wonderful Wreath framelits. A lot of layers indeed, yet I think they all play a part in contributing to the balance of the card design.

Glitter, Glitter - I used lots of elements to add sparkle to my card, from the Fabulous Foil Acetate, to the glimmer paper and sprinkle of Fancy Frost sequins, along with a rather fancy bow in silver (current) and Pool Party (retired) glitter ribbon beneath my snowflake. This card is definitely not practical for posting, but will make a nice special one to be hand delivered. The snowflake/glitter combination means I am linking up with CAS-ual Fridays too where these are both the order of the day!

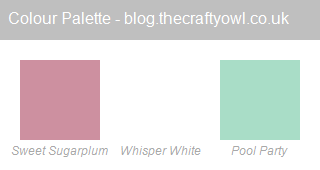
A Contemporary Colour Combination - you may recognise my colour combination this week as the one our very own lovely Nance used for her pines card last week - you can see her card here. This isn't a colour combination I would ordinarily choose for a Christmas card, and I did start out using just white, silver and Sweet Sugarplum, but I felt it needed something more. I decided to add in the Pool Party as it looked so great on Nance's card and voila - an altogether brighter card, so thank you Nance! If you like this colour combination, feel free to save it:
 

So only one main snowflake on my card, but it is a big one! That said, I did use the snowflake background stamp from the Pretty Pines stamp set on my card base to add a little background decoration, so there are lots more there too!

Here is the visual summary of the key products used on today's project for you to pin for easy reference:
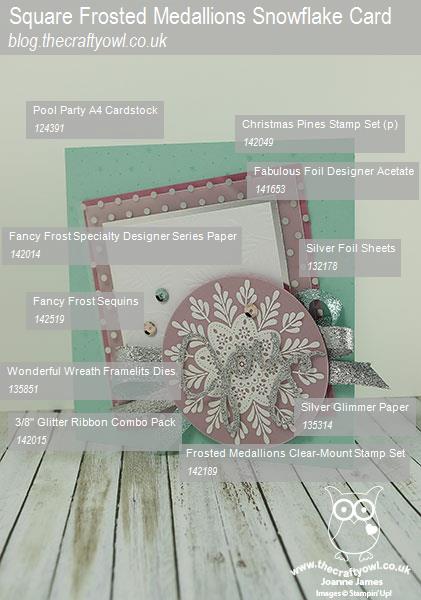
 

You can see all of my 'How To' summaries on my 'How To - Tips and Techniques' Pinterest board in case you've missed any. 

Before you reach for your ink and papers, check out what our amazing team has created to inspire you this week:

The Paper Players Design Team
 
 
Here's a quick recap of our challenge rules:
 
1.  Create a new paper project
2.  Upload your creation to your blog with a link back to us and provide a direct link to the post featuring your challenge submission.
3.  Please link your card to no more than four challenges, TOTAL.
4.  Have FUN! 


I look forward to seeing what you create with our theme this week. We are off for our usual Sunday morning of sport, followed by a spot of lunch and then we are going to watch a basketball game this afternoon - go Northampton Neptunes!

Enjoy the rest of your weekend as it will be over all too quickly; I'll be back soon with another project; until then, happy stampin'!


Stampin' Up! Supplies Used:

Table built using Product Table Builder by The Crafty Owl - Independent Stampin' Up! Demonstrator.

Detailed Santa Thinlits Shaker Card

by Joanne James30. October 2016 09:00

It's Sunday and time for a new challenge over at The Paper Players! It's the turn of the lovely LeAnne to host this week and she has a fun tic tac toe challenge for you to work with:


Normally I find these such a challenge (I know, I know - that's the whole point!) but today I knew exactly where I was going on the grid: straight down the left with Red, Santa and Diecut. I ended up making a couple of cards (if you check out the card on yesterday's post here you will see it also fits this column) but today's card is definitely one of my most favourite  - take a look:


Here's the low-down on today's card:

Detailed Santa Thinlits Die - Today I've used the whole of the diecut Santa image to create the front for my shaker card. I cut it in extra thick Whisper White and added a piece of window sheet behind, so that you could see both my white heat embossed 'ho ho ho' sentiment and the contents of my shaker. I left a wider border at the bottom in order to accommodate my embellishments and Real Red stamped sentiment - a line from my most favourite festive poem, 'Twas The Night Before Christmas', by Clement C. Moore. I recited this poem at Christmas concerts as a child on a number of occasions and I still know all the words -  I now read it to my own children each Christmas, it has become a James family tradition.

Snowy White - I used the white Mica Flakes on page 41 of the seasonal catalogue for my shaker card contents today. These are one of those products that could be easily overlooked  yet I love these soft flakes - perfect for snow, beards and great for shaker cards! I rubbed my Embossing Buddy over the inside of the window to reduce static so that they would shake freely and the whole thing is held in place using foam adhesive strips - they really do make shaker cards so easy. Check out the detail here of the mica flakes and the diecut:


Jingle All The Way - To finish my card today, I added some red and white Candy Cane Lane baker's twine and a couple of mini jingle bells, perfect for my red and white colour scheme today.

Here is the visual summary of the key products used on today's project for you to pin for easy reference:


You can see all of my 'How To' summaries on my 'How To - Tips and Techniques' Pinterest board in case you've missed any. 

I can't tell you how much I love this card, I might even have to send it to myself - shakers are such fun! 

Before you reach for your ink and papers, check out what our amazing team has created to inspire you this week:

The Paper Players Design Team
 
 
Here's a quick recap of our challenge rules:
 
1.  Create a new paper project
2.  Upload your creation to your blog with a link back to us and provide a direct link to the post featuring your challenge submission.
3.  Please link your card to no more than four challenges, TOTAL.
4.  Have FUN! 


I look forward to seeing what you create with this week's tic tac toe board. We have a week off from hockey so it's only basketball that's calling today, then I have a few errands to run but hopefully a restful afternoon in store before Rebecca returns to school tomorrow. Ben has another week off, much to Rebecca's dismay! Well, I guess you can't have everything! 

One last reminder: the 'Buy 3, Get 1 Free' offer on designer paper ends tomorrow. You can read the full details here if you need to refresh your memory about what's included. 

B3G1DSP_DemoHeader_UKSP

Enjoy the rest of your weekend as it will be over all too quickly; I'll be back tomorrow with another project; until then, happy stampin'!


Stampin' Up! Supplies Used:

Table built using Product Table Builder by The Crafty Owl - Independent Stampin' Up! Demonstrator.

New Online Exclusives

There are new products available exclusively in the online store from 5 November - check them out here.

Latest Kits!

Stampin Cut and Emboss

The Perpetual Beauty Calendar Kit and Cherry Blossoms Treat Boxes Kit are the latest kits in the online store - get yours here!

Shop Online

Access my online shop 24 x 7, 365 days of the year:

Current December hostess code:

9NKXDTTR

Shop Online

Mini Catalogue

BROWSE THE CATALOGUE

'Tis The Season - the new Stampin' Up! Mini Catalogue is here! For more details and to download your copy click here

Scrapbooking

Stampin' Up! has introduced a new range of 12x12" scrapbooking product and kit - the full range is now available to purchase online. To download a copy of the new digital Scrapbooking Catalogue click here.

2024-25 Annual Catalogue

BROWSE THE CATALOGUE

Click on the image to download your copy of the 2024-25 annual catalogue. For a full list of current SU! supplies, go to my online store. If you would like any help or advice, please drop me a line at joanne@thecraftyowl.co.uk or give me a call on 07773 421446 - I'd be happy to help.

Join My Team

It's always a great time to join Stampin’ Up! New team members can get £130 worth of products for only £99 + free business supplies + free shipping + all the fun being a part of Stampin’ Up! Stampin' Up! has something for everyone: join my growing team and benefit from my support to enjoy Stampin' Up! however you choose.

If you're interested, call me for a chat to understand how I can help you realise your goals. Alternatively, if you have already decided to sign up and you just can't wait, please click here for the link to the online form where you can sign up and order your starter kit right away! 

About Me

Hi I'm Joanne and live in Northampton and when I'm not looking after my husband and two beautiful children, am an avid crafter with a passion for all things Stampin' Up!

I must confess that I have never been a big rubber stamper - until I discovered Stampin' Up! that is. I love the fact that I can get such great results with co-ordinating stamps, inks, papers and punches - the possibilities are endless! Join me on my stamping journey as I share the things I love and be inspired to create amazing things yourself!

Follow Me

Monthly Newsletter

Box Builder

Click the button above to use Box Buster to create your custom box design using the Envelope Punch Board!

Kits Collection Now Available!

Stampin Cut and Emboss

The new Kits Collection from Stampin' Up! is now available!

Click here to see the current kits available and order yours online today.

I Design For


Stampin' Up Stuff

This is my personal blog and is not endorsed by Stampin’ Up! I hope you find it a plentiful source of ideas and personal inspiration but please don't copy my designs for contest submission or use for classes, publication or sale without express permission.

DSP Special Release

Check out 3 popular designer series paper designs in fresh new colourways! Available exclusively in the online store from 3 December - check them out here

Last Chance Products

Last Chance Products will now be updated every other month - check them out here.