Grandad's Treasures of Life AYSI 245

by Joanne James5. March 2021 13:00

Today I'm sharing my design team card for our new challenge over at As you See It where it's time for a recipe challenge:


The often-dreaded masculine card! I decided to go with one of my current favourites from the January-June mini catalogue as I wanted to give this set another outing and create something a little different to my previous card with this set (you can see that card here if you missed it). Here's my card for today:


 Here's the low-down on today's card:

Treasures of Life - I decided to use the Grandad and Grandson image from the 'Treasures of Life' stamp set as the main feature of my masculine card today. This is such a beautiful set to celebrate the joys of being a grandparent. I stamped my image in Early Espresso and gave it a rough watercolou in earthy tones, picking out some of the details of the little boy in Night of Navy. I stamped my image on some retired Naturals White card for added texture and added another sentiment to the inside of my card from the set:


I left it otherwise fairly blank as I haven't yet decided what occasion I'm going to use this card for and I may add a birthday greeting too in due course.

All About Texture - I used lots of textural elements on today's card: a piece of Early Espresso embossed with the Tasteful Textile 3D embossing folder, a piece of the In Good Taste designer series paper. along with the texture added by the navy twine and my naturals white cardstock. I think the combination of elements along with the earthy brown tones give my card a homely, cosy feel. What do you think?


Tasteful Labels and an Old Faithful - The final element to complete this week's recipe challenge was to use a diecut: I used one of the Tasteful Labels dies for my sentiment, along with one of my old faithful Stitched Rectangle Dies to frame my watercoloured image.

Here is the visual summary of the key products used on today's project for you to pin for easy reference:


You can see all of my 'How To' summaries on my 'How To - Tips and Techniques' Pinterest board in case you've missed any. 

So how will you use this week's recipe?

Here's a summary of our challenge rules:

  • Create any card, scrapbooking page, 3D project or packaging project that fits the challenge.
  • Please include the challenge graphic and link back to the challenge in your blog post. Turn off word verification so we can leave you lots of lovely comments. Make sure you link the post not the whole blog to the Linky. Use #AYSIXXX when uploading to a public gallery.
  • If you’re unsure about ‘the rules’, check the details under the Challenge Guidelines tab on the As You See It Challenge homepage.
We look forward to seeing your creations in the AYSI gallery.

Enjoy your day and I'll be back tomorrow with another project. Until then, happy stampin'!


Stampin' Up! Supplies Used:

Table built using Product Table Builder by The Crafty Owl - Independent Stampin' Up! Demonstrator.

A Clean and Simple Dandelion Trio For The Final CAS(E) This Sketch CTS#405

by Joanne James3. February 2021 07:00

Today I'm sharing a card for the final challenge over at CAS(E) This Sketch:

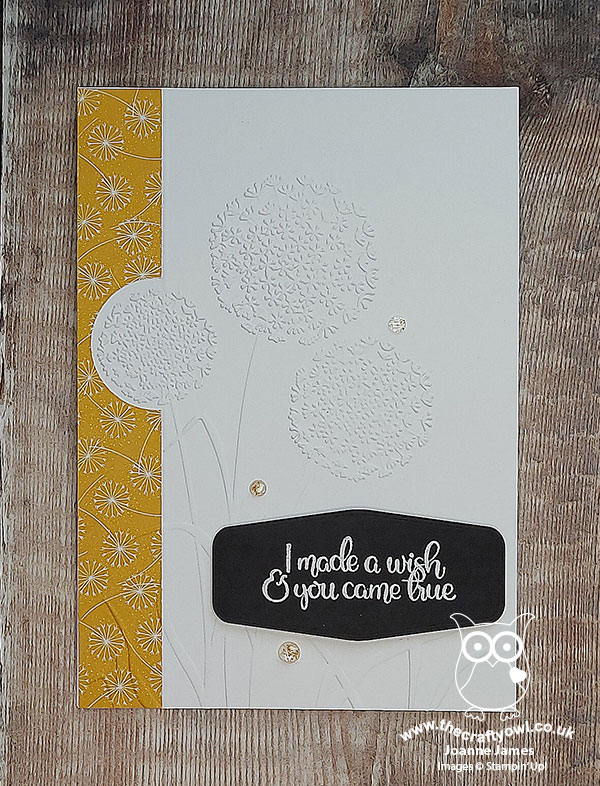
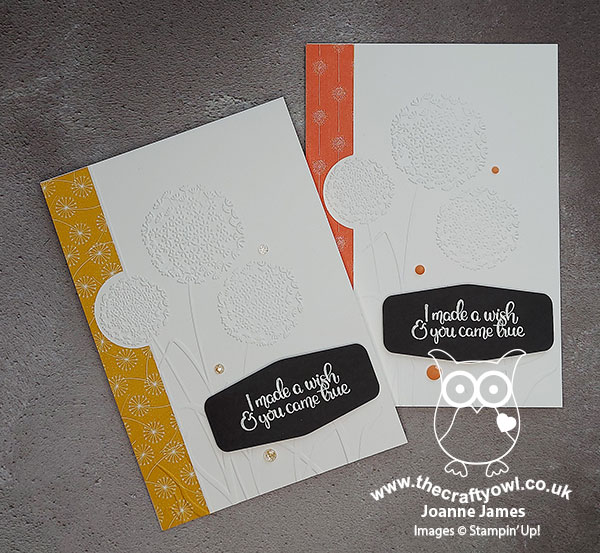
I'm so sad this challenge is ending! I thought this sketch was a tricky one, and I did take quite a liberal interpretation, but since it was the very last one I couldn't not play along. After much consideration, I decided to go with dandelions for my card - take a look:
 

Here's the low-down on today's card:

A Dandelion Trio - I've both a trio of dandelions and a trio of dandelion products on today's card! The first is the beautiful Dandelions 3D embossing folder from the main catalogue. This embossing folder is the makings of a card in itself and I thought the positioning of the dandelion seed heads worked really well for the tag elements of the sketch - just check out the detail:
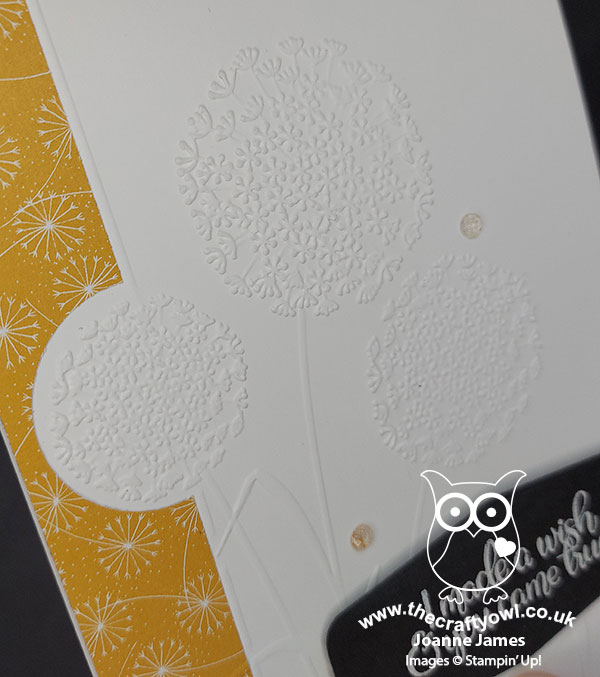
 

I addition to the embossed dandelions, Once I'd added my strip of DSP (more on that in a moment) I added a scored line at the edge of the paper to tie it into my embossed design, which you can just see on the photo above. A small and subtle detail, but it really adds to the finished appearance of the card.

Dandy Garden - I decided I needed something to represent the vertical element of the sketch, so decided that some of the dandelion-patterned paper from the Dandy Garden DSP pack in the current mini catalogue woould do the trick. I used a strip of white and Bumblebee for my first card, then I also made a second card and used a strip of the Calypso Coral design. On both cards I used a circle punch to remove a semi-circle so that my strip fit around my embossed dandelion head:
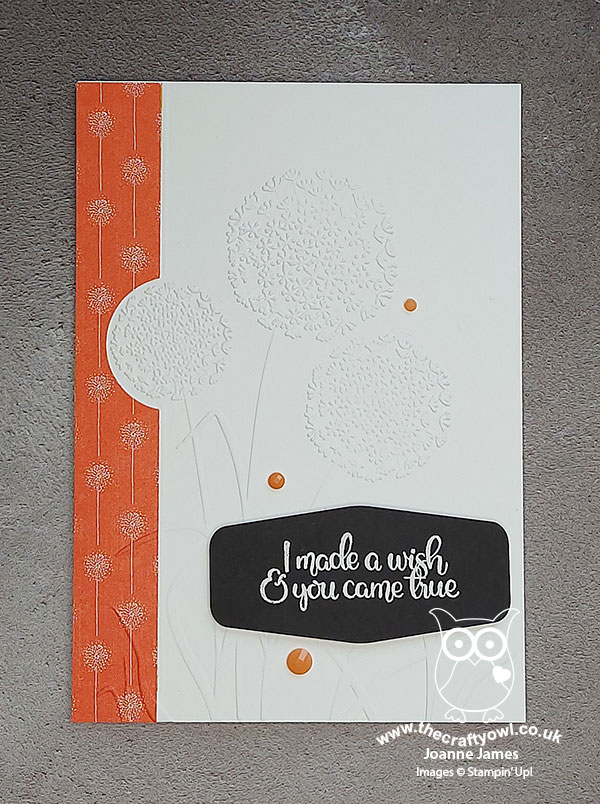
 

My customes and team know how much I have a love-hate relationship with the dandelion designs in the Dandy Garden DSP pack; I am not keen on the bold designs of proper yellow dandelions in this pack (they realy are just weeds, right?!) but I do love the reverse patterns that depict the more whispy dandelion seed heads that I've used here. Here's a shot of each of the cards together - which one do you prefer?
 

Dandelion Wishes - Finally, I paired my embossed design and DSP border with a heat-embossed sentiment from the 'Dandelion Wishes' stamp set - the third dandelion element. I also used the dandelion stamp in this set to add some decoration to the inside of my card:
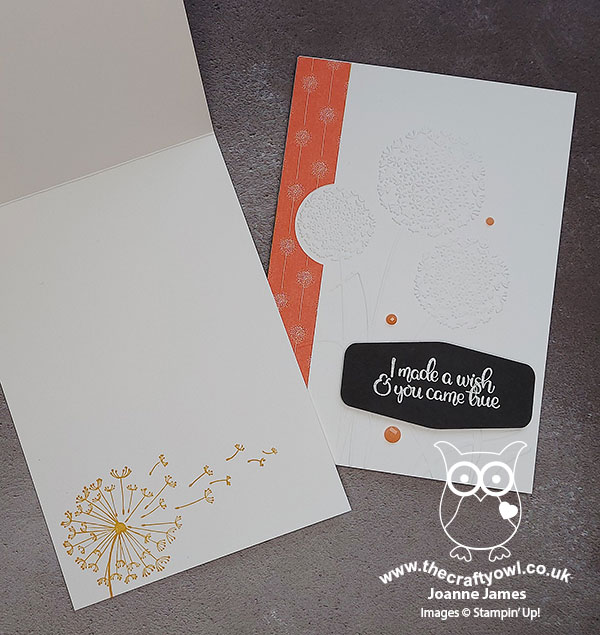
 

I added a trio of faceted gems to the front to complete my card. So what do you think - did I do the final CAS(E) This Sketch justice? I hope so.

Here is the visual summary of the key products used on today's project for you to pin for easy reference:
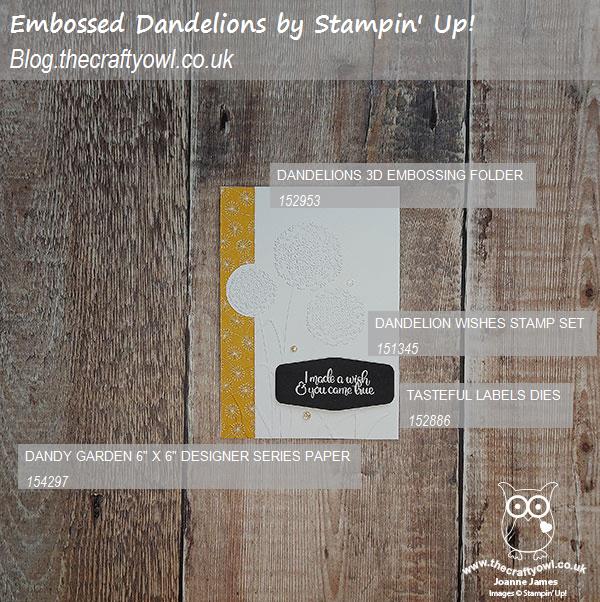
 

You can see all of my 'How To' summaries on my 'How To - Tips and Techniques' Pinterest board in case you've missed any. 

Enjoy your day and I'll be back tomorrow with another project. Until then, happy stampin'!


Stampin' Up! Supplies Used:
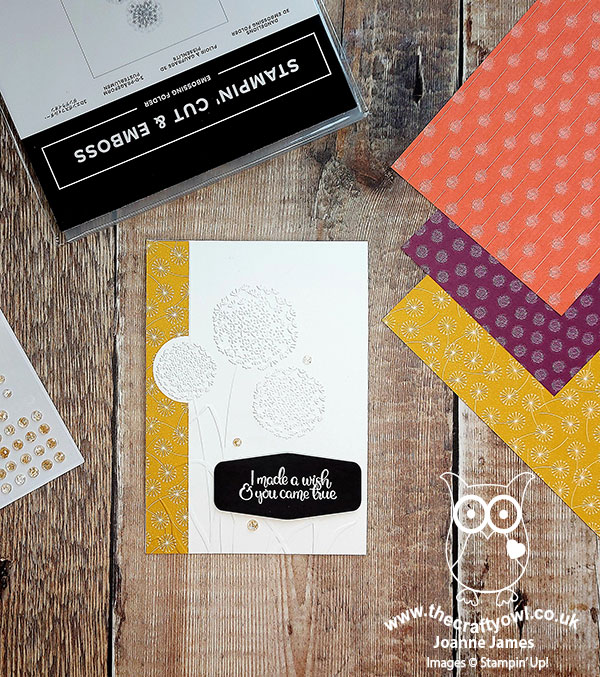
Table built using Product Table Builder by The Crafty Owl - Independent Stampin' Up! Demonstrator.


Autumn Plaid Tidings Stitched Leaves Trio

by Joanne James17. September 2020 09:10

I'm flitting between Autumn and Winter/Christmas projects at the moments so I'm back with more leaves today, although the wonderfully warm temperatures here in the UK this week are prolonging our Summer just a little longer and are determined to stave off the change in seasons for as long as possible. No complaints from me on that front! Back to my card, that was inspired by both this week's Global Design Project #GDP258 sketch and the trend over at Just Us Girls this week, where they are looking for cards divided into thirds:


I love things in threes so this sketch really appealed to me - it also gave me the opportunity to create another card using my Stitched Leaves Dies - take a look:


Here's the low-down on today's card:

Autumnal Plaid Tidings - I used one of the warm plaid patterns from the Plaid Tidings DSP pack as the basis for the colour scheme for today's card; those warm orange, red and purple tones reminded me of warm flannel shirts and are a great colour combination for autumn.

Positive and Negative - Leaves, that is! I decided to break up my trio and use both the positive diecuts of the leaves with their stitched detailing, backed by a plaid stitched rectangle, and in the centre the negative stitched outline of the same leaf, with the plaid showing in the negative space. I added a stitched banner in keeping with my theme and one of my favourite uplifting sentiments of the moment from the coordinating 'Love of Leaves' set across the centre to complete my card. Just check out all that lovely stitched detail:


Stitched Envelope Detail - I left the inside of my card blank, apart from some stamped leaf detail on the corner, however in addition to stamping leaves on my envelope, I added the embossed stitch detail to the leaf on the rear envelope flap for an interesting textural detail. This is really easy to do: simply stamp the leaf and run the centre part of the die through your diecutting machine, without the outline piece.

Here is the visual summary of the key products used on today's project for you to pin for easy reference:


You can see all of my 'How To' summaries on my 'How To - Tips and Techniques' Pinterest board in case you've missed any. 

Enjoy your day and I'll be back later with my card for this week's new TicTacToe challenge. Until then, happy stampin'!


Stampin' Up! Supplies Used:

Table built using Product Table Builder by The Crafty Owl - Independent Stampin' Up! Demonstrator.
 
Edited To Add: This card was a winner over at Just Us Girls:

Mini Catalogue

BROWSE THE CATALOGUE

The mini catalogue is now live! Read and download your copy here.

Shop Online

Access my online shop 24 x 7, 365 days of the year:

Current April hostess code:

VDKNV7BH

Shop Online

Join My Team

It's always a great time to join Stampin’ Up! New team members can get £130 worth of products for only £99 + free business supplies + free shipping + all the fun being a part of Stampin’ Up! Stampin' Up! has something for everyone: join my growing team and benefit from my support to enjoy Stampin' Up! however you choose.

If you're interested, call me for a chat to understand how I can help you realise your goals. Alternatively, if you have already decided to sign up and you just can't wait, please click here for the link to the online form where you can sign up and order your starter kit right away! 

Latest Kit!

Stampin Cut and Emboss

The Rock Legend Kit has all you need to make 8 cards with coordinating envelopes. Along with the new Panda Friends Kit, both are available from January 4th for just £14 each - get yours here!

2023-24 Annual Catalogue

BROWSE THE CATALOGUE

Click on the catalogue for a full list of current SU! supplies - if you would like to order any of the items featured, please drop me a line at [email protected] or give me a call on 07773 421446 - I'd be happy to help.

New Online Exclusives

There are new products available exclusively in the online store from 5 March - check them out here.

About Me

Hi I'm Joanne and live in Northampton and when I'm not looking after my husband and two beautiful children, am an avid crafter with a passion for all things Stampin' Up!

I must confess that I have never been a big rubber stamper - until I discovered Stampin' Up! that is. I love the fact that I can get such great results with co-ordinating stamps, inks, papers and punches - the possibilities are endless! Join me on my stamping journey as I share the things I love and be inspired to create amazing things yourself!

Follow Me

Monthly Newsletter

Box Builder

Click the button above to use Box Buster to create your custom box design using the Envelope Punch Board!

Kits Collection Now Available!

Stampin Cut and Emboss

The new Kits Collection from Stampin' Up! is now available!

Click here to see the current kits available and order yours online today.

I Design For


Stampin' Up Stuff

This is my personal blog and is not endorsed by Stampin’ Up! I hope you find it a plentiful source of ideas and personal inspiration but please don't copy my designs for contest submission or use for classes, publication or sale without express permission.