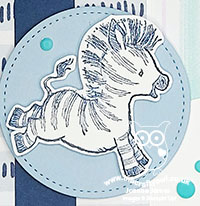
Zany Zebras Meets Playing With Patterns Birthday Cards For Boys PP539

by Joanne James2. May 2021 09:00

Today it's Sunday and time for this week's new challenge over at The Paper Players! It's my turn to host this week and I have a fun theme challenge for you to work with:
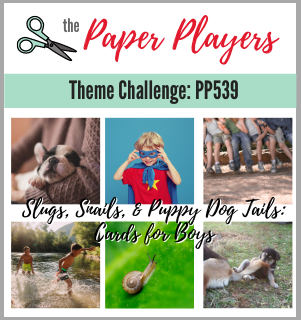
    

Are you familiar with the nursery rhyme: 'What are little boys made of?' It inspired my theme this week and the fabulous badge that our teamie Nance made illustrates it perfectly. So whether you choose to feature snails, puppy dogs, superheroes, or anything else that works for you, my theme this week is cards for boys. I'm making the most of the last couple of days of retiring favourites before the new annual catalogue arrives, so I chose to go with a zany zebra (or two!) for my card, using Julee's current Mojo Monday sketch layout which was great for some simple layering of retiring papers too - take a look:
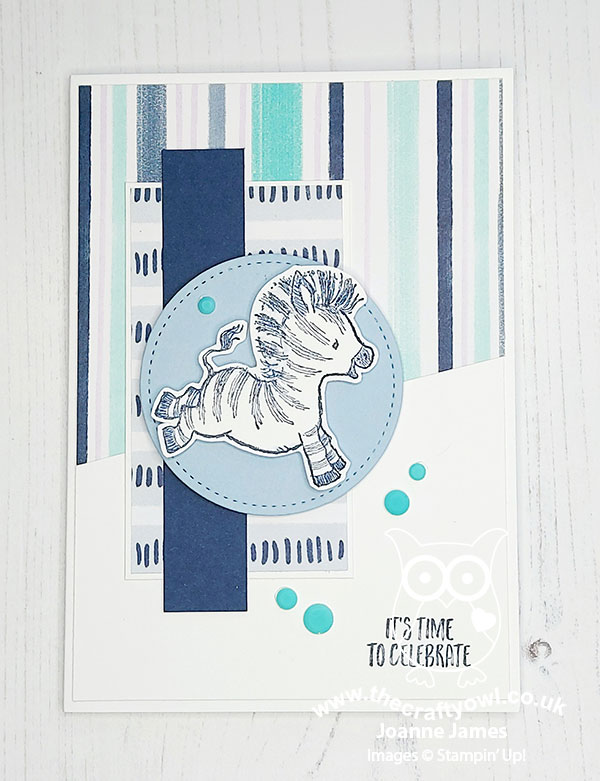
 

Here's the low-down on today's card:

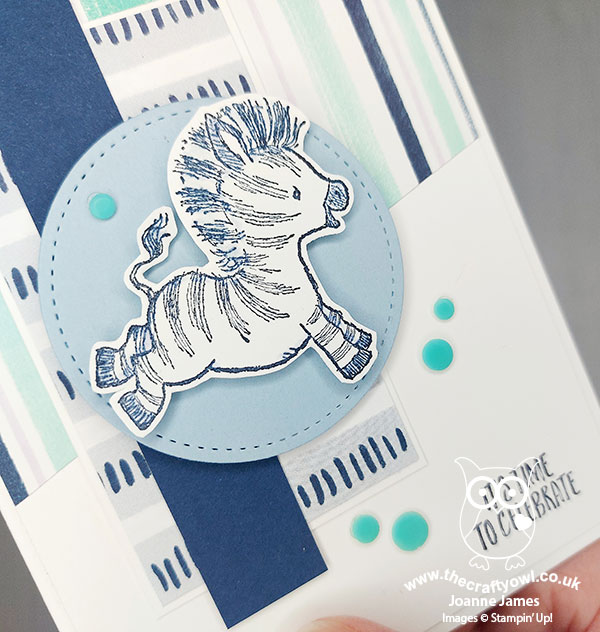
I used a mix of Playing With Patterns DSP for my layers as I think these colours have a fun masculine feel and stamped one of the zebras from the 'Zany Zebras' stamp set in Night of Navy, adding some Wink of Stella to his mane, then fussy cut it before adding to my card. A sprinkle of resin dots finished my card front:
I added another of the zebras, this time with a party hat, to decorate the inside of my card:
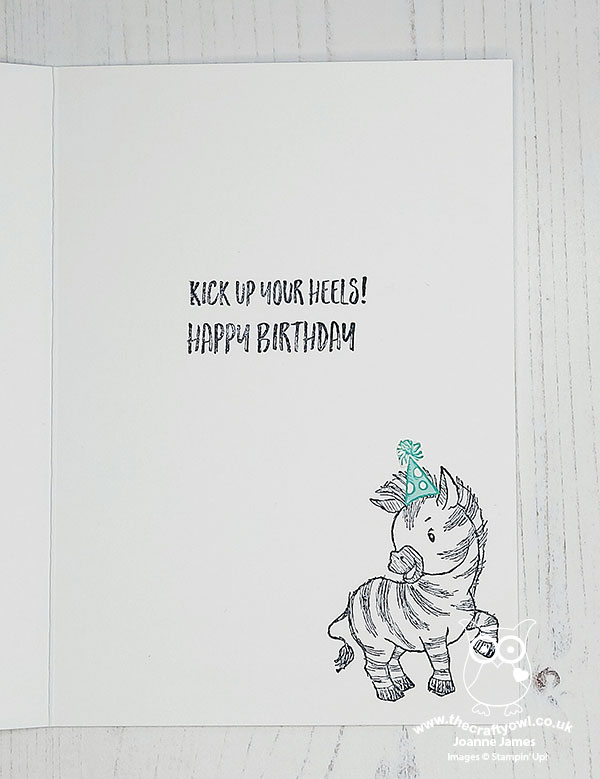
 

I love these cute zebras and think they make fun a fun birthday card for a young boy. If you're a fan too, you have until tomorrow to get your hands on a set before they are gone forever! I will have another card for boys using them later this week - they might be retiring, but I'm not ready to part with mine just yet!

Here is the visual summary of the key products used on today's project for you to pin for easy reference:
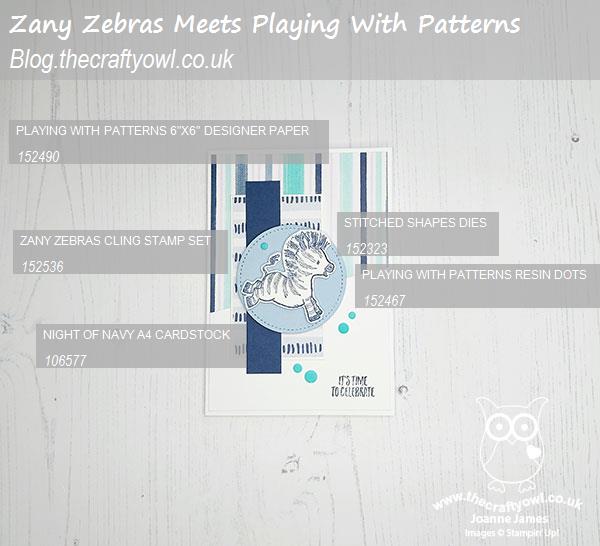
 

You can see all of my Product and 'How To' summaries on my 'How To - Tips and Techniques' Pinterest board in case you've missed any. 

I actually made a second card for our challenge this week that was altogether more clean and simple. It is based on last week's Freshly Made Sketches sketch and uses another of my favourite retiring sets, Silhouette Scenes:
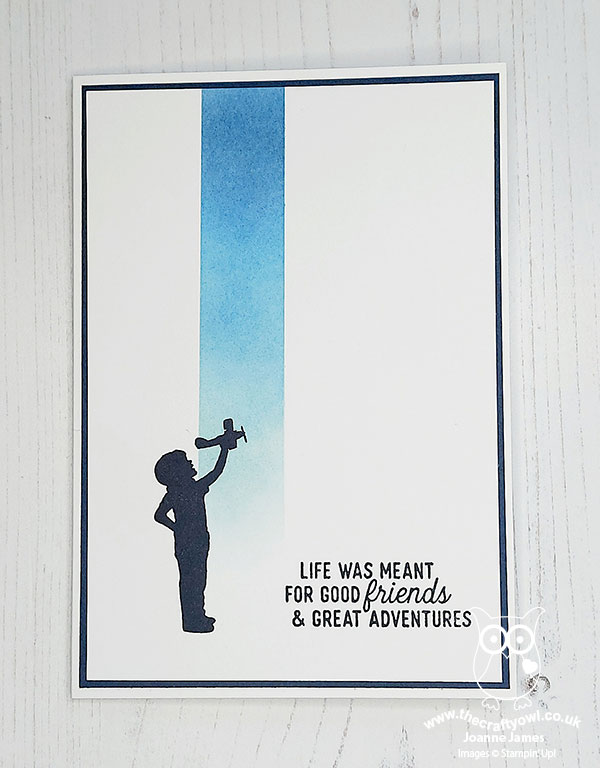
 

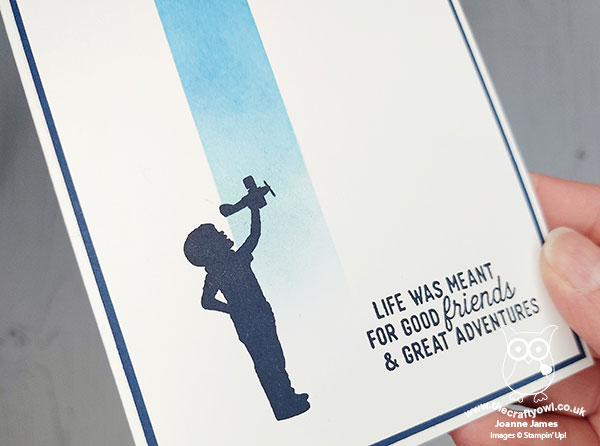
I masked off a column and created an ombre blended strip of sky using Balmy Blue, Pacific Point and Night of Navy inks and my blending brushes, and added the little boy with a toy aeroplane and a sentiment from the same set in Night of Navy, then added a simple 'Happy Birthday' sentiment to the inside using a stamp from 'Itty Bitty Greetings'. I love the simplicity of this card, and the way that the silhouette image overlays the ombre blended panel:
 

Here is the visual summary of the key products used on today's project for you to pin for easy reference:
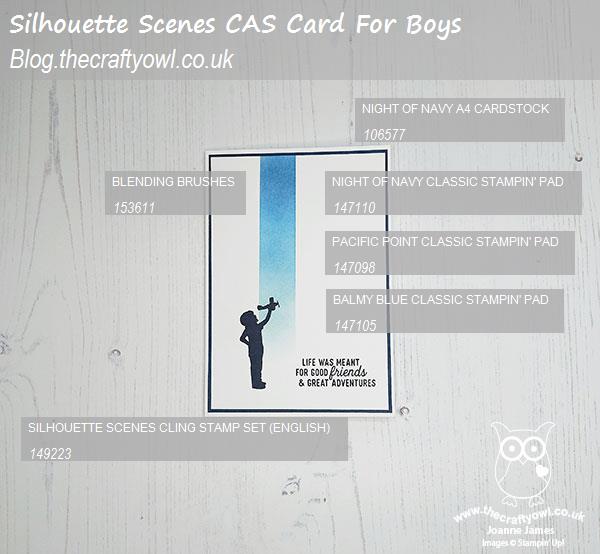
 

You can see all of my Product and 'How To' summaries on my 'How To - Tips and Techniques' Pinterest board in case you've missed any. 

I love this card - so full of nostalgia! I'm linking this one up over at The Spot where the challenge is ink blending and TGIF Challenges where they are looking for ombre this week.
   

Before you reach for your ink and papers, check out what our amazing team has created to inspire you this week:

Here's a quick recap of our challenge rules:
 
1.  Create a new paper project
2.  Upload your creation to your blog with a link back to us and provide a direct link to the post featuring your challenge submission.
3.  Please link your card to no more than four challenges, TOTAL.
4.  Have FUN!

You can see all of my 'How To' summaries on my 'How To - Tips and Techniques' Pinterest board in case you've missed any. 

Enjoy your day; we have a long weekend here in the UK this weekend so are planning on making the most of it by taking things easy, especially since Rebecca starts her final round of GCSE exam assessments this week. I'll be back tomorrow with another project. Until then, happy stampin'!


Stampin' Up! Supplies Used: 

Table built using Product Table Builder by The Crafty Owl - Independent Stampin' Up! Demonstrator.


Table built using Product Table Builder by The Crafty Owl - Independent Stampin' Up! Demonstrator.

Sweet Silhouettes Go In The Direction Of Your Dreams

by Joanne James27. July 2020 07:00

Happy Monday everyone! It's the start of a new week and I am here with a card using some 'oldie but goodie' products from the annual catalogue for a couple of challenges:

Tic-Tac-Toe Challenge   

I went down the centre of The Paper Craft Crew's TicTacToe board - watercolour background, favourite colour (Melon Mambo Pink), Anything But Floral - and whilst I don't have any fairground-related stamps, was totally inspired by those pink swings in the Just Us Girls photo - take a look:


Here's the low-down on today's card:

Sweet Silhouettes - I diecut a tree using my Sweet Silhouettes Dies for the uppermost layer on my card and cut it first so that I could check my positioning even though I added it last. I snipped a small branch off the left hand side in order to enable my card to still fit in a standard envelope when complete.

In The Pink - Melon Mambo is one of my favourite pink colours and I thought it would be the perfect colour for a feminine, watercoloured background behind my swinging girl. I also added a touch of Magenta Madness to the top of the panel to emphasise the ombre effect of my panel and used a Melon Mambo card base. Once my watercoloured panel was dry, I spritzed it liberally with shimmer spray; it's difficult to see on the main photo but give this card such a beautiful lustre - you can see it a little better on the image below:


Silhouette Scenes - To compliment my pink background, I used my Stamparatus to add a well-inked stamp of the young girl on her swing. I stamped it a few times to get a good solid image; the slight flecking is due to the texture of the watercolour paper which prevents a truly solid print being achieved. I also stamped a suitable sentiment from the same set below and added a few sequins to further compliment the pink.

This card is heading to a valued member of my team who is constantly striving and reaching for bigger and better things - I hope she likes it!

Here is the visual summary of the key products used on today's project for you to pin for easy reference:


You can see all of my 'How To' summaries on my 'How To - Tips and Techniques' Pinterest board in case you've missed any. 

Enjoy your day; I have an online class today amongst other things so today will be a busy one! I'll be back tomorrow with another project. Until then, happy stampin'!


Stampin' Up! Supplies Used:

Table built using Product Table Builder by The Crafty Owl - Independent Stampin' Up! Demonstrator.

Tags: , , , , ,

Cards | Shop Online | Shop Stampin' Up! Online | Stamping

Delightfully Detailed Forever Wedding Card

by Joanne James18. May 2020 07:00


Monday already - where does the week go?! I meant to blog this card last Friday and the end of the week simply ran away from me. Anyway, today I'm sharing a card that I made for this week's Less Is More Challenge and the current challenge over at Addicted to CAS:


Yes, LIM wanted cards in cream and white and Addicted to CAS have the code word of flower. I have done all-white type cards before and these are always a challenge. I haven't managed to play along over at Less Is More in a while so thought this would be a good time to remedy that - take a look at what I created:


Here's the low-down on today's card:

A Laser Cut Cheat - I used some retired Delightfully Detailed Lasercut Specialty Paper for my showcase floral flourish on today's card. It's white on one side and vanilla on the other. For today's card, I used the white side against a vanilla card base and snipped a piece to the size I wanted from a larger 12" x 12" sheet. This paper is still available on the Clearance Rack (just click on the link below) if you would like to recreate my card.

It's All About Texture - When using only shades of cream and white, I find texture plays an important role in creating interest, whilst maintaining a clean and simple feel. So in addition to my laser-cut floral flourish, I embossed my card base with the Subtles Embossing Folder and added a simple diecut sentiment from white sparkle glimmer paper for added interest. 

Inside Reversal - I added another piece of laser-cut paper inside my card, this showing the reversed side so that the vanilla shows up against the white lining. I stamped my sentiment in Sahara Sand to maintain the neutral feel: 


Here is the visual summary of the key products used on today's project for you to pin for easy reference:


You can see all of my 'How To' summaries on my 'How To - Tips and Techniques' Pinterest board in case you've missed any. 

I do have another card to share today so I'll be back with that later! Until then, happy stampin'!


Stampin' Up! Supplies Used:

Table built using Product Table Builder by The Crafty Owl - Independent Stampin' Up! Demonstrator.

Silhouette Scenes Brother Birthday Card PP454

by Joanne James11. August 2019 09:00


Today it's Sunday and time for this week's new challenge over at The Paper Players! It's the turn of the lovely Jaydee to host this week and she has an interesting colour challenge for you to work with:


I had an idea of I wanted to do with this week's colour palette and the sketch from TGIF Challenges was just what I needed to turn my idea into a reality (although I made my base horizontal rather than vertical and used an extra-large card base) - take a look:


Today is a special day in the James household: the youngest of the James Juniors celebrates his 12th birthday. I'm not sure where those years have gone, but I did need as a result need a couple of special birthday cards to celebrate. Today's card is the card I made for Ben from Rebecca and features Blueberry Bushel as my featured additional colour. Here's the low-down on today's card:

When Is An Adventure Not An Adventure? - The two figures on today's card from the Silhouette Scenes stamp set so remind me of Ben and Rebecca. I can honestly say they truly are each others best friends and always have been. Even as they approach their teens, they still enjoy each others company more than anyone else's - and I love that about them! So it seemed only right to feature them together on my card. I could have stamped the sentiment 'as is', however I wanted to feature the 'adventure' diecut to tie in with the sketch - but I needed it in the plural. Luckily for me, the Sweet Silhouettes dies also incude the word 'inspire' - so I diecut this too, snipped away the letter 's' and paper-pieced it seamlessly to my 'adventure'. Clever, right? :-) I diecut both twice, once in Blueberry Bushel and again in Basic Black and offset this one behind; this allows the diecut to stand out from the background a little better.

A Starry Sky - Since I only had one colour to pair with my black and white, a sponged or brayered sky wasn't really an option. The starry stamp in the 'Bokeh Dots' set came to the rescue; the distinktive nature of this stamp meant that even with one colour, there would be enough variation to create interest. 

Sisterly Love - Lastly, not content with my tinkering of sentiments, I did the same on the inside. Do you recognise this sentiment from an existing stamp set? I'll give you a clue - it's in the 'A Wish For Everything' stamp set, but it doesn't look quite like this:


Did you spot it? I took the stamp that reads 'First my Mother...forever my friend' and masked out the 'Mo' of Mother and replaced it with the 'Br' from another stamp in this set that reads 'Hope this new year is filled with promises of many bright tomorrow's':


It took a little while to ink and mask with my Stampin' Write marker, but I'm really pleased with the result. Do you look for opportunities to create your own customised sentiments out of your stamp collection when you don't have the perfect fit? Do share any that you've created - I'd love to know what other combinations there are.

Here is the visual summary of the key products used on today's project for you to pin for easy reference:


You can see all of my Product and 'How To' summaries on my 'How To - Tips and Techniques' Pinterest board in case you've missed any. 

Before you reach for your ink and papers, check out what our amazing team has created to inspire you this week:

Here's a quick recap of our challenge rules:
 
1.  Create a new paper project
2.  Upload your creation to your blog with a link back to us and provide a direct link to the post featuring your challenge submission.
3.  Please link your card to no more than four challenges, TOTAL.
4.  Have FUN!

You can see all of my 'How To' summaries on my 'How To - Tips and Techniques' Pinterest board in case you've missed any. 

Enjoy your day; we will be celebrating with cake, an escape room outing and a best friend sleepover - wish me luck! I have my monthly technique class tomorrow but I'll be back tomorrow with another project. Until then, happy stampin'!


Stampin' Up! Supplies Used: 

Table built using Product Table Builder by The Crafty Owl - Independent Stampin' Up! Demonstrator.

Silhouette Scenes Anniversary Card

by Joanne James23. July 2019 21:00

Today I'm sharing a card for the current challenge over at Fusion where they have a great sketch and ombre photo inspiration:

This is a great sketch to showcase one of my favourite stamps in the new Silhouette Scenes stamp set - take a look:


I stamped my silhouette image in Rich Razzleberry using my Stamparatus so that I could get a good solid image and used my largest layered oval diecut to cut it out. I overlaid my sentiment and stamped it in Versamark and heat embossed it in gold. 

I used some of my retired Painted With Love specialty designer series paper as a backdrop for this image as the photo inspiration reminded me of it - I love those splashed of gold foil.

Here is the visual summary of the key products used on today's project for you to pin for easy reference:


You can see all of my 'How To' summaries on my 'How To - Tips and Techniques' Pinterest board in case you've missed any. 

Enjoy your day and I'll be back tomorrow with another project. Until then, happy stampin'!


Stampin' Up! Supplies Used:

Table built using Product Table Builder by The Crafty Owl - Independent Stampin' Up! Demonstrator.

Mini Catalogue

BROWSE THE CATALOGUE

The mini catalogue is now live! Read and download your copy here.

Shop Online

Access my online shop 24 x 7, 365 days of the year:

Current April hostess code:

VDKNV7BH

Shop Online

Join My Team

It's always a great time to join Stampin’ Up! New team members can get £130 worth of products for only £99 + free business supplies + free shipping + all the fun being a part of Stampin’ Up! Stampin' Up! has something for everyone: join my growing team and benefit from my support to enjoy Stampin' Up! however you choose.

If you're interested, call me for a chat to understand how I can help you realise your goals. Alternatively, if you have already decided to sign up and you just can't wait, please click here for the link to the online form where you can sign up and order your starter kit right away! 

Latest Kit!

Stampin Cut and Emboss

The Rock Legend Kit has all you need to make 8 cards with coordinating envelopes. Along with the new Panda Friends Kit, both are available from January 4th for just £14 each - get yours here!

2023-24 Annual Catalogue

BROWSE THE CATALOGUE

Click on the catalogue for a full list of current SU! supplies - if you would like to order any of the items featured, please drop me a line at [email protected] or give me a call on 07773 421446 - I'd be happy to help.

New Online Exclusives

There are new products available exclusively in the online store from 5 March - check them out here.

About Me

Hi I'm Joanne and live in Northampton and when I'm not looking after my husband and two beautiful children, am an avid crafter with a passion for all things Stampin' Up!

I must confess that I have never been a big rubber stamper - until I discovered Stampin' Up! that is. I love the fact that I can get such great results with co-ordinating stamps, inks, papers and punches - the possibilities are endless! Join me on my stamping journey as I share the things I love and be inspired to create amazing things yourself!

Follow Me

Monthly Newsletter

Box Builder

Click the button above to use Box Buster to create your custom box design using the Envelope Punch Board!

Kits Collection Now Available!

Stampin Cut and Emboss

The new Kits Collection from Stampin' Up! is now available!

Click here to see the current kits available and order yours online today.

I Design For


Stampin' Up Stuff

This is my personal blog and is not endorsed by Stampin’ Up! I hope you find it a plentiful source of ideas and personal inspiration but please don't copy my designs for contest submission or use for classes, publication or sale without express permission.