
It's time to get festive - the new Stampin' Up! mini catalogue is here! Paper copies of the catalogue are on their way to those customers who have shopped with me in the last 6 months (slightly later than usual due to my vacation). If you don't have one, never fear - the catalogue is available right now for you to download by clicking here or on the image below:

It will be available until it ends on 6 January 2025 by clicking on the image on the right hand sand of my blog page. So many great stamp sets, papers and more for your Halloween, Autumn and Christmas projects.

Also launching today is the new Digital Scrapbooking Catalogue. Further to the purchase of Close To My Heart, Stampin' Up! is expanding it's 12x12" scrapbooking line. There are new packs of 12x12" coloured cardstock, new two-tone cardstock and some fabulous scrapbooking kits too. The scrapbooking catalogue is only available in digital format and the full product line will be available online and through me as your Stampin' up! demonstrator whilst supplies last. New products will be added to this line on an ongoing basis. The catalogue is available right now for you to download by clicking here or on the image below:

Here are some useful links that show some of the new scrapbooking product in more detail - the first shows the new two-tone cardstock (this is an addition to our current solid core cardstock, not a replacement):
The second gives a closer look at the new scrapbooking kits in more detail:
I also want to bring to your attention two new kits that will be available later this month. The release date has not yet been confirmed, but as with other recent kits they are likely to be popular (the Haunted House Kit sold out in days!) so if either of these kits appeals to you, please let me know and send through your order now so that I can order for you as soon as they release to avoid any disappointment. The first of the kits is a Card Keeper Kit:
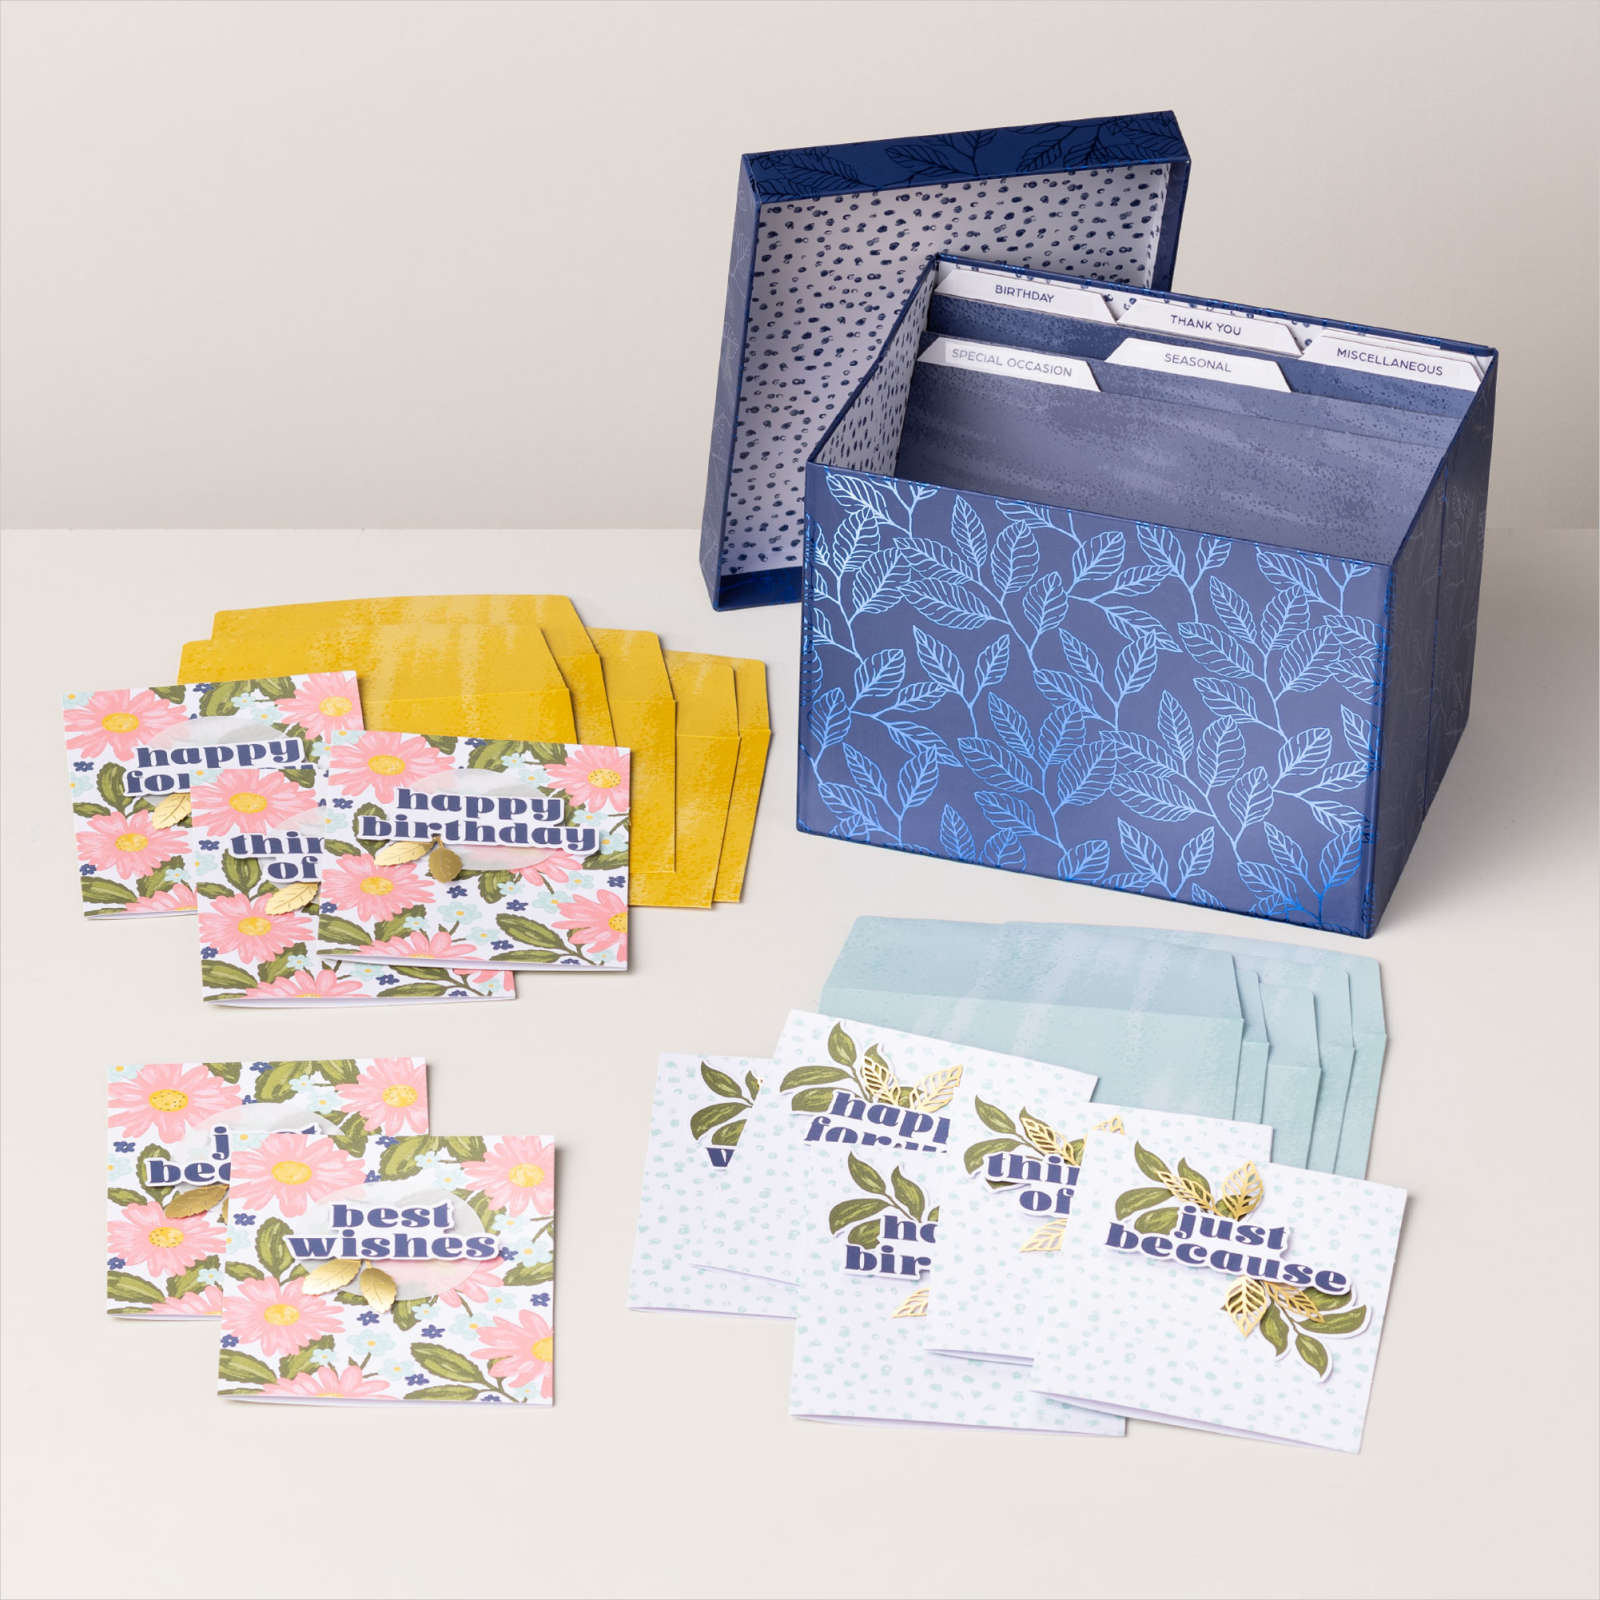
Step up your handmade card collection with our Card Keeper Kit! This kit comes with everything you need to make 10 beautiful all-occasion cards. With a variety of sentiments, you can create an assortment of cards fit for birthdays, saying thanks, and more. And don’t miss the coordinating card container! This cute storage option is the perfect solution for keeping these all-occasion cards organised and ready to go. The printed sentiments are available in Dutch, English, French, and German.
Kit includes:
* Pre-designed projects
* Step-by-step instructions
* Pre-cut pieces (No prep work! Get right to crafting)
* Makes 10 cards: 5 each of 2 designs, and 1 card container (includes lid)
* Folded card size: 5-1/2" x 4-1/4" (14 x 10.8 cm)
* Card container size: Approx. 8-1/4" x 6-1/4" x 6" (21 x 15.9 x 15.2 cm)
* 10 pre-printed envelopes
* Enough adhesive to complete projects
* A 9-1/8" x 6-3/4" x 1-7/8" (23.2 x 17.2 x 4.8 cm) printed designer box for storage or crafting on the go
The second kit coming later this month is the Christmas Ornaments Kit:
Get into the Christmas spirit with our Christmas Ornaments Kit! This craft kit comes with everything you need to make 9 beautiful Christmas ornaments, including pre-cut paper greenery, pinecones, bright berries, and festive details. Whether you gift it to a friend or keep it for yourself, this kit is the perfect solution for quick and easy Christmas crafting projects.
Kit includes:
* Pre-designed projects
* Step-by-step instructions
* Pre-cut pieces (No prep work! Get right to crafting)
* Makes 9 4" (10.2 cm) & 3" (7.6 cm) metal ring ornaments: 3 each of 3 designs
* Enough adhesive to complete projects (or use hot glue for easier assembly; hot glue not included.)
* Plastic pinecones and faux berries
* Pre-tied satin bows
* Metallic string
* A 9-7/8" x 6-1/2" x 2-3/4" (25.1 x 16.5 x 7 cm) printed designer box for storage or crafting on the go
Featured colours: Basic Beige, brown, Cherry Cobbler, gold, Mossy Meadow, Old Olive, Pretty Peacock
Both kits will retail at £24 each and make great gifts too. The ornaments would also be great to make with children -a half-term project perhaps?
I'll let you know when they are available to purchase, but if you're interested you should get in touch now so that your order is ready to go. Back soon with a new project and some samples from new mini catalogue makes.