Hydrangea Hill Mothers Day Card PP532

by Joanne James14. March 2021 09:00

Today it's Sunday and time for this week's new challenge over at The Paper Players! It's my turn to host this week and I have a colour challenge for you to work with:
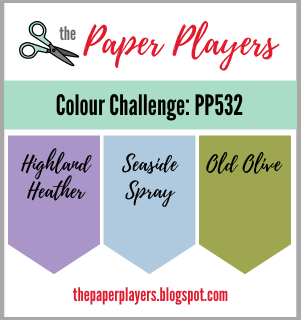
 

Today is Mothering Sunday or Mother's Day here in the UK and I chose my colour palette this week based on the products I wanted to use on the card that I was going to make for my Mum to celebrate this special day, specifically the Hydrangea Hill Mercury Glass Acetate which I was keen to incorporate into my card. I've lots of photos for you today and two versions of my card too, so get ready! Here's the first and original version of my card:
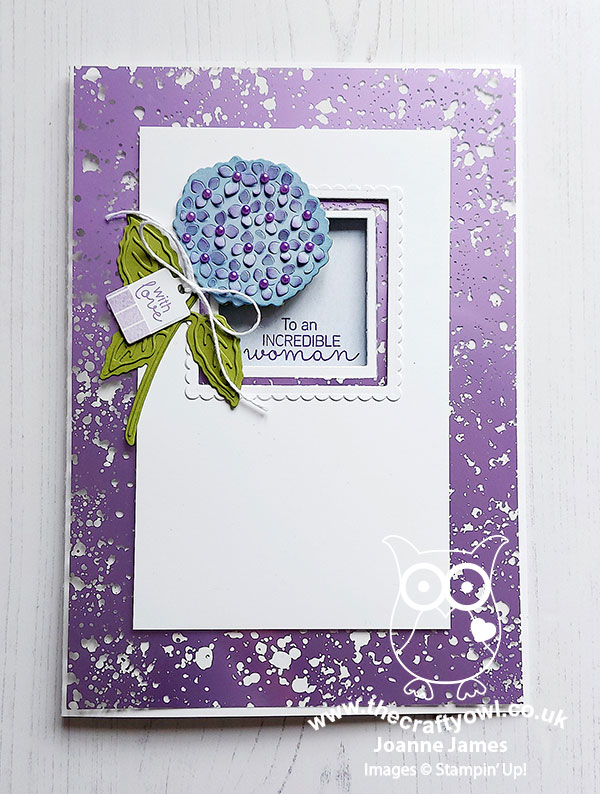
 

Here's the low-down on today's card:

Hydrangea Hill - My Mum is not particularly precious when it comes to flowers or gifts on Mother's Day, but she does appreciate a special card, so her card was the perfect opportunity to showcase the Hydrangea Hill Mercury Glass Acetate in Highland Heather, alongside other elements of the Hydrangea Hill Suite. I love the idea of these coloured foil acetates, but often find them trickier to use in practice. I think they make great frames or backgrounds though, so that's where I started with today's card. Measuring 21cm x 14.9cm (a sheet of folded A4) my card is larger than usual. I created an open window for my stamped sentiment (more on that below) and layered my frame with a scallop-edged border and a beautiful diecut hydrangea. Whilst the card above is my original card, and could actually be used for a special birthday too, I knew my Mum would want to see the words 'Happy Mother's Day' front and centre on her version - ever happy to oblige, I added an additional diecut sentiment in Highland Heather using the Word Wishes Dies to the front of my card:
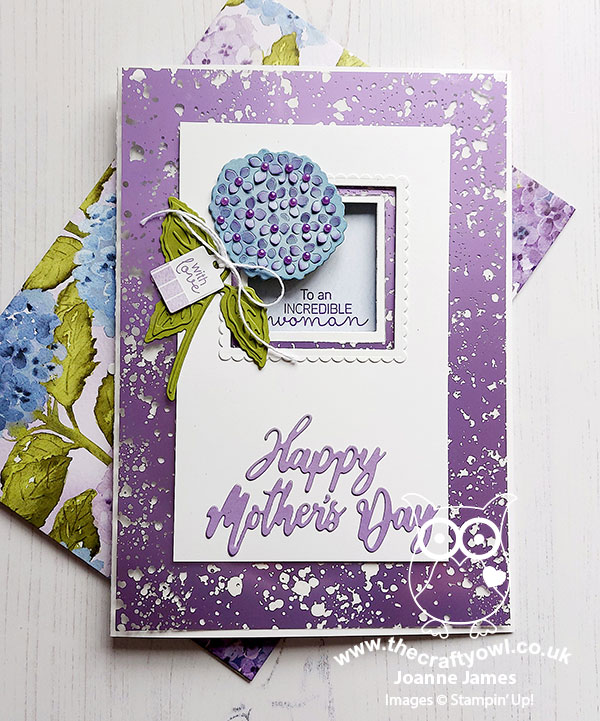
Layers, Layers - Despite its rather simple appearance, there are lots of layers to my card: the mercury glass acetate and framed sentiment window, along with the layered diecut elements to my flower, cut with the Hydrangea Dies. I also added a twine bow and tag to my floral stem using other elements in the set:
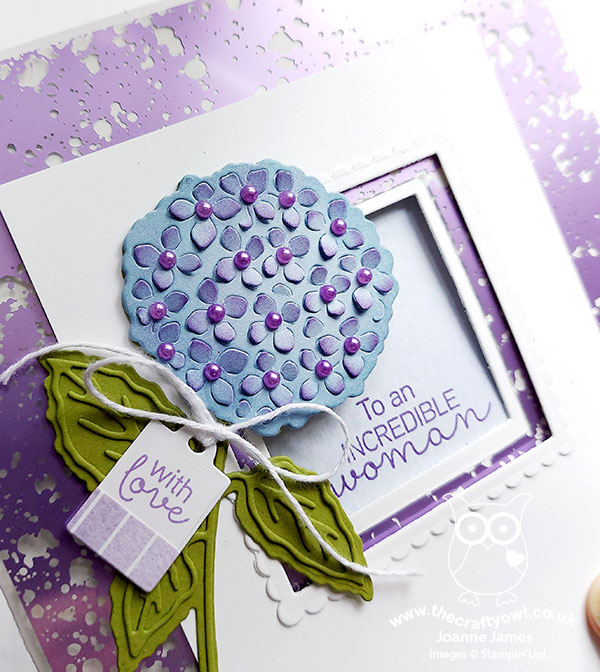
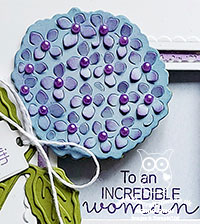
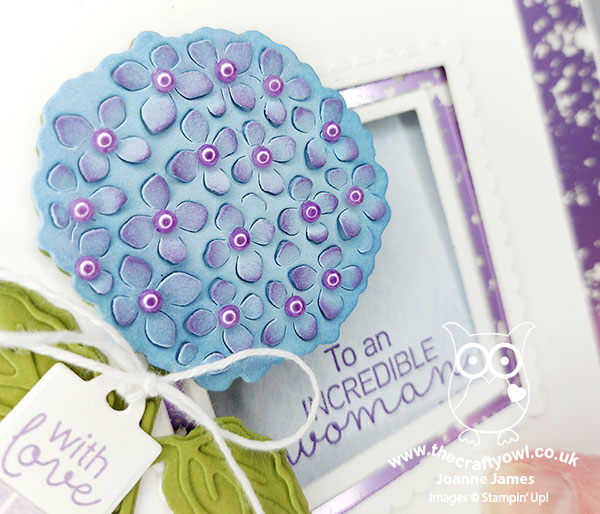
How beautiful is that hydrangea die? I cut it out of Balmy Blue and sponged the edges in the same colour to add depth, then lifted the petal elements and carefully sponged the tips of the petals with Highland Heather to create that two-tone look so often seen with this type of bloom. The suite has some beautiful coordinating pastel pearls, but they were too large for me to decorate the centre of my flowers. Instead, I used my dark Highland Heather Blends marker and coloured some small basic pearl jewels that were just the right size - aren't they so pretty?
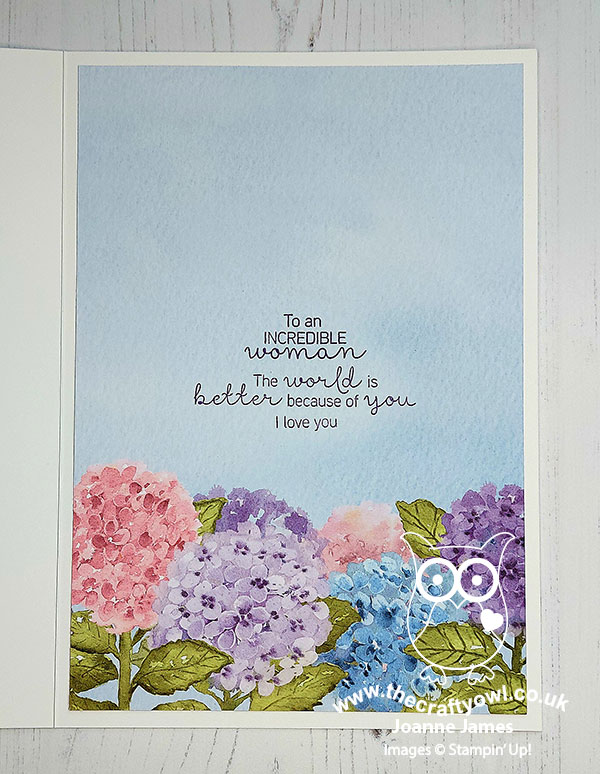
All About The Paper - I couldn't pass up the opportunity to use some of the beautiful Hydrangea Hill papers on my card today. The outside of my card only features the colours of my chosen palette, with a little of the Balmy Blue DSP visible through the window aperture, but the inside of my card also includes a little pink and some Gorgeous Grape on that hydrangea border paper; this paper is so perfect for additional hidden detail on the inside of the card, including my stamped message:
 

I also made a custom envelope from a whole sheet of 12" x 12" DSP, featuring the hydrangea flower heads and with a Highland Heather striped border on the flap:
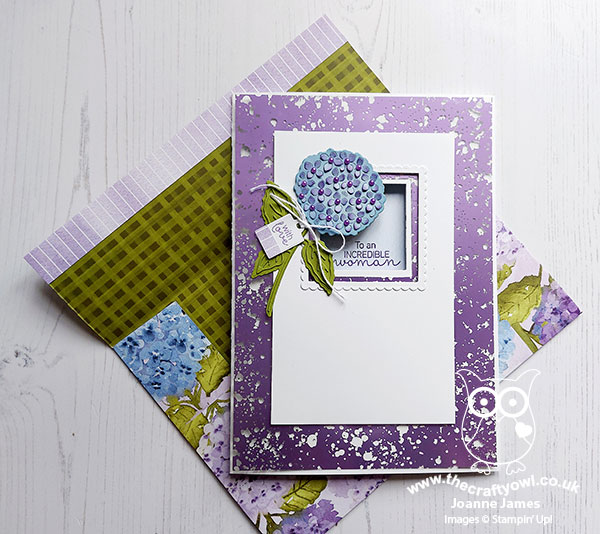
 

This paper is simply too good not to use! I added a simple stitched scalloped rectangle to the front of the envelope to address it:
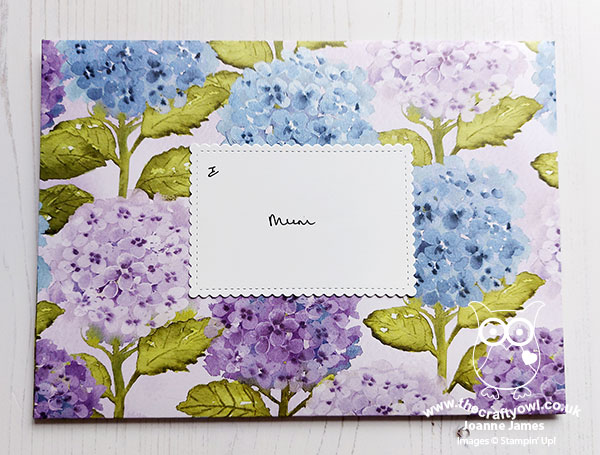
 

My card is going in the mail, so I packed it in a plain white envelope for mailing; I know my Mum will appreciate the extra pretty detail when she opens it though, so the double envelope is so worth it! I haven't seen my Mum in person for 15 months, due to ongoing restrictions in lockdowns and travel between Wales and England, however with the increasing rate of vaccination here in the UK, we shouldn't have too much longer to wait until we can all meet in safety once more.

Here is the visual summary of the key products used on today's project for you to pin for easy reference:
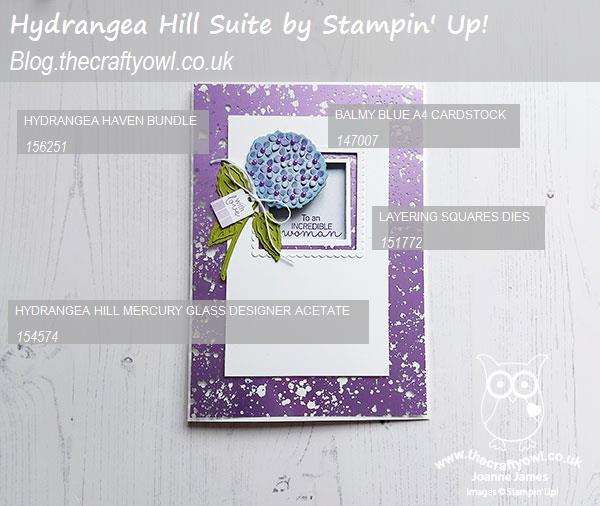
 

You can see all of my Product and 'How To' summaries on my 'How To - Tips and Techniques' Pinterest board in case you've missed any. 

Before you reach for your ink and papers, check out what our amazing team has created to inspire you this week:

Here's a quick recap of our challenge rules:
 
1.  Create a new paper project
2.  Upload your creation to your blog with a link back to us and provide a direct link to the post featuring your challenge submission.
3.  Please link your card to no more than four challenges, TOTAL.
4.  Have FUN!

You can see all of my 'How To' summaries on my 'How To - Tips and Techniques' Pinterest board in case you've missed any. 

I am looking forward to a special lunch cooked for me by my nearest and dearest, along with an afternoon bike ride if the rain holds. This is one of those days of the year that can mean many things to different people, so whether you are with your Mum or your offspring today, or whether you are missing your Mum because of Covid or other reasons, and for those who have perhaps lost a child or for whom motherhood is still to become a longed-for reality, I am thinking of you all and I hope you spend the day in a way that is meaningful to you.

I'll be back tomorrow with another project. Until then, happy stampin'!


Stampin' Up! Supplies Used: 

Table built using Product Table Builder by The Crafty Owl - Independent Stampin' Up! Demonstrator.

An Unusual Christmas Crowd for PP471

by Joanne James8. December 2019 09:00

Today it's Sunday and time for this week's new challenge over at The Paper Players! It's the turn of the fabulous LeAnne to host this week and for our last challenge of the year she has a colour challenge for you to work with:


I used Karren's sketch over at Freshly Made Sketches (turned through 90 degrees) for my layout this week and decided to use this fun stamp 'Christmas Crowd' again but in a somewhat less traditional way - take a look:


Here's the low-down on today's card:

I stamped the image in Versamark then heat embossed it in silver and coloured with my Stampin' Blends, adding either clear Wink of Stella or Dazzling Diamonds glitter to the white areas for added sparkle. I heat embossed my silver sentiment onto vellum so that it wouldn't overwhelm the main image too much and added both a strip of Mercury Glass acetate over the Seaside Spray border edge of my card, with a strip of Seaside Spray scalloped edge linen ribbon to border my piece of Whisper White. A sprinkle of snowflake sequins completes my card.

Normally I wouldn't dream of colouring this image in anything but traditionally festive colours such as red and green (I mean, a blue Santa?!) yet I thought it would be a good opportunity to show how even a large image can be successfully coloured with only a few colours and supplies and whilst a break from the norm, I quite like the finished result. What do you think? Do you ever dress Santa in anything other than red or is that an absolute no-go?

Here is the visual summary of the key products used on today's project for you to pin for easy reference:


You can see all of my Product and 'How To' summaries on my 'How To - Tips and Techniques' Pinterest board in case you've missed any. 

Before you reach for your ink and papers, check out what our amazing team has created to inspire you this week:

Here's a quick recap of our challenge rules:
 
1.  Create a new paper project
2.  Upload your creation to your blog with a link back to us and provide a direct link to the post featuring your challenge submission.
3.  Please link your card to no more than four challenges, TOTAL.
4.  Have FUN!

We understand that you are super busy in the run up to Christmas however we hope you can find a few minutes to craft along with us this week! Since it's our last challenge of 2019 before we take a break for Christmas, it's also time for us to say goodbye to our wonderful trio of 2019 guest designers: Su Mohr, Wanda Cullen and Windy Ellard. All three of them have proved worthy guest designers and share some fabulous creations with us this year. We will be sad to see them leave us and would like to thank each of them for their efforts. We look forward to welcoming in a new team of guest designers in the new year - more about that in a later PP post!

Enjoy your day; I have a busy day with a quick Christmas shopping trip, followed by the Christmas swim squad outing to the Snow Dome for some winter sledging and then an evening of tree decorating and Christmas card writing. I'll be back tomorrow with another project. Until then, happy stampin'!


Stampin' Up! Supplies Used: 

Table built using Product Table Builder by The Crafty Owl - Independent Stampin' Up! Demonstrator.

Current Promotions

Stampin Cut and Emboss

Save up to 30% off on all your favourite kits from 1 to 31 October! 

Click here to see the current kits available and order yours online today.

Join My Team

It's always a great time to join Stampin’ Up! During October you can get even more in your starter kit! New team members can get £160 worth of products for only £99 + free business supplies + free shipping + all the fun being a part of Stampin’ Up! Stampin' Up! has something for everyone: join my growing team and benefit from my support to enjoy Stampin' Up! however you choose.

If you're interested, call me for a chat to understand how I can help you realise your goals. Alternatively, if you have already decided to sign up and you just can't wait, please click here for the link to the online form where you can sign up and order your starter kit right away! 

Shop Online

Access my online shop 24 x 7, 365 days of the year:

Current October hostess code:

4XPEYCB9

Shop Online

Scrapbooking

Stampin' Up! has introduced a new range of 12x12" scrapbooking product and kit - the full range is now available to purchase online. To download a copy of the new digital Scrapbooking Catalogue click here.

Mini Catalogue

BROWSE THE CATALOGUE

'Tis The Season - the new Stampin' Up! Mini Catalogue is here! For more details and to download your copy click here

2024-25 Annual Catalogue

BROWSE THE CATALOGUE

Click on the image to download your copy of the 2024-25 annual catalogue. For a full list of current SU! supplies, go to my online store. If you would like any help or advice, please drop me a line at joanne@thecraftyowl.co.uk or give me a call on 07773 421446 - I'd be happy to help.

Latest Kits!

Stampin Cut and Emboss

The Christmas Ornaments Kit and Card Keeper Kit are the latest kits in the online store - get yours here!

New Online Exclusives

There are new products available exclusively in the online store from 5 November - check them out here.

About Me

Hi I'm Joanne and live in Northampton and when I'm not looking after my husband and two beautiful children, am an avid crafter with a passion for all things Stampin' Up!

I must confess that I have never been a big rubber stamper - until I discovered Stampin' Up! that is. I love the fact that I can get such great results with co-ordinating stamps, inks, papers and punches - the possibilities are endless! Join me on my stamping journey as I share the things I love and be inspired to create amazing things yourself!

Follow Me

Monthly Newsletter

Box Builder

Click the button above to use Box Buster to create your custom box design using the Envelope Punch Board!

Kits Collection Now Available!

Stampin Cut and Emboss

The new Kits Collection from Stampin' Up! is now available!

Click here to see the current kits available and order yours online today.

I Design For


Stampin' Up Stuff

This is my personal blog and is not endorsed by Stampin’ Up! I hope you find it a plentiful source of ideas and personal inspiration but please don't copy my designs for contest submission or use for classes, publication or sale without express permission.