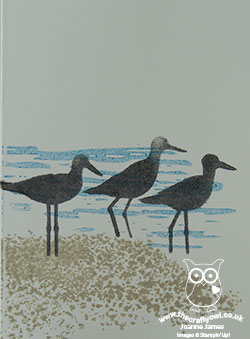
High Tide Birthday Card For Dad #GDP103

by Joanne James6. September 2017 20:25

Good evening lovely readers! So today was the day that saw my precious James Juniors return to school - I got lots of work done, but boy was the house quiet! So we are about to return to our school routines and something close to normal working will resume. I've been busy making lots of Christmas samples in readiness for my open house on Friday however September is also a big birthday month for us, with several family members and friends celebrating birthdays (my good self included!) So today I'm sharing a card that I made for my Dad's birthday that fits perfectly with the theme over at the Global Design Project this week:

I decided to make a slightly larger card than usual as I wanted to be able to personalise it - take a look:


I decided to use the High Tide stamp set for my card - such a great set for masculine cards and one that you can use to make quite colourful masculine cards (they don't always have to be brown :-) ) I stamped my beach scene off to the left as I wanted it to act as something of a background for my sentiment, then paired the Happy Birthday from the 'Butterfly Basics' stamp set with my stamped and diecut 'DAD' - you know how much I love these letters and co-ordinating framelits! I'm not generally one for frills, especially on a masculine card, so pretty ribbon was a no-no for me, however I did add some burlap beneath my diecut letters for a little extra touch - I think it fits nicely with the beachy theme too.

If you like the High Tide set and live local to me, you might like to know that this is the set we will be using in one of my October Monthly Technique Classes - get in touch if you would like more information.

Here is the visual summary of the key products used on today's project for you to pin for easy reference:


You can see all of my 'How To' summaries on my 'How To - Tips and Techniques' Pinterest board in case you've missed any. 

I hope you enjoyed today's quick post; I'll be back tomorrow with another project. Until then, happy stampin'!


Stampin' Up! Supplies Used:

Table built using Product Table Builder by The Crafty Owl - Independent Stampin' Up! Demonstrator.

High Tide Square Pop Out Swing Card For The Paper Players PP356

by Joanne James6. August 2017 10:00

It's Sunday and time for this week's new challenge over at The Paper Players! The wonderful Nance is the hostess this week and she has a fun theme for us to work with:


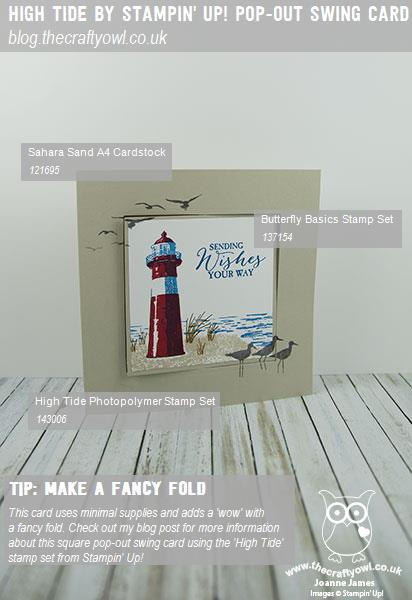
The great outdoors can be interpreted in so many ways: I needed some masculine birthday cards so decided to dig out my High Tide stamp set and take a trip to the coast for my card today - take a look:
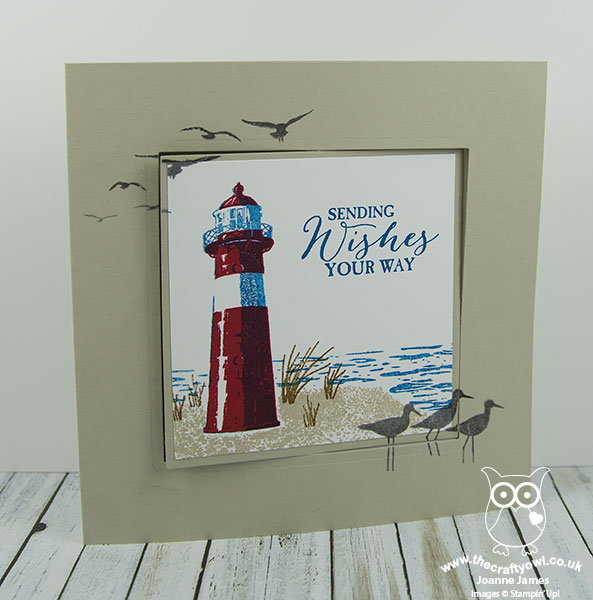
 

Today's card is a fancy fold and I've closed it above so that you can see what it looks like flat with the overstamped birds; the photo below shows it at an angle in it's popped-out position:
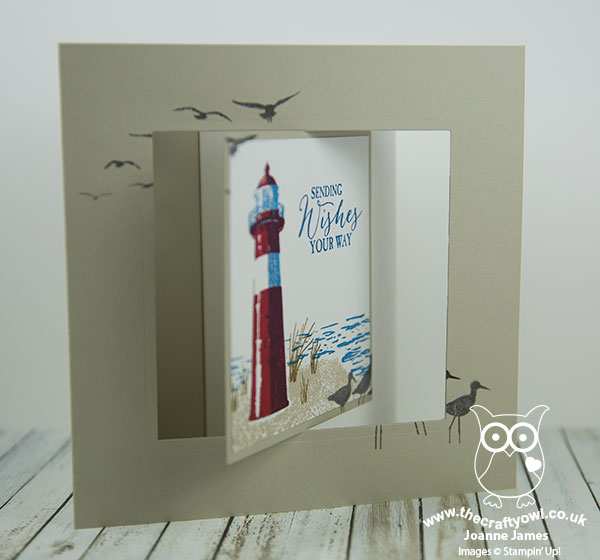
 

Here's the low-down on today's card:

High Tide - High Tide is a stamp set that can be used to build seascapes quickly and with ease, with the photopolymer stamps making it easy to see how the pieces align in order to create a scene and for the two-step stamping of the lighthouse. The set contains some lovely sentiments too, one of which I used on the inside of my card. I needed something more birthday-related for the front of my card, so went to one of my 'go to' sets, Butterfly Basics, for this one. I also over-stamped the gulls and wader birds onto the main image and the surrounding frame for extra interest.

A Fancy Fold - I wanted to use a fancy fold to add a little extra interest to today's card, so I decided to make a square pop-out swing card. I often find masculine cards difficult to add a 'special touch' to as embellishments tend to make them look quite feminine, but a fancy fold can sometimes be a good way of making a card special without adding to much in the way of frills or requiring a vast quantity of supplies. My card front measures 5 3/4" square (a slightly odd measurement to be fair, but I couldn't find any 12" x 12" in Sahara Sand so had to use a sheet of A4). I was cutting a few bases at a time so for speed used the largest square in my retired Squares Framelits set to cut the aperture in the front, but you could just as easily cut this out using you trimmer and leaving a 1" frame on all sides. Here is another shot so that you can see what the card looks like when properly opened:
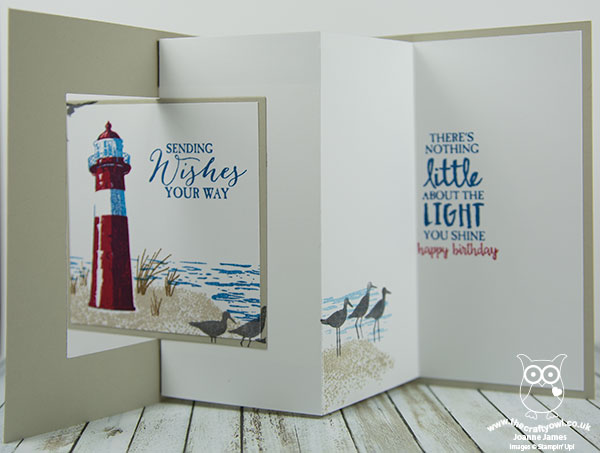
 

A Nautical Colour Combination - I used a combination of primary colours and neutrals for my calming beach scene, with the addition of the birds top and bottom stamped in Basic Grey. Here's my colour combination to save for future inspiration:


Here is the visual summary of the key products used on today's project for you to pin for easy reference:
 

You can see all of my Product and 'How To' summaries on my 'How To - Tips and Techniques' Pinterest board in case you've missed any. 

Whilst I had all my supplies out I also made a flat clean and simple card using this set which I will share some other time, but it was fun to make something a little different to share today and I love that this card is flat for posting too. 

Before you reach for your ink and papers, check out what our amazing team has created to inspire you this week:

The Paper Players Design Team
 
 
Here's a quick recap of our challenge rules:
 
1.  Create a new paper project
2.  Upload your creation to your blog with a link back to us and provide a direct link to the post featuring your challenge submission.
3.  Please link your card to no more than four challenges, TOTAL.
4.  Have FUN! 


I look forward to seeing what you create with this week's theme. Enjoy the rest of your weekend - we spent the day at a country show yesterday so are going to be taking it easy today. I'll be back tomorrow with another project; until then, happy stampin'!


Stampin' Up! Supplies Used: 

Table built using Product Table Builder by The Crafty Owl - Independent Stampin' Up! Demonstrator.

High Tide By The Shore

by Joanne James18. March 2017 21:00

Today I'm sharing a card for this week's sketch over at Freshly Made Sketches that also fits the current code word over at Addicted to CAS:

I decided to create a little scene for that central panel using the High Tide stamp set - take a look:


 Here's the low-down on today's card:

High Tide - High Tide is one of those sets that has oodles of possibilities: great for masculine cards and beach scenes, with some great sentiments too. The lighthouse is a two-step stamp, but because it is photopolymer this makes the stamps really easy to align the images. 

By The Shore - The colours for my card today were inspired by that wonderful striped panel from the By The Shore Designer Paper. It actually reminds me of old fashioned deckchairs on the beach, so reminiscent of my childhood when I spent many hours happily whiling away my summer days at the beach. 

The Obvious Mistake - Did you spot the obvious mistake on my card today? I didn't until I glued my card together; the funny thing is, I then stamped an alternative panel without the mistake and it wasn't as well balanced - so I went with my original design! If you've spotted it then do leave me a comment below and let me know if you think I should have changed it; if you're reading this and wondering what I'm talking about, then I guess it's not as obvious as one might think - and you should continue, none the wiser!

Here is the visual summary of the key products used on today's project for you to pin for easy reference:


You can see all of my 'How To' summaries on my 'How To - Tips and Techniques' Pinterest board in case you've missed any. 

I'll be back tomorrow with this week's card for the new challenge over at The Paper Players where I am the hostess this week. Until then, happy stampin'!


Stampin' Up! Supplies Used:

Table built using Product Table Builder by The Crafty Owl - Independent Stampin' Up! Demonstrator.

Picture Perfect High Tide Starfish Card

by Joanne James2. April 2016 19:00

I've had a busy day today hence my late post - more time crafting and less time blogging, I'm afraid! Anyway, I just thought I would write a quick post to share a 'something old, something new' card that I made today using this week's Mojo Monday sketch:

My 'something new' is the 'Picture Perfect' stamp set that I had out on my desk preparing for May's technique class when we will be using that set. For today's card I paired it with some retired DSP from my hoard:

The details for today's card are as follows:

Something Old - This retired High Tide Designer Series Paper has lots of nautical and sealife patterns and I remembered this one featuring a coral starfish. The panels on this sketch lend themselves to co-ordinating DSP and I knew this card would give me the perfect opportunity to use up some of my old papers.

Something New - The starfish is the only image in the 'Picture Perfect' stamp set I've yet to use, so that was naturally my image of choice today. I stamped my starfish first in Blushing Bride, then overlaid the second image in Calypso Coral to tie it in with the coral starfish on my chosen DSP. I then cropped my image using my Circles Framelits.

Something Blue - Whilst I didn't borrow anything to make today's card, in keeping with the saying there is most definitely 'something blue': I used Pacific Point cardstock to give me a bright and solid base for my background to bring together my sentiment and patterned papers and ensure my card remained cohesive. 

Here is the visual summary of the key products used on this project for you to pin for easy reference:


Back tomorrow with another project; until then, happy stampin'!


Stampin' Up! Supplies Used:

Table built using Product Table Builder by The Crafty Owl - Independent Stampin' Up! Demonstrator.

High Tide Fishin' Around for The Paper Players

by Joanne James26. May 2014 13:51

Good morning everyone on this typically wet Bank Holiday Monday! Today I'm sharing my card for this week's challenge over at The Paper Players, where the have the following sketch challenge to play along with:

When I saw this sketch, I initially wanted to create a Father's Day card with my 'Look up to Father' stamp, but having seen the great examples from Ginger and Diane, I decided to change tack totally and instead of trees, take the opportunity to use some of my High Tide DSP. Here's my card:

Whilst I loved the swirly pattern on this DSP, I've struggled to use it as it's so busy. I thought it would make a great base for this fishy-themed card though, with the cute fish bowl from Fishin' Around. The DSP gave me the colour scheme for my card, and I stamped the image twice in Pacific Point: once onto Soft Sky, which I fussy cut for my fish bowl, then a second time on Calypso Coral and fussy cut the fish and adhered them to my fish bowl. I added a little colour to the water, treasure chest and sand with my marker pens, then adhered some gold sequins to act as 'treasure' on the sand. To complete the look of my fishbowl, I cut a circle out of acetate window sheet using my Big Shot and Circles Framelits and adhered this to the bowl to look like glass. I mounted my completed fish bowl to a circle of Pacific Point and mounted this last, having first adhered the three strips of plain cardstock in Calypso Coral, Summer Starfruiit and Smoky Slate. I stamped my sentiment onto the Smoky Slate rectangle in Pacific Point ink and chose the 'You Make Me Happy' stamp from the 'Hello, Lovely' stamp set.

I bought the fishbowl set thinking it would make great children's cards, but as I put this card together it occurred to me it would make a fun anniversary/valentine card too when paired with this sentiment. Given the weather outside today, this card does seem somewhat appropriate! Back tomorrow with another card; until then, happy stampin'!

Stampin' Up! Supplies Used:

Table built using Product Table Builder by The Crafty Owl - Independent Stampin' Up! Demonstrator.


Tags: , , , , , , ,

Cards | Stamping

Blossom Party Originals Melon Mambo Flower

by Joanne James21. April 2014 08:00

Today I'm sharing a card I made with Jen Brum's great sketch over at Freshly Made Sketches - I combined it with the colours over at The Colour Throwdown, where one of my favourite colour combinations - Basic Grey and Melon Mambo - is trio'd with Garden Green:

A great combination - here is my card:

I used Basic Grey for my base and matted this with a piece of Melon Mambo to create a narrow border between my base and my central panel of High Tide DSP. I decided to use a flower as my focal point, but instead of stamping I decided to die cut two flowers with my Blossoms Originals die and layer them together, finishing with a small grey circle and pink candy dot centre. I tucked a Gumball Green leaf behind (cut with the Secret Garden framelits) and stamped my sentiment in Versamark onto Basic Grey and heat embossed with Melon Mambo embossing powder. The green leaf provides a lovely 'pop' of colour behind the flower and lifts the whole card, I think. Gumball Green has to be my favourite of the soon-to-be retiring In-Colours - I will so miss it when it's gone!

As I stepped back to admire my card, I realised that I had adhered my mat panels upside down in relation to Jen's sketch - and by this point, my Tombo was well and truly stuck fast - oops! I am hoping the team at FMS will forgive me this oversight ;-)

Back tomorrow with another card; until then, happy stampin'!


Stampin' Up! Supplies Used:

Table built using Product Table Builder by The Crafty Owl - Independent Stampin' Up! Demonstrator.

Mini Catalogue

BROWSE THE CATALOGUE

The mini catalogue is now live! Read and download your copy here.

Shop Online

Access my online shop 24 x 7, 365 days of the year:

Current March hostess code:

S9F2XJJW

Shop Online

Join My Team

It's always a great time to join Stampin’ Up! New team members can get £130 worth of products for only £99 + free business supplies + free shipping + all the fun being a part of Stampin’ Up! Stampin' Up! has something for everyone: join my growing team and benefit from my support to enjoy Stampin' Up! however you choose.

If you're interested, call me for a chat to understand how I can help you realise your goals. Alternatively, if you have already decided to sign up and you just can't wait, please click here for the link to the online form where you can sign up and order your starter kit right away! 

Latest Kit!

Stampin Cut and Emboss

The Rock Legend Kit has all you need to make 8 cards with coordinating envelopes. Along with the new Panda Friends Kit, both are available from January 4th for just £14 each - get yours here!

2023-24 Annual Catalogue

BROWSE THE CATALOGUE

Click on the catalogue for a full list of current SU! supplies - if you would like to order any of the items featured, please drop me a line at [email protected] or give me a call on 07773 421446 - I'd be happy to help.

New Online Exclusives

There will be new products available exclusively in the online store from 5 March - check them out here.

About Me

Hi I'm Joanne and live in Northampton and when I'm not looking after my husband and two beautiful children, am an avid crafter with a passion for all things Stampin' Up!

I must confess that I have never been a big rubber stamper - until I discovered Stampin' Up! that is. I love the fact that I can get such great results with co-ordinating stamps, inks, papers and punches - the possibilities are endless! Join me on my stamping journey as I share the things I love and be inspired to create amazing things yourself!

Follow Me

Monthly Newsletter

Box Builder

Click the button above to use Box Buster to create your custom box design using the Envelope Punch Board!

Kits Collection Now Available!

Stampin Cut and Emboss

The new Kits Collection from Stampin' Up! is now available!

Click here to see the current kits available and order yours online today.

I Design For


Stampin' Up Stuff

This is my personal blog and is not endorsed by Stampin’ Up! I hope you find it a plentiful source of ideas and personal inspiration but please don't copy my designs for contest submission or use for classes, publication or sale without express permission.