Happy As Can Be Seaside Scrapbook Layout PP552

by Joanne James1. August 2021 08:00

Today it's Sunday and time for this week's new challenge over at The Paper Players! It's my turn to host this week and I have a timely theme challenge for you to work with:
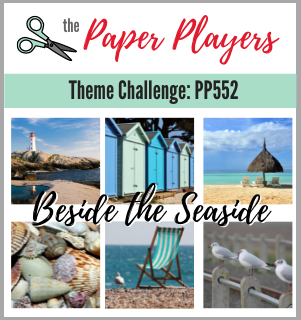
 

Whilst lots of us are already starting to work on Christmas projects, it is still very much summer time and I chose this week's theme with that in mind. As the rhyme goes, 'Oh I do like to be beside the seaside, oh I do like to be beside the sea' - sand between your toes, fish and chips, buckets and spades and more - the seaside is one of my favourite places to be. I decided to break from my usual card and make a scrapbook page to share with you for a change this week.

I live in Northampton which is very close to the very centre of England, so is about as far from the coast as you can get. I recently took the James Juniors to visit their grandparents, my parents, in Wales for the first time since the start of the Covid pandemic and the first place they always ask to visit is the beach. This left me with lots of great photos ready to scrapbook. I am mostly a Memories and More pocket scrapbooker, but occasionally I do make full 12" x 12" layouts and with the gorgeous 'Friends are Like Seashells' bundle in the annual catalogue I couldn't resist. Take a look at today's layout:
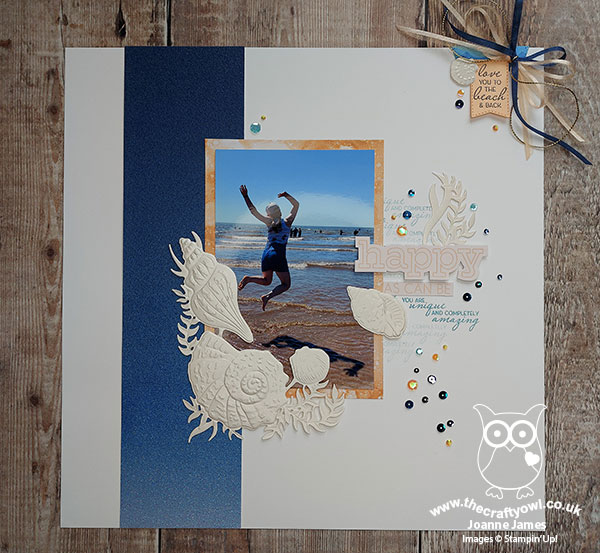
 

Here's the low-down on today's project:

I captured a great photo of Rebecca jumping the waves as I followed her down to the shoreline, so thought it would be perfect for my layout. Here's a close-up of my photo and the surrounding decoration in more detail: 
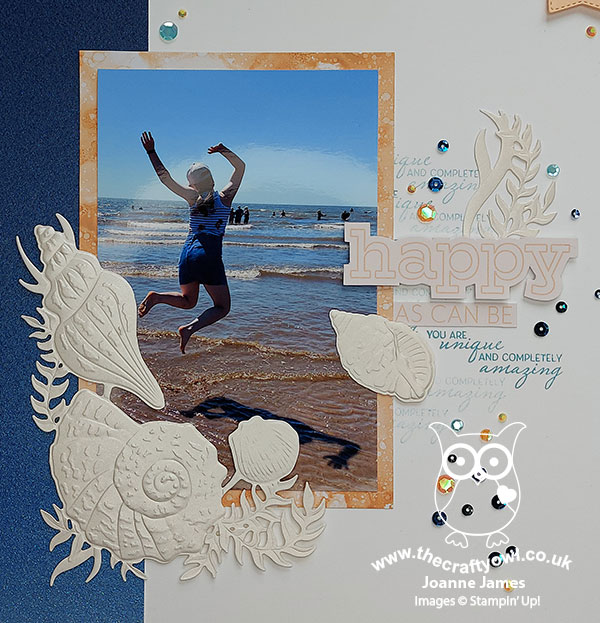
 

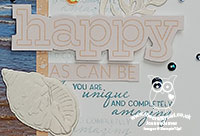
 I backed my photo with a piece of 'Expressions In Ink' designer paper and added a strip of the gorgeous Night of Navy ombre glimmer paper down the left side, to pick up on the bright blues of the sky in the photo. I embossed and diecut the seaside shells from pearlescent paper, then used the corner to decorate my photo whilst snipping the the other shells and seaweed apart to add as decoration elsewhere. I did a little background stamping beneath my layering and my main sentiment is fussy cut from one of the 'What A Year' Memories and More cards; you can see that more closely below:
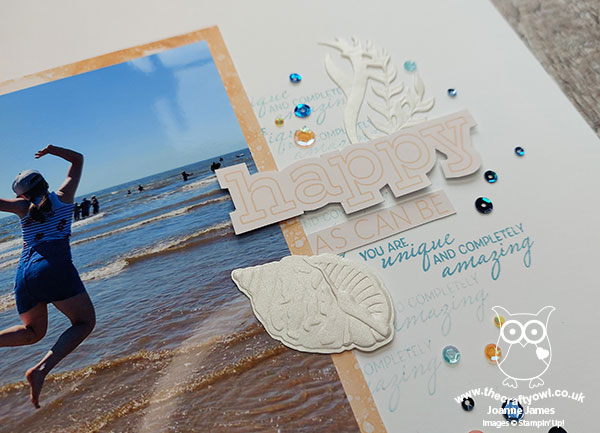
 

I love that sentiment and it totally sums up the mood of the day and Rebecca in particular in that moment. Both of the James Juniors were so thrilled to be at the beach that day, jumping the waves, fishing in rock pools and generally enjoying the sea air.

In addition to a sprinkling of sequins and gems, I also added a sentiment tag to the corner of my page, decorated with a fussy ribbon bow:
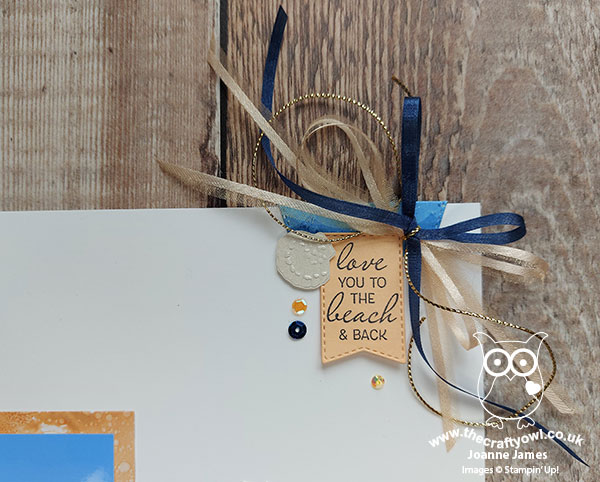
 

My layout is actually quite simple, and very much like my card making style - although if you could see the pile of patterned papers that covered my desk as I made this page you would think that it must have been anything but and I did procrastinate for quite some time before deciding on my final papers and design!

So what do you think? Did you enjoy my scrapbook layout today for a change? Should I share more of this kind of thing on my blog? Feel free to leave me a comment below - I'd love to hear your thoughts.

Before you reach for your ink and papers, check out what our amazing team has created to inspire you this week:

Here's a quick recap of our challenge rules:
 
1.  Create a new paper project
2.  Upload your creation to your blog with a link back to us and provide a direct link to the post featuring your challenge submission.
3.  Please link your card to no more than four challenges, TOTAL.
4.  Have FUN!

I can't wait to see how my theme inspires you this week!

Since I did something other than a card today, I am going to link up over at Just Us Girls where that happens to be their theme this week.

Enjoy your day; I have a family day at home today, with nothing special planned. I'll be back tomorrow with another project. Until then, happy stampin'!


Stampin' Up! Supplies Used: 

Table built using Product Table Builder by The Crafty Owl - Independent Stampin' Up! Demonstrator.
 
Edited to add - I was Chic of the Week with my scrapbook page over at Just Us Girls for the 'Anything But A Card' Challenge:
 

Friends Are Like Seashells Glossy Shell Trio Card

by Joanne James21. June 2021 19:25

I've had a busy day today, having spent the morning with a group of lovely ladies hosting my latest online class. That was all about pansies; the card I'm sharing here today though is all about seashells for the current Fusion challenge:

I used both the sketch and the jar of seashells as my inspiration and this is what I came up with:


Here's the low-down on today's card:

This card really did evolve as I made it. The starting point for my card was the sand dollar-patterned DSP I used on my card base and I decided to use the same colours for my trio of shells. Rather than stamp them though, I fussy cut them from another of the sheets of Sand and Sea DSP as I wanted to use these shell designs but not ones that were as large as the stamped versions. I fussy cut my shells, embossed them with the Seashells 3D embossing folder, added some frosted white shimmer paint then added clear Crystal Effects to give them a glossy shine:


Having heat-embossed my sentiment in white, I added a shadow by stamping again in Early Espresso to make the words stand out a little better against the sandy background. A few opal rounds complete my card.

I really love the effect of those glossy shells - with the frosted shimmer inside and the embossed detail beneath the glossy exterior, they really are quite eye-catching in real life.

Here is the visual summary of the key products used on today's project for you to pin for easy reference:


You can see all of my 'How To' summaries on my 'How To - Tips and Techniques' Pinterest board in case you've missed any. 

Enjoy your evening and I'll be back tomorrow with another project. Until then, happy stampin'!


Stampin' Up! Supplies Used: 

Table built using Product Table Builder by The Crafty Owl - Independent Stampin' Up! Demonstrator.

Friends Are Like Seashells Monochromatic Pink CAS Card CCS423

by Joanne James8. June 2021 12:00

It's Tuesday and time for a new challenge over at CAS Colours & Sketches. Apologies that I'm a little later going live with my post this week - I'm blaming the sunshine! This week's challenge is a sketch challenge and Shannon has asked that we use a trio of shapes to anchor a horizontal strip. Feel free to flip or rotate the sketch when making your card.


For my card today I decided to go pink and create something that suits the 'Beach' challenge over at Addicted to CAS too - take a look:


Here's the low-down on today's card:

Sketch Liberties - I did take a couple of liberties with Shannon's sketch this week: I decided to use 2 shells and a stitched circle for my trio of shapes and instead of using 3 shells and adding my sentiment to the horizontal panel, I stamped it onto my stitched circle. This was primarily because I wanted to use this specific sentiment and it fitted better on a circle! The basic elements of the sketch are all visible though and it's easy to see how it inspired my card. I used another of the sentiments from the 'Friends Are Like Seashells' stamp set on the inside of my card - this set has such lovely sayings:


A Question of CAS - I used a piece of Sand and Sea designer series paper for the horizontal panel of my card. There is a school of thought that says DSP shouldn't be used on a CAS card, however this patterned paper lover is of the view that it's ok if it's used sparingly, and there is still plenty of 'white space' on the remainder of the card and other general rules of clean and simple card making, such as minimal layers and embellishments are also adhered to. What do you think? Is there a place for DSP on a CAS card? I'd love to hear your thoughts.

Monochromatic Pink - One of my favourite techniques to maintain a CAS feel to a card is to use a monochromatic colour scheme. Today's card used the Flirty Flamingo pink that features in my patterned paper. I stamped my sentiment in it and heat embossed my sand dollar and starfish in white onto Flirty Flamingo cardstock, adding varying degrees of sponged white kraft ink to mute it and create some subtle colour variation. A trio of tiny (retired) white and pink faceted gems complete my card:


I am also linking up today's card over at Less Is More where it's lucky dip week and they are asking us to feature our favourite CAS card technique - I think using a monochromatic colour scheme is a useful technique when creating a clean and simple card (I'm just hoping they think there's enough white space to justify that DSP - the LIM team have high CAS standards!)

Here is the visual summary of the key products used on today's project for you to pin for easy reference:


You can see all of my 'How To' summaries on my 'How To - Tips and Techniques' Pinterest board in case you've missed any. 

Right - off to prepare the dinner prior to the school run, piano lessons and an extra hockey match on the schedule today - thank heavens for in-car air conditioning! Enjoy your day and I'll be back tomorrow with another project. Until then, happy stampin'!


Stampin' Up! Supplies Used:

Table built using Product Table Builder by The Crafty Owl - Independent Stampin' Up! Demonstrator.

Friends Are Like Seashells PP530

by Joanne James28. February 2021 09:00

Today it's Sunday and time for this week's new challenge over at The Paper Players! It's the turn of the fabulous Ann to host this week and she has my favourite, a sketch challenge for you to work with:


So many options for today's sketch! The weather is slowly warming up as Spring approaches and whilst we may not be experiencing beach vacations for some time to come still, I decided to break out my Sand and Sea Suite and recreate that feeling with a card or two instead. So this is the first card I came up with:


Here's the low-down on today's card:

Sand and Sea - So much to love about the Sand & Sea Suite! One of the most unique aspects is the way that the dies contain a whole joined sheet of shells and sea fronds that can be both stamped and embossed then either used as a single piece or the individual pieces can be cut away as I've done on my card. I stamped, embossed and diecut the panel in both pink, yellow and pearlescent cardstock and mixed the various elements on my card, with that large, pink circular shell as the centrepiece. I gave it a pearlescent finish by sponging with frost white shimmer paint before adding to my card - just check out the amazing texture and detail:


I added some pearls and braided trim to finish. This stamp really does have the most lovely sentiments too; one the front of my card I used the one that forms the basis of the name for this stamp set - here's a peek at the inside of my card with the second part of my greeting:


This card is headed to one of my oldest and most dear friends for her birthday - I know she will love it! I'm also linking it up with the team over at Time Out Challenges, who are also celebrating their 7th birthday this week and challenging us to make birthday cards too - way to go Time Out!

A Pearlescent Alternative - I had another piece of the Sand & Sea DSP left after making the above card, so I decided to flip it and make another card using the reverse pattern, with the same layout but changing out some of the elements and colours and going for a slightly softer look:


I actually had something of a happy accident with this pearlescent shell. I had intended to simply emboss it, but having embossed the pink shell on the card above first, I hadn't realised that some of the pink ink had rubbed off onto the embossing folder so when I removed my pearly shell from the embossing folder, it had traces of pink ink on the indents. I wiped some of it away but then decided to go with it and instead rubbed the raised areas with Blushing Bride ink to accentuate them. I decided I actually quite liked the detail so no harm done - what do you think?


So which of these cards do you prefer? This one: 


Or this one:


Do leave me a comment below - I'd love to hear your thoughts. I am using this suite for my next monthly online stamp class and am looking forward to creating more fabulous cards with it - get in touch if you'd like more information.

Here is the visual summary of the key products used on today's main project for you to pin for easy reference:


You can see all of my Product and 'How To' summaries on my 'How To - Tips and Techniques' Pinterest board in case you've missed any. 

Before you reach for your ink and papers, check out what our amazing team has created to inspire you this week:

Here's a quick recap of our challenge rules:
 
1.  Create a new paper project
2.  Upload your creation to your blog with a link back to us and provide a direct link to the post featuring your challenge submission.
3.  Please link your card to no more than four challenges, TOTAL.
4.  Have FUN!

You can see all of my 'How To' summaries on my 'How To - Tips and Techniques' Pinterest board in case you've missed any. 

Enjoy your day; the weather has been unseasonally mild here this week, so I will be spending some time in the garden today and probably heading out on my bike for a long cycle ride with the other members of the James household to take advantage of the warmer temparatures in case winter decides to make a return! I will also be placing my last Sale-A-Bration order as the current Sale-A-Bration promotion ends today - last call for orders if you would like to earn one of the amazing free gifts that are available as part of the promotion. I'll be back tomorrow with another project. Until then, happy stampin'!


Stampin' Up! Supplies Used: 

Table built using Product Table Builder by The Crafty Owl - Independent Stampin' Up! Demonstrator.

Scrapbooking

Stampin' Up! has introduced a new range of 12x12" scrapbooking product and kit - the full range is now available to purchase online. To download a copy of the new digital Scrapbooking Catalogue click here.

Mini Catalogue

BROWSE THE CATALOGUE

'Tis The Season - the new Stampin' Up! Mini Catalogue is here! For more details and to download your copy click here

Shop Online

Access my online shop 24 x 7, 365 days of the year:

Current September hostess code:

JQEHTZGK

Shop Online

2024-25 Annual Catalogue

BROWSE THE CATALOGUE

Click on the image to download your copy of the 2024-25 annual catalogue. For a full list of current SU! supplies, go to my online store. If you would like any help or advice, please drop me a line at joanne@thecraftyowl.co.uk or give me a call on 07773 421446 - I'd be happy to help.

Join My Team

It's always a great time to join Stampin’ Up! New team members can get £130 worth of products for only £99 + free business supplies + free shipping + all the fun being a part of Stampin’ Up! Stampin' Up! has something for everyone: join my growing team and benefit from my support to enjoy Stampin' Up! however you choose.

If you're interested, call me for a chat to understand how I can help you realise your goals. Alternatively, if you have already decided to sign up and you just can't wait, please click here for the link to the online form where you can sign up and order your starter kit right away! 

Latest Kits!

Stampin Cut and Emboss

The Christmas Ornaments Kit and Card Keeper Kit are the latest kits that will be arriving in the online store later this month - get yours here!

New Online Exclusives

There are new products available exclusively in the online store from 3 July - check them out here.

About Me

Hi I'm Joanne and live in Northampton and when I'm not looking after my husband and two beautiful children, am an avid crafter with a passion for all things Stampin' Up!

I must confess that I have never been a big rubber stamper - until I discovered Stampin' Up! that is. I love the fact that I can get such great results with co-ordinating stamps, inks, papers and punches - the possibilities are endless! Join me on my stamping journey as I share the things I love and be inspired to create amazing things yourself!

Follow Me

Monthly Newsletter

Box Builder

Click the button above to use Box Buster to create your custom box design using the Envelope Punch Board!

Kits Collection Now Available!

Stampin Cut and Emboss

The new Kits Collection from Stampin' Up! is now available!

Click here to see the current kits available and order yours online today.

I Design For


Stampin' Up Stuff

This is my personal blog and is not endorsed by Stampin’ Up! I hope you find it a plentiful source of ideas and personal inspiration but please don't copy my designs for contest submission or use for classes, publication or sale without express permission.