Jar of Flowers Sunflower Shaker Card PP549

by Joanne James11. July 2021 09:00

Today it's Sunday and time for this week's new challenge over at The Paper Players! Ann is hosting this week's challenge with a trio of colours chosen by the lovely Jaydee:


Now before you think I'm completely mad sharing a Mother's Day card in July, there is a reason I'm sharing this card today! I made this card back in February and when I went to make my card for today, Rebecca reminded me that we had made this card that featured Jaydee's colours and I hadn't blogged it, so although the papers are now retired, she wanted me to share it - so here it is:


Here's the low-down on today's card:

This super-simple shaker card was a Mother's Day project that I made with a group of local Brownie Guides that I work with. For ease, we used the (retired) in-colour Memories & More card bases, onto which we heat embossed a Mother's Day sentiment (from the retired 'Strong and Beautiful' stamp set). We used the jar punch to punch a jar shape out of a piece of (retired) Flowers of the Season designer series paper that we had cut out using a scalloped stitched die, then inserted a mason jar shaker dome into the aperture and filled it with sunflower seeds, before attaching it to the card base. We stamped and coloured some co-ordinating sunflowers from the 'Jar of Flowers' stamp set and added these with a dimensional to the top of our jar, before finishing our shaker jar with a Bumblebee ribbon bow. 


The intention was that once Mother's Day had passed, the Brownies would then be able to remove their sunflower seeds from an opening in the back of the card, plant them and enjoy them in their gardens all summer long. The Mother's Day card that keeps on giving, you might say! I hope that their Mums are still enjoying their cards, several months on.

These mason jar domes are a great way to make an easy shaker card - have you used them in your crafting? What did you put in yours? Share with me in the comments below - I would love to hear your ideas!

Here is the visual summary of the key products used on today's project for you to pin for easy reference:


You can see all of my Product and 'How To' summaries on my 'How To - Tips and Techniques' Pinterest board in case you've missed any. 

   I'm also linking up today's card with the girls over at The Flower Challenge where they are asking us to add spots or stripes to our card - my DSP has spots and my floral panel has a dotty border :-). 

Before you reach for your ink and papers, check out what our amazing team has created to inspire you this week:

Here's a quick recap of our challenge rules:
 
1.  Create a new paper project
2.  Upload your creation to your blog with a link back to us and provide a direct link to the post featuring your challenge submission.
3.  Please link your card to no more than four challenges, TOTAL.
4.  Have FUN!

You can see all of my 'How To' summaries on my 'How To - Tips and Techniques' Pinterest board in case you've missed any. 

Enjoy your day; I spent much of my day yesterday in the garden jet washing patios and paths, before catching the end of a thrilling Wimbledon ladies final. Today I will be getting my jobs out of the way in the morning before settling in for an afternoon and evening of sport: the men's finals at Wimbledon before I have to give way to the men of the house for football and the finals of the European Championship, England v Italy - wish me luck! I'll be back tomorrow with another project. Until then, happy stampin'!


Stampin' Up! Supplies Used: 

Table built using Product Table Builder by The Crafty Owl - Independent Stampin' Up! Demonstrator.

Flowers For Every Season - Spring Butterfly Panel Card

by Joanne James7. March 2021 09:00

Today it's Sunday and time for this week's new challenge over at The Paper Players! It's the turn of the amazing Claire to host this week and she has a seasonal theme challenge for you to work with:
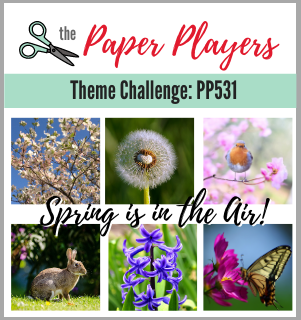
    

Whilst it has been a little chillier again here in the UK this week, there are still so many wonderful signs that spring is in the air. The daffodils are starting to open, the first lambs have been born on a neighbouring farm so today's card is full of spring colour - take a look:
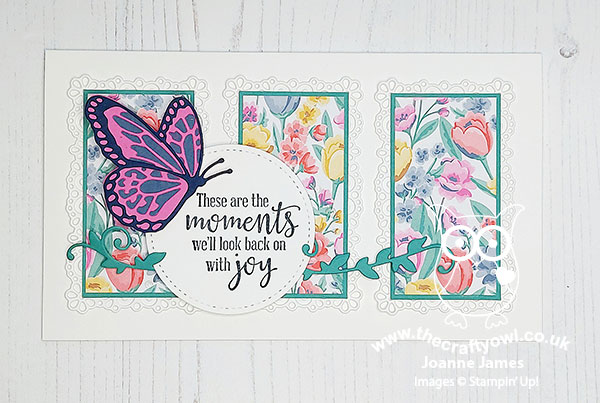
 

Here's the low-down on today's card:

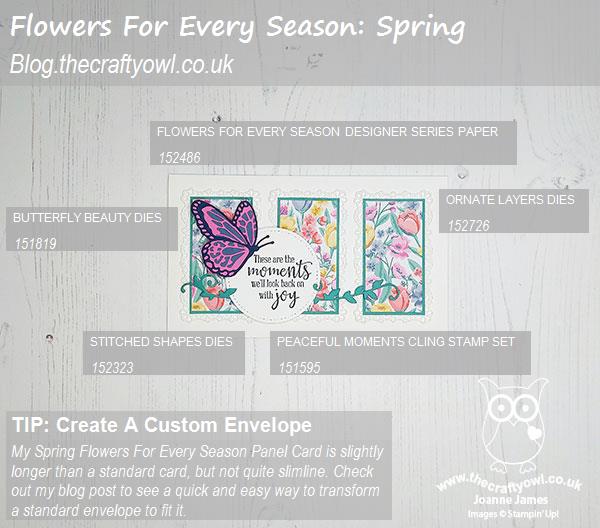
Flowers For Every Season - I decided that for today's card I wanted to see an injection of spring colour, so reached for the Flowers For Every Season designer paper pack. This pack contains some very bold, bright florals and the one I chose, with its tulips amongst other flowers, is just perfect for spring. I used the three panel layout over at Paper Craft Crew so that the pattern didn't become too overwhelming, and backed each one with a thin border of Just Jade and a fancy frame diecut with the Ornate Layers Dies in Whisper White.

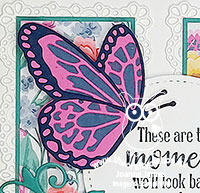
Butterfly Beauty - I chose a sentiment that I thought reflects the optimism that comes with the spring season, and embellished it with a layered butterfly cut using the Butterfly Beauty dies (I snipped this one away from the larger die):
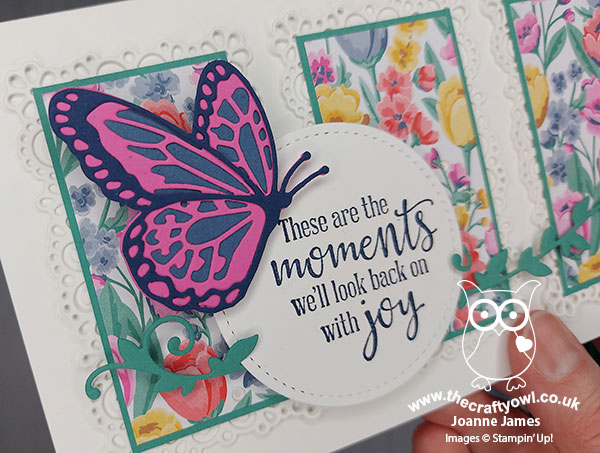
 

I also used another of the dies in the same set to create my horizontal pieces of greenery. 

Elongated Envelope - In order to comfortably accommodate my three panels, I made my card slightly longer than a standard card front (it measures 18cm instead of 14.9cm). The photo below shows the difference in sizes:
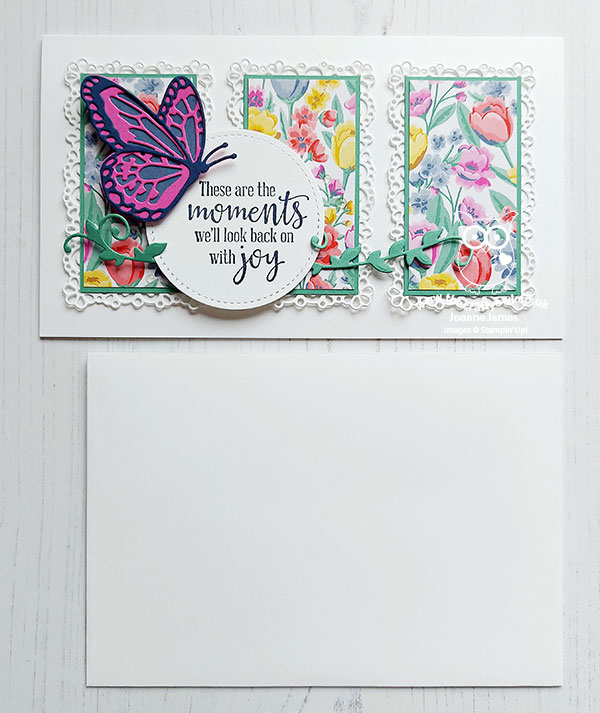
 

This meant I needed to create a custom envelope. Rather than start from scratch though, I thought I'd share with you a quick trick that you can use to convert a standard envelope to fit a larger card. All you need to do is glue the envelope closed, then slice off the end on the short side and add some some designer paper to create a new closure:
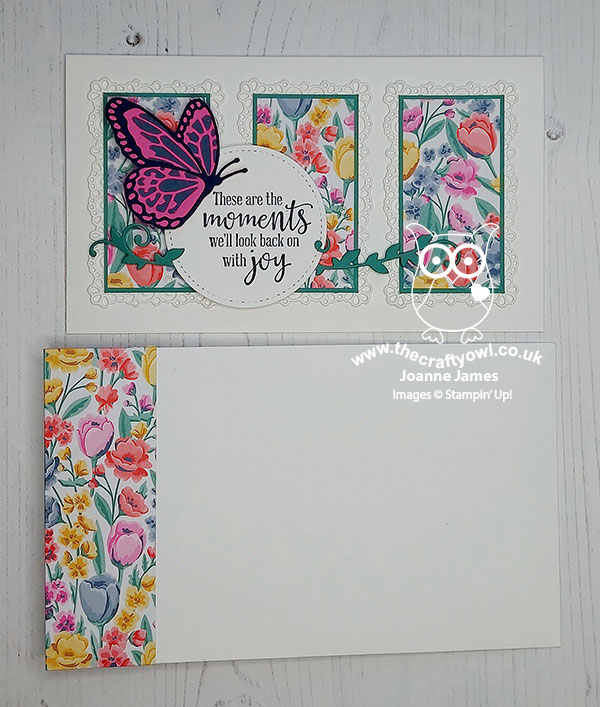
It's really straightforward: Take two strips of coordinating DSP, one measuring 4cm x 30.5cm (1 1/2" x 6") and one 4cm x 10.5cm and attach the longer one to the cut edge of the front of the envelope, with an even overhang top and bottom. Measure 18cm from the end of the envelope and score a line along your DSP, cut away the corners to create your flap then flip your envelope over to the reverse. Fold over the overhangs and glue those in place then align the shorter piece across the back of the envelope and glue to the base. Add tear and tape to the envelope flap and you're done. Here's a photo of the reverse of the envelope extension which hopefully makes some sense of my instructions above:
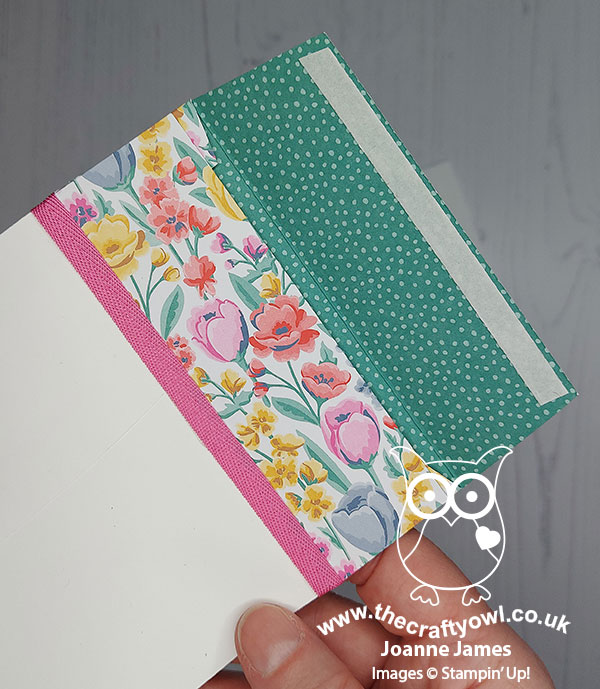
 

 I also added some Magenta Madness ribbon to cover my seam as my card will be hand delvered rather than posted - you can always leave this off if you need to be able to post your card.
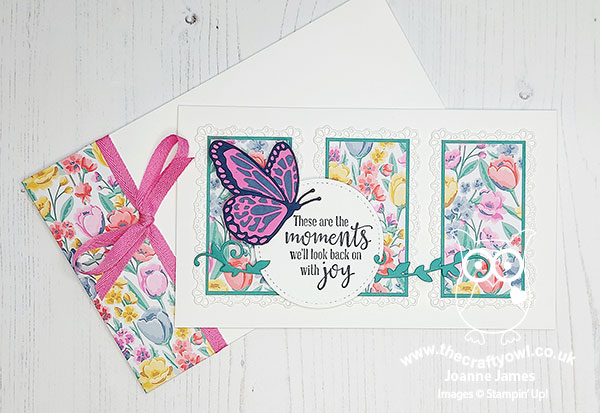
 

What do you think? I hope you found the envelope instructions useful and you like my card full of spring colour and flowers. I'm also linking up today over at SUO Challenges, where the theme is 'things that fly' - I think my butterfly qualifies on that front!

Here is the visual summary of the key products used on today's project for you to pin for easy reference:
 

You can see all of my Product and 'How To' summaries on my 'How To - Tips and Techniques' Pinterest board in case you've missed any. 

Before you reach for your ink and papers, check out what our amazing team has created to inspire you this week:

Here's a quick recap of our challenge rules:
 
1.  Create a new paper project
2.  Upload your creation to your blog with a link back to us and provide a direct link to the post featuring your challenge submission.
3.  Please link your card to no more than four challenges, TOTAL.
4.  Have FUN!

You can see all of my 'How To' summaries on my 'How To - Tips and Techniques' Pinterest board in case you've missed any. 

Enjoy your day; I am hoping to spend some time in the garden today and will be making the most of my last day at home with the James Juniors before they head back to school next week on Monday and Tuesday respectively. I'll be back tomorrow with another project. Until then, happy stampin'!


Stampin' Up! Supplies Used: 

Table built using Product Table Builder by The Crafty Owl - Independent Stampin' Up! Demonstrator.

Curvy Christmas Buffalo Check Christmas Card

by Joanne James24. November 2020 21:57

Today I'm sharing a card using the current sketch over at Paper Craft Crew in a card that was inspired by the fabulous photo over at The Card Concept to create my clean and layered card:

 Vertical Sketch Challenge   

I was inspired by the red and black buffalo check pillow, green ribbon-tied foliage and the white of the rocking chair of the Card Concept photo; this is what I came up with:


Here's the low-down on today's card:

I used the foliage stamps in the 'Curvy Christmas' set to create my tied foliage and stamped this on a stitched scallop square; no curves on the front of the card, but I did use one of the curved stamps to decorate my envelope and the inside of my card:


I paired this with a panel of Real Red cardstock stamped in black with the Buffalo Check background, a banner of green gingham ribbon and some rhinestones and pearls to decorate, along with a sentiment snipped from one of the stamps in the 'Itty Bitty Christmas' stamp set.

Here is the visual summary of the key products used on today's project for you to pin for easy reference:


You can see all of my 'How To' summaries on my 'How To - Tips and Techniques' Pinterest board in case you've missed any. 

I absolutely love that inspiration photo and combined with the sketch am really pleased with how this card turned out.

Enjoy your evening and I'll be back tomorrow with another project. Until then, happy stampin'!

Stampin' Up! Supplies Used:

Table built using Product Table Builder by The Crafty Owl - Independent Stampin' Up! Demonstrator.

Blue Flowers For Every Season AYSI 230

by Joanne James31. July 2020 12:00

Today I'm sharing my design team card for our new challenge over at As you See It where it's time for a sketch challenge:


I designed this week's sketch and decided to use some of the new in-colours and make a blue card - take a look:


 Here's the low-down on today's card:

Today's card features two different patterns from the Flowers For Every Season designer series paper stack. Some simple layering, a couple of co-ordinating floral embellishments from the Flowers For Every Season Memories and More pack and a simple heat-embossed sentiment from the 'Celebrate Sunflowers' set. And that's it - super simple! I must say, having seen the amazing cards from the rest of the team mine looks positively mediocre - they all came up with some fabulous takes on this week's sketch!

Here is the visual summary of the key products used on today's project for you to pin for easy reference:


You can see all of my 'How To' summaries on my 'How To - Tips and Techniques' Pinterest board in case you've missed any. 

 I'll be linking up with the team over at Inspire.Create as my card today features three of the 5 new in-colours: Misty Moonlight, Just Jade and Cinnamon Cider.

Here's a summary of our challenge rules:

  • Create any card, scrapbooking page, 3D project or packaging   project that fits the challenge.
  • Please include the challenge graphic and link back to the challenge in your blog post. Turn off word verification so we can leave you lots of lovely comments. Make sure you link the post not the whole blog to the Linky. Use #AYSIXXX when uploading to a public gallery.
  • If you’re unsure about ‘the rules’, check the details under the Challenge Guidelines tab on the As You See It Challenge homepage.
  • In a sketch challenge, you are welcome to rotate or flip a sketch. You can replace shapes used such as substituting a circle panel for a square panel. However, we must be able to still see the basis of the original sketch in your finished product.

We look forward to seeing your creations in the AYSI gallery.

Enjoy your day and I'll be back tomorrow with another project. Until then, happy stampin'!


Stampin' Up! Supplies Used:

Table to follow

Flowers For Every Season Misty Moonlight Sunflower Card PP497

by Joanne James28. June 2020 09:00

Today it's Sunday and time for this week's new challenge over at The Paper Players! It's the turn of sweet Claire to host this week and she has my favourite, a sketch challenge for you to work with:


With all these lovely layers I decided Claire's sketch was perfect to showcase some designer series paper. Lots to choose from, but I eventually settled on the Flowers For Every Season paper again - I've been having so much fun with these floral designs. This is what I came up with:


Here's the low-down on today's card:

Flowers For Every Season - I chose two co-ordinating patterns with a Misty Moonlight background for today's card - I love this blue and I've been itching to use this sunflower floral pattern. This paper contains four of the five new in-colours, so is also perfect for the current challenge over at Fab Friday, where the aim is to use one or more of these new colours. These papers really are the star of my card and I wanted them to be prominent; I used the Flowers For All Season twine to represent the vertical panel/column so that it wouldn't detract from or obscure the florals beneath.

A Wish For Everything - The sentiment on this card could be used for a number of different occasions and it is definitely one of my favourites in the 'A Wish For Everything' set.

Memories and More - I added a co-ordinating floral embellishment from the Flowers For Every Season Memories and More pack to my stitched rectangle sentiment panel, with a twist of Cinnamon Cider ribbon beneath it for added decoration. Here's a closer look: 


Here is the visual summary of the key products used on today's project for you to pin for easy reference:


You can see all of my Product and 'How To' summaries on my 'How To - Tips and Techniques' Pinterest board in case you've missed any. 

Before you reach for your ink and papers, check out what our amazing team has created to inspire you this week:

Here's a quick recap of our challenge rules:
 
1.  Create a new paper project
2.  Upload your creation to your blog with a link back to us and provide a direct link to the post featuring your challenge submission.
3.  Please link your card to no more than four challenges, TOTAL.
4.  Have FUN!

You can see all of my 'How To' summaries on my 'How To - Tips and Techniques' Pinterest board in case you've missed any. 

Enjoy your day; we have no big plans today, just a day of pottering around the house and some cooking - we have some new recipes that we would like to try out, so that should be fun.  I'll be back tomorrow with another project. Until then, happy stampin'!


Stampin' Up! Supplies Used: 

Table built using Product Table Builder by The Crafty Owl - Independent Stampin' Up! Demonstrator.

Flowers For Every Season Floral Birthday Card

by Joanne James22. June 2020 11:25

Happy Monday everyone! Today is a special day - not one, but two, yes both of the James Juniors are back to school! There was much excitement in the James household this morning and whilst it's only for a couple of weeks, and for one it's only for a couple of days each week, the excitement at seeing friends and teachers face to face again was palpable! The house is now eerily silent, but it does mean that I am racing through my jobs today and am getting my blog post in early too! Today I'm sharing a card that I made inspired by the lovely Amy's sketch over at Freshly Made Sketches:

A super versatile sketch I'm sure you'll agree and I decided to get snipping for my floral creation today - take a look:


Here's the low-down on today's card:

Flowers For Every Season - Whilst flowers are by no means mandatory for this sketch, I initially reached for my Flowers For Every Season Memories and More cards as I wanted to incorporate the adhesive sentiments into my card. I couldn't find any flowers that worked for me though, so I reached for my co-ordinating papers and decided to get fussy cutting! I wanted to create some layering with my flowers, with some behind and some in front of my label, so separated the flowers to make this work. 

A Sweet Label - My sentiment label is from the Stitched So Sweetly Die set - such a great set for labels with a good variety of shapes and sizes. 

Textile Texture - I added some texture to the top layer of my Misty Moonlight cardstock using the new Textile Texture embossing folder which is lovely for a little extra detail.

This card was simple to put together once the fussy cutting was completed. I used another leftover edge piece of DSP to decorate the inside of my card too:


Waste not, want not and all that!

Here is the visual summary of the key products used on today's project for you to pin for easy reference:


You can see all of my 'How To' summaries on my 'How To - Tips and Techniques' Pinterest board in case you've missed any. 

Enjoy your day. I'm racing through my jobs before early school pick up. I'll be back tomorrow with another project. Until then, happy stampin'!


Stampin' Up! Supplies Used:

Table built using Product Table Builder by The Crafty Owl - Independent Stampin' Up! Demonstrator.

Mini Catalogue

BROWSE THE CATALOGUE

The mini catalogue is now live! Read and download your copy here.

Shop Online

Access my online shop 24 x 7, 365 days of the year:

Current April hostess code:

VDKNV7BH

Shop Online

Join My Team

It's always a great time to join Stampin’ Up! New team members can get £130 worth of products for only £99 + free business supplies + free shipping + all the fun being a part of Stampin’ Up! Stampin' Up! has something for everyone: join my growing team and benefit from my support to enjoy Stampin' Up! however you choose.

If you're interested, call me for a chat to understand how I can help you realise your goals. Alternatively, if you have already decided to sign up and you just can't wait, please click here for the link to the online form where you can sign up and order your starter kit right away! 

Latest Kit!

Stampin Cut and Emboss

The Rock Legend Kit has all you need to make 8 cards with coordinating envelopes. Along with the new Panda Friends Kit, both are available from January 4th for just £14 each - get yours here!

2023-24 Annual Catalogue

BROWSE THE CATALOGUE

Click on the catalogue for a full list of current SU! supplies - if you would like to order any of the items featured, please drop me a line at [email protected] or give me a call on 07773 421446 - I'd be happy to help.

New Online Exclusives

There are new products available exclusively in the online store from 5 March - check them out here.

About Me

Hi I'm Joanne and live in Northampton and when I'm not looking after my husband and two beautiful children, am an avid crafter with a passion for all things Stampin' Up!

I must confess that I have never been a big rubber stamper - until I discovered Stampin' Up! that is. I love the fact that I can get such great results with co-ordinating stamps, inks, papers and punches - the possibilities are endless! Join me on my stamping journey as I share the things I love and be inspired to create amazing things yourself!

Follow Me

Monthly Newsletter

Box Builder

Click the button above to use Box Buster to create your custom box design using the Envelope Punch Board!

Kits Collection Now Available!

Stampin Cut and Emboss

The new Kits Collection from Stampin' Up! is now available!

Click here to see the current kits available and order yours online today.

I Design For


Stampin' Up Stuff

This is my personal blog and is not endorsed by Stampin’ Up! I hope you find it a plentiful source of ideas and personal inspiration but please don't copy my designs for contest submission or use for classes, publication or sale without express permission.