by Joanne James17. May 2017 06:00Wednesday already - this week is flying by! Today I'm sharing a card for this week's challenge over at CAS(E) This Sketch:
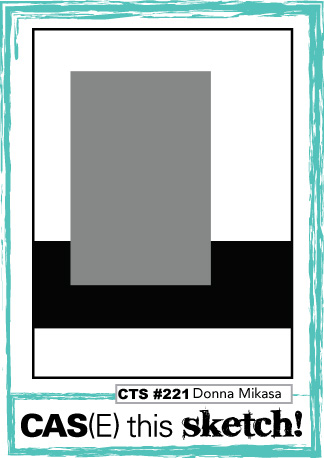
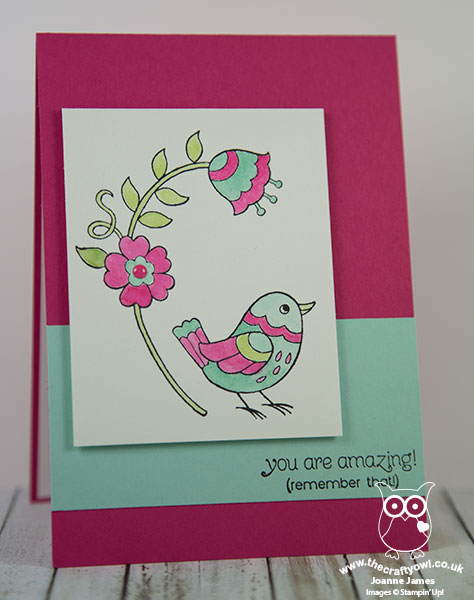
This is one of those sketches with so many possibilities. I decided to use one of my favourite hostess stamp sets in the new catalogue for my fun card today - take a look:
Here's the low-down on today's card:
Feathery Friends - One of the best things about getting a new catalogue is that it always contains a new set of exclusive hostess stamp sets - stamp sets that can only be purchased with Stampin' Rewards earned as a result of hosting a Stampin' Up! party (or placing a qualifying individual order of £150 or more). I love stamps that I can colour - with pencils, markers or inks and my trusty aquapainter - so this set with its quirky bird and flower images is perfect for me. Here I simply stamped two of the images in Archival Black ink onto watercolour paper and coloured it with my ink pads and an aquapainter.
There's Never Been A Better Time To Host A Stampin' Up! Party - Hosting a party is a great way to earn free product and is a fun thing to do at any time. Great news: to coincide with the launch of the the new Stampin' Up! 2017-18 Annual Catalogue, there is a host promotion starting 1st June that means hostesses can earn an extra £30 Stampin' Rewards with qualifying party sales. There will be more details to follow nearer the time, however if you want to book your slot in my diary, feel free to get in touch now and be sure of those rewards - there's never been a better time to host a Stampin' Up! party!
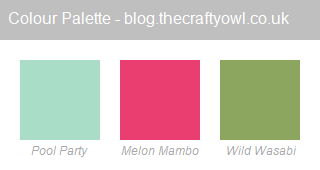
A Fresh Colour Combo - I chose to pair two colours from the Subtles family - Pool Party and Wild Wasabi - with a pop of bright Melon Mambo pink for today's card and added a single pink candy dot by way of embellishment to one of my flowers. Here is my colour combo if you would like to save it for future use:
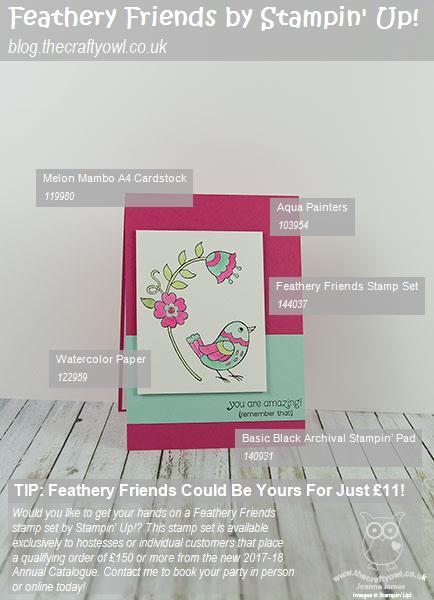
Here is the visual summary of the key products used on today's project for you to pin for easy reference:
You can see all of my 'How To' summaries on my 'How To - Tips and Techniques' Pinterest board in case you've missed any.
Enjoy your day and I'll be back tomorrow with another project. Until then, happy stampin'!
Stampin' Up! Supplies Used:
256fae68-39b0-4791-bdb8-dce80e46382e|0|.0|96d5b379-7e1d-4dac-a6ba-1e50db561b04
Tags: Host a Party, Earn Free Product, Earn Free Products, Feathery Friends, 2017 Annual Catalogue, Shop online, Shop Stampin' Up online, Shop Stampin' Up! Online, Stampin' Up, Stampin' Up Card, Stampin' Up Card ideas, Stampin' Up Supplies
Cards | Host a Party | hosting | Promotions | Shop Online | Shop Stampin' Up! Online | Stamping
by Joanne James30. March 2017 19:30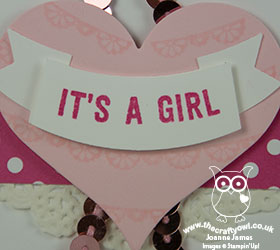
Today I'm sharing a couple of cards that I made for my last Sale-A-Bration class using Stampin' Up!s precut notelets and envelopes - take a look:
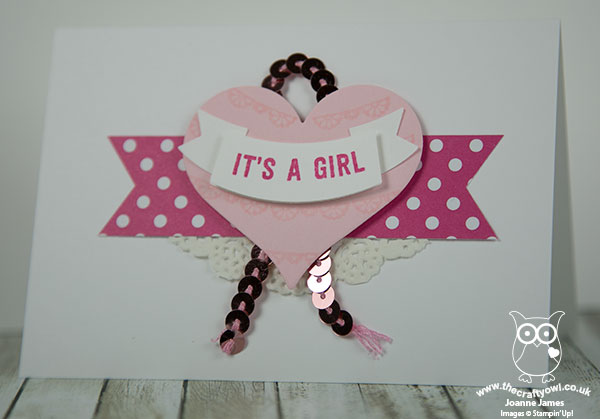
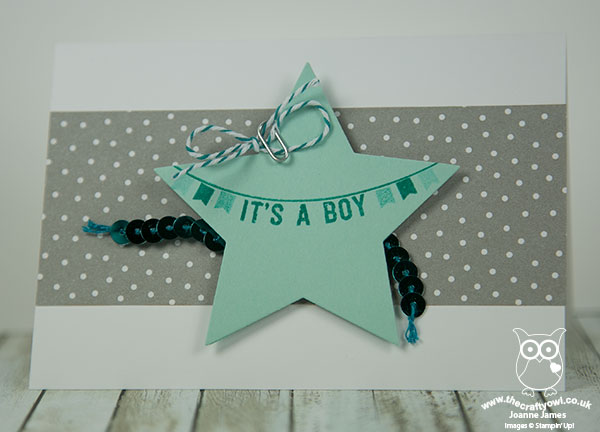
These cards would be great for a note to welcome a new baby boy or girl and would also make nice birth announcement cards. I made a video showing how I put these together - here it is if you would like to see just how quick and easy they are to make:
This stamp set contains lots of fun bits and pieces - I'm sure there are lots of similar combinations you could make for well, any occasion!
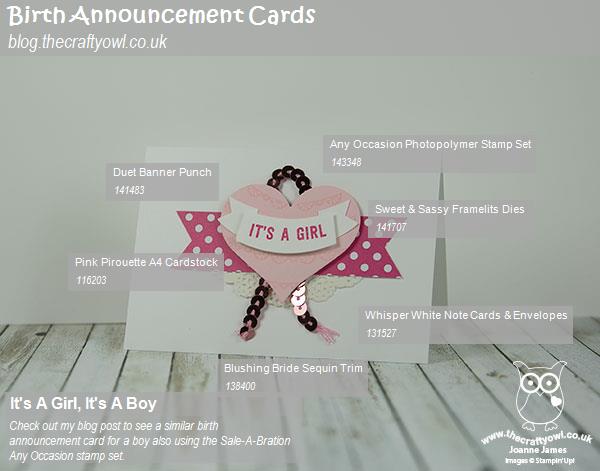
Here is the visual summary of the key products used on today's project for you to pin for easy reference:
You can see all of my 'How To' summaries on my 'How To - Tips and Techniques' Pinterest board in case you've missed any.
The links to my online store for the supplies to make today's cards are included below, but bear in mind you only have until 10.50pm GMT tomorrow evening to snap up your own 'Any Occasion' stamp set before we say goodbye to Sale-A-Bration for another year.
I'll be back tomorrow with another project. Until then, happy stampin'!
Stampin' Up! Supplies Used:
dc42b7ab-973b-42e4-bf12-ae411f2f91b4|0|.0|96d5b379-7e1d-4dac-a6ba-1e50db561b04
Tags: Any Occasion, Sale-a-bration, Sale-A-Bration 2017, Earn Free Product, Earn Free Products, Stampin' Up, Stampin' Up Card, Stampin' Up Card ideas, Stampin' Up Supplies, Sweet and Sassy Framelits, Star Framelits, Triple Banner Punch, Duet Banner Punch
Cards | Promotions | Sale-a-bration | Shop Online | Shop Stampin' Up! Online | Stamping
by Joanne James28. March 2017 19:30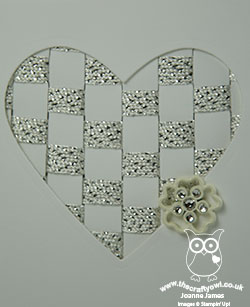
Today I'm sharing a card for this week's Less Is More challenge where the recipe is to use a frame:

I used a heart diecut to frame a panel of ribbon weaving as a feature on a wedding anniversary card - take a look:
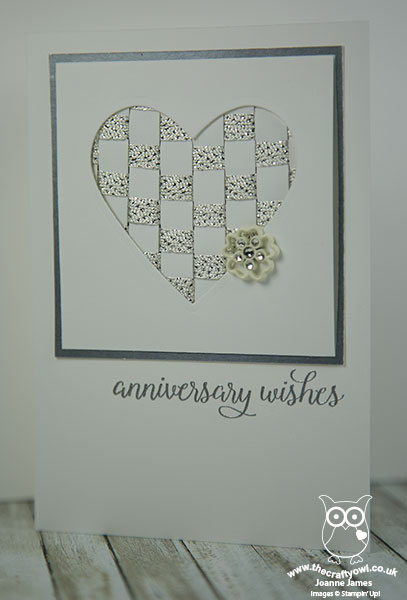
I made today's card to showcase the metallic ribbon that is one of the Sale-A-Bration products available FREE with a £45 order before the end of the month - only a couple more days to go to get yours! This gorgeous smooth ribbon ties beautiful bows, but I wanted to show another way that ribbon can be used on your project. I made a video tutorial to explain how you too could recreate this card with the same metallic ribbon or something similar:
I hope you found that useful - I haven't made any video tutorials in a while, I'd forgotten how much fun they are!
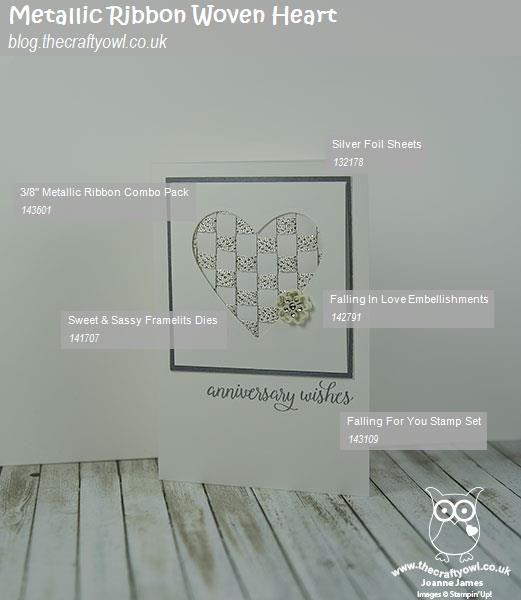
Here is the visual summary of the key products used on today's project for you to pin for easy reference:
You can see all of my 'How To' summaries on my 'How To - Tips and Techniques' Pinterest board in case you've missed any.
I'll be back tomorrow with another project. Until then, happy stampin'!
Stampin' Up! Supplies Used:
690e007d-935e-44a1-8065-11bac1c85335|0|.0|96d5b379-7e1d-4dac-a6ba-1e50db561b04
Tags: Sale-A-Bration 2017, Sale-a-bration, Stampin' Up, Stampin' Up Card, Stampin' Up Card ideas, Stampin' Up Supplies, Shop Stampin' Up! Online, Shop Stampin' Up online, Shop online, Ribbon Weaving, Sweet and Sassy Framelits, Falling For You, Falling In Love, Earn Free Product, Earn Free Products
Cards | Promotions | Sale-a-bration | Shop Online | Shop Stampin' Up! Online | Stamping
by Joanne James21. March 2017 10:00Today I have some exciting news! You all know that this year's Sale-A-Bration promotion will end on 31st March and in addition to hosting and joining benefits (you can read about those here) you also earn a free product for every £45 spend - you can see the existing items here and here.
Good news: from now until the 31st March, you will also be able to choose from the catalogue items below (you must use the special code as detailed as opposed to the usual item code to get one of these items free with a £45 spend):
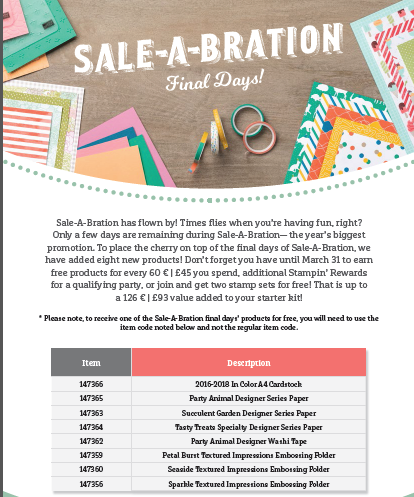
To make things easier for you, I've created a table linking each of the products directly to the promotional item in my online store - just click on the links below:
If you have your eye on any of the other Sale-A-Bration items, do bear in mind that they will only be available whilst stocks last - the glimmer paper is already sold out, so don't leave it to late to place your order.
I'll be back soon with another project. Until then, happy stampin'!
8af8be4e-3f10-4b4e-af06-549e41b5f2c0|0|.0|96d5b379-7e1d-4dac-a6ba-1e50db561b04
Tags: Promotions, Sale-A-Bration 2017, Sale-a-bration, Earn Free Product, Earn Free Products, Shop online, Shop Stampin' Up online, Shop Stampin' Up! Online, Stampin' Up, Stampin' Up Card, Stampin' Up Card ideas, Stampin' Up Supplies
Catalogues | Promotions | Sale-a-bration | Shop Online | Stamping
by Joanne James13. March 2017 10:55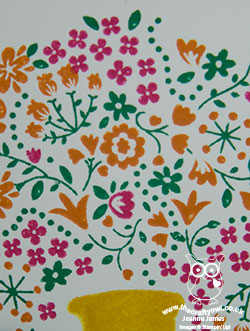
Good morning and welcome to another week! Mine is going to be a busy one so without further ado I'm sharing a card for this week's challenge over at Freshly Made Sketches:

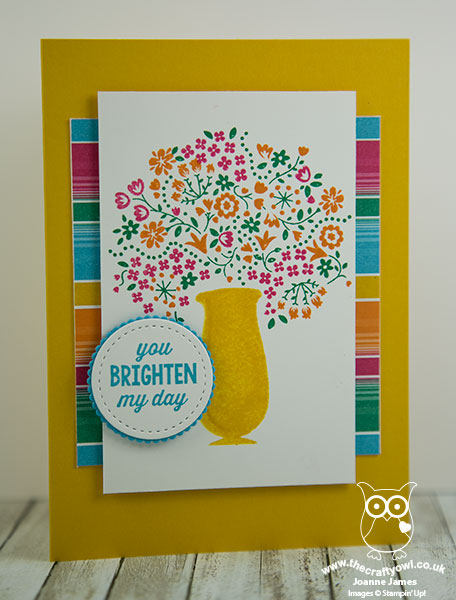
These ladies have some great sketches and this one from Jen M is no exception - I love the layering of the panels. I went bright today - take a look:
Here's the low-down on today's card:
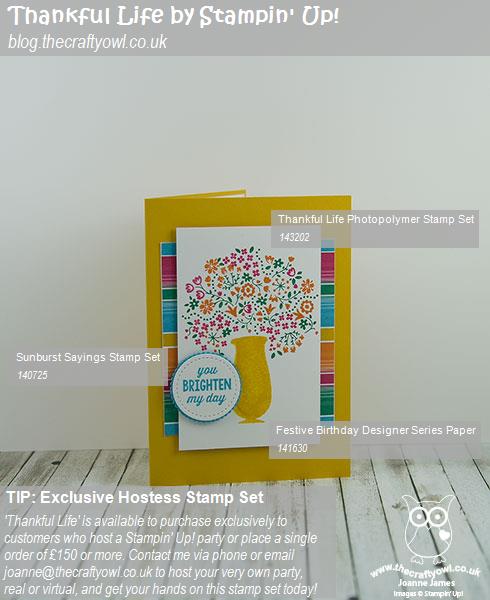
Get A Vase of Flowers For Hosting A Stampin' Up! Party - Yes, that's right - today's card features the vase of flowers from the hostess set in the Spring-Summer seasonal catalogue, 'Thankful Life', a set available to purchase exclusively to customers who host a Stampin' Up! party or place a single order of £150 or more. Extra Stampin' Rewards during Sale-A-Bration make this an excellent time to host, although stamp sets like this one make it worth hosting a party all year round. The stamps are photopolymer and so easy to line up to create a vase of colourful blooms that will last so much longer than fresh ones! This set will be available to hostesses until the Spring-Summer catalogue ends on 31st May, so if it's a set you would like to own, do get in touch with me to arrange a night for your crafty night in with friends.
You Brighten My Day - The 'Thankful Life' hostess set does come with two sentiments of its own, however both were too too big for the embellishment 'button' that I wanted to create. I opted instead for this one from 'Sunshine Sayings' that seemed particularly appropriate given my colour choices for today's card.
A Fiesta Of Colour - I took the inspiration for my colour combination straight from the Festive Birthday Designer Series Paper that I used for my background panel - as a brights girl these colours really appeal to me and I just love the mix of patterns they contain:

Here is the colour combination if you would like to save it to use on your projects too:
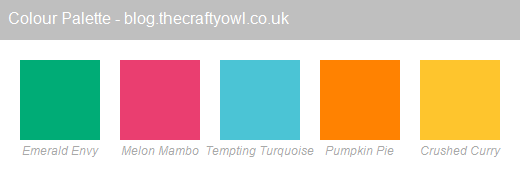
What a great combination of bold and bright colours - guaranteed to cheer!
Here is the visual summary of the key products used on today's project for you to pin for easy reference:
You can see all of my 'How To' summaries on my 'How To - Tips and Techniques' Pinterest board in case you've missed any.
Enjoy your day and I'll be back tomorrow with another project. Until then, happy stampin'!
Stampin' Up! Supplies Used:
6ebacf65-b5a0-4804-b1b9-4955ee93e713|0|.0|96d5b379-7e1d-4dac-a6ba-1e50db561b04
Tags: Thankful Life, Festive Birthday, Earn Free Product, Earn Free Products, Host a Party, Shop online, Shop Stampin' Up online, Shop Stampin' Up! Online, Stampin' Up, Stampin' Up Card, Stampin' Up Card ideas, Stampin' Up Supplies, Sunburst Sayings
Cards | Host a Party | hosting | Shop Online | Shop Stampin' Up! Online | Stamping
by Joanne James24. February 2017 20:29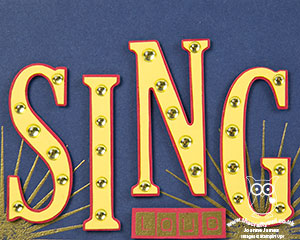
Yay it's Friday! Today I'm sharing a card that I made last week following my half-term visit to the movies with the James Juniors - take a look:
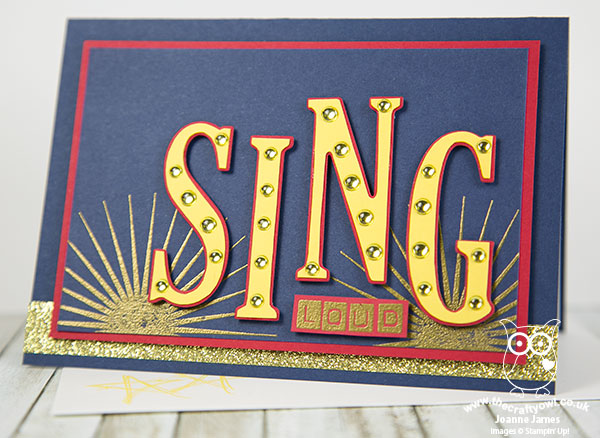
Here's the low-down on today's card:
Movie Inspiration - We had been to the movies to see the fun computer-animated comedy movie 'Sing' (you can read all about that here if you're interested) and with this week's Paper Players challenge in mind (use a sentiment as the focal point on your card) I decided to create something using the movie title image as my inspiration:
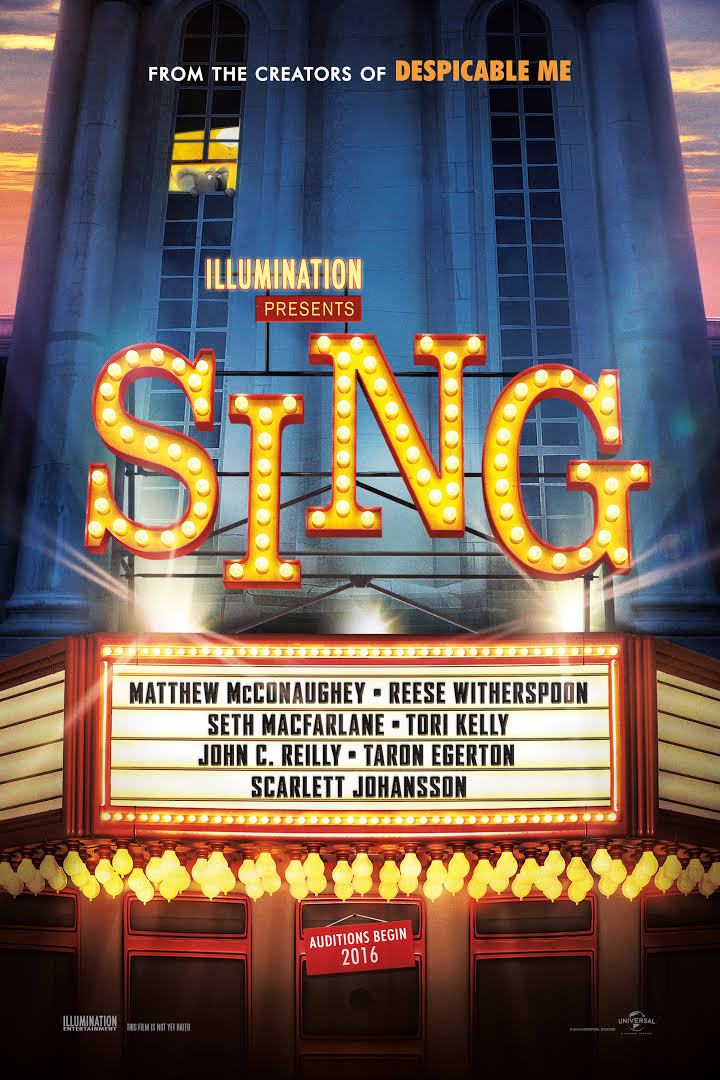
With a daughter who sings and often participates in public performances and examinations, I knew that this would make a great encouragement card for her - I'm sure you can see the similarities.
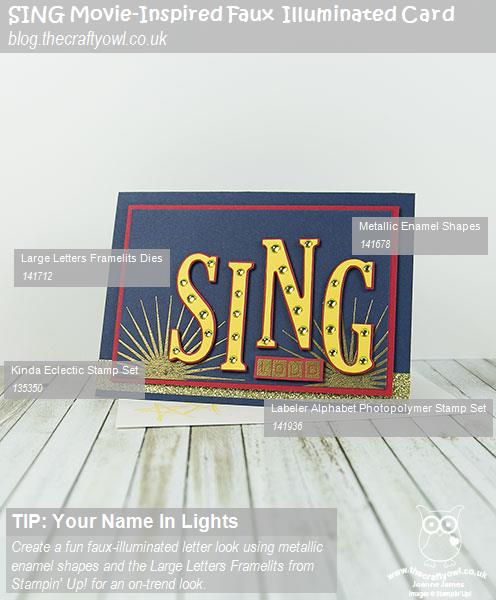
Love Those Letters - I know I say it every time I use them, but the Large Letters Framelits are so worth the investment - I love them! Buying them during Sale-A-Bration leaves you only £1 away from two free gifts too, what a great time to invest! Here I layered them, cutting one set in red and then tracing the inner line of the framelit with a pencil and fussy-cutting them by hand in order to leave a thin border visible. I also used my Labeler Alphabet for the 'loud' part of my sentiment - a great 'mix and match'.
Fake Illumination - I used a liberal dose of gold metallic enamel shapes to create my illuminated letters and heat embossed the starburst from the Kinda Eclectic stamp set to give the illusion of bright lights shining in the background along with a strip of gold glimmer for extra sparkle. The layering and lettering detail made this card less than 'clean and simple', hence the reason why I decided not to use it as my Paper Players card.
I love this card though - just shows that sometimes inspiration can strike in the strangest places. What things inspire you? Do leave me a comment below - I'd love to hear your thoughts.
Here is the visual summary of the key products used on today's project for you to pin for easy reference:
You can see all of my 'How To' summaries on my 'How To - Tips and Techniques' Pinterest board in case you've missed any.
I'll be back tomorrow with another project. Until then, happy stampin'!
Stampin' Up! Supplies Used:
f9c7c008-d63b-4a94-910c-4d5b4f498089|0|.0|96d5b379-7e1d-4dac-a6ba-1e50db561b04
Tags: Earn Free Products, Earn Free Product, Labeler Alphabet, Large Letters Framelits, Kinda Eclectic, Sale-a-bration, Sale-A-Bration 2017, Shop online, Shop Stampin' Up online, Shop Stampin' Up! Online, Stampin' Up, Stampin' Up Card, Stampin' Up Card ideas, Stampin' Up Supplies
by Joanne James21. February 2017 01:00 
I know how much you've all been enjoying the benefits of the Sale-A-Bration promotion; as if it couldn't get any better this is a quick early post today to let you know that there are some new items being added to the selection of products that can be earned free with a £45 order: there are two new stamp sets and some rather lovely glimmer paper.
Like the other items in the Sale-A-Bration catalogue, these items will be available free with each £45 spend from now until the end of the Sale-A-Bration period, 31st March. You can see full details for each of the new product on the new Sale-A-Bration flyer here.
Back later with today's creative project; until then, happy shopping!
a90d8701-ae0d-4b13-b872-6096fd5cf927|0|.0|96d5b379-7e1d-4dac-a6ba-1e50db561b04
Tags: Promotions, Stampin' Up, Stampin' Up Card, Stampin' Up Card ideas, Stampin' Up Supplies, Shop online, Shop Stampin' Up online, Shop Stampin' Up! Online, Sale-A-Bration 2017, Sale-a-bration, Earn Free Product, Earn Free Products
Sale-a-bration | Shop Online | Shop Stampin' Up! Online | Stamping
by Joanne James19. February 2017 22:00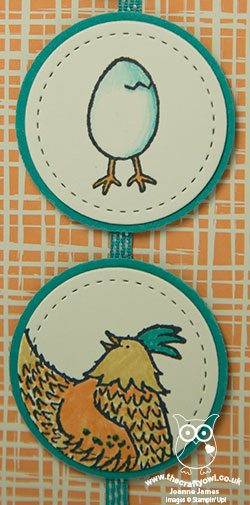
I know technically it's still Sunday, but this is Monday's post as I want to link up to the Stamp Ink Paper challenge which closes late this evening - so I'm early! Here's their colour palette this week:

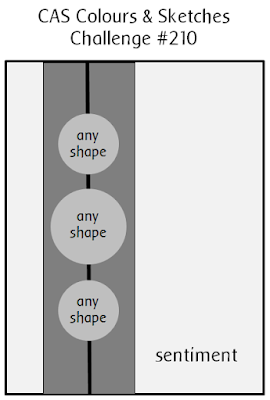

I'm also linking up with CAS Colours and Sketches as I used their sketch for my card, SUO Challenges who are looking for projects featuring Sale-A-Bration sets and the ladies over at TGIF Challenges where they have a 'birds of a feather' theme that my chickens are perfect for! I thought it was about time I broke out the most popular of all this year's Sale-A-Bration free gifts this year - take a look:
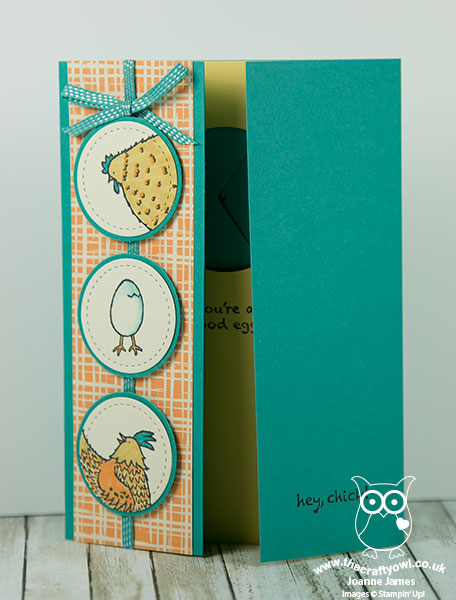
This is the outside of my card - read on for more details and a fun reveal inside! Here's the low-down on today's card:
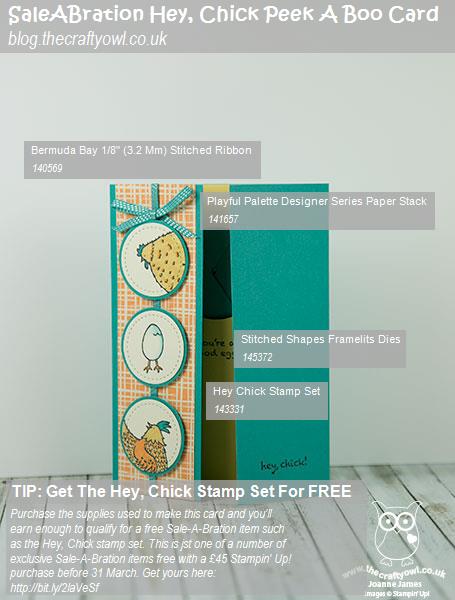
Hey, Chick - What's better than a new stamp set? Well, it has to be a new FREE stamp set, right? The comical chicks in the 'Hey, Chick' stamp set are proving the runaway success of this year's Sale-A-Bration promotion and could be yours free too with a purchase of £45 or more. I cropped the two large, feathered birds top and bottom using my Stitched Shape Framelits looking up and down respectively on the little 'egg on legs' and coloured with my Stampin' Write markers.
Peek A Boo - There is another chicken that features in this set, perhaps my most favourite of all - the crazy-haired Polish Frizzle Bantam White. Where's mine? Well, take a look inside my card where all will be revealed:
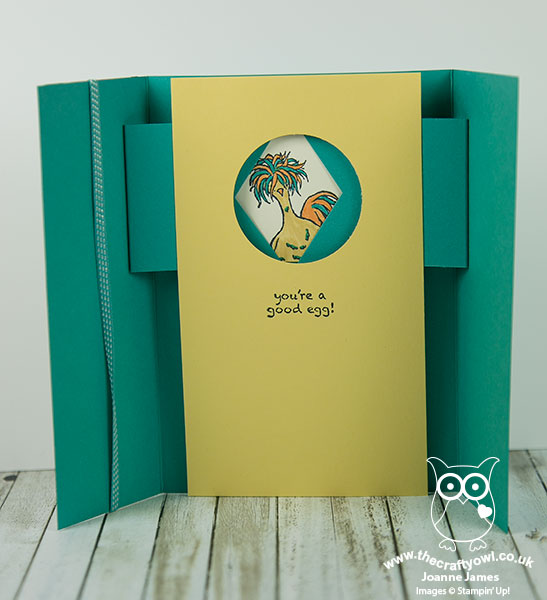
As the card is opened, the shutters pull back to reveal the funky chicken that I like to think hatched out of that egg - isn't that just the most fun? I like this card so much it's made the cut for my next Sale-A-Bration class - you can see details of my class listings here and I would love you to join me!
Playful Palette - Some Playful Palette designer series paper and some Bermuda Bay stitched satin ribbon complete my card.
Here is the visual summary of the key products used on today's project for you to pin for easy reference:
You can see all of my 'How To' summaries on my 'How To - Tips and Techniques' Pinterest board in case you've missed any.
I'll be back on Tuesday with another project. Until then, enjoy the start to your week and happy stampin'!
Stampin' Up! Supplies Used:
bccf0aac-7192-461a-8e4a-ad1b88a1a7e9|0|.0|96d5b379-7e1d-4dac-a6ba-1e50db561b04
Tags: Earn Free Product, Earn Free Products, Hey Chick, circle punch, Sale-a-bration, Sale-A-Bration 2017, Stampin' Up, Stampin' Up Card, Stampin' Up Card ideas, Stampin' Up Supplies, Stitched Shapes Framelits, Fancy Fold, Peek A Boo Card, Shutter Card
Cards | Classes | Promotions | Sale-a-bration | Shop Online | Shop Stampin' Up! Online | Stamping
by Joanne James17. February 2017 20:32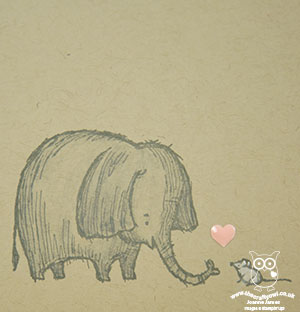
Yay it's Friday! It has felt a little like the weekend here today as my hubby has had the day off today having been away all week so the four of us have spent the day doing fun family things - a little more on that on Sunday's post though! Today I'm sharing a little card that I made for this week's challenge over at Less Is More where the challenge is for a one layer card featuring opposites that also works for the current CASology challenge too:
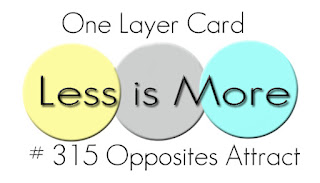
I haven't managed to play along with the LIM ladies for a while but as they are celebrating their birthday this month I was determined to squeeze in an entry at some point. I toyed with 'rain and shine' but decided to allow the ideas percolate in the back of my mind as I went about my jobs this week and as I was flicking through my Stampin' Up! catalogue last night I was suddenly inspired - take a look:
Cute eh?! Here's the low-down on today's card:
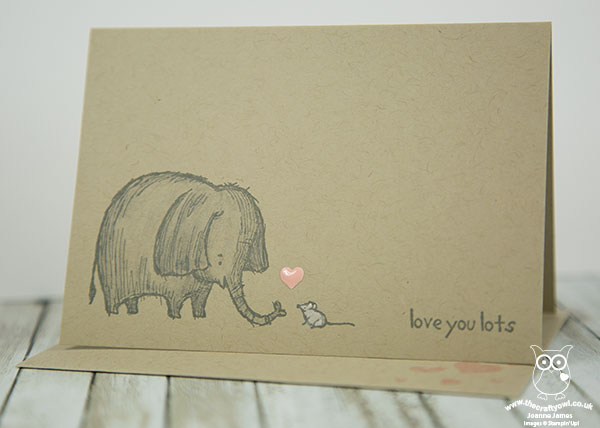
Love You Lots - I happened across the hostess set 'Love You Lots' and realised it had the perfect pair of opposites with the massive elephant and the teeny tiny mouse. I decided they would be perfect for a little love note ready for one of my James Juniors next week.
Another Way With Watercolour Pencils - I wanted to try something a little different in terms of technique on this card too: I stamped my pair and sentiment in Archival Grey ink and coloured them with my Basic Grey and Whisper White watercolour pencils and my aquapainter onto a Crumb Cake (kraft) cardstock notelet. The lovely Darnell Kraus of NBUS fame used this as an optional theme on one of her recent challenges (check out Darnell's creations and the wonderful gallery on her blog here) and it intrigued me; I decided today's card would be the perfect opportunity to try it out; I must say I really like the effect.
A quick heads up for any of you with Watercolour Pencils on your wish lists; they have been incredibly popular with demand outstripping supply. Current stocks are likely to last only another few weeks before ordering will be suspended temporarily in order for stock levels to be replenished, so if you want to get your hands on them in the short term order now; once current stock has run out, they are estimated to be re-orderable mid- to late April.
And Finally A Love Heart - I finished my card with a tiny Blushing Bride enamel heart to add just a pop of colour to my otherwise neutral card. I toyed with adding some Blushing Bride baker's twine but decided against it - after all, sometimes less is more!
A sweet notelet using minimal supplies and perfect to send a few words of love!
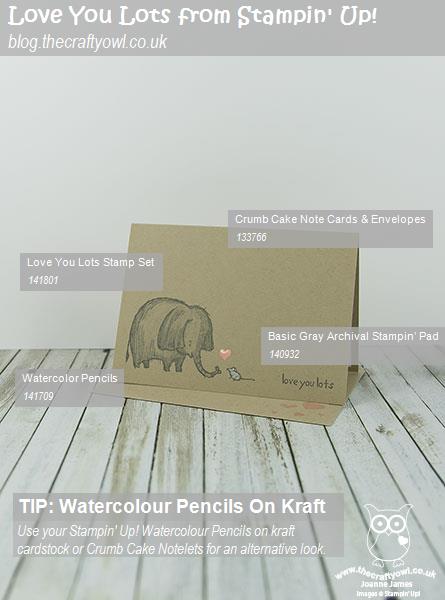
Here is the visual summary of the key products used on today's project for you to pin for easy reference:
You can see all of my 'How To' summaries on my 'How To - Tips and Techniques' Pinterest board in case you've missed any.
I'll be back tomorrow with another project. Until then, happy stampin'!
Stampin' Up! Supplies Used:
7cda8694-49fd-440d-9ac2-1f0b0d537c3a|0|.0|96d5b379-7e1d-4dac-a6ba-1e50db561b04
Tags: Host a Party, Love You Lots, Shop Stampin' Up online, Shop Stampin' Up! Online, Shop online, Stampin' Up, Stampin' Up Card, Stampin' Up Card ideas, Stampin' Up Supplies, Earn Free Product, Earn Free Products
Cards | Host a Party | Shop Online | Shop Stampin' Up! Online | Stamping
by Joanne James16. February 2017 07:00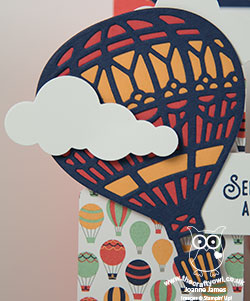
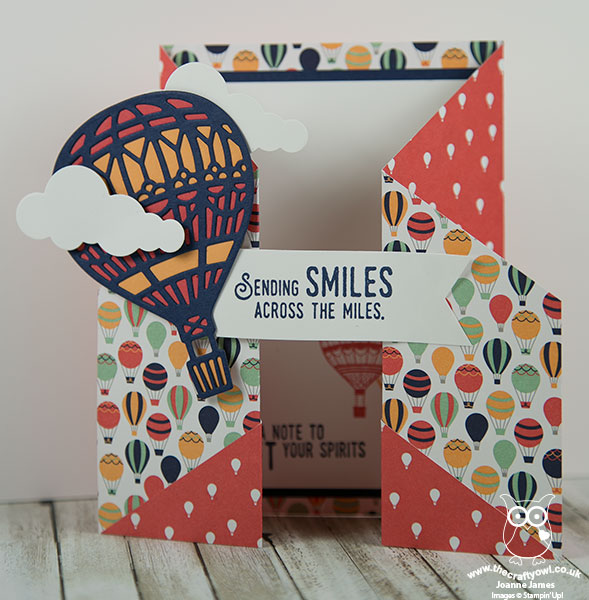
I'm a little more organised today with a nice early post featuring another card that I made using the gorgeous balloon papers that can be yours free during Sale-A-Bration with an order of £45 or more:
Here's the low-down on today's card:
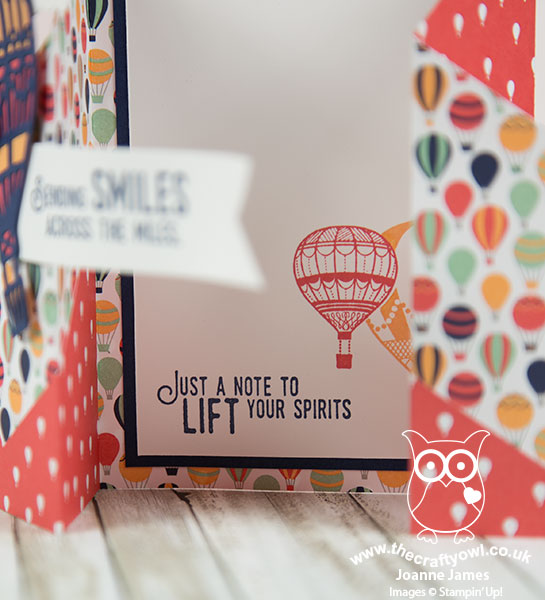
Double Gate Fold Card - I used one of my favourite patterns in the Sale-A-Bration Carried Away Designer Series Paper pack for my double gate fold card today. This is such a fun card to showcase designer paper and with a base of 12" x 6", you can get two cards out of one sheet of designer series paper - bonus! Here's a peek at the inside panel too:
Up and Away Tiny Treat - I also dressed up one of Stampin' Up!'s Clear Tiny Treat Boxes with a 3D diecut hot air balloon and some of the Carried Away paper for a co-ordinating sweet treat - take a look:
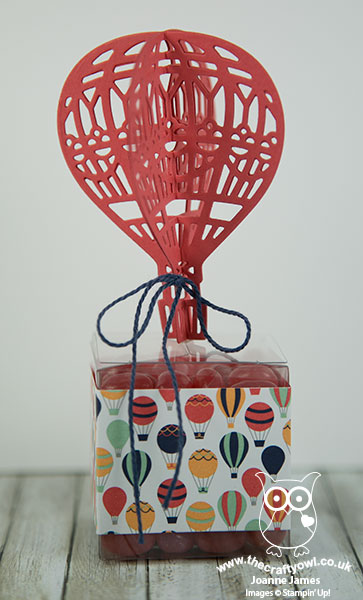
I love these boxes - they are so easy to dress up some sweets or a small gift. Great for a little Friday afternoon after-school treat or to make a fun addition to someone's birthday present.
Everyone Loves A Freebie - Would you like to get your hands on the Carried Away Designer Series Paper? If you buy all the other supplies I used on today's card, you'll earn enough to qualify for a free Sale-A-Bration item - like the Carried Away Designer Series Paper. Just click on the items in the table below to go directly to my online shop and add these items to your basket.
Here is the visual summary of the key products used on today's project for you to pin for easy reference:

You can see all of my 'How To' summaries on my 'How To - Tips and Techniques' Pinterest board in case you've missed any.
Enjoy your day - we have swimming and go karting in store. I'll be back tomorrow with another project. Until then, happy stampin'!
Stampin' Up! Supplies Used:
c9e348b0-bcd2-42e2-82ef-42b892e28c65|0|.0|96d5b379-7e1d-4dac-a6ba-1e50db561b04
Tags: Stampin' Up Supplies, Stampin' Up Card ideas, Stampin' Up, Shop online, Shop Stampin' Up online, Sale-A-Bration 2017, Carried Away, Lift Me Up, Up & Away Thinlits, Earn Free Product, Earn Free Products, Promotions
Cards | Promotions | Sale-a-bration | Shop Online | Shop Stampin' Up! Online | Stamping