
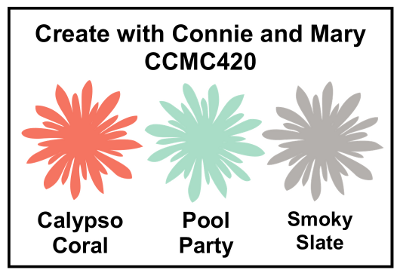
I've had a few blog-free days this week; we are in thick of the summer holidays and I've been spending time with the James Juniors, meeting up with friends, cooking and cycling and more. Crafting time has been limited and blogging time even less so, but I'm not complaining! We've been having fun and enjoying the sunshine and I'm sure that those of you out there in a similar situation understand completely! That said, today it's time for a new challenge over at Create With Connie and Mary and this week we have a colour combination for you:

I also used this week's sketch over at Retrosketches for my layout. I was so tempted to create a Foxy Friends card, given that these colours all appear in the A Little Foxy DSP stack; instead though, I used this paper and broke out one of my preorder Christmas stamps - wahoo! - to make my first card using my new goodies. Here's my card:
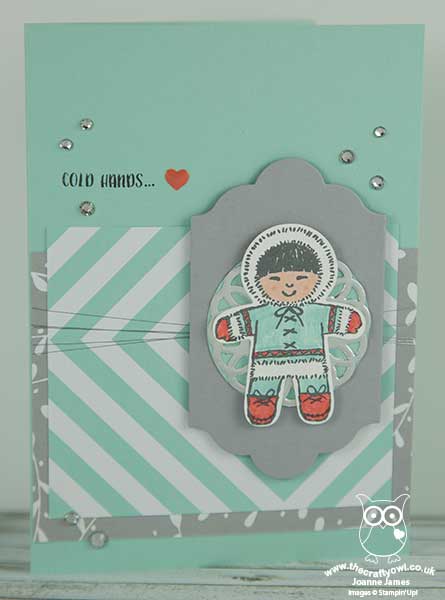
How cute is that little chap?! Here's the low-down on today's card:
Cookie Cutter Eskimo - This cute eskimo comes from the Cookie Cutter Christmas stamp set which is part of a bundle with the co-ordinating Cookie Cutter Builder Punch. He comes with a santa, gingerbread man, reindeer and teddy bear too but for today I thought he would look great on my card in his Pool Party outfit with Calypso Coral shoes. It's tricky to see, but I also added a liberal dose of clear Wink of Stella to his fur trim which gives it a lovely shimmer. The sentiment is perfect too: it carries on to the inside of the card with 'warm heartfelt greetings for a very merry Christmas'.
A Little Foxy For The Festive Season - I used two of the papers from the A Little Foxy DSP stack for the layered panels on my card. This is such a versatile pack with lots of great patterns that work all year round, Christmas included!
A Little Sparkle And Shine - As my card was for Christmas, I took the opportunity to add some touches of silver for a little festive sparkle: a small silver metallic doily behind my eskimo, some silver metallic thread, a liberal sprinkling of rhinestones. Well, if you can't add some sparkle at Christmas when can you add it?!
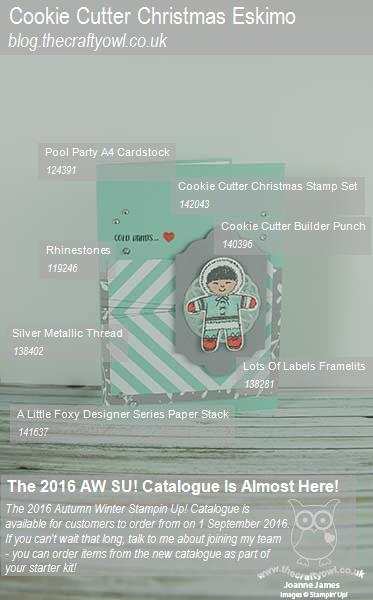
Here is the visual summary of the key products used on today's project for you to pin for easy reference:
You can see all of my 'How To' summaries on my 'How To - Tips and Techniques' Pinterest board in case you've missed any.
You only have to wait until the 1st of September before you can order this little chap and lots of other goodies from the seasonal catalogue - not long now! If you can't wait, talk to me about joining my team - you are able to order items from the new catalogue immediately as part of your starter kit. I am currently preparing my catalogues to be sent out to my customers; if you don't currently have a demonstrator and would like a copy of the new Autumn Winter catalogue, get in touch with me and I can add you to my list.
Do visit the other Design Team members to see what they did with this week's colours; there's lots of inspiration over on their blogs too!
Enjoy your day and I'll be back tomorrow with another project; until then, happy stampin'!
Stampin' Up! Supplies Used: