Let's Just Roll With It and Quarantini For #ShareSunshine

by Joanne James6. May 2020 10:30

Hi everyone! Wednesday already? Oh my! I've had a busy start to my week with online card classes which are really starting to take off as we get used to the technology. I had my main class on Monday using 'Beautiful Friendship' one of my most favourite sets (cards to follow). In order to stave off boredom for a lot of my regular crafty ladies, I've been following up each class with a couple of shorter 30 minute sessions that use the same set we used in our class but using different techniques. This is more like a Facebook live but we still use Zoom so that we are in a classroom format and can all see and talk to each other as I'm demonstrating. I don't do many Facebook lives and must confess I much prefer the classroom format. If anyone is reading this and thinking they would like to know more about online classes or these little demo sessions, then do check out my Facebook page or leave me a comment below and I can add you to my group.

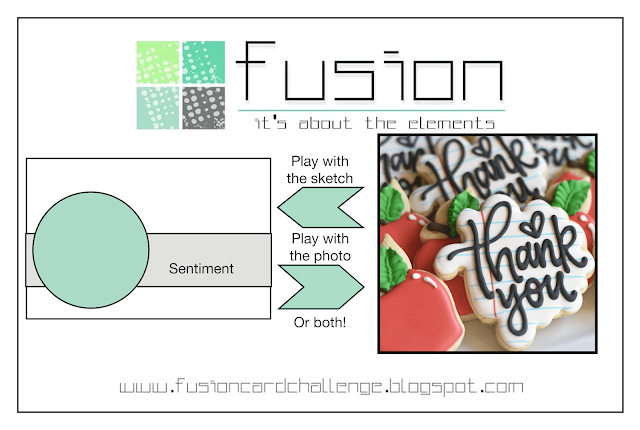
Anyway - time for a blog post! I've had a few server issues with my hosting company earlier this week, so if you popped by and couldn't reach my blog, please accept my apologies - things should all be sorted now I'm told! So today I'm sharing another couple of cards using the #ShareSunshine product giveback download that Stampin' Up! has released to raise funds for Covid-19 related charities - you can read all about it and purchase the download if you are interested in my previous post here. For the first one I used the current Fusion sketch for my layout (great sketch!):
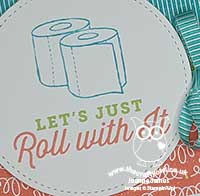
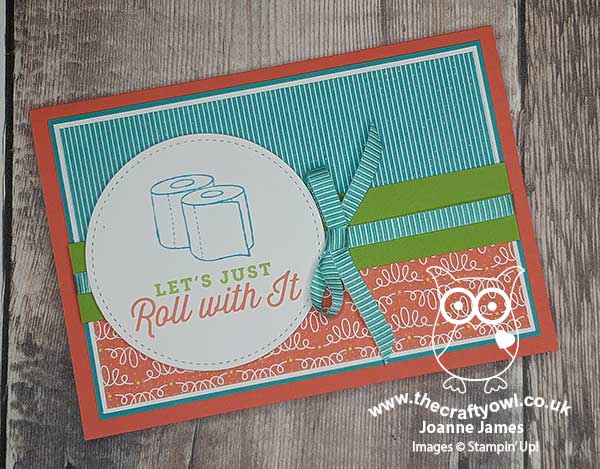
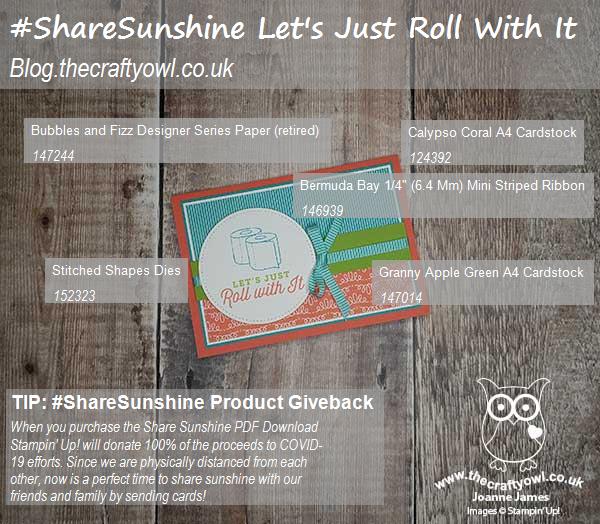
I used the fun loo roll image and once printed die cut it with a stitched circle, and paired it with some retired Bubbles & Fizz Sale-A-Bration papers - take a look:
 

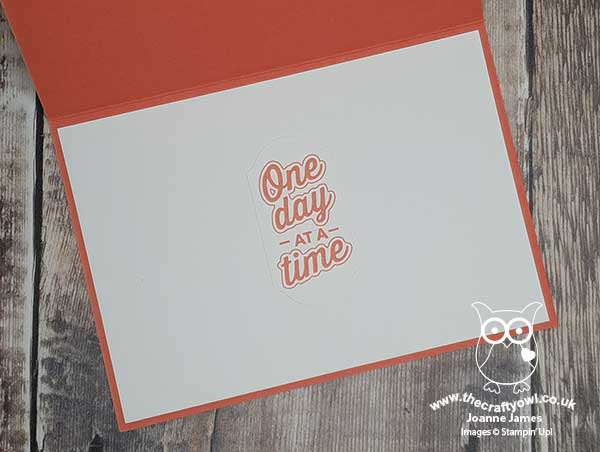
I added some striped Bermuda Bay ribbon and another of the print out sentiments to the inside of my card:
 

That's pretty much all we can do right?!

One of my lovely customers, Jane, shared some fabulous cards using this download over on my Facebook page and I noticed that she had used some of these papers and they actually match quite a lot of the sentiments and images, so I got to use up some paper too. If you would like to see Jane's cards, you can see them here - thanks for the inspiration Jane!

Here is the visual summary of the key products used on today's project for you to pin for easy reference:
 

You can see all of my 'How To' summaries on my 'How To - Tips and Techniques' Pinterest board in case you've missed any. 

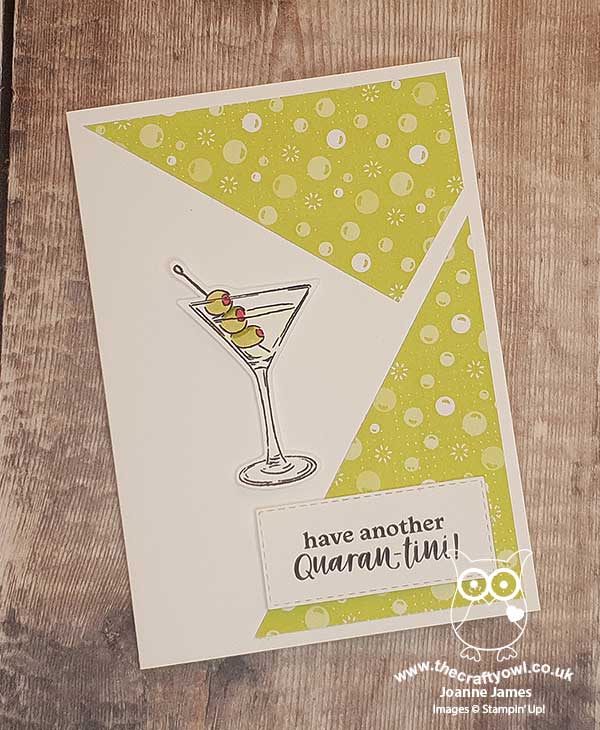
I also managed a quick second card this afternoon, using this week's CAS(E) This Sketch:

I used another or the retired Bubble and Fizz papers and paired it with the martini glass that I coloured with Blends and this fun sentiment:
 

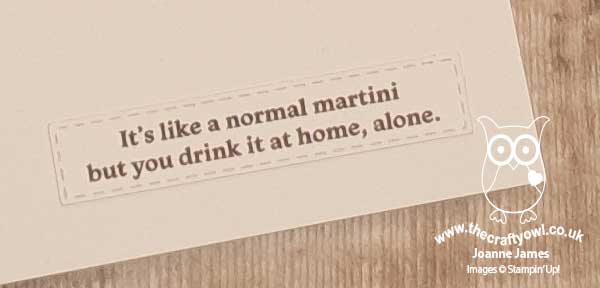
It finishes inside the card like this:
 

Enjoy your evening. I spent my day editing and uploading some online class videos and enabling my oven repair man to do his job whilst social distancing - why do these things always break down at the most inconvenient times?! I'll be back tomorrow with another project. Until then, happy stampin'!


Stampin' Up! Supplies Used:

#ShareSunshine Digital Download: get yours here

Bubble Over Large Letters Party Banner Decoration

by Joanne James31. March 2018 08:00


Today it's the last day to snap up a Sale-A-Bration freebie, whether that's free stamps with your starter kit when you join my team, extra hostess rewards when you place an order of £200 or more or a free gift with a purchase of £45 or more. You only have until 10.50pm this evening though, so don't leave it too late!


I'm sharing the last of my Sale-A-Bration makes with you today, a party banner featuring the Bubble Over stamp set and Bottles & Bubbles Framelits Dies, and the FREE Bubbles & Fizz Designer Series Paper - take a look:


My banner letters are courtesy of the Letters For You stamp set and co-ordinating Large Letters framelits, on some layered circles before adding to the pennants featuring all of the designer paper designs. Here's a picture of it hanging properly at last November's Onstage event:


This is a great set for making part banners for a birthday or summer BBQ celebration (if it stops raining for long enough here in the UK to light one, of course!) and the Bubbles and Fizz designer papers add great colour and pattern with a fun party vibe.

Here is the visual summary of the key products used on today's project for you to pin for easy reference:


You can see all of my 'How To' summaries on my 'How To - Tips and Techniques' Pinterest board in case you've missed any. 

I'll be back tomorrow with this week's project for our new challenge over at The Paper Players. Until then, happy stampin'!


Stampin' Up! Supplies Used:

Table built using Product Table Builder by The Crafty Owl - Independent Stampin' Up! Demonstrator.

Bubbles And Fizz Clock - No Stamping Required #GDP127

by Joanne James2. March 2018 22:00

Today I'm sharing a 3D project with you that is the ultimate showcase of the Sale-A-Bration Bubbles & Fizz papers, so is perfect for this week's Global Design Project challenge:

Why is it the ultimate DSP showcase? Well there's not a single bit of stamping on today's project - take a look:


A multi-coloured and fully functional working clock - how fun is that?! Here's the low-down on today's project:

No Stamping Required - This is another of the projects that I showcased at Onstage back in November and is a real favourite of mine. You know how much I love those Bubbles and Fizz papers and this project showcases 3 of the designs (4 if you count the decorated pizza box I used to gift wrap it!): the multi-coloured bubble background, the bottle tops indicating where the numbers are and the bottles that form the clock hands. All three papers work really well together and leave no need for any stamping on this project.  

Bottles and Tops - Well, Bottles and Bubbles actually - well framelits that is, that fit the Bottles and Fizz paper perfectly. On each of these sheet designs every bottle and top can be cut out perfectly with the co-ordinating framelits, so there is no wastage. 

A Touch of Gloss - I added a layer of fine tip glue to my bottles and tops before attaching the to my clock face, to give a layer of shine and protection. That's all there is to it!

This project uses a simple clock kit that you can buy at any craft store and is great if you have customers who like home decor projects but are not big stampers (I have a group of those!) The clock is also fun - great for decorating the bedroom of a discerning teenager or maybe a student away from home. It really doesn't use much in the way of supplies and whilst you only need the framelits for this project, you are definitely going to want to buy the bundle to benefit from the stampset too and explore further creative opportunities.

Here is the visual summary of the key products used on today's project for you to pin for easy reference:


You can see all of my 'How To' summaries on my 'How To - Tips and Techniques' Pinterest board in case you've missed any. 

Enjoy your weekend; I will be hosting my first two day residential Stampin' Sanctuary luxury craft retreat so will not be blogging tomorrow. I'll be back on Sunday with another project for this week's new challenge over at The Paper Players though so be sure to tune in then. Until then, happy stampin'!


Stampin' Up! Supplies Used:

Table built using Product Table Builder by The Crafty Owl - Independent Stampin' Up! Demonstrator.

Bubble Over Thank You Make And Take Card

by Joanne James23. February 2018 21:00

Yay it's Friday! Another fun beer bottle to end the week, this time the make and take card from our Onstage event:


This card design is great for showcasing those fabulous bold and bright patterns in the Bubble Over Designer Series Paper Pack - it's also a good way to use up scraps of paper that you may have lying around from other projects. Paired with a mat stamped with bubbles, a bottle and some of those lovely sparkly Glitter and Clear Epoxy Shapes, this thank you card is sure to brighten anyone's day!

Here is the visual summary of the key products used on today's project for you to pin for easy reference:


You can see all of my 'How To' summaries on my 'How To - Tips and Techniques' Pinterest board in case you've missed any. 

I'll be back tomorrow with another project. Until then, happy stampin'!


Stampin' Up! Supplies Used:

Table built using Product Table Builder by The Crafty Owl - Independent Stampin' Up! Demonstrator.

Yay For Bubbles And Fizz - And FREE!

by Joanne James22. February 2018 21:00

A quick post this evening to share with you another Bubble Over card featuring one of my favourite patterns in the Bubbles and Fizz pack of designer series paper - take a look:


I just love that multi-coloured bubble pattern - such a great background for a fun card! Super simple, with some basic layering and another brightly coloured pop bottle front and centre, complete with straw and a fun sentiment - perfect when you want to send someone a little love for a 'yay' moment. 

Here is the visual summary of the key products used on today's project for you to pin for easy reference:


You can see all of my 'How To' summaries on my 'How To - Tips and Techniques' Pinterest board in case you've missed any. 

I'll be back tomorrow with another project. Until then, happy stampin'!


Stampin' Up! Supplies Used:

Table built using Product Table Builder by The Crafty Owl - Independent Stampin' Up! Demonstrator.

Bubble Over Meets Bubble and Fizz - The Perfect Match

by Joanne James21. February 2018 21:00

A busy day yesterday with a class and a Stampin' Up! party with a lovely bunch of ladies yesterday evening so no time to blog but I'm back with you this evening with another Bubble Over card - take a look:


Here's the low-down on today's card:

Bubbles and Fizz - Today's card features two of the bottle patterns in the bright and colourful Bubbles and Fizz Designer Series Paper. This can be yours free during the current Sale-A-Bration promotion with an order of £45 or more. I just love the modern patterns and colours that have a universal appeal and work particularly well on cards for teenagers I think (sometimes a tricky crowd!)

Bottles and Bubbles - You can see the bottles again, this time they've been cut out though with the co-ordinating Bottles and Bubbles Framelits, along with some bubbles and a bottle top. Here's a sheet showing all of the framelit shapes - as you can see, there are two of some shapes to speed up your crafting as you can cut multiples of the same shape at the same time - super useful. Lots of little bits and pieces though, so you are definitely going to want to attache them to a magnetic sheet for storage to avoid losing any.


Here is the visual summary of the key products used on today's project for you to pin for easy reference:


You can see all of my 'How To' summaries on my 'How To - Tips and Techniques' Pinterest board in case you've missed any. 

Enjoy your day and I'll be back tomorrow with another project. Until then, happy stampin'!


Stampin' Up! Supplies Used:

Table built using Product Table Builder by The Crafty Owl - Independent Stampin' Up! Demonstrator.

Bubble And Fizz - To Fussy Cut Or Not?

by Joanne James12. February 2018 06:00

Happy Monday everyone! The James Juniors are on their half-term holiday from school this week so whilst they are likely to be enjoying some much-needed R&R, I will be juggling as usual! I did manage to grab some time over the weekend to write up a ton of blog posts, so hopefully a more regular blogging service is about to resume. Today I'm sharing a card for this week's challenge over at CAS(E) This Sketch - take a look:


I haven't managed to play along here for a little while, so was super-happy to see this sketch as I immediately knew how I was going to tackle it! Now clean and simple my card might be, but it does include a fair bit of fussy cutting - take a look:

Here's the low-down on today's card:

Bubbles And Fizz - When I saw the sketch, I immediately thought of those mini bottles on the Bubbles and Fizz Designer Series Paper that can be yours free with a purchase of £45 or more during the current Sale-A-Bration promotion. These papers are designed to co-ordinate with the Bubble Over bundle in the seasonal catalogue - more on that another day! Whilst the paper really makes the most of the stamp set, it also stands up on its own: fabulous bright colours, with both bottle and alternative patterns in the set. 

To Fussy Cut Or Not - Three of the papers in the Bubbles and Fizz pack have patterns that can be cut out using the co-ordinating Bottles and Bubbles Framelit dies - the design I chose to use for my card is not one of them though! Undeterred, I grabbed my paper snips and set to work. I love a bit of fussy cutting, I actually find it quite theraputic - but I know it's not everyone's thing. We had a lively debate on my Facebook page where I shared my work-in-progress at the weekend; the jury was split 50:50 between the lovers and the haters - which side of the fence would you be on? Do leave me a comment below - I'd love to know! 

A Custom Banner - I played about with lots of backgrounds, colours and sentiment banners before finally deciding in white embossed on a Bermuda Bay banner for a bright pop of colour, courtesy of the Large Number Framelits. The sentiment is from the 'Colour Me Happy' stamp set.

Here is the visual summary of the key products used on today's project for you to pin for easy reference:


You can see all of my 'How To' summaries on my 'How To - Tips and Techniques' Pinterest board in case you've missed any. 

I haven't featured the 'Bubble Over' stamp set on my blog yet, despite having a ton of projects made with it as I was lucky enough to present this set at Onstage last November. I think this may be the week I put that right - look out for a ton of bottle projects to follow, including some 3D pieces.

Enjoy your day and I'll be back tomorrow with another project. Until then, happy stampin'!


Stampin' Up! Supplies Used:

Table built using Product Table Builder by The Crafty Owl - Independent Stampin' Up! Demonstrator.

A Bird Banter Belated Birthday Card

by Joanne James27. January 2018 21:07

A late and quick post from me today as I managed to grab a little crafting time this afternoon and made a card for a friend of mine that I'm also entering for a couple of challenges:


I loved the sketch over at Fusion and those bright colours at Inspire.Create were perfect for what I had in mind. No coffee cup I'm afraid - my card is all about the apology and right on the money as far as this week's theme over at CASology is concerned - take a look:


Here's the low-down on today's card:

Bird Banter - Please tell me I am not the only cardmaker who frequently forgets birthdays? I mean, my intentions are always good and I have loads of cards on hand, but more often than not one of two things happens: I either don't have the 'right' card for that person on hand and so in taking the time to make it I end up late for the date, or alternatively I simply forget. It's never intentional, I'm just always so busy and I have a dreadful memory for dates and numbers, so they just don't stick. So all that said, Bird Banter is the perfect set for me - specifically, the rather punny sentiments and this one in particular: 'A little birdie told me it was your birthday ... obviously it wasn't an early bird'. How fun is that?! I received this set for free at Onstage, but I have to say it's one I would buy for that sentiment alone - it was (unfortunately) made for me!

A Hint of Stripes - I kept my card bright, clean and simple; I tucked in a little piece of the thin-striped Sale-A-Bration Bubbles & Fizz designer series paper behind my image to add a little interest and pop of blue, to compliment my bright pink background and yellow sentiment banner. 

A Stampin' Blends Tip - I used my Stampin' Blends to colour in my party parrot (the Melon Mambo ones were actually my old Blendabilties) and added a little clear Wink of Stella to his party hat and wing for a little sparkle. I fussy cut a second wing and tail piece and popped them on a dimensional so that I could overlap my sentiment banner slightly. My Stampin' Blends tip for you today is in relation to using them to colour a co-ordinating stamped image onto your envelope: before you begin colouring, place a piece of cardstock inside the envelope; this will prevent ink leaking through to the back of the envelope and spoiling its appearance.

I added one of the other birds along with the other part of the sentiment to the inside of my card - here he is:

Another handsome fella! One thing I do know - this card is on it's way to a friend, yes, whose birthday I forgot last week!

Here is the visual summary of the key products used on today's project for you to pin for easy reference:


You can see all of my 'How To' summaries on my 'How To - Tips and Techniques' Pinterest board in case you've missed any. 

I'll be back tomorrow with my post for this week's new challenge over at The Paper Players. Until then, happy stampin'!


Stampin' Up! Supplies Used:

Table built using Product Table Builder by The Crafty Owl - Independent Stampin' Up! Demonstrator.

Epic Celebration Meets Bubble And Fizz Bright Birthday Card

by Joanne James17. January 2018 22:00

Today I'm sharing another card made using some of the items you can earn for free with a purchase of £45 or more during Stampin' Up!'s Sale-A-Bration promotion that I made with the ladies in my card class last week - take a look:


My card uses 3 of the currently available Sale-A-Bration items - can you spot them all? Here's the low-down on today's card:

An Epic Celebration - The trainers or 'sneakers' on my card today come from the Epic Celebration stamp set - perfect for discerning teens, both male and female. I stamped mine in Archival Grey ink and highlighted areas of my shoes and the sentiment with a chalk marker to accentuate some of the detail against the Bermuda Bay background. 

Bubbles and Fizz, Stars and Stripes - My background paper is another Sale-A-Bration freebie, the Bubbles and Fizz designer series paper. It has some great bottle patterns, but also great neutral patterns in bold, bright colours. I used one piece and cut a strip that I flipped over to give a fun 'stars and stripes' combination. 

Shimmer Ribbon - I covered the join of my two papers with some shiny satin Basic Grey ribbon - yes, my third free gift! This pack of three ribbons in different widths on page 9 of the Sale-A-Bration catalogue is easily overlooked, yet the gorgeous shimmer makes them worth a second glance, not to mention the fact that they co-ordinate so beautifully with the designer series paper! 

My card was inspired by this one made by Amy Koenders, with a few subtle differences - thanks for the inspiration Amy! Here is the visual summary of the key products used on today's project for you to pin for easy reference:


You can see all of my 'How To' summaries on my 'How To - Tips and Techniques' Pinterest board in case you've missed any. 

Enjoy your day and I'll be back tomorrow with another project. Until then, happy stampin'!


Stampin' Up! Supplies Used:

Table built using Product Table Builder by The Crafty Owl - Independent Stampin' Up! Demonstrator.

Mini Catalogue

BROWSE THE CATALOGUE

The mini catalogue is now live! Read and download your copy here.

Shop Online

Access my online shop 24 x 7, 365 days of the year:

Current March hostess code:

S9F2XJJW

Shop Online

Join My Team

It's always a great time to join Stampin’ Up! New team members can get £130 worth of products for only £99 + free business supplies + free shipping + all the fun being a part of Stampin’ Up! Stampin' Up! has something for everyone: join my growing team and benefit from my support to enjoy Stampin' Up! however you choose.

If you're interested, call me for a chat to understand how I can help you realise your goals. Alternatively, if you have already decided to sign up and you just can't wait, please click here for the link to the online form where you can sign up and order your starter kit right away! 

Latest Kit!

Stampin Cut and Emboss

The Rock Legend Kit has all you need to make 8 cards with coordinating envelopes. Along with the new Panda Friends Kit, both are available from January 4th for just £14 each - get yours here!

2023-24 Annual Catalogue

BROWSE THE CATALOGUE

Click on the catalogue for a full list of current SU! supplies - if you would like to order any of the items featured, please drop me a line at [email protected] or give me a call on 07773 421446 - I'd be happy to help.

New Online Exclusives

There will be new products available exclusively in the online store from 5 March - check them out here.

About Me

Hi I'm Joanne and live in Northampton and when I'm not looking after my husband and two beautiful children, am an avid crafter with a passion for all things Stampin' Up!

I must confess that I have never been a big rubber stamper - until I discovered Stampin' Up! that is. I love the fact that I can get such great results with co-ordinating stamps, inks, papers and punches - the possibilities are endless! Join me on my stamping journey as I share the things I love and be inspired to create amazing things yourself!

Follow Me

Monthly Newsletter

Box Builder

Click the button above to use Box Buster to create your custom box design using the Envelope Punch Board!

Kits Collection Now Available!

Stampin Cut and Emboss

The new Kits Collection from Stampin' Up! is now available!

Click here to see the current kits available and order yours online today.

I Design For


Stampin' Up Stuff

This is my personal blog and is not endorsed by Stampin’ Up! I hope you find it a plentiful source of ideas and personal inspiration but please don't copy my designs for contest submission or use for classes, publication or sale without express permission.