Christmas Tidings & Trimmings Copper Star Trio PP548

by Joanne James4. July 2021 09:00

Today it's Sunday and time for this week's new challenge over at The Paper Players! It's the turn of the fabulous Anne Marie to host this week and she has a timely theme challenge for you to work with:
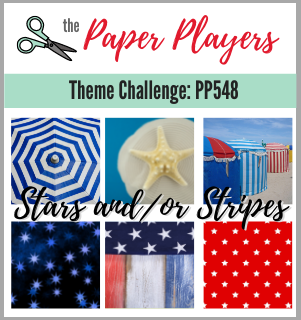
    

With today being the fourth of July and American Independence Day, Anne Marie's patriotic stars and/or stripes theme is very topical indeed. I wish all of my fellow teamies and readers on the other side of the pond a very happy Independence Day, yet I actually decided to jump forward to another holiday with my stars this week - yes, the (dreaded) 'C' word: Christmas! I took Amy's fabulous Sunday Stamps sketch and a little something old paired with something new for today's card - take a look:
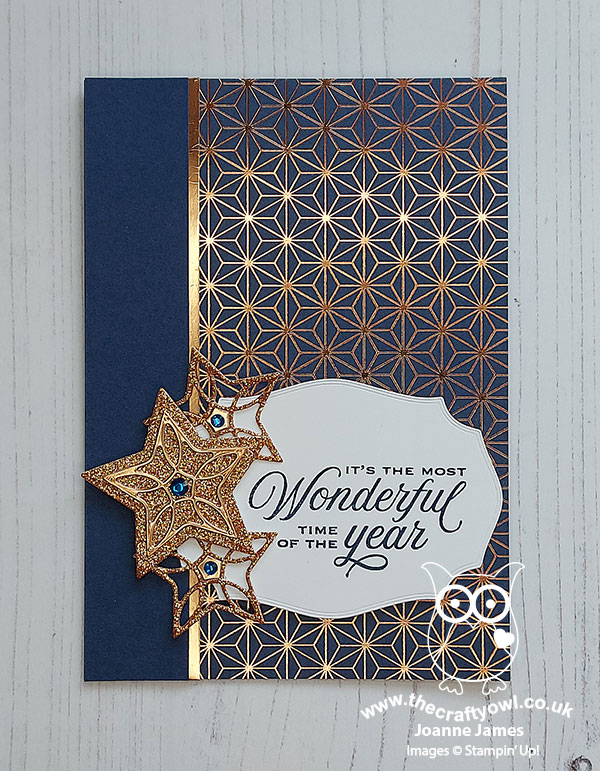
 

Here's the low-down on today's card:

Something Old - Whilst the stars in my 'something new' were the starting point for my card today, I couldn't resist digging out some of my retired Brightly Gleaming designer paper from last season to use as the basis for my colour scheme on today's card. I just love this paper and the copper/gold combination is such a winner in my book. I went with the graphic star pattern for my main panel to further compliment the 'stars and/or stripes' theme.

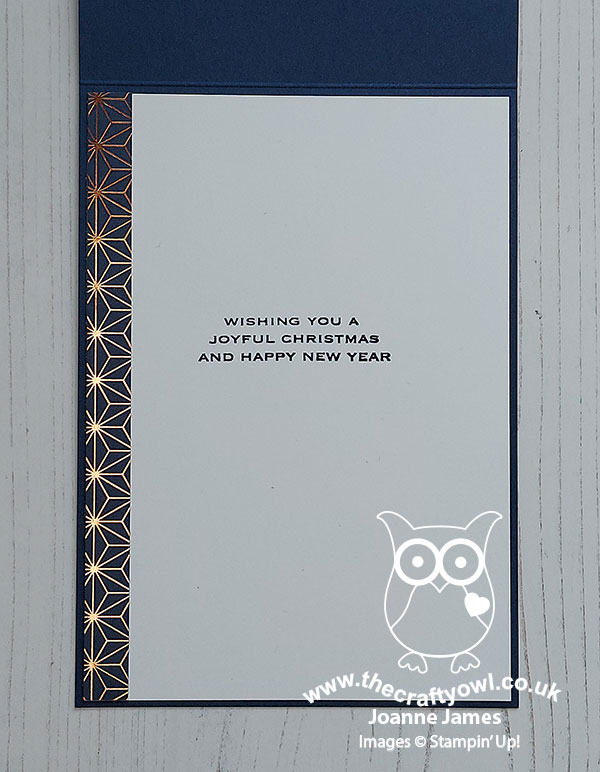
Something New - The starting point for today's card was most definitely some new goodies I received this week with the Tidings & Trimmings bundle from the annual catalogue. The layered star dies in this set were the first things to catch my eye, but the stamp set also includes some lovely sentiments too. In addition to the one stamped onto my label on the front of my card, I stamped this one inside:
 

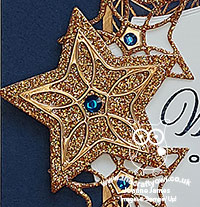
 The real scene-stealers on today's card though are the diecut stars on the front of the card, with the centre one a combination of layered (retired) copper glimmer paper and copper foil:
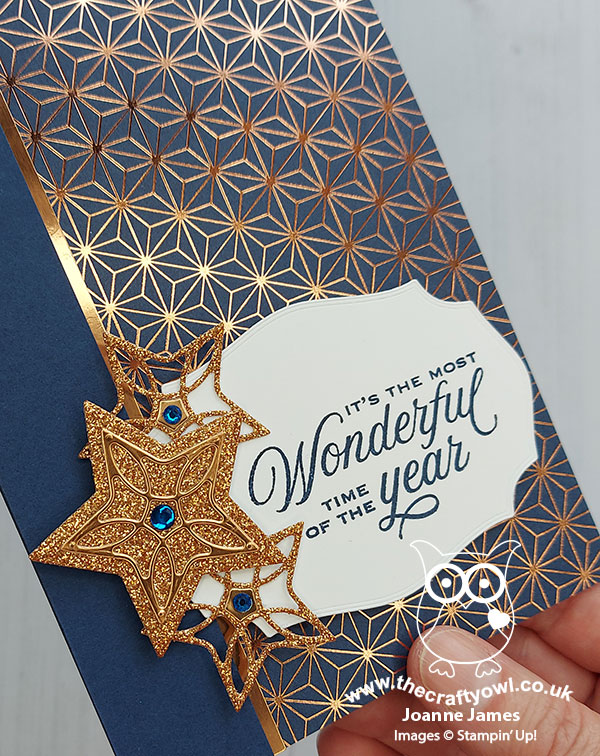
 

Aren't those stars just fabulous?! This is such a sparkly Christmas card in real life and I love how my trio of stars has given new life to my stash of hoarded DSP too.

Holiday Bling - Last but not least, I added a Night of Navy rhinestone from the Holiday Rhinestones pack to the centre of each of my stars to compliment the navy and really draw your eye to the diecut detail.

Here is the visual summary of the key products used on today's project for you to pin for easy reference:
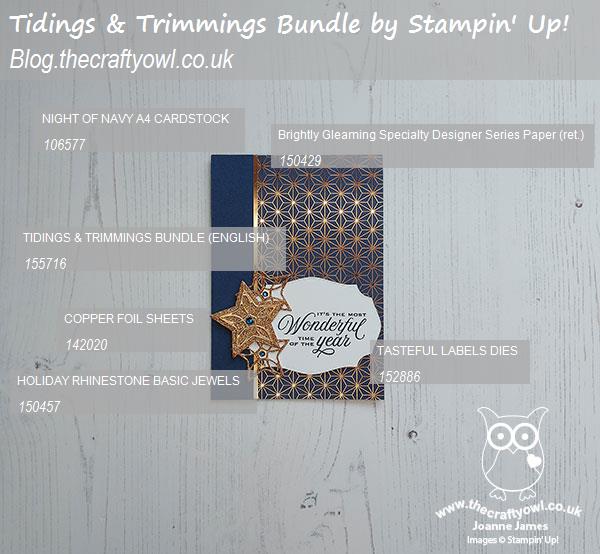
 

You can see all of my Product and 'How To' summaries on my 'How To - Tips and Techniques' Pinterest board in case you've missed any. 

I can't wait to play more with the Tidings and Trimmings stamp set and those Christmas Trimmings Dies - I think they are going to become a staple in my Christmas craft room and you will definitely be seeing more of them in the coming months.

Before you reach for your ink and papers, check out what our amazing team has created to inspire you this week:

Here's a quick recap of our challenge rules:
 
1.  Create a new paper project
2.  Upload your creation to your blog with a link back to us and provide a direct link to the post featuring your challenge submission.
3.  Please link your card to no more than four challenges, TOTAL.
4.  Have FUN!

You can see all of my 'How To' summaries on my 'How To - Tips and Techniques' Pinterest board in case you've missed any. 

Enjoy your day; I have no special plans today but am hoping to find a little crafting time and with any luck will be back tomorrow with another project. Until then, happy stampin'!


Stampin' Up! Supplies Used: 

Table built using Product Table Builder by The Crafty Owl - Independent Stampin' Up! Demonstrator.

Copper and Navy Merry and Bright Christmas Card FMS463

by Joanne James30. November 2020 13:48

Today I'm sharing a card that uses Amy's sketch over at Freshly Made Sketches as its starting point:

I absolutely loved Amy's sketch this week (it's a keeper - thanks Amy!) and could have made a ton of cards with it! Alas time was my enemy so I chose my favourite idea and ran with it! It uses one of my favourite festive combinations inspired by the patterns of the Brightly Gleaming designer paper I used for my rectangle background - take a look:


Here's the low-down on today's card:

I made the paper the star of the show and paired it with a stamped and diecut sentiment from the 'Peace and Joy' bundle, using vellum for the base layer to soften the panel but allow the pattern to shine through. I used a bunch of retired diecuts for the trio of background 'sticks' (they are actually cut using the candle die from the 'Doily Wishes' set!) and added a copper star in place of the dot on the 'i' in 'bright' for a little something extra - check it out below:


I added a copper bow from some leftover twine from a retired card kit to complete my card.

Here is the visual summary of the key products used on today's project for you to pin for easy reference:


You can see all of my 'How To' summaries on my 'How To - Tips and Techniques' Pinterest board in case you've missed any. 

I made another card using the 'Peace and Joy' dies for another card over the weekend which I will hopefully be back to share with you later; right now I'm against the clock so have to dash!! Enjoy the rest of your day and I'll hopefully be back later with another project. Until then, happy stampin'!


Stampin' Up! Supplies Used:

Table built using Product Table Builder by The Crafty Owl - Independent Stampin' Up! Demonstrator.

Strong & Beautiful Starry Congratulations Card

by Joanne James20. October 2020 19:25

Today I'm sharing a card that is based on the current Fab Friday Challenge sketch, which I love:


I decided it would be the perfect layout for a card I needed to make for the newest member of my Stampin' Up! team who recently achieved a 'rising star' milestone for consistent sales during her first quarter; an achievement to be celebrated! Here's my card:


Here's the low-down on today's card:

Shoot For The Stars - I thought the starry flourish from the Stitched Stars Dies was perfect for the flourish in the sketch and totally fitting with my congratulatory theme, so I cut it out of copper foil for a swirl of shiny stars.

Brightly Gleaming - I picked up on the starry theme with a piece of Brightly Gleaming designer paper and used the Night of Navy/copper colour combo as the basis for the rest of my card. I also added a narrow copper scalloped border and a trio of copper star embellishments to my card. I love this paper - great for all kinds of occasions, not just Christmas.

Strong & Beautiful - The 'Strong and Beautiful' stamp set has some wonderful empowering sentiments and I chose to feature two on today's card; one on the front of this card and another on the inside:


Here is the visual summary of the key products used on today's project for you to pin for easy reference:


You can see all of my 'How To' summaries on my 'How To - Tips and Techniques' Pinterest board in case you've missed any. 

Enjoy your evening and I'll be back tomorrow with another project. Until then, happy stampin'!


Stampin' Up! Supplies Used:

Table built using Product Table Builder by The Crafty Owl - Independent Stampin' Up! Demonstrator.

Brightly Gleaming Dove of Hope PP510

by Joanne James27. September 2020 09:00

Today it's Sunday and time for this week's new challenge over at The Paper Players! It's my turn to host this week and I have my favourite, a sketch challenge for you to work with:


I love clean and layered cards and decided to incorporate lots of layers into this week's sketch. Lots of ways to interpret it - I decided to go with something new and a returning favourite and create another Christmas card for my stash:


Here's the low-down on today's card:

Dove of Hope - There are lots of elements to today's card but my focal point is one of the doves and sentiment from the new Dove of Hope bundle. There are two stamped doves and an additional diecut dove in the Detailed Dove Die set, and I used the only left-facing one on my card. The stamp set has a number of sentiments, including this one that is perfect for decorating the inside of your card:

Brightly Gleaming - I paired my dove with some of the Brightly Gleaming designer series paper and used this to inspire my Pretty Peacock and Very Vanilla colour scheme. The Brightly Gleaming Specialty Designer Series Paper is a returning favourite from last year; it's great to be able to use if again!

Brushed Metallics - I decided to add in some Brushed Metallic Cardstock in gold to tie in with my metallic edge ribbon and add an additional touch of luxury and elegance to my card. I carried this through to my card too, where on a whim I added a strip of sparkly gold washi tape to the edge of my envelope flap, but have to say I quite like it!

I really like the Dove of Hope Bundle and think it has lots of creative possibilities. It is going to be the focus bundle for my November online card class so if you like this set too, I'd love you to join me. Message me to book your place.

Here is the visual summary of the key products used on today's project for you to pin for easy reference:


You can see all of my Product and 'How To' summaries on my 'How To - Tips and Techniques' Pinterest board in case you've missed any. 

Before you reach for your ink and papers, check out what our amazing team has created to inspire you this week:

Here's a quick recap of our challenge rules:
 
1.  Create a new paper project
2.  Upload your creation to your blog with a link back to us and provide a direct link to the post featuring your challenge submission.
3.  Please link your card to no more than four challenges, TOTAL.
4.  Have FUN!

You can see all of my 'How To' summaries on my 'How To - Tips and Techniques' Pinterest board in case you've missed any. 

Enjoy your day; following a busy day yesterday we are having a day at home with all hands on deck as I complete the final preparations for my bi-annual retreat which is next weekend. There will be lots of diecutting from everyone! I'll be back tomorrow with another project. Until then, happy stampin'!


Stampin' Up! Supplies Used: 

Table built using Product Table Builder by The Crafty Owl - Independent Stampin' Up! Demonstrator.

Flight of Fancy Christmas Whoops-A-Daisy Angel

by Joanne James22. September 2020 11:25

Tuesday already! This is my first post for today; you will definitely want to check out my next post too about tomorrow's 24 hour flash stamp sale and details of my upcoming classes - you can see that here.

For today's creative post I'm sharing a card for a couple of challenges:


The team at Just Add Ink are asking us to 'Just Add A' to our cards and from the inspo list over at Festive Friday I chose stars, metallics and blue - with a little added glitter thrown in! The team at Festive Friday are celebrating World Space Week and whilst there are no planets on my card, I did feature a celestial being of another kind - take a look:


Here's the low-down on today's card:

A Is For ... - ... Angel! I adore this whimsical line-drawn angel in the 'Flight of Fancy' stamp set - she looks just like she stepped off the set of a primary school nativity play! I decided to give mine ginger red hair, a coat of clear Wink of Stella and super-sparkly Dazzling Diamonds wings for an overdose of cuteness. 

B Is For ... - ... Brightly Gleaming Specialty Designer Series Paper! This fabulous copper-foiled paper is a returning favourite from last year and mine was still on the shelf; my Paper Player teamie Ann, who also designs with the Festive Friday team, used the same paper on her card this week and it reminded me how fabulous it is. It inspired the whole colour scheme for my card - so pretty!

C Is For ... - ... Copper Brushed Metallic Cardstock! I used this cardstock for my mat and to diecut a swirly star die cut to tuck behind my main image for some added detail. I wanted to see how it paired with the starry paper and whilst it isn't as super shiny as copper foil, it does add a beautiful sheen to compliment it.

This little angel totally reminds me of a play that the James Juniors did at Christmas once when they were at primary school called 'Whoops-A-Daisy Angel' (hence the title of today's blog post) - is there anything more adorable than little children, with wings and halos all askew, singing along at the tops of their voices to Christmas carols? Priceless!

Here is the visual summary of the key products used on today's project for you to pin for easy reference:


You can see all of my 'How To' summaries on my 'How To - Tips and Techniques' Pinterest board in case you've missed any. 

Enjoy your day and I'll be back tomorrow with another project. Until then, happy stampin'!


Stampin' Up! Supplies Used:

Table built using Product Table Builder by The Crafty Owl - Independent Stampin' Up! Demonstrator.

Brightly Gleaming Meets So Many Stars for PP460

by Joanne James22. September 2019 09:00

Today it's Sunday and time for this week's new challenge over at The Paper Players! It's the turn of the delightful Claire to host this week and she has my favourite, a sketch challenge, for you to work with:


Tall and skinny - what fun! I love occasionally to change things up and give cards a completely different look by altering their size and shape. It didn't take me long to decide where to take Claire's sketch this week - take a look:


Here's the low-down on today's card:

I took two of my favourite things - the navy and copper star patterned paper from the Brightly Gleaming set and my Stitched Stars Dies - along with some copper foil and star and foil elements, and created a layered star centrepiece. I heat embossed my sentiment from the 'So Many Stars' set in copper onto Night of Navy cardstock, fussy cut around it and popped it up on a stack of dimensionals to complete my card. 

Here is the visual summary of the key products used on today's project for you to pin for easy reference:


You can see all of my Product and 'How To' summaries on my 'How To - Tips and Techniques' Pinterest board in case you've missed any. 

I'm linking my card up with SUOChallenges where they currently have a Designer's Choice challenge. I love this card - so much so, I made a second one straight afterwards! I just need to use my trusty BoxBuster tool to make a couple of bespoke envelopes now ready to send them!

Before you reach for your ink and papers, check out what our amazing team has created to inspire you this week:

Here's a quick recap of our challenge rules:
 
1.  Create a new paper project
2.  Upload your creation to your blog with a link back to us and provide a direct link to the post featuring your challenge submission.
3.  Please link your card to no more than four challenges, TOTAL.
4.  Have FUN!

You can see all of my 'How To' summaries on my 'How To - Tips and Techniques' Pinterest board in case you've missed any. 

Enjoy your day; I am singing with my choir in a harvest festival service this morning, then will be home to assist in finishing homework and the like in the afternoon. I'll be back tomorrow with another project. Until then, happy stampin'!


Stampin' Up! Supplies Used: 

Table built using Product Table Builder by The Crafty Owl - Independent Stampin' Up! Demonstrator.

Brightly Gleaming Foil Elements CAS Bauble Christmas Card

by Joanne James21. September 2019 21:15

I am a bad blogger! I've had such a busy week that I have managed very little to either create or blog. So a quick share from me with another all-out copper clean and simple metallic, inspired by last week's Paper Players challenge that uses this week's CAS(E) This Sketch layout:


I created another super clean and simple Christmas card, this time featuring a couple of Brightly Gleaming Foil Elements baubles and a heat embossed sentiment from the 'Perfectly Plaid' stamp set - take a look:


My card is a simple extra thick Whisper White card base, a layer of copper foil cut with the Rectangle Stitched Framelits, then my copper heat-embossed sentiment on a panel of Whisper White with two foil element baubles hanging from some retired copper metallic thread - definitely clean and simple!

Here is the visual summary of the key products used on today's project for you to pin for easy reference:

 to follow

You can see all of my Product and 'How To' summaries on my 'How To - Tips and Techniques' Pinterest board in case you've missed any. 

Enjoy your evening; I'll be back tomorrow with this week's card for The Paper Players. Until then, happy stampin'!


Stampin' Up! Supplies Used: 

Table built using Product Table Builder by The Crafty Owl - Independent Stampin' Up! Demonstrator.

Copper Metallic Brightly Gleaming Christmas Card AYSI207 FF041

by Joanne James27. August 2019 09:00

Today I'm sharing another Christmas card, this time for the current challenges over at As You See It and Festive Friday:


I was determined to have another go at the current AYSI sketch and go with it the right way up and since metallics are a big feature of my card today it is also perfect for the challenge over at Festive Friday too - take a look:


Here's the low-down on today's card:

Brightly Gleaming - This fabulous copper detailed designer series paper from the Brightly Gleaming specialty designer series paper is the inspiration for the colour scheme of my card today. The Brightly Gleaming Suite is one of the new suites in the forthcoming autumn-winter seasonal catalogue and the specialty paper is most definitely the star of the show in my opinion! Seasonal stars and bauble images combined with all-purpose patterns, with half of the designs having copper foil accents that truly make this paper shine. 

Christmas Gleaming Ornaments - I stamped and heat embossed all of the elements of my decorated bauble ornament and added some Night of Navy colouring with my Stampin' Blends for added detail, before punching out with the co-ordinating ornament punch. This was so quick, a little fussy cutting with the holly and berries was totally worth it. I also did a little stamping inside my card:


Copper Cabana - If you're still reading then please accept my apologies for the dodgy Barry Manilow reference :-) Today's card really is a celebration of metallics, and copper in particular. That gorgeous copper foil-accented paper, a full copper foil mat, the heat embossed sentiment and ornament detail, along with the addition of one of the foil elements that also form part of this suite, all serve to give this card a truly luxurious feel.

Here is the visual summary of the key products used on today's project for you to pin for easy reference:


You can see all of my 'How To' summaries on my 'How To - Tips and Techniques' Pinterest board in case you've missed any. 

Enjoy your day and I'll be back tomorrow with another project. Until then, happy stampin'!


Stampin' Up! Supplies Used:

Table built using Product Table Builder by The Crafty Owl - Independent Stampin' Up! Demonstrator.


Current Promotions

Stampin Cut and Emboss

Save up to 30% off on all your favourite kits from 1 to 31 October! 

Click here to see the current kits available and order yours online today.

Join My Team

It's always a great time to join Stampin’ Up! During October you can get even more in your starter kit! New team members can get £160 worth of products for only £99 + free business supplies + free shipping + all the fun being a part of Stampin’ Up! Stampin' Up! has something for everyone: join my growing team and benefit from my support to enjoy Stampin' Up! however you choose.

If you're interested, call me for a chat to understand how I can help you realise your goals. Alternatively, if you have already decided to sign up and you just can't wait, please click here for the link to the online form where you can sign up and order your starter kit right away! 

Shop Online

Access my online shop 24 x 7, 365 days of the year:

Current October hostess code:

4XPEYCB9

Shop Online

Scrapbooking

Stampin' Up! has introduced a new range of 12x12" scrapbooking product and kit - the full range is now available to purchase online. To download a copy of the new digital Scrapbooking Catalogue click here.

Mini Catalogue

BROWSE THE CATALOGUE

'Tis The Season - the new Stampin' Up! Mini Catalogue is here! For more details and to download your copy click here

2024-25 Annual Catalogue

BROWSE THE CATALOGUE

Click on the image to download your copy of the 2024-25 annual catalogue. For a full list of current SU! supplies, go to my online store. If you would like any help or advice, please drop me a line at joanne@thecraftyowl.co.uk or give me a call on 07773 421446 - I'd be happy to help.

Latest Kits!

Stampin Cut and Emboss

The Christmas Ornaments Kit and Card Keeper Kit are the latest kits in the online store - get yours here!

New Online Exclusives

There are new products available exclusively in the online store from 5 November - check them out here.

About Me

Hi I'm Joanne and live in Northampton and when I'm not looking after my husband and two beautiful children, am an avid crafter with a passion for all things Stampin' Up!

I must confess that I have never been a big rubber stamper - until I discovered Stampin' Up! that is. I love the fact that I can get such great results with co-ordinating stamps, inks, papers and punches - the possibilities are endless! Join me on my stamping journey as I share the things I love and be inspired to create amazing things yourself!

Follow Me

Monthly Newsletter

Box Builder

Click the button above to use Box Buster to create your custom box design using the Envelope Punch Board!

Kits Collection Now Available!

Stampin Cut and Emboss

The new Kits Collection from Stampin' Up! is now available!

Click here to see the current kits available and order yours online today.

I Design For


Stampin' Up Stuff

This is my personal blog and is not endorsed by Stampin’ Up! I hope you find it a plentiful source of ideas and personal inspiration but please don't copy my designs for contest submission or use for classes, publication or sale without express permission.