Just Kiddin' Adventurer FMS632

by Joanne James20. April 2024 19:25

Today I'm sharing a card for the current challenge over at Freshly Made Sketches:


As soon as I saw Jen's layout this week I knew that I wanted to use one of the background panels from the Just Kiddin' designer series paper for that feature panel - take a look:


Here's the low-down on today's card:

I stayed with the square card layout as it allowed me to use almost the whole piece of the outdoor scene for the feature panel. I added a panel of embossed woodgrain behind, and in addition to my little explorer, that I fussy cut from another of the Just Kiddin' designs, I added a diecut (retired Christmas) tree and some additional diecut flowers from the Timeless Arrangements Dies to the scene, along with a sentiment from another retired set, Beautiful World:


Isn't that little girl with her magnifying glass in her explorer hat sweet? I thought this card would make a fun card to celebrate someone leaving on a gap year adventure - what do you think? I think it's rather cute!

Here is the visual summary of the key products used on today's project for you to pin for easy reference:


You can see all of my 'How To' summaries on my 'How To - Tips and Techniques' Pinterest board in case you've missed any. 

Enjoy your day and I'll be back tomorrow with another project. Until then, happy stampin'!


Stampin' Up! Supplies Used:

Table built using Product Table Builder by The Crafty Owl - Independent Stampin' Up! Demonstrator.

Just Kiddin Adventure Awaits FMS627

by Joanne James18. March 2024 11:30

No crafting time today but I do have a quick card to share using Karren's layout over at Freshly Made Sketches this week:

I didn't go slimline (largely because I was so fixated on making my card, I totally forgot about that bit - good job it was optional!) but I couldn't wait to use Karren's layout for another card featuring my favourite Just Kiddin' designer series paper - take a look:


Here's the low-down on today's card:

I added a panel of Boho Blue embossed with the (retired) High Seas 3D Embossing Folder to the lower portion of my white cardfront, fussy cutting along the edge of the waves - I love the dimension that this adds and it picks up the detail from the fussy cut image. My trio sailing in their cardbox box boat make the perfect focal point and broadly follow the curved shape of Karren's semi circle:


A sentiment from then (retired) 'Beautiful World' was all that was needed to complete today's fun card. 

Here is the visual summary of the key products used on today's project for you to pin for easy reference:


You can see all of my 'How To' summaries on my 'How To - Tips and Techniques' Pinterest board in case you've missed any. 

Enjoy your day; mine is filled with domestic bliss - the price we pay for a weekend away, but I wouldn't have it any other way! I'll be back tomorrow with another project. Until then, happy stampin'!


Stampin' Up! Supplies Used (current):

Table built using Product Table Builder by The Crafty Owl - Independent Stampin' Up! Demonstrator.

Sailing Home Slimline Congratulations Card PP543

by Joanne James30. May 2021 09:00

Today it's Sunday and time for this week's new challenge over at The Paper Players! It's the turn of the fabulous LeAnne to host this week and as it's the fifth Sunday of the month we have a tic-tac-toe challenge board for you to work with:
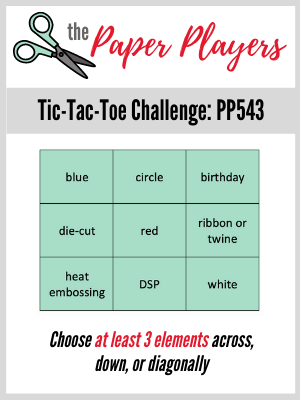
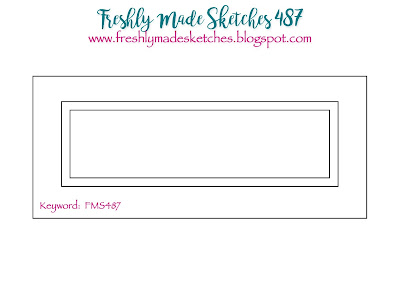
       

I went down the first column of our TicTacToe board with blue/die-cut/heat embossing and decided to use Jen's Freshly Made Sketches layout and make another slimline card that was totally inspired by the fabulous nautical photo over at The Card Concept - take a look: 
 

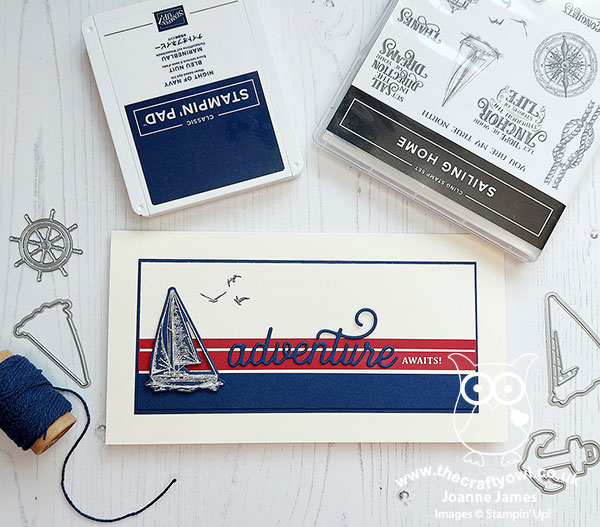
Here's the low-down on today's card:

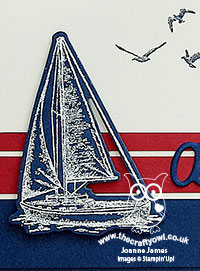
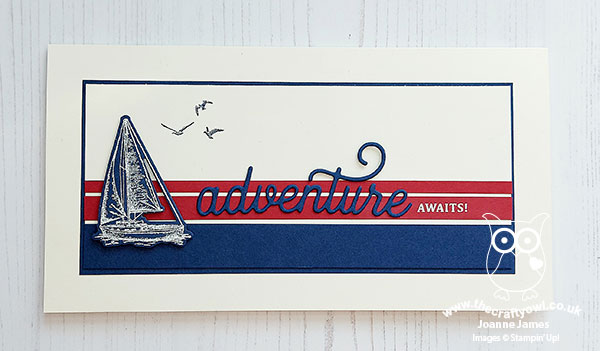
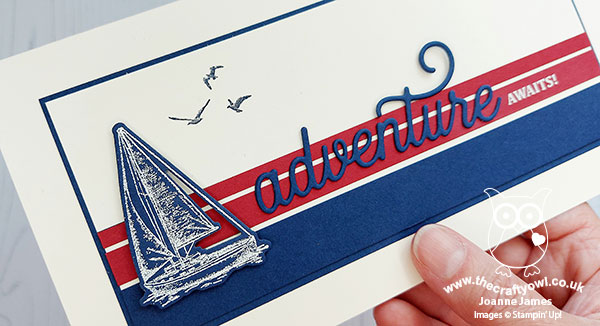
Sailing Home - I took the inspiration for my 'clean and layered' card from The Card Concept's great nautical inspiration photo this week, specifically the cushion at the top of the photo, with the blue and red stripes on cream. I incorporated these into my design but decided to change out the anchor for the sailboat that features on the central cushion as it fitted better with my sentiment, as I wanted to make a congratulations/good luck for the future-type card. I heat-embossed the large sailboat from the 'Sailing Home' stamp set in white on Night of Navy then diecut it with my Come Sail Away dies. A 'thank you' too to the team over at The Card Concept for choosing this card as one of their Honourable Mentions recently and for their kind comments on a card that felt quite out of my comfort zone but was totally inspired by their awesome photo!

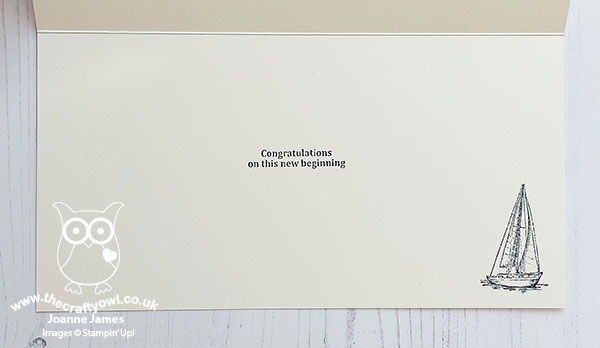
A Beautiful World - For my sentiment I used both the retired stamp set 'Beautiful World' and paired it with one of my favourite diecuts from the retired Summer Silhouettes dies - the long, slimline design is perfect for showcasing the long 'adventure' diecut, which I cut a couple of times and glued together for added height. I also added another stamped greeting from the same stamp set to the inside of my card:
A Cautionary Tale - So I'm sure you are looking at today's card and thinking it came together really quickly; to be fair, if I made a second one it probably wouldn't take long at all. For this one that was not the case though! I spent quite a bit of time deciding on which nautical elements to incorporate on my card and then just as I had everything stuck together, I decided my card needed a little something extra so decided to add a trio of stamped gulls. And that was where the disaster happened! I missed one part of one of the gulls, and then slipped with my stamp-a-ma-jig when I went back in to correct. So what to do? Luckily I managed to remove the top vanilla panel with some dental floss (such a craft room life-saver!) and then I removed the top portion and replaced with another one, with birds correctly stamped before I glued into place. Crisis averted - and let that be a lesson to you: don't glue everything down until you are completely sure your stamping is complete! I do like the addition of the birds though, so it was worth it:
This is one of those cards that I would not have made without the photo that inspired it, but I love it! What do you think? Do you like the current trend for slimline designs? Do leave me a comment below, I'd love to hear your thoughts.

Here is the visual summary of the key products used on today's project for you to pin for easy reference:
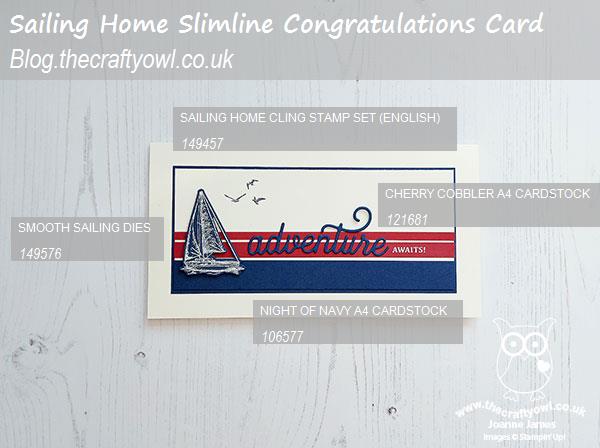
 

You can see all of my Product and 'How To' summaries on my 'How To - Tips and Techniques' Pinterest board in case you've missed any. 

Before you reach for your ink and papers, check out what our amazing team has created to inspire you this week:

Here's a quick recap of our challenge rules:
 
1.  Create a new paper project
2.  Upload your creation to your blog with a link back to us and provide a direct link to the post featuring your challenge submission.
3.  Please link your card to no more than four challenges, TOTAL.
4.  Have FUN!

You can see all of my 'How To' summaries on my 'How To - Tips and Techniques' Pinterest board in case you've missed any. 

Enjoy your day; I am looking forward to spending some time in the garden today as we are enjoying some warmer weather here in the UK for a change - it bodes well for our Bank Holiday weekend for sure. I'll be back tomorrow with another project. Until then, happy stampin'!
 

Edited to add: I was the Challenge Winner over at The Card Concept with this card!

Stampin' Up! Supplies Used:

Table built using Product Table Builder by The Crafty Owl - Independent Stampin' Up! Demonstrator.

Life Is A Beautiful Journey World Map Card

by Joanne James1. February 2021 12:00

Happy Monday everyone! So no snow here over the weekend in the UK, much to the disappointment of the James Juniors, but more than enough rain - with more on the way! So I'm staying away from the flood waters and dreaming of distant shores today with a card inspired by the inspiration photo over at The Card Concept that also uses the sketch over at Fusion:


As much as I love the Fusion inspiration photo, I wanted to use the sketch to create a Clean and Layered card using some rather neglected annual catalogue supplies for The Card Concept - take a look:


Here's the low-down on today's card:

World of Good - I chose to break out some of the World of Good papers for today's card, which reminded me of the colours and textures in the CC inspiration photo. Having chosen a piece of embossed map paper for my main panel, I then used this as the basis for the colour scheme for the rest of my card. 

Beautiful World - There isn't a huge amount of stamping on today's card, since it's the diecuts and paper that takes centre stage. That said, the sentiment, detail for the base of my globe and the detail inside my card are all courtesy of the 'Beautiful World' stamp set, which is about travel in the traditional sense but also personal journeys, which is where I went with my card today. You can see how the sentiment finishes inside my card below:


World Map Dies - I decided to pick up on the gold embossed detail of my paper by using a golden globe (not of the acting award kind!) as the focal point for my card. I backed this with a vellum panel, as I didn't want to detract from that wonderful map paper. I adhered my globe to it, then added glue to the reverse of the vellum where the globe was to enable me to add this to my card base without seeing any adhesive through the vellum. 


Here is the visual summary of the key products used on today's project for you to pin for easy reference:


You can see all of my 'How To' summaries on my 'How To - Tips and Techniques' Pinterest board in case you've missed any. 

Enjoy your day and I'll be back tomorrow with this week's card for our new colour challenge over at CAS Colours & Sketches. Until then, happy stampin'!


Stampin' Up! Supplies Used:

Table built using Product Table Builder by The Crafty Owl - Independent Stampin' Up! Demonstrator.


Peace on Earth Coastal Cabana Christmas Card

by Joanne James5. November 2020 11:40

This week is getting busier by the minute so I'm just popping in with a quick card that I'm going to hopefully squeeze in to the current CAS(E) This Sketch challenge, where they have a fabulous sketch this week:


I still had the Joy Dies out on my desk from my last class and knew immediately what I wanted to do with this sketch, which is also perfect for the current Just Us Girls challenge where the focus is on word diecuts. To complete today's challenge trio I used this week's colours over at Global Design Project #GDP265 and used Bermuda Bay as my free choice. So here's my card  - take a look:


Here's the low-down on today's card:

Peace and Joy - I love this stamp and die bundle and I knew that I had to use all 3 layers of my Peace die to full effect on the front of today's card. I played around with the colours for each layer until I was happy with the effect. I really like the endless sentiment combinations you can create; here's how I finished the sentiment on the inside of today's card:


Beautiful World - There are times when stamp sets and bundles have great cross co-ordination, and I think the Beautiful World bundle in the annual catalogue is given a whole new lease of life when paired with either the Peace and Joy bundle or the Dove of Hope bundle from the current Autumn-Winter catalogue. The image of the globe seemed like a fitting stamp to create my repeating background to tie-in with my sentiment, without detracting from it. Not overly Christmassy perhaps, but I think it would make a great masculine Christmas card.

Monochromatic Peace - Having considered a bold contrast for my free choice colour, in the end plumped for Bermuda Bay as I felt the cool palette of aqua and grey against the white fitted with the peaceful theme of my card. What do you think? Would you have gone with something more contrasting - shocking pink, perhaps? Do leave me a comment below, I'd love to hear your thoughts. 

Here is the visual summary of the key products used on today's project for you to pin for easy reference:


You can see all of my 'How To' summaries on my 'How To - Tips and Techniques' Pinterest board in case you've missed any. 

Enjoy your day and I'll be back tomorrow with another project, this time for our new challenge over at As You See It which is all about colour. Until then, happy stampin'!

Stampin' Up! Supplies Used:

Table built using Product Table Builder by The Crafty Owl - Independent Stampin' Up! Demonstrator.

Current Promotions

Stampin Cut and Emboss

Save up to 30% off on all your favourite kits from 1 to 31 October! 

Click here to see the current kits available and order yours online today.

Join My Team

It's always a great time to join Stampin’ Up! During October you can get even more in your starter kit! New team members can get £160 worth of products for only £99 + free business supplies + free shipping + all the fun being a part of Stampin’ Up! Stampin' Up! has something for everyone: join my growing team and benefit from my support to enjoy Stampin' Up! however you choose.

If you're interested, call me for a chat to understand how I can help you realise your goals. Alternatively, if you have already decided to sign up and you just can't wait, please click here for the link to the online form where you can sign up and order your starter kit right away! 

Shop Online

Access my online shop 24 x 7, 365 days of the year:

Current October hostess code:

4XPEYCB9

Shop Online

Scrapbooking

Stampin' Up! has introduced a new range of 12x12" scrapbooking product and kit - the full range is now available to purchase online. To download a copy of the new digital Scrapbooking Catalogue click here.

Mini Catalogue

BROWSE THE CATALOGUE

'Tis The Season - the new Stampin' Up! Mini Catalogue is here! For more details and to download your copy click here

2024-25 Annual Catalogue

BROWSE THE CATALOGUE

Click on the image to download your copy of the 2024-25 annual catalogue. For a full list of current SU! supplies, go to my online store. If you would like any help or advice, please drop me a line at joanne@thecraftyowl.co.uk or give me a call on 07773 421446 - I'd be happy to help.

Latest Kits!

Stampin Cut and Emboss

The Christmas Ornaments Kit and Card Keeper Kit are the latest kits in the online store - get yours here!

New Online Exclusives

There are new products available exclusively in the online store from 5 November - check them out here.

About Me

Hi I'm Joanne and live in Northampton and when I'm not looking after my husband and two beautiful children, am an avid crafter with a passion for all things Stampin' Up!

I must confess that I have never been a big rubber stamper - until I discovered Stampin' Up! that is. I love the fact that I can get such great results with co-ordinating stamps, inks, papers and punches - the possibilities are endless! Join me on my stamping journey as I share the things I love and be inspired to create amazing things yourself!

Follow Me

Monthly Newsletter

Box Builder

Click the button above to use Box Buster to create your custom box design using the Envelope Punch Board!

Kits Collection Now Available!

Stampin Cut and Emboss

The new Kits Collection from Stampin' Up! is now available!

Click here to see the current kits available and order yours online today.

I Design For


Stampin' Up Stuff

This is my personal blog and is not endorsed by Stampin’ Up! I hope you find it a plentiful source of ideas and personal inspiration but please don't copy my designs for contest submission or use for classes, publication or sale without express permission.