Rainbow Butterfly Wall Art

by Joanne James29. December 2013 13:00

As you will have guessed if you read yesterday's post and saw my 'sneak peek', today's post features butterflies - quite a few, in fact! Ever since I saw this piece of wall art by Fiona Duthie on Pinterest I've wanted to have a go at creating a version of my own. Butterflies have a special meaning to one of my best and most dear friends and she is also someone who loves home décor, so I decided to create this piece as a Christmas gift for her. Here's my finished piece:

The finished piece measures 50cm x 50cm (approx. 20") so is a definite statement piece. I used a variety of colours across each of the Stampin' Up! colour families, including in-colours, along with one or two retired colours too. I wanted to give a full rainbow spectrum of colours, particularly given the size of the piece.

For the butterflies, I used the Beautiful Wings Embosslits to make the butterflies as opposed to a punch, as I wanted the texture that the embosslit provides - here's a closer look:

You could quite easily create a similar piece using one of the butterfly punches and it would be equally effective. I'm so pleased with the finished piece - it was quite tricky to photograph, but I hope you can get a sense of the movement it gives - it is so colourful and dramatic. 

This is a nice early post from me today as I'm out with friends this evening on a cookery course, in an attempt to master the art of Indian cookery; it's the second one that hubby and I have attended (I'd like to say it's because we want to expand our repertoire, but it might just be that we need the practice - I'll have to get back to you on that!)

Back tomorrow with another project; until then, happy stampin'!


Stampin' Up! Supplies Used:

Table built using Stampin' Up! Product Table Builder from The Crafty Owl.


Tags: , , , , , , , ,

3D Projects | Punch Art

Patio Party Butterflies and Half-Term Homework!

by Joanne James29. May 2013 20:06

As promised, I'm back with the last of the current run of my patio Party birthday cards today, but first I thought I would share with you another somewhat unexpected challenge that found it's way into my craft room this week - half term homework! Both James juniors have had holiday homework this week - the youngest was tasked with making a sculpture (this is still 'work in progress' - I'll share a picture when complete!) whilst the eldest has this week to complete this term's geography project - an analysis of an African country of her choice.

With the bulk of the content complete, the important task of 'making it look pretty' came to the fore. Whilst working out the best way to draw/write 'South Africa' in big letters for the cover, I (possibly with too much haste!) suggested we could make light work of this by using Mummy's Alphabet typeset die and the Big Shot to knock these out in a jiffy. A few turns of the handle later and the cover was complete: 

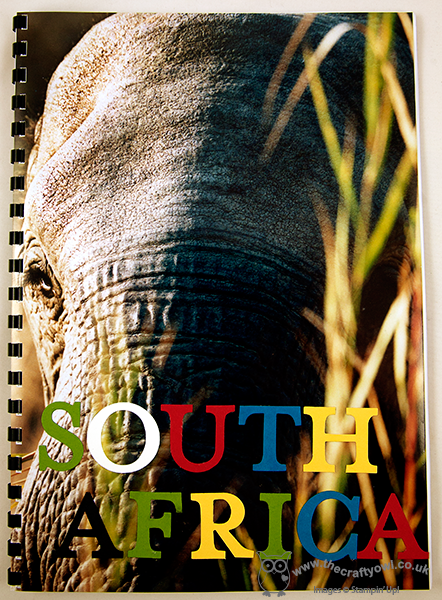
I wish I could take the credit for the photograph here, but this is all Daddy's work, captured the last time we went on safari to Sabi Sands in South Africa. Thinking we were now done, Rebecca promptly announced that she wanted me to teach her how to make a giraffe like the ones I'd made in my last card class; oh and by the way, as she had written a piece about going on safari and the hunt for 'the big 5', if I could come up with an elephant, lion, rhino and buffalo too that would be great! I wasn't phased by the lion or elephant, having seen lots of examples of these on Pinterest, but a rhino ... and a buffalo?! Never one to shy away from a challenge, I set to it and by the time Rebecca had made her giraffe the other animals were complete. Here is my version of a punch art 'big 5': 

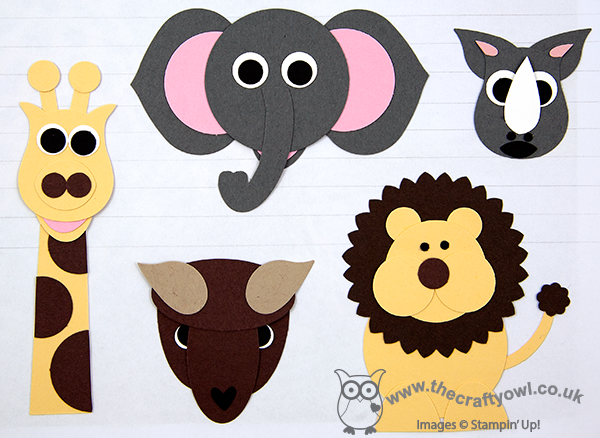
What do you think? Easy enough to work out which is which, but I'm not sure if you saw the buffalo out of context you would immediately recognise him as one!! Main thing is Rebecca loves them - and her project is finally complete. Who would have thought that Stampin' Up! punches would be so versatile?! I should just point out that I know technically these are not the safari 'big 5' rather Rebecca's personal interpretation - she substituted the leopard with the giraffe, because this was the animal she really wanted to make (that's 7 year olds for you!)

Lastly, for those of you who did check in today wanting to see the last Patio Party birthday card, here it is:

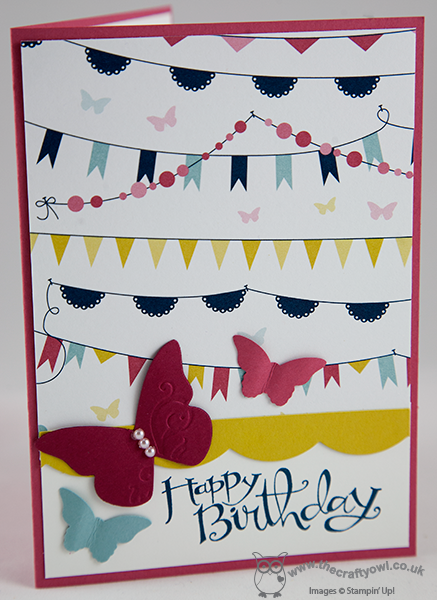
Same layout as yesterday's post-friendly card, but in the opposite orientation and picking up the butterflies in the paper pattern with a trio of co-ordinating ones flying around the sentiment.

Back tomorrow with another (non Patio Party!) project; until then, happy stampin'!


Stampin' Up Supplies (for the card):

Stamps: Sassy Salutations

Cardstock: Primrose Petals, Whisper White, Raspberry Ripple, Baja Breeze, Summer Starfruit

Ink/Stampin' Write Markers: Midnight Muse

Tools: Large Scallop Edgelit, Beautiful Wings Embosslits

Finishing Touches: Basics Pearls


Summer Silhouettes Swaps

by Joanne James13. May 2013 22:00

As promised, today I'm going to share the swaps I made to take to Telford for the Stampin' Up! regional training day on Saturday; lots of excited crafty ladies (and a few gents!) spent the day crafting, swapping and getting up to speed with all the latest news from Stampin' Up!. As is customary at these events, we all created 'swaps' to share and showcase each other's work. I often find swaps a tricky concept - the desire to create something special, but at the same time simple enough that to create a large volume of them won't take hours or break the bank.

In my wisdom, I decided I would break the seal on a stamp set I bought at the start of the year, but haven't yet used: Summer Silhouettes. I loved the look of this stamp set and have seen many beautiful examples of cards 'random stamped' with the flowers in this set. This was however, my first challenge; as my dear husband so often says to me, "(you) don't do random" - and it would seem this follows me into my stamping. I lost count of the amount of card I cut, stamped and binned before getting to a design I was finally happy with! So I ended up with this as my 'first final design' (I know, bear with me!):

I loved the stamping and fussy cut edge, along with the sentiment and pierced border to ground it. However I didn't like the position of the butterfly, but couldn't move it without removing the ribbon, so here is my final (yes, really!) design:


It took hours to finish them and I still could have made twice as many - there were so many people with great swaps! I will photograph some of my favourites and share those with you later in the week. If you would like to be one of the first to know what's going on in the world of Stampin' Up!, get free products (yes, all still to come!), great training and business advice and a permanent product discount to feed your own crafting habit, then this is a great time to join my team - until May 30th, you can get £155 of products for £99; add in a business supplies pack and you get a whopping £200 of kit for £99 - bargain! Check out the Special Offers box on the right hand side of my page or Contact me to talk about how you can sign up and start benefiting straight away; if you sign up in May, you will be one of the first to preview and order from the new annual catalogue due out on July 1st and you will have the opportunity to attend Stampin' Up's! European Convention in November, which is being held in Manchester in the UK this year.

Pop back tomorrow for another project; I have so much to share this week, including some great cards that we are making at this week's card class. Until then, happy stampin!


Stampin' Up Supplies:

Stamps: Summer Silhouettes, Wacky Wishes

Cardstock: Whisper White, Daffodil Delight, Island Indigo, Pool Party

Ink/Stampin' Write Markers: Daffodil Delight, Island Indigo, Pool Party, Wild Wasabi

Tools: Beautiful Wings Embosslits, Essentials Paper Piercing Pack, Piercing Tool

Finishing Touches: Daffodil Delight Seam Binding Ribbon


Butterfly Brights

by Joanne James23. April 2013 17:38

Today's card is one I made as a commission for a friend of mine, who wanted a 'thoughtful' sentiment and bright blues, yellows and oranges. I love rising to the challenge of working to a specific brief and actually used it as the basis for a number of very different cards. I'll share the others with you some other time, but here's one of them for today:

The sentiment is from a set called 'Word Play' and is the perfect size for one of my oval framelits, which also made creating a frame for it a breeze. I used a strip of striped brights DSP to tie the frame to the card background, then used the Beautiful Wings butterfly embosslits to make a variety of butterflies and really create a strong focal point. I love these butterflies - well, I love all butterflies, but these have lovely textures and are great for using with plain coloured cardstock. A cheery card that meets the brief - job done!

There are lots of other great sentiments in the Word Play set, so I've included an illustration of the whole set below. They are suitable for so many occasions and work for both for cards and scrapbooking.

A quick post from me today - I have a Parents' Association meeting at school to attend, so am rushing out the door. Back tomorrow with another project - until then, happy stampin'!


Stampin' Up Supplies:

Stamps: Word Play

Cardstock: Tempting Turquoise, Daffodil Delight, Tangerine Tango, Whisper White, Brights DSP

Ink/Stampin' Write Markers: Tempting Turquoise

Tools: Ovals Framelits, Beautiful Wings Embosslits

Finishing Touches: Basics Rhinestones

Tags: , , , , , ,

Cards | Stamping

Mini Catalogue

BROWSE THE CATALOGUE

The mini catalogue is now live! Read and download your copy here.

Shop Online

Access my online shop 24 x 7, 365 days of the year:

Current April hostess code:

VDKNV7BH

Shop Online

Join My Team

It's always a great time to join Stampin’ Up! New team members can get £130 worth of products for only £99 + free business supplies + free shipping + all the fun being a part of Stampin’ Up! Stampin' Up! has something for everyone: join my growing team and benefit from my support to enjoy Stampin' Up! however you choose.

If you're interested, call me for a chat to understand how I can help you realise your goals. Alternatively, if you have already decided to sign up and you just can't wait, please click here for the link to the online form where you can sign up and order your starter kit right away! 

Latest Kit!

Stampin Cut and Emboss

The Rock Legend Kit has all you need to make 8 cards with coordinating envelopes. Along with the new Panda Friends Kit, both are available from January 4th for just £14 each - get yours here!

2023-24 Annual Catalogue

BROWSE THE CATALOGUE

Click on the catalogue for a full list of current SU! supplies - if you would like to order any of the items featured, please drop me a line at [email protected] or give me a call on 07773 421446 - I'd be happy to help.

New Online Exclusives

There are new products available exclusively in the online store from 5 March - check them out here.

About Me

Hi I'm Joanne and live in Northampton and when I'm not looking after my husband and two beautiful children, am an avid crafter with a passion for all things Stampin' Up!

I must confess that I have never been a big rubber stamper - until I discovered Stampin' Up! that is. I love the fact that I can get such great results with co-ordinating stamps, inks, papers and punches - the possibilities are endless! Join me on my stamping journey as I share the things I love and be inspired to create amazing things yourself!

Follow Me

Monthly Newsletter

Box Builder

Click the button above to use Box Buster to create your custom box design using the Envelope Punch Board!

Kits Collection Now Available!

Stampin Cut and Emboss

The new Kits Collection from Stampin' Up! is now available!

Click here to see the current kits available and order yours online today.

I Design For


Stampin' Up Stuff

This is my personal blog and is not endorsed by Stampin’ Up! I hope you find it a plentiful source of ideas and personal inspiration but please don't copy my designs for contest submission or use for classes, publication or sale without express permission.