Christmas Lights Snowflake for CCS 500

by Joanne James13. December 2022 13:00

It's Tuesday and time for a new challenge over at CAS Colours & Sketches. It's not only our final challenge of the year before we all take a break for Chrstiams but we are also celebrating a milestone - our 500th challenge! There are prizes to be one for those participating this week, so we would love you to join us. We are ending the year on a high - for our final challenge, Patricia would like you to take and one of our 2022 challenges, sketch, colour or double, and make a seasonal card with it:  


No surprises that I went with the sketch option! I chose sketch number 478 from back in July. You can see the original card I made with it here; for today's card, I went with an altogether more sparkly affair with the Lights Aglow Suite - take a look:


Here's the low-down on today's card:

I used a piece of sparkly gold Very Vanilla Lights Aglow designer paper on my base, and overlaid this with a piece of Very Vanilla which I cut using my Basic Borders Dies to which I'd added a (retired) gold heat-embossed sentiment. For my focal point, I added a diecut snowflake, again with detail heat embossed in gold - I just love the delicate detail of the snowflake image:


So simple yet so sparkly!!

Here is the visual summary of the key products used on today's project for you to pin for easy reference:
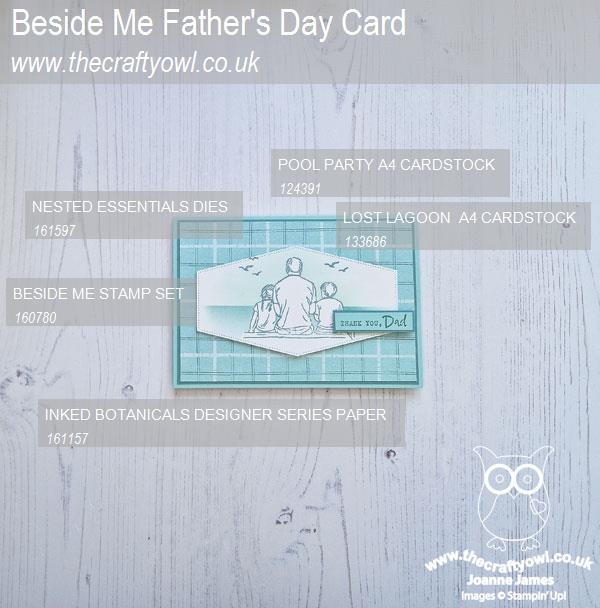
 

You can see all of my 'How To' summaries on my 'How To - Tips and Techniques' Pinterest board in case you've missed any. 

As a reminder, for our colour challenges, you must use all of the stated challenge colours. You may also use neutral colours; however, the challenge colours should be the most noticeable ones featured on your card. We use Stampin' Up! color names for reference, but you are welcome to use any other companies' products as long as you match the challenge colours as closely as possible.

I'm also linking today's card up with the team over at CAS on Friday where their challenge is embossing (I've used heat embossing on my card), at Alphabet Challenge where the current letter is 'R for reduce' (CAS) and at Inkspirational where the challenge theme prompt is 'GOLD'.

Enjoy your day and I'll be back tomorrow with another project. Until then, happy stampin'!


Stampin' Up! Supplies Used:
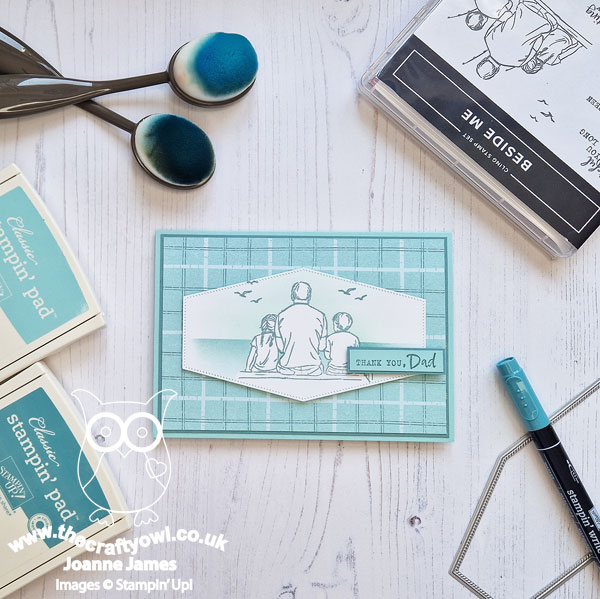
Table built using Product Table Builder by The Crafty Owl - Independent Stampin' Up! Demonstrator.

Merriest Frames Snowy White Velvet Christmas Card

by Joanne James12. December 2022 09:00

Today I've a quick post to share a card for the current challenges over at Time Out where the theme is 'Winter/Holiday Season' and at SUO Challenges where the theme is Christmas:

    SUO Challenges -

I love to make an all-white card and I hadn't made any this year, so I decided that the theme of 'Winter' along with the sub-zero temperatures here in the UK  - and waking to snow on the ground this morning were the perfect inspiration - take a look:


Here's the low-down on today's card:

I used some retiring favourites for today's card: Snowy White velvet sheets and the Merriest Moments stamp set and hybrid embossing folder. I went with some simple layers: First I ran a piece of velvet paper through with the embossing folder, then added this to my card front. Then I used the embossing folder with the embossing die to cut the large base foliage design out of white glimmer paper and adhered it to my cardbase. I then added another diecut and embossed foliage layer, this time using the smaller detailed foliage die and Snowy White velvet paper. I cut a rectangle of white glimmer paper and used this to back a diecut stitched rectangle of white cardstock, onto which I heat-embossed my sentiment in silver: 


I added a trio of opal rounds to complete my design. This is a card of many layers and wonderful texture, but was actually quick and easy to execute. I will miss Merriest Moments for sure!

Here is the visual summary of the key products used on today's project for you to pin for easy reference:


You can see all of my 'How To' summaries on my 'How To - Tips and Techniques' Pinterest board in case you've missed any. 

Enjoy your day and I'll be back tomorrow with another project. Until then, happy stampin'!


Lights Aglow Twinkling Lights Christmas Card PP621

by Joanne James11. December 2022 08:00

Today it's Sunday and time for this week's new challenge over at The Paper Players! It's the turn of the fabulous Ann to host this week and she has a festive colour challenge for you to work with:


I still had my Lights Aglow designer paper out on my desk having made yesterday's cards, so I grabbed another of the patterns in the set and this week's layout over at Freshly Made Sketches and set to work. This is what I came up with:


Here's the low-down on today's card:

I used a Cherry Cobbler card base, then adhered a sheet of Lights Aglow designer paper patterned with Very Vanilla stars to my card base. I then added a central panel of gold glimmer paper, and allowing for a thin vertical border, adhered another piece of paper from the pack, strewn with festive garlands, to which I'd added some diecut banners using one of the Twinkling Lights dies so that the gold glimmer paper showed through from below:


I did cut the piece of DSP that I used for the central section from the centre of the sheet, as I wanted the curves of the garlands to be centred, which is a little frivolous, but I know I will use the remnants on other projects as there is a beautiful gold embossed snowflake design on the reverse too.

I added a final panel of Cherry Cobbler with a sentiment heat embossed in gold to the bottom of the panel to complete the front of my card. To finish I added an extra sentiment from the 'Brightest Glow' stamp set to the inside of my card:


This is a great card that didn't take too long to create, which was especially good as I have been rather pushed for creative time this week.

Here is the visual summary of the key products used on today's project for you to pin for easy reference:


You can see all of my Product and 'How To' summaries on my 'How To - Tips and Techniques' Pinterest board in case you've missed any. 

Before you reach for your ink and papers, check out what our amazing team has created to inspire you this week:

Here's a quick recap of our challenge rules:
 
1.  Create a new paper project
2.  Upload your creation to your blog with a link back to us and provide a direct link to the post featuring your challenge submission.
3.  Please link your card to no more than four challenges, TOTAL.
4.  Have FUN!

Enjoy your day; today is the day that we will be decorating the James household inside and out for Christmas, so we are all looking forward to that. I am also going to be doing some crafting of a different kind, as I have a festive-themed fancy dress outfit to make for Rebecca to wear this week - a Sixth Form festive tradition, more on that later in the week! I'll be back tomorrow with another project. Until then, happy stampin'!


Stampin' Up! Supplies Used: 

Table built using Product Table Builder by The Crafty Owl - Independent Stampin' Up! Demonstrator.

Lights Aglow Four-In-One Square Christmas Cards FF124

by Joanne James9. December 2022 09:00

Today I have my card for the new challenge over at Festive Friday - our last challenge of the year! 


The challenge that we are celebrating this week is 'The Twelve Days of Christmas' which celebrates the nativity of Jesus and begins on 25th December and runs until 5th January. Remember the fun thing is that at Festive Friday you do not need to actually celebrate the occasion; your goal is to simply use three or more items from the inspiration list on your project. This week I used square, Christmas, gold and red and this is what I came up with:


Here's the low-down on today's card:

Keeping things Simple - In the run up to Christmas as things start to get busier, I like to have a simple yet elegant card design that can be produced in multiples and today's card definitely fits the bill. A simple sentiment on a diecut shape, a designer paper frame and gold foil mat, all on a Cherry Cobbler square card base:


That's all there is to it - with a little extra stamping on the inside:


The 'Brightest Glow' stamp set is perfect for sentiments both inside and out.

Lights Aglow Four-In-One - The product hero of today's card is most definitely the Lights Aglow Specialty Designer Series Paper. There a several sheets that feature four of these starry, gold foil embossed 'frames' - so it's easy to take the design and make four cards in only a little more time than one. Here's all four of my cards from one sheet of designer paper:


A Green Alternative - In addition to the Cherry Cobbler frame sheets, there is a Soft Succulent one too. I made four more cards using the green version, stepping them up slightly to include a background of DSP for three of the four cards too - take a look:


Here are both designs together - which one do you prefer?


Here is the visual summary of the key products used on today's project for you to pin for easy reference:


You can see all of my 'How To' summaries on my 'How To - Tips and Techniques' Pinterest board in case you've missed any. 

How does our board inspire you? I can’t wait to see what YOU create! For more inspiration, be sure to visit the rest of the  Festive Friday Challenge Design team:

Ann Schach
Beth McCullough
Sharon Hashimoto Burkert
Melanie Hungerford
Helen Jennings
Melva Peters
Jaydee
Diane Evans
Joanne James

Enjoy your day and I'll be back tomorrow with another project. Until then, happy stampin'!


Stampin' Up! Supplies Used:

Table built using Product Table Builder by The Crafty Owl - Independent Stampin' Up! Demonstrator.

Joyful Nativity Christmas Blues

by Joanne James7. December 2022 20:00

Today I'm sharing a card for the current challenge over at Hand Stamped Sentiments where they have an inspiration challenge:

It's pretty obvious to see where my inspiration came from! I loved that nativity silhouette in blues in the bottom left corner and I wanted to recreate it using one of my favourite retired sets, Joyful Nativity, and ring the changes with some new blue colours. This is what I came up with:


Here's the low-down on today's card:

I took a stitched circle in Orchid Oasis, then using a mask of torn paper, added ink in both Orchid Oasis and Starry Sky to create a faux-layered background. I added white splatters before stamping my holy family and stable in Orchid Oasis, using my Stamparatus to get a good, densely inked image:


I added a couple of wooden stars and a 'peace' sentiment, courtesy of the Santa Express Memories and More pack and left them bare as I like the resulting contrast against the blues. A little extra stamping on the inside completes my card:


So what do you think? I like to have a few religious cards to send out at Christmas time so I was glad to have the opportunity to bring out this set again.

Here is the visual summary of the key products used on today's project for you to pin for easy reference:


You can see all of my 'How To' summaries on my 'How To - Tips and Techniques' Pinterest board in case you've missed any. 

Enjoy your evening and I'll be back tomorrow with another project. Until then, happy stampin'!


Stampin' Up! Supplies Used:

Table built using Product Table Builder by The Crafty Owl - Independent Stampin' Up! Demonstrator.

Need A Christmas Gift? New Kits Added To The Kits Collection

by Joanne James6. December 2022 14:00


I thought today it was time to update you about the new kits have been added to Stampin' Up!'s line of all-inclusive craft kits recently and highlight a few other recent additions that may have passed you by.

For anyone not familiar with the Kits Collection, they are designed to be the perfect introduction to paper-crafting. They are great for the beginner crafter or the seasoned crafter on the go. Whatever your skill or experience, the kits are designed for you, the customer, to be in control and choose the kit experience that is most comfortable for you. Kits are all-inclusive, pre-cut, and ready to use with complete step-by-step instructions. The following kits have been added this month and are now available in the online store: 

Christmas Gifting Tags Kit

You’ll love the ease of gift gifting this year with the Christmas Gifting Kit! This tag and gift card holder kit is a simple way to enhance the Christmas gifting experience for you and your loved ones. Create gorgeous gift tags with attached gift cards holders so you can give your friends and family gift cards to the places they love while adding a handmade touch.

Cozy And Bright Christmas Card Kit

Celebrate the season with a card kit that has everything you need to make 12 festive cards. Wish those you love a merry Christmas and a joyous New Year with classic pine, cinnamon, and orange designs that will warm any heart. And the gold foil details add that special something to these seasonal designs. Don’t let the Christmas time overwhelm you–get your all-inclusive kit and make quick multiples everyone will love! 

These kits are perfect for a spot of Christmas crafting and a great way to add a personal touch to festive mail. In addition, the following non-seasonal card kits have also been added recently and are worth a look:

 The Best Remedy Card Kit

We all know that sometimes life stinks. When it does, there's a simple solution: The Best Remedy Kit! Make one of the adorable, under-the-weather animals the focal point of your card. Then customise your project with the stamp set and embellishments. The stamp set includes cute images and fun phrases that are sure to deliver a smile. When someone you love needs a pick-me-up, this kit offers the perfect remedy!

A Million Thanks Card Kit

Say “thank you” in style and dazzle with layers of dimensions with the versatile A Million Thanks Kit! This kit has everything you need to create beautiful, all-occasion cards to express your gratitude. Mix and match card bases, sentiments, pre-cut die pieces, and embellishments to create expertly crafted cards with ease. It’s never been so easy to show how seriously grateful you are!

There are also some new non-card/no stamping kits that are great for gift giving:

Birthday Card Organiser Kit

Get ready to party all year long with the Birthday Card Organizer Kit! This kit comes with everything you need to help you get organised and never miss out on a birthday celebration. It comes with the supplies to make 12 birthday cards with matching envelopes that you can easily customise. This kit is filled with pre-cut floral and background pieces to really make your crafts unique. And don’t forget the 8" x 10" (20.3 x 25.4 cm) yearly birthday organiser with sticker sentiments in multiple language options for perfect (and practical) personalisation! You can keep track of all your loved one’s birthdays, then make and save a card for them in the cardholder for each month. No matter who you are celebrating, you can give them something great!

Love This Memory Notebook Kit

LOVE THIS MEMORY NOTEBOOK KIT (ENGLISH)

Relive your favourite memories with this blast from the past! The Love This Memory Notebook Kit is the perfect way to preserve amazing moments from your life in a fun and colourful way. Gather up photos and paste them into the included notebook and decorate!

Celebrate Today Magnet Board Kit

159335159335

The Celebrate Today Magnet Board Kit includes supplies to create a magnet board designed to organise aspects of your daily life in a beautiful way. With interchangeable messages, backgrounds, and envelopes, you can decorate your magnet board to best suit your style and needs!

Kit includes:
*Pre-designed projects
*Step-by-step instructions
*Pre-cut pieces (No prep work! Get right to crafting)
* Makes 1 framed magnet board
*Enough adhesive to complete projects
* Includes 6 magnet clips
* Includes 2 image sticker sheets and 4 sentiment sticker sheets (1 each for the following languages: Dutch, English, French, and German)
* Includes 24 double-sided 4" x 3" (10.2 x 7.6 cm) cards
* Includes 2 sheets of 12" x 12" (30.5 x 30.5 cm) paper
*A 9-7/8" x 6-1/2" x 2-3/4" (25.1 x 16.5 x 7 cm) printed designer box for storage or crafting on the go
* Coordinating colors: Basic Black, Blushing Bride, Flirty Flamingo, Melon Mambo, Mint Macaron, Smoky Slate

Stampin' Up! kits offer great value for money and with Christmas on the horizon, they would make great gifts. So whether you are looking for something for a new crafter, a busy crafter or just someone who likes quick and easy projects, these kits are the perfect solution. Links to all of these and lots more available in the online store can be found below - happy shopping! 

Table built using Product Table Builder by The Crafty Owl - Independent Stampin' Up! Demonstrator.


#Simplestamping Jingle Jingle Jingle Jolly Wreath Christmas Card CCS 499

by Joanne James6. December 2022 13:00

It's Tuesday and time for a new challenge over at CAS Colours & Sketches. It's the last month of the year and Patricia is hosting this month. This will be a special month for us, since next week we celebrate our 500th challenge! More on that next week though - we are kicking off the month with a colour challenge: 


For my card today I went with some #simplestamping using just the three ink colours in this week's colours, one stamp set and some Basic White Thick cardstock to create my fun and colourful Christmas card:


Here's the low-down on today's card:

I decided the small candy cane, star and bell images in the 'Jingle Jingle Jingle' stamp set would be perfect for a fun festive wreath with a difference, so I lightly drew a circle in pencil on my card front and stamped my small images randomly in a circle. On a separate piece of cardstock, I stamped the word 'jolly', adding a santa hat to the O, and fussy cut it out. I stamped part of my sentiment inside my wreath and the added my fussy cut word, slightly offset for interest:


I originally stamped my wreath onto a rectangular card, but it didn't look right, so I cropped it tightly and mounted it onto a square white card with a wide frame to preserve some 'white space' and it looked much better. If I had started on a square base I would have forgone the red mat layer - this would simplify this card even further. This is such a great stamp set for #simplestamping cards that require nothing more than stamps, ink and paper.

Here is the visual summary of the key products used on today's project for you to pin for easy reference:


You can see all of my 'How To' summaries on my 'How To - Tips and Techniques' Pinterest board in case you've missed any. 

As a reminder, for our colour challenges, you must use all of the stated challenge colours. You may also use neutral colours; however, the challenge colours should be the most noticeable ones featured on your card. We use Stampin' Up! color names for reference, but you are welcome to use any other companies' products as long as you match the challenge colours as closely as possible.

Enjoy your day and I'll be back tomorrow with another project. Until then, happy stampin'!


Stampin' Up! Supplies Used:

Table built using Product Table Builder by The Crafty Owl - Independent Stampin' Up! Demonstrator.

Jolly Memories and More Santa PP620

by Joanne James4. December 2022 08:00

Today it's Sunday and time for this week's new challenge over at The Paper Players! It's the turn of the fabulous LeAnne to host this week and she has a fun and festive theme challenge for you to work with:


I knew exactly where I was headed for today's card - yes the Santa Express Suite and the Memories and More card pack - you know how I love these cards! I went with a quick and simple card that is super easy for you to recreate - take a look:


Here's the low-down on today's card:

I took a Petal Pink card base and used a retired snowflake stamp for a little tone-on-tone stamping for the background. I added a strip of red glimmer paper and an offcut of Santa Express designer paper, then used one of the wooden sentiments from the Memories & More pack along with a santa, fussy cut from one of the cards in the pack, for a jolly focal point:

I also used a couple of the wooden elements from the pack and a diecut snowflake for added detail. The stamped sentiment on the front of the card comes from the 'Jingle Jingle Jingle' stamp set, which I also used for the inside of my card:


Super easy using up lots of bits and pieces and really easy to recreate - just what we need now that we are into December! What's more, the Santa Express Memories and More card pack is reduced as part of the Last Chance promotion - I already treated myself to a couple of extra packs, and I would recommend you do too!

Here is the visual summary of the key products used on today's project for you to pin for easy reference:


You can see all of my Product and 'How To' summaries on my 'How To - Tips and Techniques' Pinterest board in case you've missed any. 

Before you reach for your ink and papers, check out what our amazing team has created to inspire you this week:

Here's a quick recap of our challenge rules:
 
1.  Create a new paper project
2.  Upload your creation to your blog with a link back to us and provide a direct link to the post featuring your challenge submission.
3.  Please link your card to no more than four challenges, TOTAL.
4.  Have FUN!

Enjoy your day; we are enjoying a family lunch and an extra session of hockey this evening; fortunately, this is practice for an indoor tournament so we will be out of the cold for once! I'll be back tomorrow with another project. Until then, happy stampin'!


Stampin' Up! Supplies Used: 

Table built using Product Table Builder by The Crafty Owl - Independent Stampin' Up! Demonstrator.

Celebrate Everything Speedy Spruced Up Ornament Christmas Card AYSI 289

by Joanne James2. December 2022 13:00

Today I'm sharing my design team card for our new challenge over at As you See It where it's time for a speed challenge chosen by Jan:


The dreaded speed challenge! I had both paper and dies featuring ornaments to hand, but no current stamps, so this week was definitely a case of 'go hard or go home', so I grabbed the Sketch Saturday layout and decided to go for it! This is what I came up with:


Here's the low-down on today's card:

Today's card was all about the planning! I designed my card and wrote a list of the sizes I needed to cut my layers to and gathered my scraps of coloured cardstock and paired them with each die ready for cutting. I put my sentiment stamp into my Stamparatus and once I had everything to hand, set my stopwatch and started cutting! The real highlight of today's card is the brightly coloured, ornament patterned paper from the 'Celebrate Everything' hostess paper pack - I cut a panel of this then diecut an ornament using my Spruced Up Outlines Dies for a co-ordinated focal point:


I added a simple sentiment from 'Framed & Festive' that I diecut at the same time as my ornament to save time and as I still had time I added a black twine bow for a final finishing touch just as my 10 minute timer went off - not a second to spare! My desk was an absolute bomb site - a true 'craftermath', but I did it! A stamped ornament would have made for a much quicker card and I did contemplate just using the designer paper and a sentiment, but where's the fun in that, right?! It's not a speed challenge if there's no pressure!

Here is the visual summary of the key products used on today's project for you to pin for easy reference:


You can see all of my 'How To' summaries on my 'How To - Tips and Techniques' Pinterest board in case you've missed any. 

Here's a summary of our challenge rules:

  • Create any card, scrapbooking page, 3D project or packaging project that fits the challenge.
  • Please include the challenge graphic and link back to the challenge in your blog post. Turn off word verification so we can leave you lots of lovely comments. Make sure you link the post not the whole blog to the Linky. Use #AYSIXXX when uploading to a public gallery.
  • If you’re unsure about ‘the rules’, check the details under the Challenge Guidelines tab on the As You See It Challenge homepage.
  • In a speed stamping challenge, please time yourself and say in your post how long your card took to complete. 
What can you create using ornaments in 10 minutes or less? We look forward to seeing your creations in the AYSI gallery.

Enjoy your day; I have a day of housework and errands and I'll be back tomorrow with another project. Until then, happy stampin'!


Stampin' Up! Supplies Used:

Table built using Product Table Builder by The Crafty Owl - Independent Stampin' Up! Demonstrator.

Christmas Lights Christmas Tree TTT 190

by Joanne James1. December 2022 16:00

It's Thursday and time for a new challenge over at TicTacToe! It's the last turn of Team X to host this year and the lovely Vicky is our featured designer this week. This is the fun and festive board that we are playing along with: 


I took the right-hand column of the board and went with tree, metallic and ornament and used the layout from Try Stamping On Tuesday and the beautiful Christmas setting in this week's Just Us Girls inspiration photo for my Christmas card today - take a look:


Here's the low-down on today's card:

I used the Christmas tree in the 'Christmas Lights' stamp set as the centrepiece for my card, which I stamped and heat embossed in gold onto Old Olive cardstock and diecut with the Twinkling Lights Dies, and set this against a background of Very Vanilla with a gold foil mat and a horizontal piece of gold glimmer paper along with a piece of gold-patterned Very Vanilla Lights Aglow designer paper. I added a diecut tree in gold glimmer paper behind my green tree so that the glimmer shows through the diecut holes - it sparkles like tinsel on my tree. For my baubles, I used two colours of (retired) blue rhinestones to complete the decoration:

For my greeting I added a banner heat-embossed in gold on Very Vanilla, courtesy of the Christmas Banners bundle. The words are actually shaped to curve the opposite way, but it wasn't too tricky to bend my photopolymer stamp the other way so that my banner curve reflected the contours of my Christmas tree.

I love the finished effect of the tree on this card - it's so sparkly in real life!

Here is the visual summary of the key products used on today's project for you to pin for easy reference:


You can see all of my Product and 'How To' summaries on my 'How To - Tips and Techniques' Pinterest board in case you've missed any. 

Many of the seasonal items used on today's card are currently on sale as part of the Last Chance Promotion- read yesterday's post for more information, however it is fair to say that since it went live at 11pm yesterday, products have been literally flying off the shelves, so expect to see lots of the product used on upcoming cards sold out by the time the blog post goes live - the joys of working ahead!

A tictactoe board offers so many creative possibilities - how does this week's board inspire you? Why not have a go? We would love to see you in the gallery and who knows - you might be selected for Designer's Choice and be eligible to be a guest designer on a future challenge. 

Enjoy your day; I'll be back tomorrow with another project. Until then, happy stampin'!


Stampin' Up! Supplies Used: 

Table built using Product Table Builder by The Crafty Owl - Independent Stampin' Up! Demonstrator.

New Online Exclusives

There are new products available exclusively in the online store from 5 November - check them out here.

Latest Kits!

Stampin Cut and Emboss

The Perpetual Beauty Calendar Kit and Cherry Blossoms Treat Boxes Kit are the latest kits in the online store - get yours here!

Shop Online

Access my online shop 24 x 7, 365 days of the year:

Current December hostess code:

9NKXDTTR

Shop Online

Mini Catalogue

BROWSE THE CATALOGUE

'Tis The Season - the new Stampin' Up! Mini Catalogue is here! For more details and to download your copy click here

Scrapbooking

Stampin' Up! has introduced a new range of 12x12" scrapbooking product and kit - the full range is now available to purchase online. To download a copy of the new digital Scrapbooking Catalogue click here.

2024-25 Annual Catalogue

BROWSE THE CATALOGUE

Click on the image to download your copy of the 2024-25 annual catalogue. For a full list of current SU! supplies, go to my online store. If you would like any help or advice, please drop me a line at joanne@thecraftyowl.co.uk or give me a call on 07773 421446 - I'd be happy to help.

Join My Team

It's always a great time to join Stampin’ Up! New team members can get £130 worth of products for only £99 + free business supplies + free shipping + all the fun being a part of Stampin’ Up! Stampin' Up! has something for everyone: join my growing team and benefit from my support to enjoy Stampin' Up! however you choose.

If you're interested, call me for a chat to understand how I can help you realise your goals. Alternatively, if you have already decided to sign up and you just can't wait, please click here for the link to the online form where you can sign up and order your starter kit right away! 

About Me

Hi I'm Joanne and live in Northampton and when I'm not looking after my husband and two beautiful children, am an avid crafter with a passion for all things Stampin' Up!

I must confess that I have never been a big rubber stamper - until I discovered Stampin' Up! that is. I love the fact that I can get such great results with co-ordinating stamps, inks, papers and punches - the possibilities are endless! Join me on my stamping journey as I share the things I love and be inspired to create amazing things yourself!

Follow Me

Monthly Newsletter

Box Builder

Click the button above to use Box Buster to create your custom box design using the Envelope Punch Board!

Kits Collection Now Available!

Stampin Cut and Emboss

The new Kits Collection from Stampin' Up! is now available!

Click here to see the current kits available and order yours online today.

I Design For


Stampin' Up Stuff

This is my personal blog and is not endorsed by Stampin’ Up! I hope you find it a plentiful source of ideas and personal inspiration but please don't copy my designs for contest submission or use for classes, publication or sale without express permission.

DSP Special Release

Check out 3 popular designer series paper designs in fresh new colourways! Available exclusively in the online store from 3 December - check them out here

Last Chance Products

Last Chance Products will now be updated every other month - check them out here.