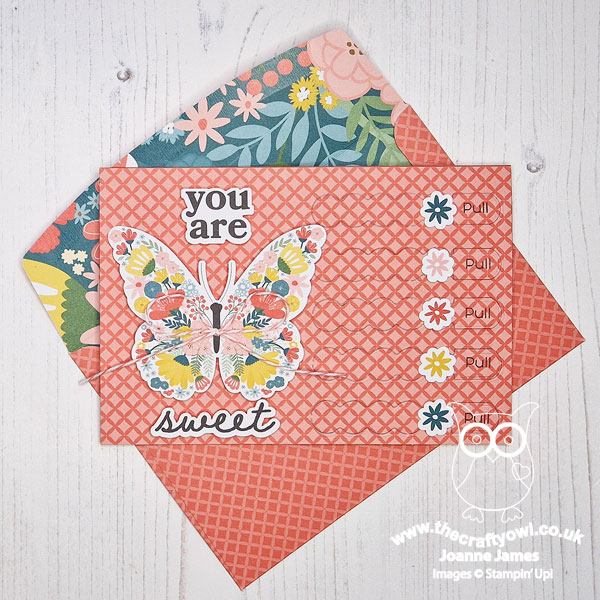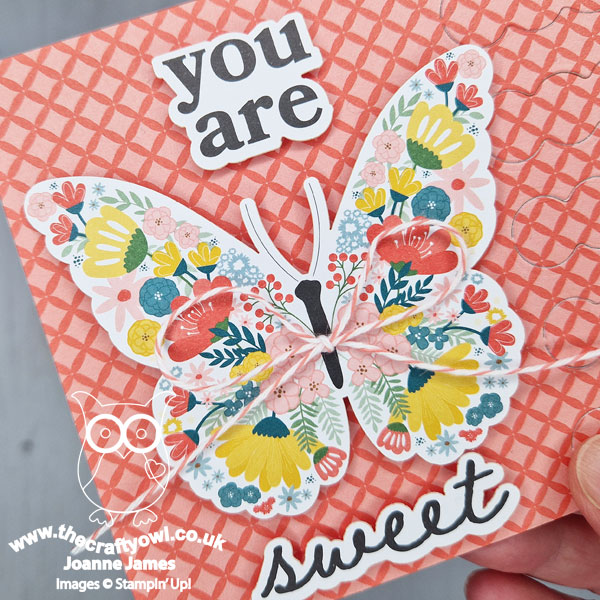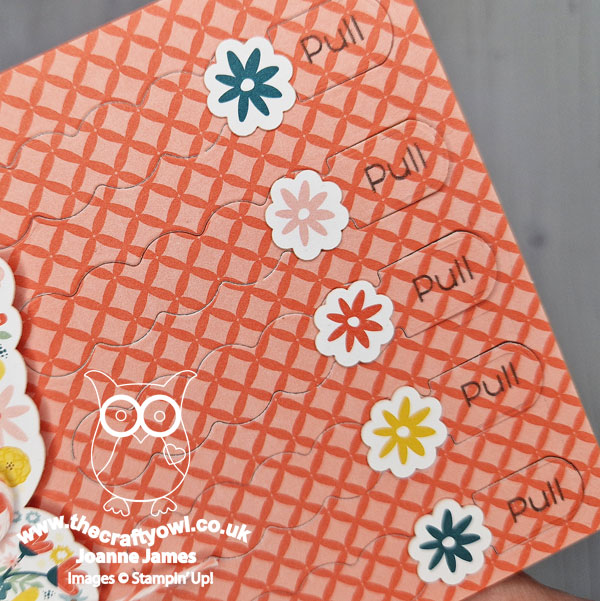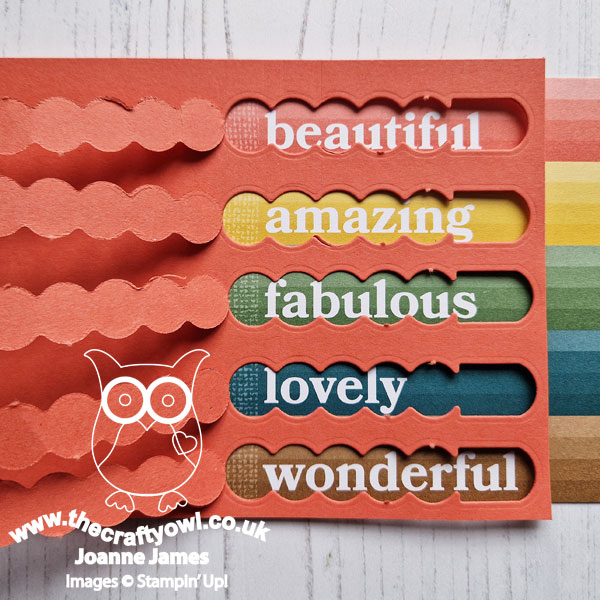
Sweet Citrus Limes Thank You Card TTT214

by Joanne James22. June 2023 17:00

It's Thursday and time for a new challenge over at TicTacToe! It's the turn of Team X to host this week and I am the featured designer. This is the fun board that we are playing along with: 


I went across the middle row with twine, flower and bright colour (my card also works for the middle column of DSP, flower and enamel dots) and decided to play along with the current Color Hues challenge of yellow and green, Global Design Project #GDP399 where the theme is 'fruits' and at my favourite SUO Challenges where they are asking us to add ribbon, lace or twine. I decided to make another card using the Sweet Citrus bundle and this time instead of lemons, thought I'd try my hand with limes - take a look:


Here's the low-down on today's card:

I paired Lemon Lime Twist with Parakeet Party for two beautiful, bright greens (I find Lemon Lime Twist to be one of those colours that looks more green when paired with a true green, as on this card, but equally looks more yellow when paired with a true yellow) and used a backing of Glorious Gingham added a Scalloped Contours diecut rectangle before decorating with my limes and a sprinkling of lime blossom flowers and Lemon Lolly gems. I don't think I'll ever get tired of seeing those embossed citrus fruits - they add so much texture and dimension to an otherwise simple card:

I added my twine to the lower portion of my scalloped rectangle - I love that the scallops make it easy to attach evenly. I rarely use lace on a card, but despite an extensive ribbon collection I probably use way more twine on cards - go figure! Another cheery thank you card that will be heading out to one of my customers with their next order :-)

Here is the visual summary of the key products used on today's project for you to pin for easy reference:
 

You can see all of my Product and 'How To' summaries on my 'How To - Tips and Techniques' Pinterest board in case you've missed any. 

A tictactoe board offers so many creative possibilities - how does this week's board inspire you? Why not have a go? We would love to see you in the gallery and who knows - you might be selected for Designer's Choice and be eligible to be a guest designer on a future challenge. 

Enjoy your day; I am busy baking today, as tomorrow marks the official end of exams for both James Juniors and this weekend we will be having the delayed celebrations for Rebecca's 18th birthday which was last week. I have a special cake planned - if it works I'll be sure to share a picture over the weekend! I'll be back tomorrow with another project. Until then, happy stampin'!


Stampin' Up! Supplies Used: 
Table built using Product Table Builder by The Crafty Owl - Independent Stampin' Up! Demonstrator.

Life Is Sweet If You Are A Roller Skating Emu

by Joanne James21. June 2023 09:20

Today I'm sharing a card that was inspired by a new-to-me word that Time Out Challenges introduced me to:


I used the layout from Sketch Saturday to make my card that totally sums up the meaning of the word 'sportive' to me - take a look:


Here's the low-down on today's card:

What could be more playful and lighthearted than a roller skating emu, I wonder?! Whilst I'm not sure roller skating is considered a 'sport', it's certainly fun. I fussy cut my emu from the Zoo Crew designer paper and paired him with some Lemon Lolly stripes and an oversize sentiment from the 'Sweetest Cherries' stamp set: 


A stitched frame and trio of Lemon Lolly solid gems complete today's card. This card makes me smile! I might even send it to one of my oldest friends, who one summer spent our entire summer vacation trying to teach me to roller skate. She was so good at it and even after 6 weeks of what felt like daily practice, I still had all the hallmarks of Bambi on wheels, but we had so much fun in the process it didn't matter. Happy childhood memories!

Here is the visual summary of the key products used on today's project for you to pin for easy reference:


You can see all of my 'How To' summaries on my 'How To - Tips and Techniques' Pinterest board in case you've missed any. 

Remember - today is free shipping day! If you are looking for something to pop in your shopping basket, I would highly recommend a pack or two of the Bright & Beautiful designer series paper - it's so versatile and I've used lots of mine already!

Enjoy your day; I am out and about as both James Juniors have exams today. I'll be back tomorrow with another project. Until then, happy stampin'!


Stampin' Up! Supplies Used:

Table built using Product Table Builder by The Crafty Owl - Independent Stampin' Up! Demonstrator.

Hello Ladybug Good Luck Card CCS 532

by Joanne James20. June 2023 13:00

It's Tuesday and time for a new challenge over at CAS Colours & SketchesThis week's challenge is a sketch challenge and Shannon has asked that we add a square focal point. Feel free to flip or rotate the sketch when making your card.


For my card today I took my inspiration from the symmetrical focal point and decided to create a fun good luck card featuring a cute ladybird - take a look:


Here's the low-down on today's card:

A Confession - So first up, a confession! I actually made my card for today's challenge and it wasn't until I was writing up today's post that I realised I had my sentiment in the wrong place. I almost went with it - the sketch is a guideline, that's all - but in the end I decided to make a second version that was faithful to Shannon's layout and compare the two. So the card above is my 'take two' - my original card is the one below:


On this one I added my sentiment from the 'Charming Sentiments' stamp set to the card base, whereas on the sketch the sentiment in on the focal square. Here's a photo pf both cards together - which one works better for you? 

I must be honest, I'm on the fence; I like my second version more than I though I would - kudos to Shannon for her layout!

Ladybug Builder - I thought a ladybug - or ladybird as we call them here in the UK - would make a cute centrepiece for a good luck card. I wondered why ladybirds are considered lucky in many cultures and Google tells me it's simply that they are one of the chief insects to eat crop pests - the gardener's friend. The Ladybug Builder punch made light work of mine - a simple punching of the elements and some heat-embossed black dots for a little extra shine:

Remember The Inside - I designed this card with a child in mind, so couldn't resist adding another stamped comical smiling ladybird to the inside of my card with another sentiment from the 'Hello Ladybug' stamp set:


I love making good luck cards for children; so much of their lives seem to consist of exams and tests, it's nice to send some positive vibes and let you know you are wishing them every success! I am linking today's card up with the team over at Inspire.Create who are sharing cards for babies or children and at the Alphabet Challenge Blog where there are on 'F is for Flying' - my ladybird has her wings ready to go!

Here is the visual summary of the key products used on today's project for you to pin for easy reference:


You can see all of my 'How To' summaries on my 'How To - Tips and Techniques' Pinterest board in case you've missed any. 

Today is the last full study day for both James Juniors - we are at T-1 and T-3 respectively - the end of the exam season is nigh! We have experienced some torrential downpours this morning, so I am hoping to get ahead with my crafty endeavours - I even have a second card to share with you today - I'll be back with that shortly!

Enjoy your day and I'll be back tomorrow with another project. Until then, happy stampin'!


Stampin' Up! Supplies Used:

Table built using Product Table Builder by The Crafty Owl - Independent Stampin' Up! Demonstrator.

A Clean and Simple Rainbow Happy Birthday

by Joanne James20. June 2023 11:00

Today I've a second post to share a quick second card that I made yesterday pairing a little something old with something new for the following challenges:


I realised at the weekend that I was out of options for simple birthday cards suitable for teenage boys, so I decided to embrace those diagonals over at Just Add Ink and incorporate some rainbow colour for the peeps over at Addicted To CAS who are featuring rainbow colours  - take a look:


Here's the low-down on today's card:

Whilst searching for something else the other day (isn't that always the way?!) I rediscovered my retired Happy Dies that I thought would make a great diagonal (with a score line top and bottom to be true to the sketch). I popped my top layer up on dimensionals and added a strip of the current Bright and Beautiful designer series paper behind, adding the remainder of my sentiment from the co-ordinating (retired) 'So Much Happy' stamp set in Blueberry Bushel below the diecut:


At the last moment I decided to add a trio of sparkly tinsel gems to finish. I added a happy birthday sentiment inside, but realised afterwards that without it this would make a good congratulations card too - and since I am still stocking up on exam congratulations cards as I'm hopefully going to need a fair few in August, I might go back and make another couple of these to add to my stash and the two birthday cards I made!

There is something so happy about a flash of rainbow stripes against all that white with just as hint of sparkle too, don't you think? Remember that paper is currently on sale too - and with free shipping tomorrow, there couldn't be a better time to stock up!

No visual summary of the key products used on today's project, but everything that is current and still available is listed in the supplies table below.

Enjoy your day and I'll be back tomorrow with another project. Until then, happy stampin'!


Stampin' Up! Supplies Used:

Table built using Product Table Builder by The Crafty Owl - Independent Stampin' Up! Demonstrator.

FREE SHIPPING 21 June for 24 Hours Only

by Joanne James20. June 2023 10:02

STOP PRESS for an important announcement: For 24 hours only, starting at 11pm UK time this evening, Stampin' Up! are offering FREE shipping on orders of £60 or more.

The key information is as follows:

  • Free shipping applies after the qualifying order amount has been met.
  • The minimum qualifying amount to receive free shipping is £60 or more.
  • Free shipping only applies during the 24-hour period the promotion is live in each market; this means that the order must be opened and closed between 20 June 2023, at 11p.m. and 21 June 2023, at 10:59 p.m (UK).

This is a great time to stock up on the designer series paper that is on sale this month, to pick up one of our all-inclusive papercrafting kits or to treat yourself to a bargain from the clearance rack. So start making those lists and head off to my online Stampin' Up! store to place your order. Remember to add the current hostess code KFVKVNXK to receive an extra thank you in the post from me.

Happy shopping!

Waterfront Almost One Layer CAS Card

by Joanne James19. June 2023 17:32

Today I have a super quick post since I'm sneaking in a last minute entry over at Freshly Made Sketches - I couldn't resist Kim's fabulous sketch! 


I'm also playing over at Just Us Girls where you will see immediately how their photo inspired my clean and simple card - take a look:


Here's the low-down on today's card:

When I saw Kim's sketch I was still in 'one layer card' mode and I decided to make a super simple beachfront scene using my retired 'Waterfront' stamp set, with each of the horizontal elements represented by the sea, sandy beach and the row of beach huts. I stamped the beach and sea and for each of my beach huts, used my Stampin' Write markers to colour and add each one individually:


I masked them off and added a hint of blue sky behind using my blending brush to complete my scene. I decided in the end to not make this a one layer card, and snipped my stamped 'HELLO' sentiment from the 'Gorgeously Made' stamp set and popped it up on dimensionals to complete my clean and simple card.

Enjoy your day and I'll be back tomorrow with another project. Until then, happy stampin'!


Stampin' Up! Supplies Used:

Table built using Product Table Builder by The Crafty Owl - Independent Stampin' Up! Demonstrator.

Waves Of Inspiration Oceanfront One Layer Card PP645

by Joanne James18. June 2023 08:00

Today it's Sunday and time for this week's new challenge over at The Paper Players! It's the turn of the fabulous Jaydee to host this week and she has a clean and simple challenge for us to work with:


I know they aren't everyone's cup of tea, but I do love a good one layer card! I decided to use the 'everything beach' inspiration from another of my favourite clean and simple challenges, AAA Cards, to create my one layer wonder for you today - take a look:


Here's the low-down on today's card:

One of the challenges with a one layer card is the ability to create a scene with depth, without having actual layers to do it. This is where technique such as masking and stencilling can prove really useful. For my card today, I first stamped the pelican from the 'Waves of Inspiration' stamp set in Smoky Slate. I added a touch of colour to this image with my watercolour pencils; not generally my first choice of colouring medium, but super useful when creating a one layer card, as you won't get any bleeding of colour onto the reverse, something which is unavoidable if you are colouring with Stampin' Blends markers, for example. I then stamped the same image onto a post-it note and fussy cut it to create a mask; I positioned this over the stamped image on my card so that I could add my background. 

I decided to stamp my sea in Lost Lagoon (I applied the ink to my stamp using a blending brush for a soft finish), using the sea stamp in the 'Oceanfront' stamp set. It isn't wide enough to cover the width of the card, but it was easy to extend the stamp by first stamping one side of the mask, then repositioning the card and stamping the other side, being careful to ink only the edge of the sea stamp and not overstamp the sea to the left of the mask. I then used a cloud stencil and some Pool Party ink and a blending brush to add in a hint of cloudy sky behind the pelican - you can see that better on the close up below:

Finally I added a trio of seagulls in Basic Grey and stamped my sentiment in black just above the horizon line. I didn't add any embellishments and by keeping my design to the bottom third of my card managed to preserve that all-important 'white space' of a clean and simple card too.

Here is the visual summary of the key products used on today's project for you to pin for easy reference:


You can see all of my Product and 'How To' summaries on my 'How To - Tips and Techniques' Pinterest board in case you've missed any. 

Before you reach for your ink and papers, check out what our amazing team has created to inspire you this week:

Here's a quick recap of our challenge rules:
 
1.  Create a new paper project - remember for this challenge your design should be clean and simple
2.  Upload your creation to your blog with a link back to us and provide a direct link to the post featuring your challenge submission.
3.  Please link your card to no more than four challenges, TOTAL.
4.  Have FUN!

Enjoy your day; It's Father's Day here in the UK today so whilst I might be looking forward to enjoying another day of sunshine and relaxation (fingers crossed!), I suspect it might be the DH who will have his feet up! I'll be back tomorrow with another project. Until then, happy stampin'!


Stampin' Up! Supplies Used: 

Table built using Product Table Builder by The Crafty Owl - Independent Stampin' Up! Demonstrator.

Season of Chic Speedy Seashells AYSI 301

by Joanne James16. June 2023 12:00

Today I'm sharing my design team card for our new challenge over at As you See It where it's time for the 'dreaded' speed challenge:


I know some of you dread the idea of creating a card in under 10 minutes, but with a little preparation it doesn't have to be tricky - take a look:


Here's the low-down on today's card:

I knew that I would be using the shell stamps and dies from the Seasons of Chic stamp set and Chic Dies for my card today as they are my only current seashells, so I grabbed each of the dies and laid up each of the stamps and found a piece of the co-ordinating (retired) Texture Chic designer series paper to use for my background. This is the easiest way to get big design impact in the shortest possible time. Having found my sheet of paper, I pulled out the co-ordinating ink pads and cardstock (Petal Pink, Pebbled Path and an offcut of distressed gold), started my timer and set to work!

I cut a piece of designer paper to cover my entire cardbase, stamped a shell and diecut it along with three more in solid cardstock colours all in one go to save time, the stamped my sentiment onto a banner of Basic White and attached it to my cardfront, anchored with my shells. I added some clear Wink of Stella to my stamped shell and a sprinkling of basic pearls to complete my cardfront:


I did a quick timecheck and was doing so well, I even managed a quick stamped detail on the inside of my card within the allotted time:


And - stop the clock! I used a total of 7 minutes 59 seconds to create today's card - I managed to surprise myself at just how much time I had left over! My desk was a mess and I hadn't cleaned a single stamp, but it just goes to show if you need a card in a hurry, it can be done! The designer paper definitely does the heavy lifting on this card - the same background could be created using the stamps in the set, but it would take sooo much longer! I am also sharing today's beach-inspired card with thoughts of summer with the team over at Inkspirational where they are looking for seasonal cards.

Here is the visual summary of the key products used on today's project for you to pin for easy reference:


You can see all of my 'How To' summaries on my 'How To - Tips and Techniques' Pinterest board in case you've missed any. 

Here's a summary of our challenge rules:

  • Create any card, scrapbooking page, 3D project or packaging project that fits the challenge.
  • Please include the challenge graphic and link back to the challenge in your blog post. Turn off word verification so we can leave you lots of lovely comments. Make sure you link the post not the whole blog to the Linky. Use #AYSIXXX when uploading to a public gallery.
  • If you’re unsure about ‘the rules’, check the details under the Challenge Guidelines tab on the As You See It Challenge homepage.
  • In a speed stamping challenge, please time yourself and say in your post how long your card took to complete. 
We look forward to seeing your creations in the AYSI gallery.

Enjoy your day and I'll be back tomorrow with another project. Until then, happy stampin'!


Stampin' Up! Supplies Used:

Table built using Product Table Builder by The Crafty Owl - Independent Stampin' Up! Demonstrator.

Abstract Beauty Congratulations Card

by Joanne James14. June 2023 09:00

Today I'm sharing a quick card I made using both the sketch and photo inspiration over at Inspired By Challenges:

When I saw the pretty abstract pattern on the pillows of Lauren's inspiration sketch I knew I had just the paper to make a quick no-stamping card - take a look:


Here's the low-down on today's card:

The retired Abstract Beauty papers had a similar pattern so I cut out a stitched square, along with another from the pack for the offset layer, and paired them with a pre-coloured card base and diecut sentiment:


These 'Wanted to Say' Dies are so useful for a quick sentiment - the gold diecut stars that I added are also from this die set, one of a number of useful extra bits and pieces in this set in addition to the sentiment dies. Whilst the card bases are no longer available, the Abstract Beauty papers are still available - they are currently on the Clearance Rack for just £5.60 a pack - bargain! 

Another quick, no-stamping card to add to my exam congratulations stash!

Here is the visual summary of the key products used on today's project for you to pin for easy reference:


You can see all of my 'How To' summaries on my 'How To - Tips and Techniques' Pinterest board in case you've missed any. 

Enjoy your day and I'll be back tomorrow with another project. Until then, happy stampin'!


Stampin' Up! Supplies Used:

Table built using Product Table Builder by The Crafty Owl - Independent Stampin' Up! Demonstrator.

Oceanfront Sunset #GDP398

by Joanne James13. June 2023 08:00

Today I'm sharing a card inspired by the photo over at Just Add Ink that also uses this week's Global Design Project #GDP398 sketch (rotated anti-clockwise 45 degrees):


The photo inspiration over at Just Add Ink this week is really beautiful and whilst I would usually make my sunset scenes with some ink blending or brayering, having had the 'Oceanfront' stamp set out on my desk for a few cards recently I decided to see if I could create a similar scene using these scenic stamps. I had a little play and this is what I came up with:


Here's the low-down on today's card:

I stamped each of the elements - sky, sea and foreground - one at a time. My top tip is that your Stamparatus is a must for this kind of card: it makes aligning the stamps super easy, but also allows you to build up your colours gradually when you apply each one individually. I took card to not allow each colour to overlap too much as I wanted to avoid a 'muddy' line of colour. Other than that, it really was quite straightforward; once the background elements were in place, I stamped my foliage and grasses, going over each several times to get a strong black image. I used a back panel layer of Gorgeous Grape to bring out the purple of the water and having rotated the GDP sketch, I decided to use some diecut grasses (I used the retired Harvest Dies) for the final element and dispense with a sentiment: 

This card was the result of a few attempts until I achieved something I was happy with and I'm really pleased with the end result. If you have often looked at scene-building sets but have been put off by the need to 'put them together' to make something, the 'Oceanfront' stamp set is a really good set to start with: the pieces fit together to make a simple scene without too much imagination required, but this can be easily built on and by changing out colour schemes can be used to create a completely different look and feel. Why not find a photo of a favourite seascape and try and recreate it as I've done here?

Here is the visual summary of the key products used on today's project for you to pin for easy reference:


You can see all of my 'How To' summaries on my 'How To - Tips and Techniques' Pinterest board in case you've missed any. 

Today is the penultimate GCSE exam for the youngest of the James Juniors - to say that he is beginning to feel demob-happy is an understatement! We have only just reached the halfway point as far as A Levels are concerned though, so the challenge for the next 2 weeks will be maintaining a state of equilibrium I feel! Enjoy your day and I'll be back tomorrow with another project. Until then, happy stampin'!


Stampin' Up! Supplies Used:

Table built using Product Table Builder by The Crafty Owl - Independent Stampin' Up! Demonstrator.

New Online Exclusives

There are new products available exclusively in the online store from 5 November - check them out here.

Latest Kits!

Stampin Cut and Emboss

The Perpetual Beauty Calendar Kit and Cherry Blossoms Treat Boxes Kit are the latest kits in the online store - get yours here!

Shop Online

Access my online shop 24 x 7, 365 days of the year:

Current December hostess code:

9NKXDTTR

Shop Online

Mini Catalogue

BROWSE THE CATALOGUE

'Tis The Season - the new Stampin' Up! Mini Catalogue is here! For more details and to download your copy click here

Scrapbooking

Stampin' Up! has introduced a new range of 12x12" scrapbooking product and kit - the full range is now available to purchase online. To download a copy of the new digital Scrapbooking Catalogue click here.

2024-25 Annual Catalogue

BROWSE THE CATALOGUE

Click on the image to download your copy of the 2024-25 annual catalogue. For a full list of current SU! supplies, go to my online store. If you would like any help or advice, please drop me a line at joanne@thecraftyowl.co.uk or give me a call on 07773 421446 - I'd be happy to help.

Join My Team

It's always a great time to join Stampin’ Up! New team members can get £130 worth of products for only £99 + free business supplies + free shipping + all the fun being a part of Stampin’ Up! Stampin' Up! has something for everyone: join my growing team and benefit from my support to enjoy Stampin' Up! however you choose.

If you're interested, call me for a chat to understand how I can help you realise your goals. Alternatively, if you have already decided to sign up and you just can't wait, please click here for the link to the online form where you can sign up and order your starter kit right away! 

About Me

Hi I'm Joanne and live in Northampton and when I'm not looking after my husband and two beautiful children, am an avid crafter with a passion for all things Stampin' Up!

I must confess that I have never been a big rubber stamper - until I discovered Stampin' Up! that is. I love the fact that I can get such great results with co-ordinating stamps, inks, papers and punches - the possibilities are endless! Join me on my stamping journey as I share the things I love and be inspired to create amazing things yourself!

Follow Me

Monthly Newsletter

Box Builder

Click the button above to use Box Buster to create your custom box design using the Envelope Punch Board!

Kits Collection Now Available!

Stampin Cut and Emboss

The new Kits Collection from Stampin' Up! is now available!

Click here to see the current kits available and order yours online today.

I Design For


Stampin' Up Stuff

This is my personal blog and is not endorsed by Stampin’ Up! I hope you find it a plentiful source of ideas and personal inspiration but please don't copy my designs for contest submission or use for classes, publication or sale without express permission.

DSP Special Release

Check out 3 popular designer series paper designs in fresh new colourways! Available exclusively in the online store from 3 December - check them out here

Last Chance Products

Last Chance Products will now be updated every other month - check them out here.