At Home With You Doorstep Card - Three Ways To Incorporate Texture Into Your Projects

by Joanne James26. September 2017 05:00

Today I'm sharing a card from one of my recent monthly technique classes featuring the At Home With You bundle. This class was also all about ways to incorporate texture into your projects and so is perfect to link up with the team over at Just Add Ink this week where the theme is 'Just Add Texture':

Each of the cards that we made used texture in different ways: one using embossing paste, another using stencilling and dry embossing and this Autumnal new home doorstep card which actually features three different ways to incorporate texture into your project - take a look:


Aside from the obvious texture created by layering my diecut pieces, there are also more subtle textures added to this card. Here's the low-down on how I did it:

Adding Texture 1: Use Patterned Paper - I used a piece of the Wood Textures Designer Series Paper Stack for my front door - this is a quick and easy way to add texture to your project. I chose a piece of whitewashed wood pattern to stand out against my Bermuda Bay walls, however with each DSP stack containing 4 sheets each of 12 double-sided designs, you have 24 different wood effects to choose from - seriously spoilt for choice!

Adding Texture 2: Dry Embossing - To ground my door I added a strip of Crumb Cake cardstock across the lower part of my cardfront, but before I glued it in place I first embossed it with one of the hidden gem pieces in the Bike Ride Framelits set; did you know that this set, just like the Eclectic Layers Thinlits, includes a piece that embosses as opposed to diecuts? I've circled it so that you can see it in the set below:


This added a fun cobblestone-textured path outside my front door.

Adding Texture 3: Stamping - Lastly, I wanted my doormat to look like one of those rough, coir mats that are a traditional feature of a front doorstep. To achieve this look, I used one of the stamps in the 'Timeless Textures' stamp set and stamped it in Soft Suede onto Soft Suede cardstock, for a tone-on-tone textured look. I stamped off first so the effect is subtle, yet it adds a little detail that definitely contributes by adding further texture to my card.

There are lots of ways to add texture to your projects; I will have a few more to share in the other projects from this class and the gallery over at Just Add Ink also has lots of inspiration too.

Here is the visual summary of the key products used on today's project for you to pin for easy reference:


You can see all of my 'How To' summaries on my 'How To - Tips and Techniques' Pinterest board in case you've missed any. 

Enjoy your day and I'll be back tomorrow with another project. Until then, happy stampin'!


Stampin' Up! Supplies Used:

Table built using Product Table Builder by The Crafty Owl - Independent Stampin' Up! Demonstrator.

Coffee Cafe Friendship Card

by Joanne James25. September 2017 05:00

It's Monday and the start of a very busy week for me! Today I'm sharing a card that uses this week's sketch over at The Paper Craft Crew:

 Paper Craft Crew Sketch Challenge 260 ends September 26

This week is the week when the Macmillan cancer charity here in the UK are holding their 'World's Biggest Coffee Morning' here in the UK on Friday and I needed a card for a friend who is hosting an event. You can read all about the wonderful work this charity does here; meanwhile, here is my card: 


Here's the low-down on today's card:

Happiness Is ... - I knew I wanted to use this sentiment from the 'Coffee Cafe' stamp set on my banner today, so as much as I loved the sketch in its original orientation, I rotated it through 90 degrees to make it work for me. All of the basic elements are there though and I'll definitely be using this sketch again. 

Time For A Coffee Break - Today's card features two of the fabulous papers in the Coffee Break Designer Series Paper set - can you spot both? Here's a picture of the full set of papers:


I used the large spots to border my card and the second piece of paper is actually the adorable little coffee cup embellishment, cut straight from the paper. Even better still, there is a tiny coffee cup framelit that co-ordinates perfectly and makes getting a neat finish easy. Once I'd cropped my cup, I did another one out of extra-thick whisper white and glued them together before adding to my banner tag, for extra stability.

A Textured Pair - I added a little textured coffee stain stamping to the background base of my card - inspired by one of the patterned papers in the above set, but in fact stamped with the coffee ring stamp in the Timeless Textures set, along with a few splatters for good measure.

Such a fun card and quick to produce and will be perfect for my friend to wish her well in hosting her event later this week. I like it so much I'm going to make a few more of these for my other coffee-loving friends too - who doesn't enjoy coffee with friends?!

Here is the visual summary of the key products used on today's project for you to pin for easy reference:


You can see all of my 'How To' summaries on my 'How To - Tips and Techniques' Pinterest board in case you've missed any. 

Enjoy your day and I'll be back tomorrow with another project. Until then, happy stampin'!


Stampin' Up! Supplies Used:

Table built using Product Table Builder by The Crafty Owl - Independent Stampin' Up! Demonstrator.

Iconic Christmas Square Card For The Paper Players #PP363

by Joanne James24. September 2017 09:00

It's Sunday and time for this week's new challenge over at The Paper Players! Our superstar leader the lovely Nance is the hostess this week and she has a sketch for us to work with:


I took the opportunity to make another Christmas card today, this time in a rather unusual colour scheme - take a look:


Here's the low-down on today's card:

Iconic Christmas - I decided to feature the tree from the Iconic Christmas set on my card today. Now I think this set is a little like Marmite - you either love it or you hate it! With all those teeny tiny iconic festive images I loved it the moment I saw it; you can stamp just the outlines, or you can use one or both of the infill stamps and a little two-step stamping to colour them in. You also have the option to use the co-ordinating Ornamental Christmas Framelits Dies to cut out some of them so that you can see the detail on a second layer below, as I've done on my card today. I honestly think the biggest hurdle with this set is that it's difficult to see it's true potential in the catalogue - you need to play with it to see how it all comes together. The set itself is more versatile than it looks - I'll be back to share more makes with it in coming weeks I'm sure. I tweaked the base of Nance's sketch to a 6" x 6" square rather than a rectangle, as the tree is a little too large for this layout to work comfortably on a standard A6 card, but all of the main elements are there so it works.

A Quilted Christmas - I used a piece of the Quilted Christmas 6" x 6" Designer Series Paper for my background panel, making sure to cut the pattern so that it was even and centralised within the panel. I matted it in white - not something I do often, but it really helps define the edge of this patterned paper and makes it stand out from the Pool Party card base.

Unorthodox Christmas Colours - When I initially sat down to make today's card, I knew exactly how I was going to work with the sketch, however I hadn't decided which patterned paper I wanted to use for the right-hand panel. I flicked through my swatches and decided on this one from the Quilted Christmas set and it inspired my PoolParty base and Lemon-Lime Twist Christmas tree. Not the most traditional of Christmas colour combinations although I love the bright and zingy Christmas tree. Here's my swatch in case you would like to use it as inspiration for your festive projects:


Here is the visual summary of the key products used on today's project for you to pin for easy reference:


You can see all of my Product and 'How To' summaries on my 'How To - Tips and Techniques' Pinterest board in case you've missed any. 

So what do you think? Do these colours work or are they are little too non-traditional for the festive season? I'd love to hear your thoughts. 

Before you reach for your ink and papers, check out what our amazing team has created to inspire you this week:

The Paper Players Design Team
 
 
Here's a quick recap of our challenge rules:
 
1.  Create a new paper project
2.  Upload your creation to your blog with a link back to us and provide a direct link to the post featuring your challenge submission.
3.  Please link your card to no more than four challenges, TOTAL.
4.  Have FUN! 

I look forward to seeing what you create with our sketch this week. Enjoy the rest of your weekend as it will be over all too quickly; we had our usual day of sport yesterday so today is about finishing our homework and then we have a change of sport this afternoon, with Ben going sailing with friends. Let's hope it stays fine, although I guess he will get wet whatever the weather! I'll be back tomorrow with another project; until then, happy stampin'!


Stampin' Up! Supplies Used:

Table built using Product Table Builder by The Crafty Owl - Independent Stampin' Up! Demonstrator.

At Home With You Christmas Card and Matching Gift Bag Punch Board Gift Box

by Joanne James21. September 2017 18:59

Happy Friday everyone! I'm not sure where the time goes - I can't believe it's the end of the working week already - well, for some anyway! Today I'm sharing a another card along with a matching gift box from one of last month's monthly technique classes using the At Home With You bundle - take a look:


Here's the low-down on today's card:

At Home With You At Christmas - The At Home With You bundle is so versatile and works for lots of different seasons. Today's card features the gorgeous holly bough around the door, along with the holly wreath and the ornamental trees either side of the front door. I coloured them with my Stampin' Write markers and they were easily cut out with the framelits. I even decorated the inside and envelope for complete co-ordination.

More Ways To Add Texture - As with the last card I shared featuring this set (you can see that card here if you missed it), today's card has another three ways in which you can incorporate texture into your projects:

Adding Texture 1: Stamping To add to the Christmas feel, I wanted a red front door; by stamping my Real Red cardstock with the Hardwood stamp in Real Red, before stamping with the door outline in black, to add some tone-on-tone interest and texture for added kerb appeal.

Adding Texture 2: Dry Embossing On both my card and box I embossed the Smoky Slate base cardstock with my Brick Wall textured embossing folder to create some textured walls as a backdrop for my festive entrance.

Adding Texture 3: Embellish Sometimes on a card it helps to minimise bulk especially if you need it to be post-friendly, however this is rarely the case with packaging and the addition of bulky embellishments is less of an issue. On my gift box, in addition to a tag and ribbon, I added a boxwood wreath to my front door - I love the extra texture this adds.

A Matching Gift Box - It's always nice to be able to create fancy packaging for gifts and no more so than at this time of year. I made my simple gift box using the Gift Bag Punch Board (I just didn't score the side indents to make the bag shape) and created a little triangle roof for a lid (it's a simple hinged closure that is held in place with washi tape) that I stencilled some tile on using some Basic Grey ink and my brick pattern Patterned Party Decorative Mask and added a tag punched with the super-useful Everyday Label Punch:

This box measures approx. and is a reasonable size, big enough to accommodate most small gifts. Here's a picture of both items together:


Here is the visual summary of the key products used on today's project for you to pin for easy reference:


You can see all of my 'How To' summaries on my 'How To - Tips and Techniques' Pinterest board in case you've missed any. 

Enjoy the rest of your day and I'll be back tomorrow with another project. Until then, happy stampin'!


Stampin' Up! Supplies Used:

Table built using Product Table Builder by The Crafty Owl - Independent Stampin' Up! Demonstrator.

Seasonal Chums Watercoloured Pumpkin CAS Card for The Paper Players PP362

by Joanne James17. September 2017 09:00

It's Sunday and time for this week's new challenge over at The Paper Players! It's the turn of my good friend, the awesome LeAnne, to host this week and she has a timely clean and simple challenge for us to work with:


I'm also playing along with the team over at Stamp Ink Paper today as I'm just in time to link up with their CAS Fall challenge and the lovely ladies over at SUO Challenges where the theme is Autumn colours.

When I think about harvest, I think about harvest loaves, vegetables from the garden ... and pumpkins! I love the photo inspiration that Nance found for this week's challenge and I decided I just had to have pumpkins on my card. I decided to go with something a little different - take a look:


Here's the low-down on today's card:

Pumpkins Are For Harvest, Not Just For Halloween - Most of the pumpkin stamps I have in my set are ones with carved faces, all ready for Halloween. This stamp from the new seasonal catalogue is one of the few that I own that isn't - do you recognise which set it comes from? It's actually from the 'Seasonal Chums' set on page 47, but it's not the front of the face on the Halloween tag - it's the back piece of the same tag. I've circled it below so that you can see which one I mean:


This part of the stamp makes for a perfect pre-carved pumpkin - all I needed to do was mask off the front portion of the stamp and stamp just the back image. I also created a mask out of a post-it note to enable me to stamp my trio of pumpkins overlapping each other, to create depth and dimension.

No Line Watercolouring -  I decided to use a little no-line watercolouring to give my pumpkins a natural look. I love this effect and it's so easy to achieve: simply stamp your chosen image in a pale colour such as Sahara Sand onto watercolour paper, then use your chosen inks and an aquapainter to colour your stamped images normally, making the lines 'disappear'. 

Colours of Fall - Warm yellows, oranges, reds, browns and olive greens are the colours I associate with autumn and I chose to focus on orange and brown on my card today. Here's my colour palette should you wish to save it as inspiration for your fall projects:


To finish my card I added a little lace and ribbon embellishment (retired bits and pieces); not something I usually do with a CAS card, but I felt my card needed a little something just to balance it visually. I love this card!

Here is the visual summary of the key products used on today's project for you to pin for easy reference:


You can see all of my Product and 'How To' summaries on my 'How To - Tips and Techniques' Pinterest board in case you've missed any. 

Before you reach for your ink and papers, check out what our amazing team has created to inspire you this week:

The Paper Players Design Team
 
 
Here's a quick recap of our challenge rules:
 
1.  Create a new paper project
2.  Upload your creation to your blog with a link back to us and provide a direct link to the post featuring your challenge submission.
3.  Please link your card to no more than four challenges, TOTAL.
4.  Have FUN! 


I look forward to seeing your clean and simple creations in the gallery this week. Enjoy the rest of your weekend as it will be over all too quickly; mine is sports-filled, with hockey, swimming and ice hockey yesterday and basketball and more hockey today! I'll be back tomorrow with another project; until then, happy stampin'!


Stampin' Up! Supplies Used: 

Table built using Product Table Builder by The Crafty Owl - Independent Stampin' Up! Demonstrator.

Card Front Builder Christmas Shaker Card PP361

by Joanne James10. September 2017 09:00

It's Sunday and time for this week's new challenge over at The Paper Players! It's the turn of my fellow Brit turned Yankee teamie, the lovely Jaydee, to host this week and she has a fun colour challenge for us to work with:


Before I get into my post today, you will notice that our esteemed team leader, the fabulous Nance Leedy, is off this week; she is currently battling with the effects of Hurricane Irma; we love you Nance and our thoughts and prayers are with you that you and your family are safe! The same goes for anyone else reading this who is impacted either directly or indirectly by the devastating effects of the hurricanes moving through the Caribbean and USA currently.

Back to my card. Whilst these colours made me think 'floral', I struggled to incorporate the silver into my floral design so decided instead to create an unconventionally-coloured Christmas card with my Card Front Builder Thinlits Dies - take a look:


Here's the low-down on today's card:

Card Front Builder Dies - With the exception of a one-word stamped sentiment, today's card focuses on the Card Front Thinlit Builder Dies. I used a trio of trees to edge my shaker window and the teeny tiny deer to create a simple wintry scene.

Softly Falling Snow - Today I've used another embossing folder - my all-time favourite, the Softly Falling Textured Impressions Embossing folder. It provides great texture for my top card layer and my winter scene.

Shake, Shake, Shake - I continued my softly falling snow by creating a shaker card window as a focal point for my winter scene and filled it with white mica flakes. These were in last year's seasonal catalogue however you can currently snap them up on the clearance rack; they make a great alternative to sequins for a softer look and feel.

Here is the visual summary of the key products used on today's project for you to pin for easy reference:


You can see all of my Product and 'How To' summaries on my 'How To - Tips and Techniques' Pinterest board in case you've missed any. 

These may be unusual colours for a Christmas card, but I think they work. What do you think? Are there any unusual colour combinations you like to try on your Christmas cards? Do leave me a comment below - I'd love to hear your thoughts. 

Before you reach for your ink and papers, check out what our amazing team has created to inspire you this week:

The Paper Players Design Team
 
 
Here's a quick recap of our challenge rules:
 
1.  Create a new paper project
2.  Upload your creation to your blog with a link back to us and provide a direct link to the post featuring your challenge submission.
3.  Please link your card to no more than four challenges, TOTAL.
4.  Have FUN! 


I look forward to seeing what you create with this week's colour palette. Enjoy the rest of your weekend as it will be over all too quickly; I'll be back tomorrow with another project; until then, happy stampin'!


Stampin' Up! Supplies Used: 

Table built using Product Table Builder by The Crafty Owl - Independent Stampin' Up! Demonstrator.

Window Box Thinlits Pencil Gift Box and Back To School Card For The Paper Players PP360

by Joanne James3. September 2017 09:00

It's Sunday and time for this week's new challenge over at The Paper Players! My dear friend Claire is the hostess this week and she has a fun and timely theme for us to work with:
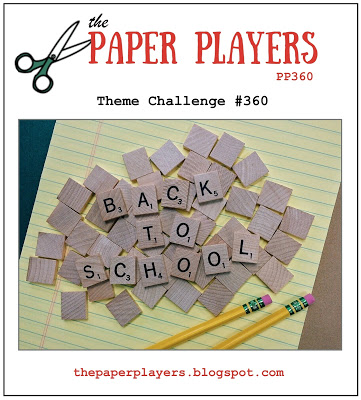
    

I know some of my readers in other countries have already seen a return to school, but for us this week Wednesday is the day, so this week's challenge is a timely one. Is it me or do all Mums especially get just a little excited at the prospect of the start of a new academic year and a return to school after the long summer break? Don't get me wrong, I love having my two Juniors at home and am thankful for the break from the sometimes relentless activities that comprise the school routine, however all good things must come to an end and so it is that we are getting ready to begin a new school year, with the excitement, opportunities and challenges that this will undoubtedly bring.

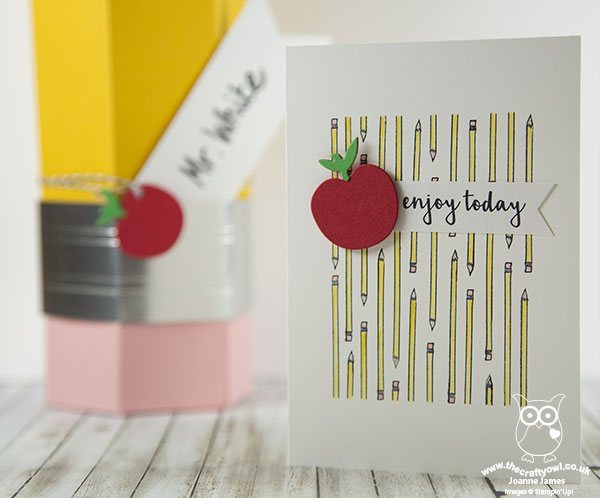
I've double projects for you today as I needed some gift packaging for a teacher gift this week, so took the opportunity to create a fun gift box and co-ordinating card - take a look:
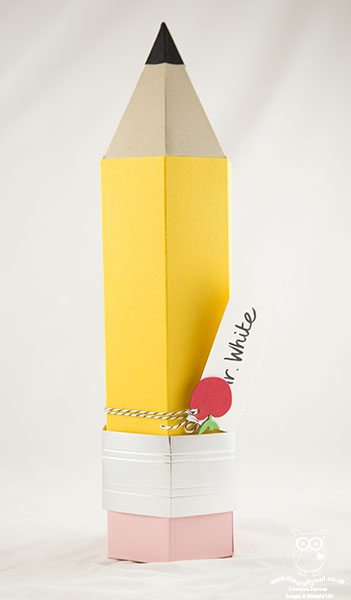
 

The gift box is rather large (approx. 18 inches long) so was something of a challenge to photograph but hopefully the detail below will enable you to see how I made it. Here's the low-down on today's projects:

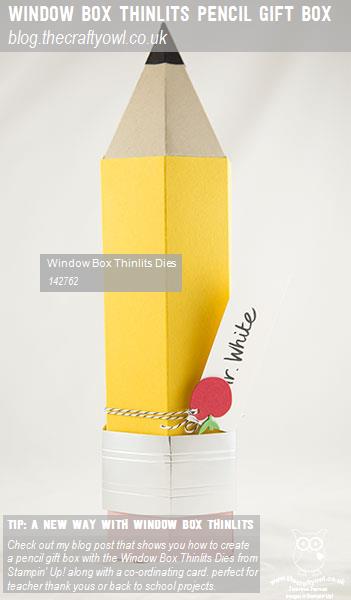
A Window Turned Pencil Box - Having made an elongated box with my Window Box previously with the ladies in one of my technique classes earlier this year, I knew that I could use the same idea to create my pencil-shaped box. I cut one piece of the window box without cutting straight through and elongated this for the length of my sheet of A4 Crushed Curry cardstock. I then cut another piece that was the same length and the width of three sides, for the opposite 3 sides of my pencil, but without a bottom/lid. Instead I used some Maths to create a template for my pencil point in Crumb Cake, and adhered this inside the end of the tube to create my pencil point:
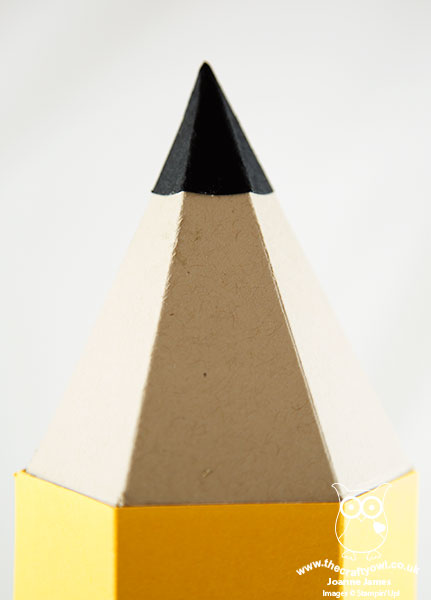
 

Here's a shot showing you how the main body of the pencil box opens to accommodate the main gift:
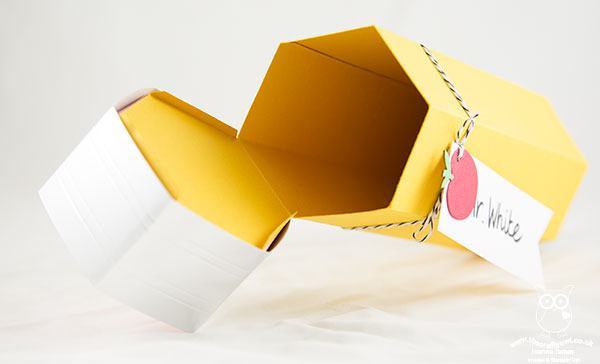
 

In addition to the main box, I also made a complete box using my Window Box Thinlits in Blushing Bride for my eraser and adhered this to the top of my pencil, which also opens separately - just big enough to add a little treat or two inside to accompany my main gift:
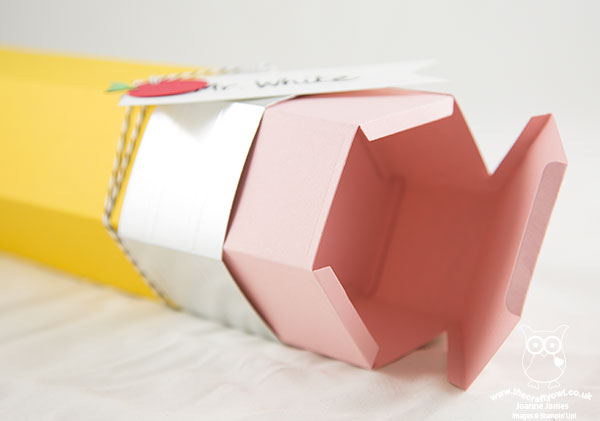
 

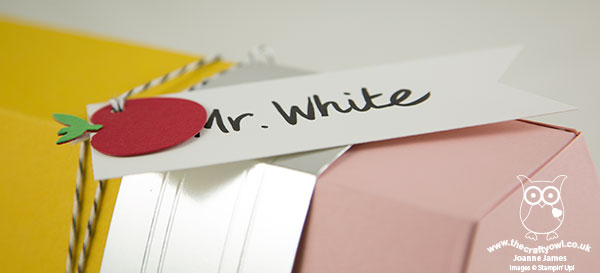
Finally I added a sleeve created from silver foil, to hold the pencil box closed securely - it just slides off to create access to the main box. A banner tag decorated with an apple - every teacher project has to have one, right? - finished my box. 
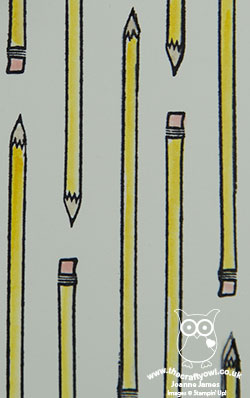
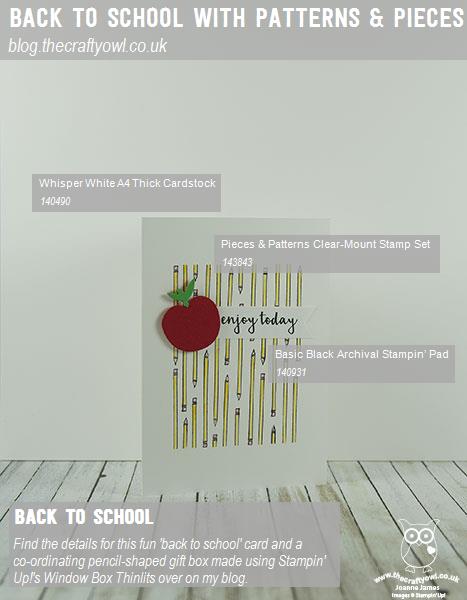
Pieces And Patterns For A Co-ordinating Card - I wanted a card to co-ordinate with my gift box, so decided to replicate the pencil design on a simple card using the pencil stamp from the Pieces and Patterns set. I masked a square and created my own repeating pattern - thank heavens for a stamp-a-ma-jig! - and then added a banner sentiment from the same set, again anchored with an apple (made using an old die I have in my stash):
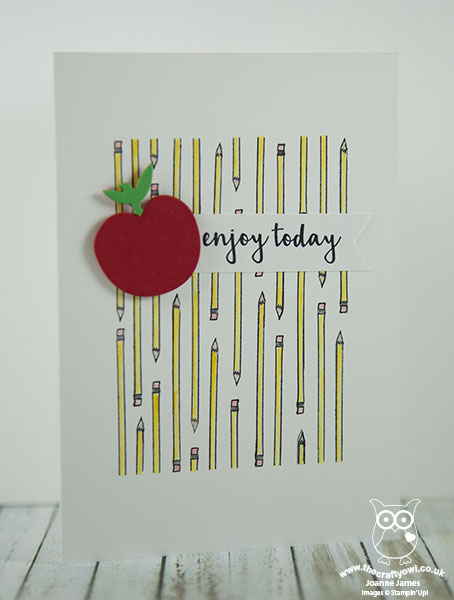
Back To School Colours - My back-to-school pencil and apple colours fit perfectly with the colour palette and photo inspiration over at The Color Throwdown this week (I hope I'll be allowed my pink eraser and a few neutrals (the pencil really wouldn't be complete without it). I'm also linking my card up with the challenge over at Addicted to CAS where the code word is 'apples' and both of my projects fit the bill over at Paper Craft Crew where they have extended their 'back to school' challenge for another week:

      Play along with the Paper Craft Crew Theme Challenge 257! Visit www.papercraftcrew.com #theme #themechallenge #stampinup #sunnygirlscraps #playalong #cardmaking #papercrafting #papercraft #scrapbooking #handmade #rubberstamping #cards

Here is the visual summary of the key products used on today's project for you to pin for easy reference:
     

You can see all of my Product and 'How To' summaries on my 'How To - Tips and Techniques' Pinterest board in case you've missed any. 

Before you reach for your ink and papers, check out what our amazing team has created to inspire you this week:

The Paper Players Design Team
 
 
Here's a quick recap of our challenge rules:
 
1.  Create a new paper project
2.  Upload your creation to your blog with a link back to us and provide a direct link to the post featuring your challenge submission.
3.  Please link your card to no more than four challenges, TOTAL.
4.  Have FUN! 


I look forward to seeing what you create with this week's theme. Enjoy the rest of your weekend as it will be over all too quickly; I'll be back tomorrow with another project; until then, happy stampin'!


Stampin' Up! Supplies Used: 

Table built using Product Table Builder by The Crafty Owl - Independent Stampin' Up! Demonstrator.

Birthday Memories Big Birthday Card For The Paper Players

by Joanne James27. August 2017 10:00

I've been absent from my blog for a few days - once again precious time with my Juniors this week as we make the most of our school summer holidays hasn't left me time for blogging during the latter part of this week. Luckily for you today it's Sunday and time for this week's new challenge over at The Paper Players! The lovely Laurie is the hostess this week and she has a sketch for us to work with:


I tried a few different things for my card today, but kept wanting to put a sentiment in the circle! Since I was trying to be truly faithful to Laurie's sketch, I kept at it then it hit me - the answer was in a piece of paper I have been saving for just such an opportunity! Take a look:


Here's the low-down on today's card:

What Birthday Memories Are Made Of -  In the end this card makes me feel like a little bit of a cheat, since there is very little stamping and the gorgeous sheet of Birthday Memories Designer Series Paper does all the hard work! There are some gorgeous papers in this pack, all of which contain intricate and colourful birthday imagery reminiscent of days gone by. The sheet I've used today is a design that covers the whole of the 12" x12" sheet and is really one that is hard to cut into. It makes a beautiful gift box lid or gift bag where you can see the entire animal parade.

Big Is Beautiful - I happened to have a half-width of this sheet of designer paper left over from another project, so decided to upsize my card to the larger size of 14.9cm x 21cm in order to accommodate as much of the design as possible, including those fun floating balloons. To emphasise the shape of the sketch, which I represented with the little racoon, I decided to fussy-cut another identical racoon out of one of the other sheets of DSP and pop it up on dimensionals, allowing it to hang over the edge of my central panel. 

Don't Forget The Envelope - The only stamping on my card front was for my sentiment I couldn't resist embellishing with a gift that I also cut out of the DSP too), and on the inside. I also used the 'Birthday Delivery' stamp set to stamp and decorate my envelope front and back though - a special handmade card shouldn't stop at the card front, although I don't often photograph mine to share with you. For some great examples of this be sure to check out my teamie Nance's blog - her cards always look as fabulous on the inside as on the outside :-)

Here is the visual summary of the key products used on today's project for you to pin for easy reference:


You can see all of my Product and 'How To' summaries on my 'How To - Tips and Techniques' Pinterest board in case you've missed any. 

This paper is truly gorgeous and it's almost as if it was made for Laurie's sketch this week. I love this card - I just need to find a special little person to send it it to now! 

Before you reach for your ink and papers, check out what our amazing team has created to inspire you this week:

The Paper Players Design Team
 
 
Here's a quick recap of our challenge rules:
 
1.  Create a new paper project
2.  Upload your creation to your blog with a link back to us and provide a direct link to the post featuring your challenge submission.
3.  Please link your card to no more than four challenges, TOTAL.
4.  Have FUN! 


I look forward to seeing what you create with our sketch this week. Enjoy the rest of your weekend as it will be over all too quickly; we are lucky that we have a Bank Holiday here in the UK so it's a slightly longer one than usual - I'm hoping for some sunshine! I'll be back this week with some of the projects from my last class and maybe even another sneak peak or two of some great sets from the upcoming Autumn-Winter seasonal catalogue, so stay tuned. Until then, happy stampin'!


Stampin' Up! Supplies Used:

Table built using Product Table Builder by The Crafty Owl - Independent Stampin' Up! Demonstrator.

Just Add Color For The Paper Players

by Joanne James20. August 2017 10:00

It's Sunday and time for this week's new challenge over at The Paper Players! It's my turn to host this week and I have a clean and simple challenge for you to work with:


Time for some colouring fun! I love to colour, whether it's stamped images or pre-printed paper, with pencils, inks or marker pens, I find it so theraputic and a great stress-reliever. I took the opportunity to make a card using Jen's sketch over at Freshly Made Sketches this week and the colour palette at The Color Throwdown - take a look:


Here's the low-down on today's card:

Today's card has barely any stamping; I used a piece of the Just Add Color Speciality Designer Series Paper for the base of my card today. Open designs printed on heavyweight paper, these papers have everything from feathers to houses, a complete underwater scene and lots more in between. I used my Stampin' Write markers to colour in my pretty design of watering cans and florals. I finished my card with the angled panel and a stamped and die cut sentiment.  

Here is the visual summary of the key products used on today's project for you to pin for easy reference:


You can see all of my Product and 'How To' summaries on my 'How To - Tips and Techniques' Pinterest board in case you've missed any. I also have another coloured creation to share with you today - Rebecca decided that she wanted to get in on the colouring action too as I made my card for today's post and made her own card at the same time, which she was adamant I shared with you too! So here it is:


Pretty, right? And all her own work too! Colouring is definitely something for everyone from the ages of 2 to 102!

Before you reach for your ink and papers, check out what our amazing team has created to inspire you this week:

The Paper Players Design Team
 
 
Here's a quick recap of our challenge rules:
 
1.  Create a new paper project
2.  Upload your creation to your blog with a link back to us and provide a direct link to the post featuring your challenge submission.
3.  Please link your card to no more than four challenges, TOTAL.
4.  Have FUN! 

I look forward to seeing your clean and simple creations in the gallery this week. Enjoy the rest of your weekend as it will be over all too quickly; I'll be back tomorrow with another project; until then, happy stampin'!


Stampin' Up! Supplies Used: 

Table built using Product Table Builder by The Crafty Owl - Independent Stampin' Up! Demonstrator.

A Bermuda Bay Bike Ride For The Paper Players

by Joanne James13. August 2017 10:00

It's Sunday and time for this week's new challenge over at The Paper Players! Firstly, thanks to everyone who left such lovely comments on my High Tide square pop out swing card last week; I have a few more cards made using the same design and will be sharing a more detailed 'how to' for this fun fold, so stay tuned for more information on this one. Back to today: it's the turn of the awesomely-inspiring Sandy to host this week and she has a colour challenge for us to work with:


I must say I did find this colour palette rather challenging; the green got me thinking of flowers, but I was struggling to make the three colours work together. Instead I chose to focus on the blue and I took the opportunity to get out my Bike Ride stamp set and create a fun birthday card - take a look:


Here's the low-down on today's card:

Build A Bike Made Simple - This is the first time I've use my Bike Ride stamp set with the co-ordinating Build A Bike Framelits, as the cards I made with it previously were having returned from Onstage in Amsterdam where we received the stamp set only as an all-attendee giveaway but not the framelits. What a difference they make - I pieced together the pieces of my bicycle with ease and got to use the little wire basket too - love it!

Flip The Sketch And Chop The Bike - I used the sketch over at CAS Colours & Sketches for my layout today (I figured a bike is about as non-rectangular a shape as you can get!), rotating it through 180 degrees as I wanted my bike to be riding onto my card rather than off it. Patricia's sketch shows the shape appearing to hang off the edge of the card so there was nothing else for it - I chopped off the end of my bicycle! I think it works though - if anything, it adds to the sense of movement I think. 

Coffee Break Border - My card is predominantly blue, with the Pear Pizzazz and Calypso Coral featuring only in small quantities: the flowers in the basket, a heart enamel dot. I almost left it there, but I felt like I wanted to ground my bicycle and include a little more of one of the colours so added a strip of Coffee Break designer series paper with a subtle green and white stripe.


Here is the visual summary of the key products used on today's project for you to pin for easy reference:


You can see all of my Product and 'How To' summaries on my 'How To - Tips and Techniques' Pinterest board in case you've missed any. 

Before you reach for your ink and papers, check out what our amazing team has created to inspire you this week:

The Paper Players Design Team
 
 
Here's a quick recap of our challenge rules:
 
1.  Create a new paper project
2.  Upload your creation to your blog with a link back to us and provide a direct link to the post featuring your challenge submission.
3.  Please link your card to no more than four challenges, TOTAL.
4.  Have FUN! 

I look forward to seeing what you create with this week's colour palette. Enjoy the rest of your weekend - we are continuing with Ben's weekend of birthday celebrations, so lots of fun to be had here! I'll be back tomorrow with another project; until then, happy stampin'!


Stampin' Up! Supplies Used: 

Table built using Product Table Builder by The Crafty Owl - Independent Stampin' Up! Demonstrator.

Shop Online

Access my online shop 24 x 7, 365 days of the year:

Current May hostess code:

3NR3FB9W

Shop Online

2024-25 Annual Catalogue

BROWSE THE CATALOGUE

Click on the image to download your copy of the 2024-25 annual catalogue. For a full list of current SU! supplies, go to my online store. If you would like any help or advice, please drop me a line at [email protected] or give me a call on 07773 421446 - I'd be happy to help.

Join My Team

It's always a great time to join Stampin’ Up but during May it's even better! New team members can get £78.25 of new In Color products for FREE! That's in addition to another £130 worth of products of your choice for only £99 + free business supplies + free shipping + all the fun being a part of Stampin’ Up! Stampin' Up! has something for everyone: join my growing team and benefit from my support to enjoy Stampin' Up! however you choose.

If you're interested, call me for a chat to understand how I can help you realise your goals. Alternatively, if you have already decided to sign up and you just can't wait, please click here for the link to the online form where you can sign up and order your starter kit right away! 

Latest Kits!

Stampin Cut and Emboss

The City Sights Kit has all you need to make 8 cards with coordinating envelopes for £20. Along with the new Happy Hollyhocks Kit, a no stamping kit including 9 cards for just £14, both are available from May 1st - get yours here!

New Online Exclusives

There are new products available exclusively in the online store from 5 March - check them out here.

About Me

Hi I'm Joanne and live in Northampton and when I'm not looking after my husband and two beautiful children, am an avid crafter with a passion for all things Stampin' Up!

I must confess that I have never been a big rubber stamper - until I discovered Stampin' Up! that is. I love the fact that I can get such great results with co-ordinating stamps, inks, papers and punches - the possibilities are endless! Join me on my stamping journey as I share the things I love and be inspired to create amazing things yourself!

Follow Me

Monthly Newsletter

Box Builder

Click the button above to use Box Buster to create your custom box design using the Envelope Punch Board!

Kits Collection Now Available!

Stampin Cut and Emboss

The new Kits Collection from Stampin' Up! is now available!

Click here to see the current kits available and order yours online today.

I Design For


Mini Catalogue


The next mini catalogue will be live in September! 

Stampin' Up Stuff

This is my personal blog and is not endorsed by Stampin’ Up! I hope you find it a plentiful source of ideas and personal inspiration but please don't copy my designs for contest submission or use for classes, publication or sale without express permission.