by Joanne James23. May 2016 16:05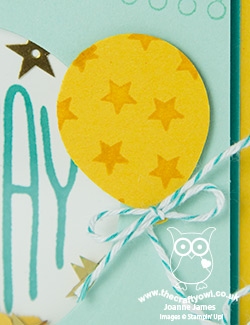
Happy Monday everyone! I've spent a busy day doing housework today, with the result that 'Chez James' now looks as neat as a pin and the ironing basket is completely empty, so I am writing my blog post before collecting Rebecca from school. I am collecting her from her rounders practice a little earlier than usual today as her singing lesson this week has been rescheduled; she is off on a school trip to Harry Potter world at Elstree Studios on Wednesday - lucky girl!
So today's card uses yesterday's Paper Players sketch again, but this time to make a shaker card for this week's challenge over at Pals Paper Arts:
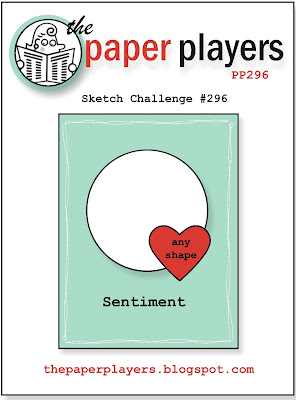

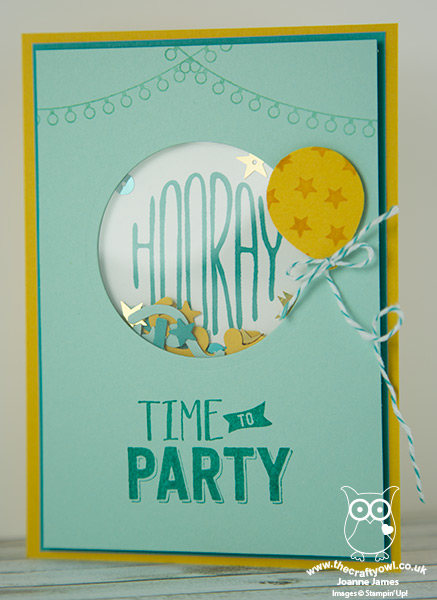
I loved this bright and cheery colour combo and there are some lovely Design Team cards this week. My fellow Paper Players designer Linda Callahan also used them on her Paper Players card yesterday (you can see Linda's card here) with some gorgeous florals. I decided to go with a shaker card for my entry - take a look:
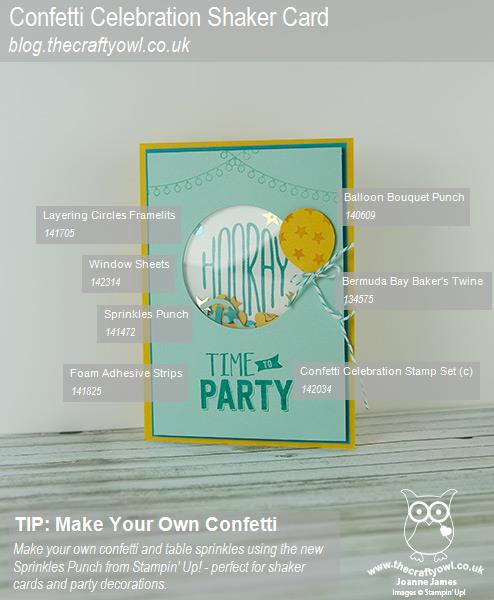
For today's card the colours may well be familiar to you, but there are some fabulous 'sneak peeks' of new catalogue product:
Time to Party With Confetti Celebration - Confetti Celebration is a fun new stamp set with all the making of a good party: decorations (check out the string of lights that I used on the front of my card), stars, balloons and some great sentiments. Both of the sentiments on my card are in this new set and I love that the 'Hooray' is framed perfectly in the shaker window.
Lots of Sprinkles - The sprinkles for today's shaker were created with a new punch of the same name. The Sprinkles Punch will be perfect for creating table confetti or the insides for shakers in a range of colours and glimmer papers. I colour-co-ordinated mine with the challenge colours and added a few gold star sequins too for good measure.
A Hidden Shaker 'Gem' - The best thing about today's shaker card is the one thing you can't see! A strange thing to say I know, but the new catalogue has a new supply item that will revolutionise shaker card construction: foam adhesive strips! Just like the ones in the Christmas shaker card kits in the last Autumn-Winter seasonal catalogue, they are a little deeper than Dimensionals and give just the right height for a good shaker card. I am going to get so much use out of these!
Here is the visual summary of the key products used on today's project for you to pin for easy reference:
You can see all of my 'How To' summaries on my 'How To - Tips and Techniques' Pinterest board in case you've missed any.
Enjoy your day and I'll be back tomorrow with another project; until then, happy stampin'!
7f2dac36-8e10-4834-88a0-66274ae9d447|0|.0|96d5b379-7e1d-4dac-a6ba-1e50db561b04
Tags: Shaker cards, Shop online, Shop Stampin' Up online, Stampin' Up, Stampin' Up Card, Stampin' Up Card ideas, Stampin' Up Supplies, Sprinkles Punch, Confetti Celebration, Circles Framelits, Balloon Bouquet Punch
Cards | Shop Online | Stamping
by Joanne James30. November 2015 11:56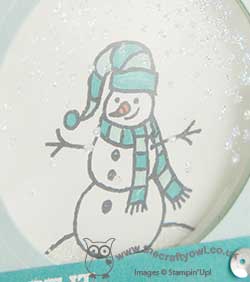
Happy Monday everyone! Happier for some than others - I'm working from home with one James Junior off school today fighting the seasonal lurgy - but for everyone reading this, your day is about to get better! I have a double post for you today (to make up for Saturday's lack of post!) with cards for a couple of challenges. The first is my card for this week's challenge over at Freshly Made Sketches where they have a great sketch - I combined with the theme inspiration of 'Blue Christmas' over at Fusion:

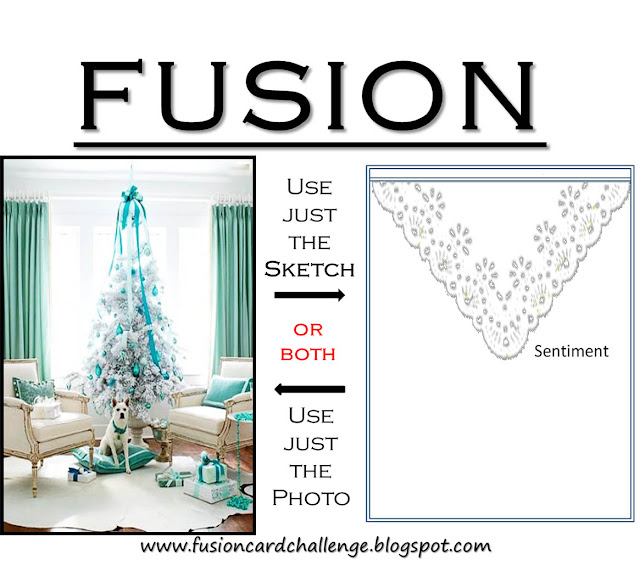
I love the simplicity of Jen T's sketch this week, although by the time I finished my card I wondered if I'd got just a little bit carried away - take a look:
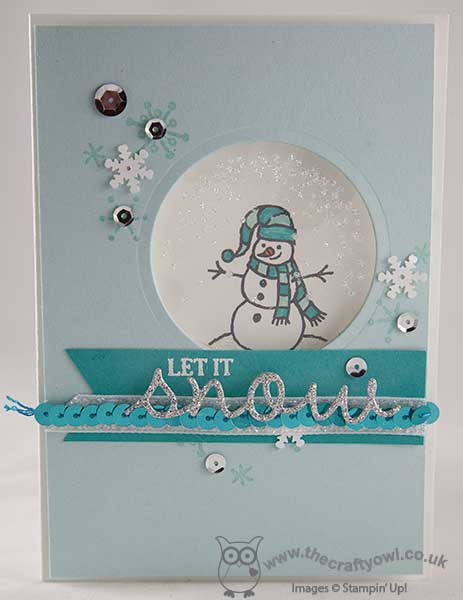
I made a cute 'faux shaker' card using the snowman image from the 'Sparkly Season' stamp set, stamping him in Memento Black and colouring him in with my Pool Party and Bermuda Bay markers, with Pumpkin Pie for his nose, then used my two-way glue pen to adhere some Dazzling Diamonds to the snow mound that the snowman is sat on. I then stamped the snowfall stamp in Versamark to my window sheet and applied Heat & Stick and Iridescent Ice to give it a lovely sparkle, before adhering behind the hole that I'd cut in my Pool Party top layer. On this layer I stamped a few clusters of snowflakes in Pool Party using the snowflake stamp in the Snow Place stamp set and highlighted these with some silver sequins along with a few retired snowflake sequins from last year's stash. To finish, I added a layered banner that contains a little of everything: white glitter ribbon, Bermuda Bay sequins and a dash of silver glimmer paper to boot! I just love the sparkle and shine of this card and the shades of blue - so very pretty!
Back shortly with another quick and easy card for today; I must be on a roll! Until then, happy stampin'!
Stampin' Up! Supplies Used:

7198e06d-39ee-451a-8225-93ee239c6905|0|.0|96d5b379-7e1d-4dac-a6ba-1e50db561b04
Tags: Big Shot, Christmas, Shop online, Shop Stampin' Up online, Stampin' Up, Stampin' Up Supplies, Stampin' Up Card ideas, Stampin' Up Card, Sparkly Season, Snow Place, Seasonal Frame Thinlits Dies, Shaker cards
Cards | Shop Online | Stamping
by Joanne James20. November 2015 21:10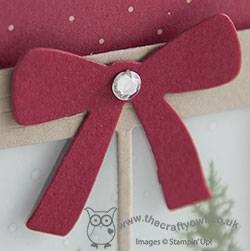
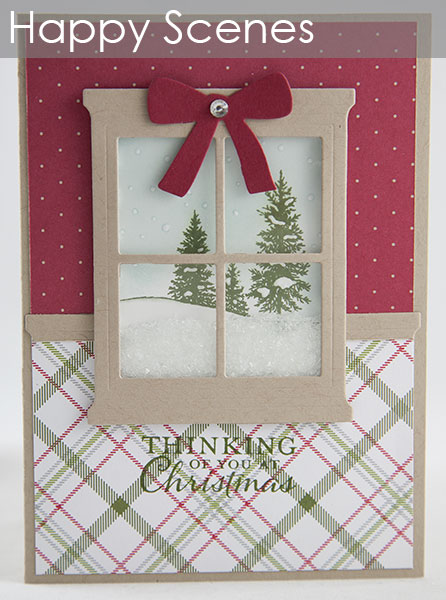
Today I'm sharing another of the cards from this month's technique class - a Christmas shaker card using the 'Happy Scenes' stamp set and some of the paper from the Merry Moments DSP Stack for wallpaper:
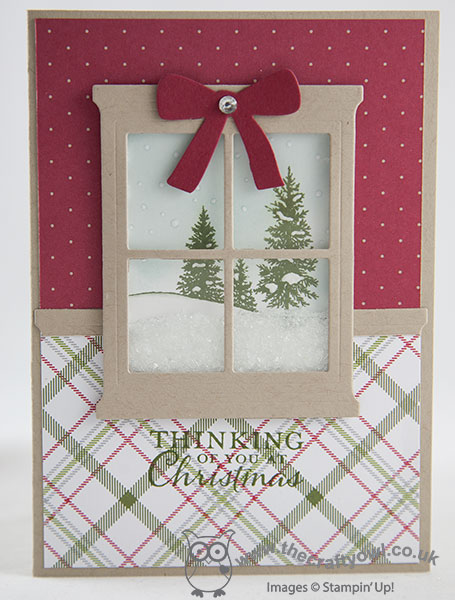
I stamped the scene in Mossy Meadow, sponged in some sky and stamped some snow flakes in Soft Sky, then using my white gel pen I coloured in the snowflakes and the settled snow on the trees - it's amazing what a difference this makes to the finished scene, it adds a subtle yet definite dimension. The shaker is filled with some clear glass glitter and the window itself finished with a Cherry Cobbler bow, made with the Wonderful Wreath framelits. There's one other cute feature of this card - did you see the dado rail? I created it from the edge of a second window, trimming along the crease line and snipping in half. I think it's a nice way to cover the join of the designer series papers, which are incidentally cut from a single sheet and reversed to show both sides.
That's all from me today; back tomorrow with another project. until then, happy stampin'!
Stampin' Up! Supplies Used:
a016a73f-d5c5-4a8c-852d-b5b88c558d8d|0|.0|96d5b379-7e1d-4dac-a6ba-1e50db561b04
Tags: Big Shot, Hearth and Home, Happy Scenes, Christmas, Merry Moments, Shaker cards, Shop online, Stampin' Up, Stampin' Up Card, Stampin' Up Card ideas, Stampin' Up Supplies, Shop Stampin' Up online, Wonderful Wreath Framelits
Cards | Shop Online | Stamping
by Joanne James10. November 2015 07:00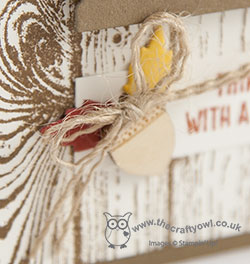
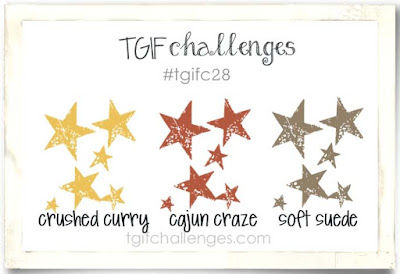
Today I have a card for this week's colour challenge over at TGIF Challenge - here is their colour palette this week:
Before I get to my card though, I would like to give the team over there a big shout out to say thank you for choosing my card as the winner of last week's remix challenge - you can see that card here if you missed it - I love designing for and participating in challenges and it's always nice to be recognised, so thank you!
I used this week's colours to create one of the shaker cards that I will be making in my November technique class, so for any of the ladies booked to attend, today you are getting a sneak peek! Here is my card:
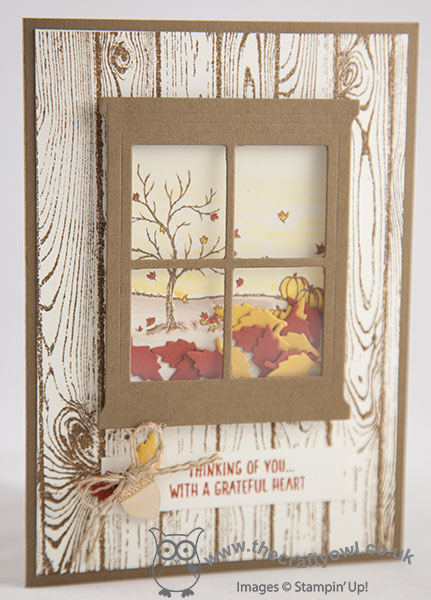
I used Soft Suede for my card base and the window frame that I cut with my Hearth and Home framelits. I stamped my Hardwood and the little autumn scene and sentiment banner from the 'Happy Scenes' stamp set in Soft Suede on Very Vanilla and coloured in the leaves and pumpkins with Cajun Craze and Crushed Curry, given the sky a wash with my aquapainter and a little Crushed Curry ink and some Crumb Cake for the ground (as a permissible neutral). For my shaker element I cut some leaves in the challenge colours using the little die in the Square Pillow Box Framelits set - what a useful little item! I used a couple of these leaves with one of the acorn Wooden Elements and some shredded burlap for an added embellishment to ground my sentiment banner too.
A pretty autumn scene perfectly suited to this week's colours. If you live in or around Northampton and would like to make this and the other shaker cards that I'll be featuring in my November Technique Classes on 16th and 17th November, then do get in touch; I still have a couple of places left if you would like to join us.
That's all from me today; back tomorrow with another project. Until then, happy stampin'!
Stampin' Up! Supplies Used:
5ac121e2-bc6e-449a-931d-2c5a7ecef8b9|0|.0|96d5b379-7e1d-4dac-a6ba-1e50db561b04
Tags: Big Shot, Hearth and Home, Happy Scenes, Hardwood, Shaker cards, Shop online, Shop Stampin' Up online, Stampin' Up, Stampin' Up Card, Stampin' Up Card ideas, Stampin' Up Supplies, Square Pillow Box Thinlits Dies
Cards | Shop Online | Stamping
by Joanne James8. November 2015 09:00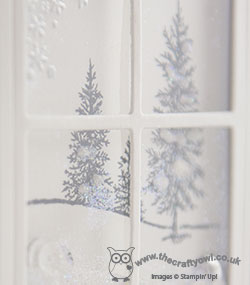
It's Sunday and time for a new challenge over at The Paper Players! This week it's my turn to host and I have a festive colour scheme to get your creative juices flowing this week:
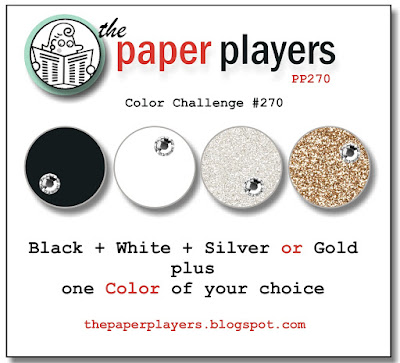
I'm not generally a big fan of black and white, but I am fascinated by the idea of black and white with pops of colour and a little sparkle - I find this can completely change the look and feel of a card. I've been spending lots of time this week playing with my Hearth and Home framelits and co-ordinating Happy Scenes stamp set, as this is what my November technique classes will be using. We are also learning how to make shaker cards so I couldn't resist making one to share with you today:
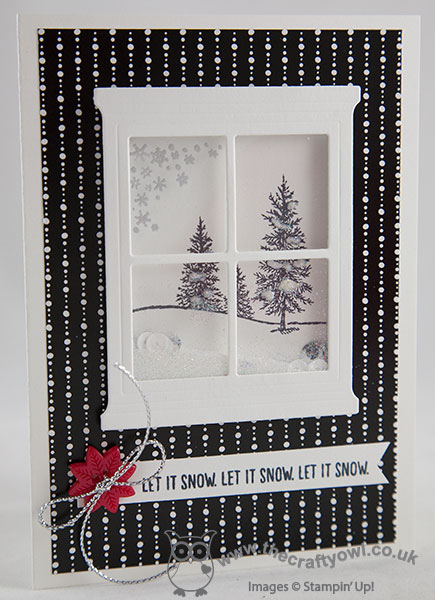
For my card base and window frame, I used extra thick Whisper White and covered the front with a piece of striking black and white patterned paper from the Winter Wonderland Specialty Designer Series Paper - this paper has a lovely sheen to it and looks really luxurious so was the perfect choice for my 'wallpaper'. I stamped my insert using the winter image from the 'Happy Scenes' stamp set in Memento Black on Whisper White, and I used some Tombo Glue, Dazzling Diamonds and White embossing powder to create some dimensional snow on my trees in the same way as I did on my card last Thursday. I also stamped the corner snowflakes on my window in Versamark and heat embossed in silver before adding my foam tape and filling my window with a combination of white and silver sequins and some Dazzling Diamonds. I stamped my sentiment on a simple banner beneath my window and anchored it to my card with a red poinsetta button from the Home For Christmas Designer Button set threaded with silver cord trim. The button is the only spot of additional colour on my card - and I love it!
There's something so special about a shaker card - I guarantee if you give someone a card you can shake it will make them smile!
Before you reach for your ink and papers, check out what our amazing team has created to inspire you this week:
The Paper Players Design Team
Here's a quick recap of our challenge rules:
1. Create a new paper project
2. Upload your creation to your blog with a link back to us and provide a direct link to the post featuring your challenge submission.
3. Please link your card to no more than three challenges, TOTAL.
4. Have FUN!
I look forward to seeing what you make with my colour palette this week. I'm off for a morning of basketball and then lunch and something fun with the children in the afternoon - we might make a start on their Christmas cards for their classmates, who knows?
Back tomorrow with another project; until then, happy stampin'!
Stampin' Up! Supplies Used:
183fcf6d-7021-4985-92f7-f74296d8eb55|0|.0|96d5b379-7e1d-4dac-a6ba-1e50db561b04
Tags: Stampin' Up, Stampin' Up Card, Stampin' Up Card ideas, Stampin' Up Supplies, The Paper Players, Shop online, Shop Stampin' Up online, Hearth and Home, Happy Scenes, Winter Wonderland, Shaker cards
Cards | Shop Online | Stamping
by Joanne James6. October 2015 21:23Today I have another kit based project to share with you: the 'To You And Yours Shaker Cards' project kit featured on page 4 of the current seasonal catalogue. Whilst I love creating my own cards from scratch, I am also a huge fan of Stampin' Up!'s card kits. Like the rest of the Stampin' Up! product range they are always of a very high quality and represent great value for money and for me are a great way to relax as I craft, as all I have to do is follow the instructions and put them together!
I don't always blog my kit projects because often they are completed then straight out the door (they make great last minute cards for busy crafters too!) however I often get the feedback when people see them made up at classes, parties or open house events that they look so much better in real life than the catalogue images. So, with that in mind I have been making a concerted effort, along with one of my downlines and fellow 'kit fan' Barbara, to get my kits put together ahead of time and share them with you. So here goes!
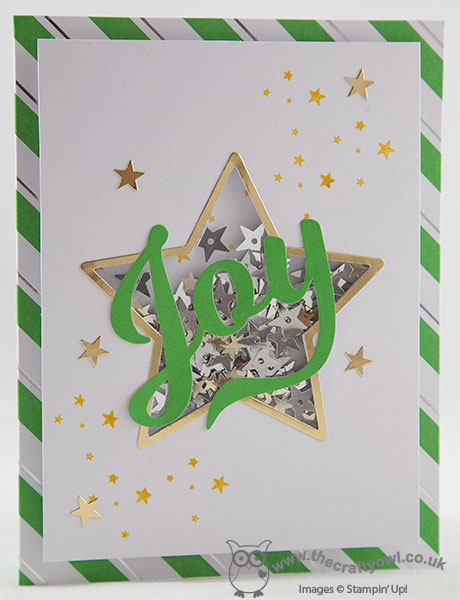
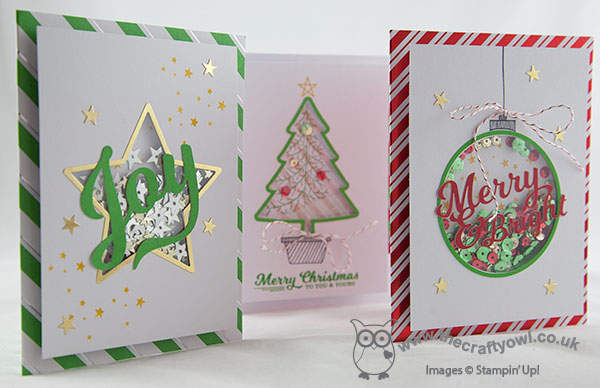
The 'To You And Yours Shaker Cards' Project Kit contains everything you need to make 18 cards, 6 each of three designs. You can make them with or without the additional stamping - for this you will need the 'To You And Yours Too' co-ordinating stamp set and a few ink pads (see product table below). The first card features a star shaker, complete with star-shaped sequins:
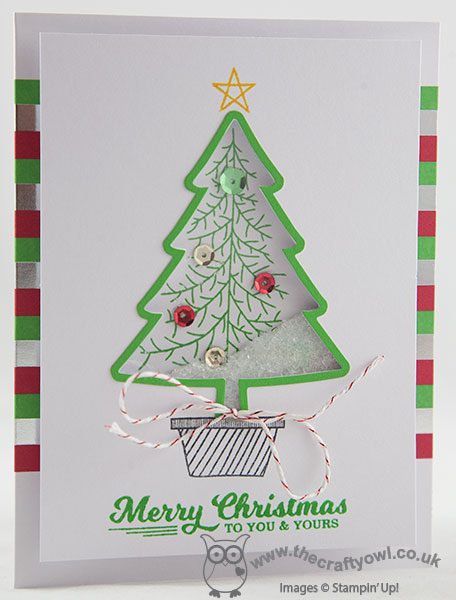
The second card features a Christmas tree, with sequin baubles and glitter glass shaker:
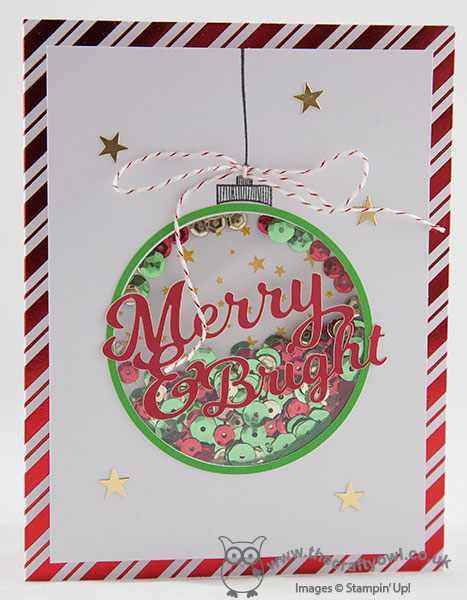
The last card features a bauble, in gorgeous green and red (in case you're wondering, I swapped the sentiments on the front of each of the star and bauble cards because I preferred them this way) - I think this one is actually my favourite:
Aren't they just gorgeous?! And not tricky to put together at all! So much so that I am running a couple of children's classes to make these cards during the forthcoming half-term holiday; you can check out the details by clicking on the 'events' tab on my Facebook page here or alternatively send me an email or give me a call - spaces are limited and they are filling up fast! Likewise, if you would like to get together with a group of grown up friends to make this kit then let me know - I'll bring along the inks and stamp sets, you just need to purchase the kits!
If you are purchasing this kit to craft at home, (or need more convincing!) the lovely people at Stampin' Up! have even made a video showing you step by step how to put the kit together:
I hope you enjoyed the review of this fantastic little kit; I'll be back with details of the other kits we offer in due course. That's all from me today - back tomorrow with details of this week's new Wednesday Weekly Deals and a creative punch art project. until then, happy stampin'!
Stampin' Up! Supplies Used:
7894dbe0-99ad-4efc-b689-c507b5ef089d|0|.0|96d5b379-7e1d-4dac-a6ba-1e50db561b04
Tags: Christmas, Shaker cards, Stampin' Up Supplies, Stampin' Up Card ideas, Stampin' Up Card, Stampin' Up, Shop online, Shop Stampin' Up online, Classes, Children's parties, Children's Craft Groups, To You And Yours Shaker Cards Project Kit, To You And Yours Too
Cards | Children's Parties | Classes | Host a Party | Shop Online | Stamping
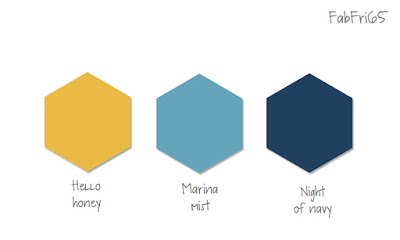
by Joanne James1. June 2015 11:49Happy Monday everyone! I have a busy week ahead so I'm starting it with a quick post for this week's Freshly Made Sketches challenge that also features the current colours over at Fab Friday:
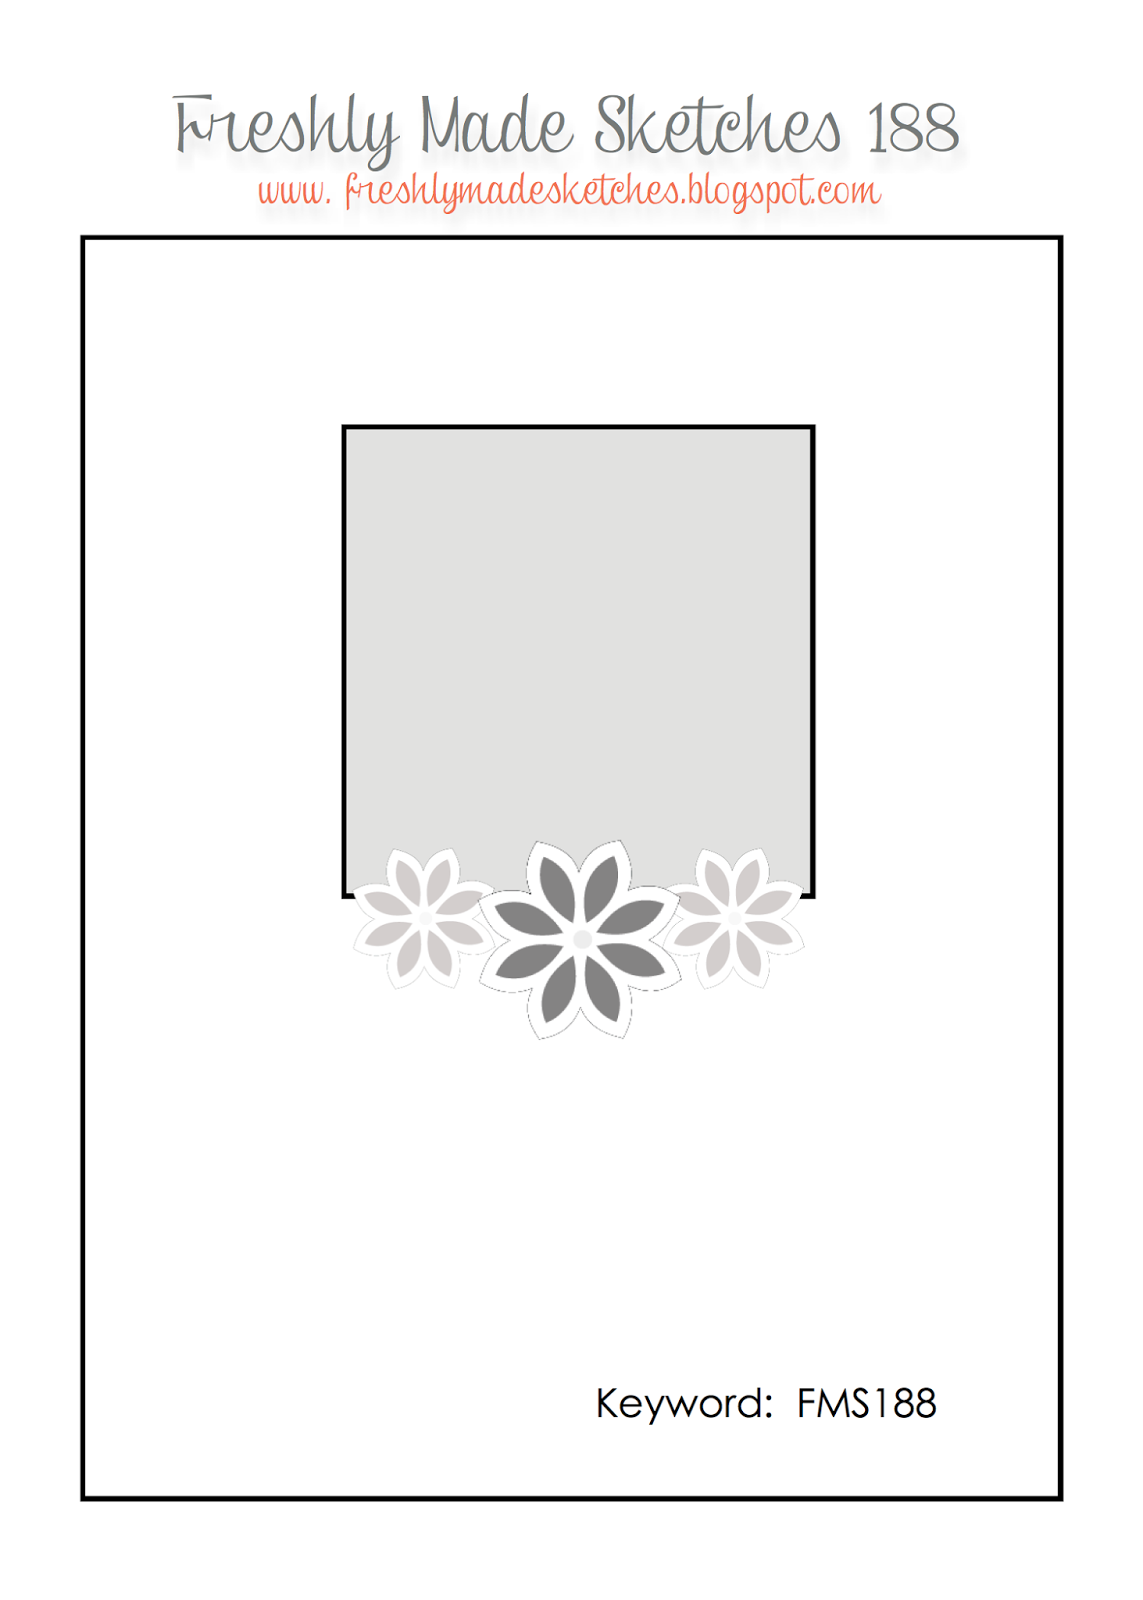
The FMS sketch has been designed by the super-talented Karren Johnson, currently guesting with us over at The Paper Players, so I just had to play along. I decided to make a little 'encouragement' card today - with a fun shaker twist too:
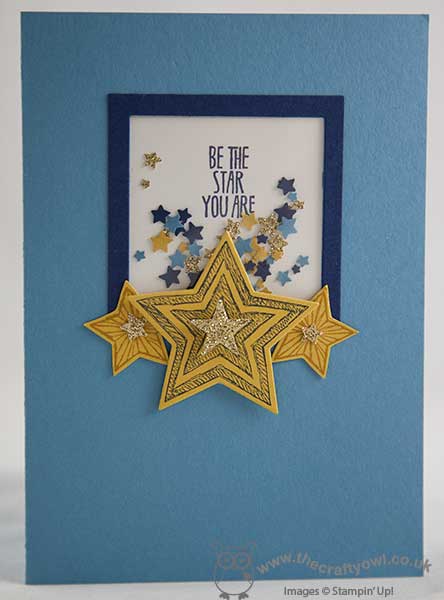
I used Marina Mist for the base of my card and created a frame of Night of Navy using my big Shot and Square Framelits, which I backed with a piece of acetate window sheet. I wanted a 'flat' shaker for this card, so having punched some stars in each of the challenge colours and some gold glimmer paper using my Confetti Stars Border Punch, I stamped my 'be the star' sentiment in navy onto Whisper White, laid the stars on top, then attached this to the back of the window. To finish, I added a trio of stars in Hello Honey, two stamped in Hello Honey and the larger one stamped in Night of Navy, from the 'Be The Star' stamp set, attaching the larger one with dimensionals for added lift and adding some gold glimmer stars to the star centres.
I chose to feature the blues primarily on my card, as Hello Honey is not a favourite of mine and is not a colour I am immediately drawn to, however I think the Fab Friday crew settled upon a great colour combo here as the yellow looks really quite nice with the blue; I may well use this colour combo again!
That's all from me today; I'm off to prepare more goodies for my Open House sessions later this week (you can read full details here). Back tomorrow with another project; until then, happy stampin'!
Stampin' Up! Supplies Used:
by Joanne James1. January 2015 22:41Happy New Year everyone! Today I'm sharing a Valentine's cad with you - there is method in my madness, as it's only January 1st: this card uses the 'love' stamp from the 'Seasonally Scattered' set in the current seasonal catalogue, which is only available for another 5 days. I've used the other two stamps in the set countless times, so am getting in an early Valentine's with this one:
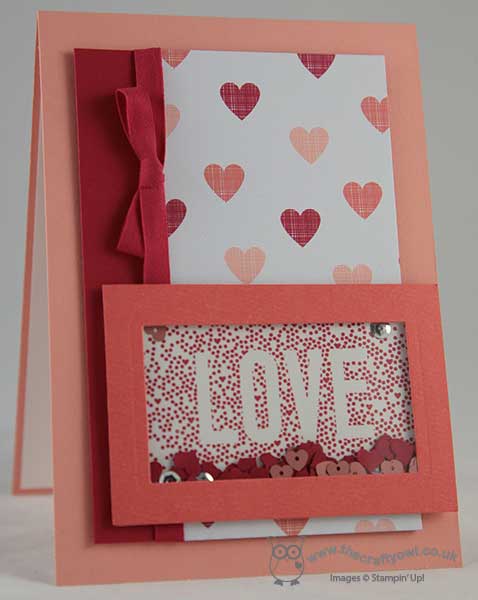
I decided to make a fun shaker card, inspired by this festive version of Justin Krieger's from a couple of weeks ago, using a couple of new product 'sneak peeks' too: the background paper I used is from the new 'Stacked with Love' DSP stack and along with some silver and in-colour sequins, I punched some red hearts using the new Confetti Heart border punch to make the confetti for my shaker. Isn't it fun?
Right, I'm off to finish my glass of champagne and watch the end of that all time classic love story - Titanic. Back tomorrow with another project; until then, happy stampin'!
Stampin' Up! Supplies Used:
*Confetti Hearts Border Punch and Stacked with Love DSP stack available 6th January.
by Joanne James10. December 2014 10:00It's Wednesday and this week's challenge over at Colour Me...! is one of my favourites - we have a beautiful striking colour combination for you to work with:
Night of Navy and Silver - such a great pairing for Christmas cards. I immediately knew what I wanted to create with this week's colour combination - a star shaker card. Here it is:
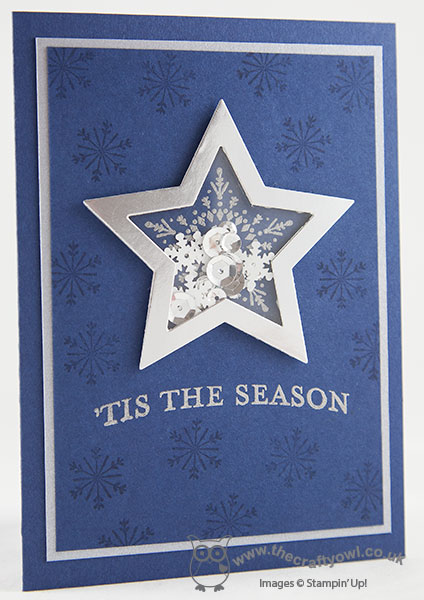
When I uploaded my Design Team card this week, I can see I wasn't the only one who thought stars were a good idea - you know what they say about great minds thinking alike though, right? I created a layered panel of Night of Navy and Brushed Silver on a Night of Navy base, then stamped the large snowflake and sentiment in Versamark and heat embossed in silver. I then stamped the small snowflake all over the front of my card in Versamark to give a subtle background pattern. Lastly, I created a star shaker frame using silver foil, a piece of window sheet and some dimensionals and after placing a mixture of Frosted Sequins in the centre, attached my frame to the background.
I love shaker cards and really don't make them often enough; after all, they are such fun. Feel free to leave a comment on today's card, before hopping over to check out the amazing cards by the rest of the Colour Me...! team:
We look forward to seeing your striking creations - what does this palette inspire you to create?
Back tomorrow with another project; until then, happy stampin'!
Stampin' Up! Supplies Used:
by Joanne James26. August 2014 15:30As I'm writing my post today there is finally a break in the rain - hurrah! I hope that everyone here in the UK had a lovely Bank Holiday weekend, despite the dreadful weather across most of the country yesterday. I am now home, having spent a long weekend away in Somerset with my extended family, celebrating my Mother-in-law's forthcoming 70th birthday. We were fortunate to have had wonderful weather and spent a great weekend on the beach, fossil hunting, playing rounders and generally having a relaxing time.
Today I'm sharing a card I made a while ago as one of the samples for the UK Regional Training Day where I was asked to do a 'wow' technique presentation using the Traveler stamp set. This card is one of the ones that was actually inspired by the set, rather than featuring it directly, although the old fashioned brownie camera that inspired my card does feature on the inside. I decided to try my hand at a shaker card and created it to look like an old fashioned camera - here's the front of my card:
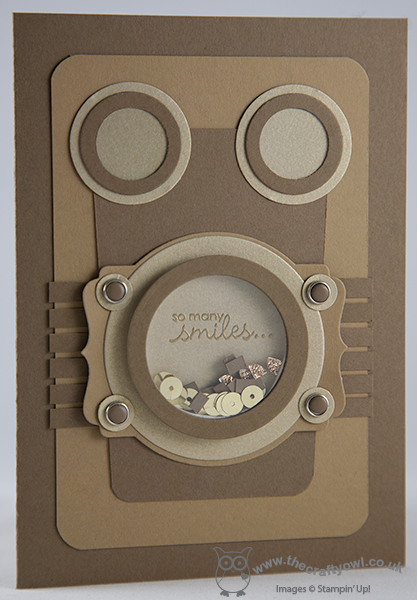
I used Soft Suede, Baked Brown Sugar and Brushed Gold cardstock and a variety of circle punches and both circle and deco label framelits to construct my shaker, and filled the window with gold sequins and some confetti squares cut using my fringe scissors from baked Brown Sugar cardstock and Champagne glimmer paper. I used the Petite Pairs sentiment set and heat embossed the first half of my sentiment in gold on the inside of my shaker frame. This was then continued on the inside of the card:
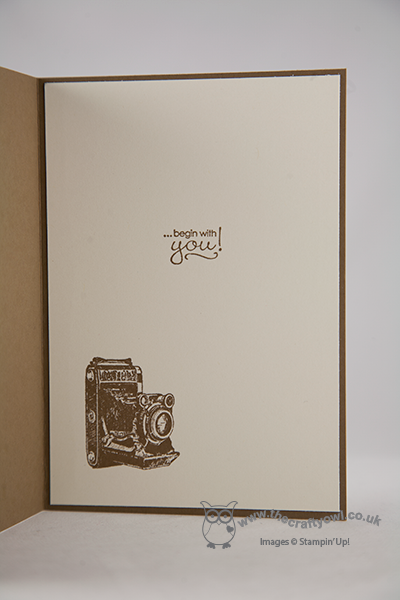
I also finished with the camera stamp. So what do you think - does my punch art camera shaker card bear any resemblance to the real thing? I thought this would make a fun masculine shaker card - proving even grown ups can be fun!
Back tomorrow with my Design Team card for this week's Colour Me...! challenge - and I have a fun 'sneak peek' Christmas card to share with you!
Until then, happy stampin'!
Stampin' Up! Supplies Used:
d8ff5816-b75b-4099-8492-98feab5b6931|0|.0|96d5b379-7e1d-4dac-a6ba-1e50db561b04
Tags: Traveler, Stampin' Up Supplies, Stampin' Up Card ideas, Stampin' Up Card, Stampin' Up, Shaker cards, Shop online, circle punch, Circles Framelits, Deco Labels Framelits, Petite Pairs, Candy Dots, Candy Dot Brads, corner punch
Cards | Punch Art | Stamping