by Joanne James27. March 2015 14:34A quick card from me to share another four leaf clover card, this time for the 'green' challenge over at Addicted to CAS:
Here's my card:
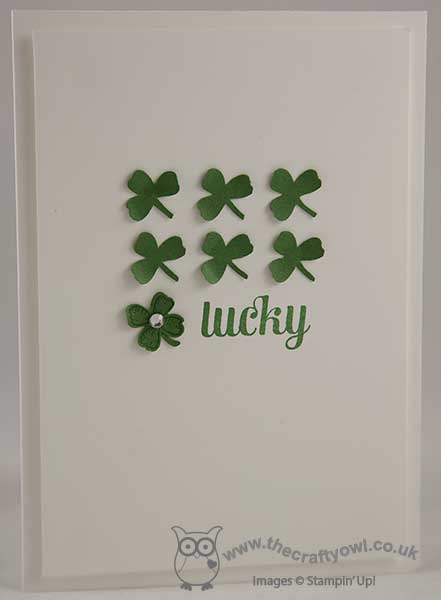
I actually made this card a couple of weeks ago and realised as I was sifting through my photos today that I had forgotten to blog and upload it, so here it is! A simple white background, with a couple of rows of three-leaf clovers, made by punching out some shapes out of Garden Green cardstock using the flower punch in the Itty Bitty Accents Punch Pack and cutting away one of the four petals. For my lucky four leaf clover, I stamped my flower image in green on green and punched it out, leaving all four petals intact and adding a stem and a rhinestone for added sparkle. My 'lucky' is stamped in Garden Green and is one of those ever-useful stamps in the Project Life 'Remember This' stamp set - yes, Project Life is for all your crafting, not just for memory-keeping!
That's all from me today; I've been busy catching up on paperwork and emails all day and I'm itching to get some 'real' crafting done! Back tomorrow with another project; until then, happy stampin'!
Stampin' Up! Supplies Used:
by Joanne James4. March 2015 20:05Finally time for today's creative post! I was fortunate enough to be selected as the 'Top Pick' over at the As You See It Challenge last week - thank you ladies! - for this card here. Today I'm entering a card for this week's challenge which is another sketch-based one - you know how I love a good sketch:

I was keen to interpret the ring in the sketch as a wreath in some way and since I had some leftover burlap on my desk from another project that I am currently working on, I knew which direction I wanted to go. My thoughts are definitely on Spring this week - here is my interpretation of the sketch:
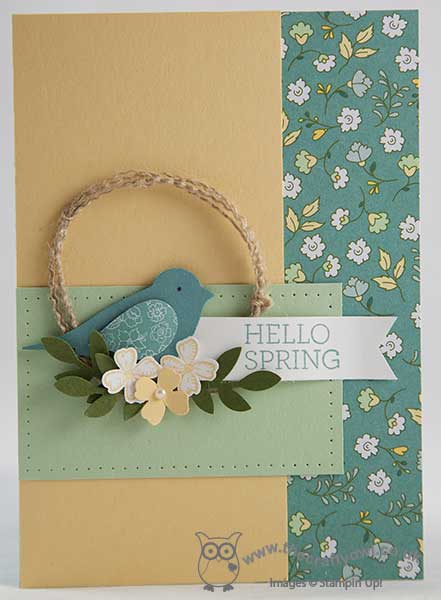
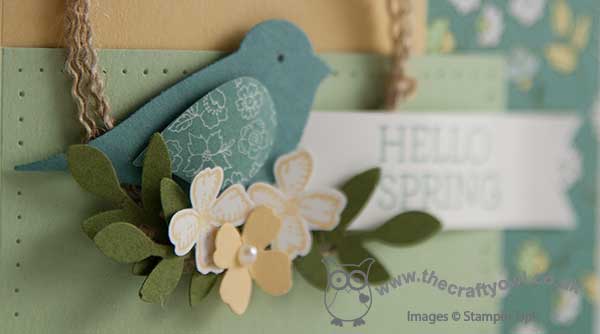
I started with a base of Lost Lagoon then added a piece of All Abloom DSP down the side. I overlapped this with a piece of So Saffron and added a Pistachio Pudding panel across the horizontal, that I pierced around the edge to add interest. To create my spring wreath, I used a few strands of burlap that I stripped from a length and tied it together at three points around the edge to hold everything together. To decorate, I added a few springs of leaves in Mossy Meadow punched from my bird punch, then punched my bird itself in Lost Lagoon. I added an eye with a Basic Grey marker and I punched his wing out of a snippet of All Abloom paper in a different stack design. I added a sentiment banner that I stamped using the Crazy About You' stamp set and to finish a trio of flowers, one in So Saffron with a pearl centre, and two that I stamped in So Saffron on Whisper White with the flower stamp from the 'Something to Say' stamp set and punched out with the co-ordinating Itty Bitty Accents punch.
I love the look and feel of this card - it's so fresh and says that Spring is on the way. I haven't used my bird punch in ages but this little fella looks quite at home sat on his burlap wreath. This would also make a nice Easter or Birthday card, with a change of sentiment.
Back tomorrow with another double-post day and some exciting news too! Until then, happy stampin'!
Stampin' Up! Supplies Used:
d85e6154-0322-4e9a-80ce-64ebefb6d975|1|5.0|96d5b379-7e1d-4dac-a6ba-1e50db561b04
Tags: 2-step bird punch, All Abloom, Itty Bitty Accents Punch Pack, Crazy About You, Shop online, Something To Say, Stampin' Up, Stampin' Up Card, Stampin' Up Card ideas, Stampin' Up Supplies, Paper Piercing
Cards | Punch Art | Stamping
by Joanne James10. February 2015 08:00Today I have not one but two cards for you! Both cards fit this week's colour challenge over at Pals Paper Arts, where there is a gorgeous colour palette to work with this week:
I absolutely love this colour combination and couldn't wait to create something pink and pretty with it. Here is my first card:
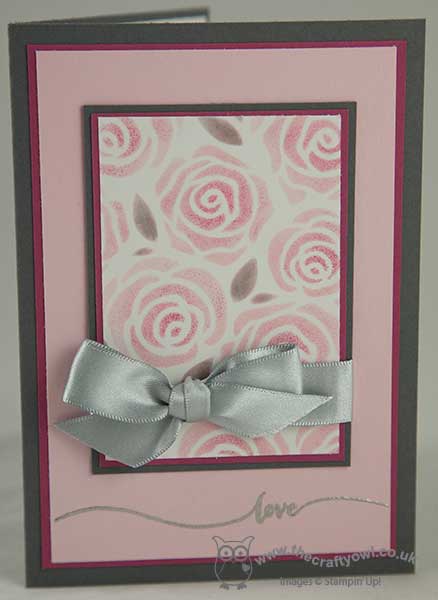
I layered the colours in two sections and in the central section used one of the lovely rose die cut panels from the Artisan Embellishment kit as a stencil and stencilled the roses in the two shades of pink, adding in touches of Basic Grey for the flower leaves. These die cuts are so beautiful - it's a shame there are only two in the kit! Here's a close up of the sponged area:
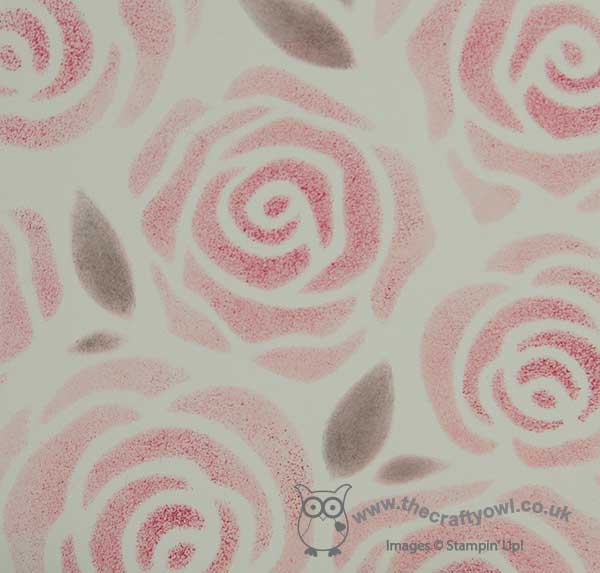
The form of the roses is just so pretty I think and looks really beautiful. I added a bow in luxurious silver satin ribbon and stamped my sentiment on the wide mat layer of Pink Pirouette, stamped in Versamark and heat embossed in pewter. This card is full of romance, but I think it would work equally well as a birthday card.
My second card today uses exactly the same colour palette, but is altogether a more clean and simple affair. This week the team over at Less is More is celebrating its 4th birthday and have a colour challenge of 'pink and grey'. Here is my card for this week's challenge:
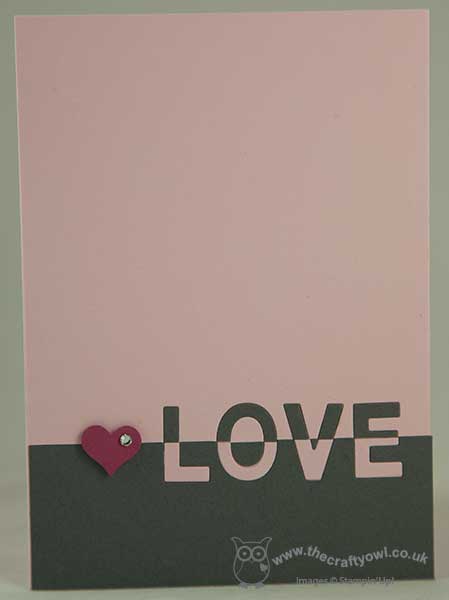
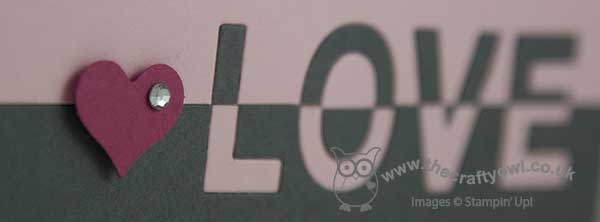
My card started out as a two-tone pink and grey affair, with an inlaid split sentiment - I die cut the word 'love' using my Little Letters thinlits, then did the same with the cardstock the other way around top and bottom in order that I could paper-piece the reverse colours into the negative space. The more I looked at it though, the more it needed a little something else - I toyed with a scrap of Rose Red that sat on my desk leftover from the first card and the addition of the tiny heart with a tiny sparkle was just what it needed. You can see the detail of the die cut and inlaid letters below:
Congratulations to Chrissie and the team on their 4th birthday - you are an awesome bunch who run a most successful weekly challenge and are truly an inspiration.
I'll be back tomorrow with another card; until then, happy stampin'!
Stampin' Up! Supplies Used:
Card 1:
Card 2:
5ea040da-8d47-4155-a48b-0e884e234343|0|.0|96d5b379-7e1d-4dac-a6ba-1e50db561b04
Tags: Artisan Embellishment Kit, Hello Life, Little Letters Thinlits Die, Big Shot, Itty Bitty Accents Punch Pack, Shop online, Stampin' Up, Stampin' Up Card, Stampin' Up Card ideas, Stampin' Up Supplies, Valentines, Valentine's, Anniversary, Stencilling
Cards | Stamping
by Joanne James27. January 2015 08:00Today I have a card inspired by this week's sketch over at Pals Paper Arts:
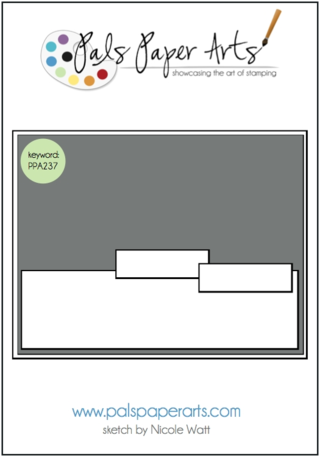
Today's card is a super simple card, using a few offcuts from a card I made a couple of weeks ago. You can see that card here; this is today's card:
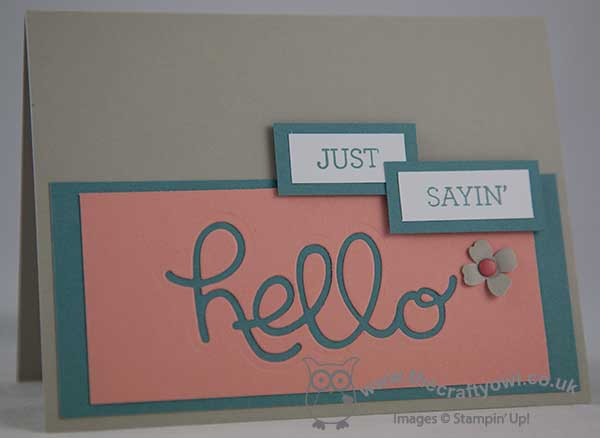
I saved the negative die cut from my original card (I am such a hoarder - I can't bear with anything that I think will come in useful at a later date!) and used it for the panel across the bottom of my card. I used the same colour combination as my original card too, so that I could use up some of the Lost Lagoon offcuts in my box - waste not, want not and all that! I think the negative die cut can make just as much of a statement on a card as the thinlit itself, as this card shows.
I mounted the 'Just Sayin'' on Lost Lagoon and popped it up on dimensionals and added a little punched flower with a candy dot to finish. A super simple card and a great way to use up the bits and pieces leftover from another project.
Back tomorrow with another project; until then, happy stampin'!
Stampin' Up! Supplies Used:
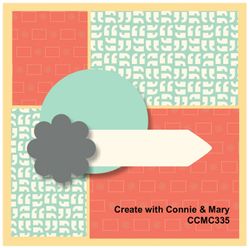
by Joanne James31. December 2014 10:00Today it's a special day: the Colour Me...! challenge is celebrating its first birthday and so the co-creators, the lovely Hayley and Tara, are hosting a party to celebrate! As one of the outgoing designers, I was invited to choose any previous challenge colour combination and create a card for this week's showcase. I decided to go with the creative choice from week 5, which enabled me to use some of the gorgeous new 'Best Year Ever' DSP from the 2015 Sale-A-Bration offering; I also used this week's sketch layout over at Create With Connie and Mary, as this layout was perfect for what I had in mind:
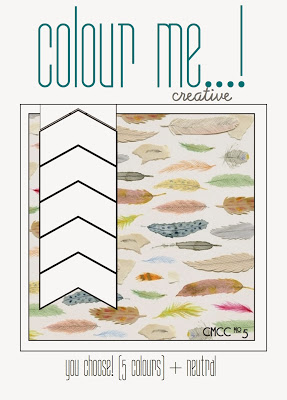
As much as I've enjoyed making Christmas cards these past few months, I am so ready for a change! The colours of the promotional designer series paper and co-ordinating embellishment packs are like a breath of spring air - take a look:
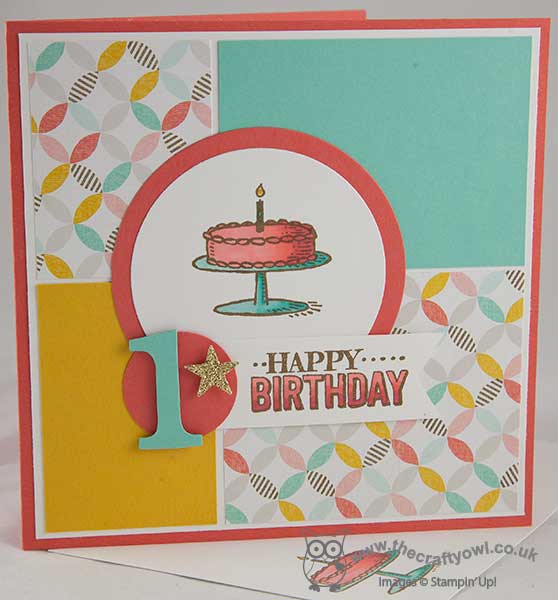
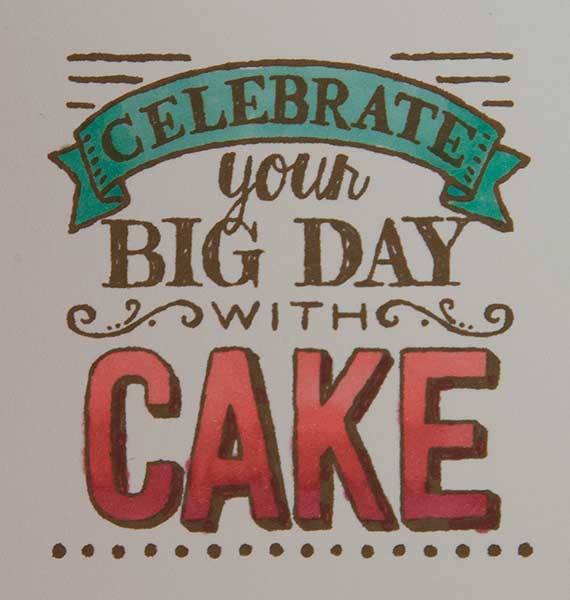
I based the colour scheme for my card on the feature colours of the Best Day Ever papers - Calypso Coral, Coastal Cabana, Crushed Curry, Soft Suede and Sahara Sand, with white as my neutral - isn't it a gorgeous colour combination for Spring? I used two pieces of the same paper for my card, paired with a couple of blocks of solid colour, as the background for my card, then used another Sale-A-Bration promotional item, the 'Big Day' stamp set to create my focal point. What better than a birthday cake with a single candle for a first birthday?! The sentiment is from the same set. I stamped them both in Soft Suede, before colouring with my Calypso Coral and Coastal Cabana Blendabilities. Did you know that Stampin' Up! Blendabilities work with many of the standard Stampin' Up! coloured ink pads, in addition to Memento Black? Sometimes an alternative colour outline works really well and can give a different effect. I decided to create a little 'badge' to anchor my sentiment, using a punched circle, a number 1 cut with my retired Typeset alphabet Bigz Die (you could use the Perfect Print Bigz Number Die as an alternative) and a punched gold glimmer star. I coloured the envelope to match and I even created a fancy sentiment inside my card:
Both the Best Day Ever DSP and the Big Day stamp set are items that could be yours free with a purchase of £45 or more during Sale-A-Bration; Slae-A-Bration starts early this year on 6th January, so not long to wait now! I made this card to congratulate Hayley and Tara on their first Colour Me...! anniversary, however it would work just as well for a child's first birthday I think in this colour scheme.
That's all from me today; do pop by the Colour Me...! challenge blog and see what other birthday delights are in store. I hope you have a fun New Year's Eve planned - mine will be a quiet one - and I'll be back tomorrow with another project; until then, happy stampin'!
Stampin' Up! Supplies Used:
* Best Day Ever Designer Series Paper and Big Day stamp set available 6th January.
40a68875-0514-40a3-a433-8a494767272f|0|.0|96d5b379-7e1d-4dac-a6ba-1e50db561b04
Tags: Blendabilities, Big Day, Best Day Ever, circle punch, Circles Framelits, Itty Bitty Accents Punch Pack, Typeset Alphabet, Big Shot, Sale-A-Bration 2015, Sale-a-bration, Shop online, Stampin' Up, Stampin' Up Card, Stampin' Up Card ideas, Stampin' Up Supplies
Cards | Sale-a-bration | Stamping
by Joanne James24. September 2014 10:00It's Wednesday and time for a new challenge over at the Colour Me...! Card Challenge. This week we have a playful colour palette for you to work with - I also chose to use this week's Retrosketches layout for my card:
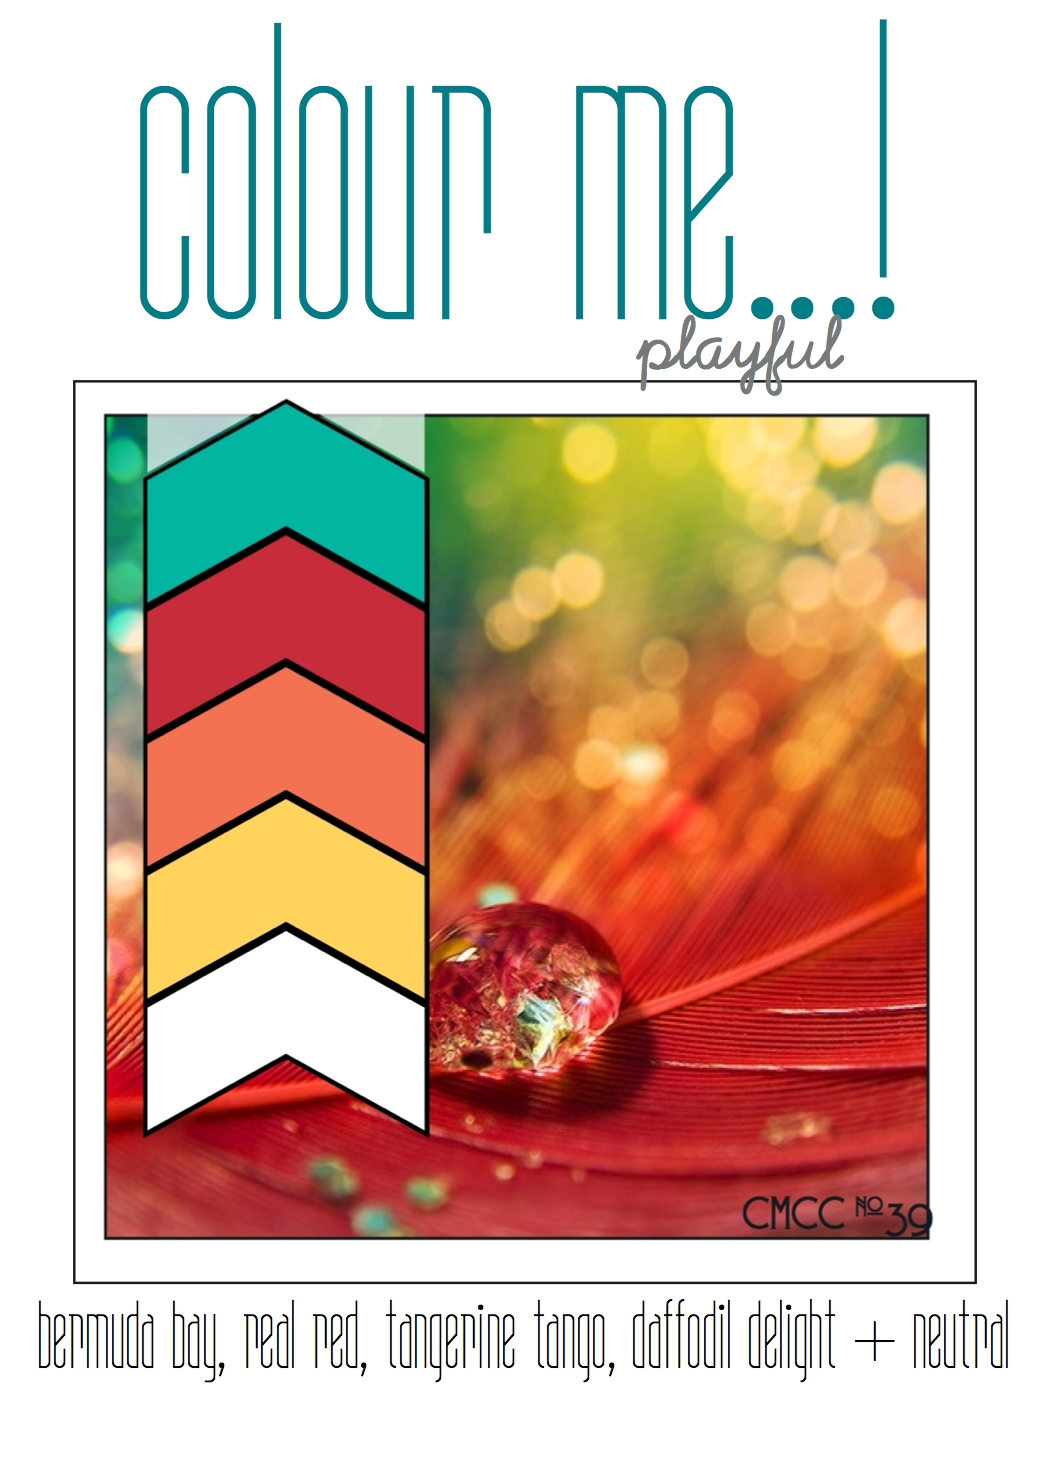
I love the bright colours of this week's colour palette, so decided to create a nice cheery card to really make the most of them - here's my card:
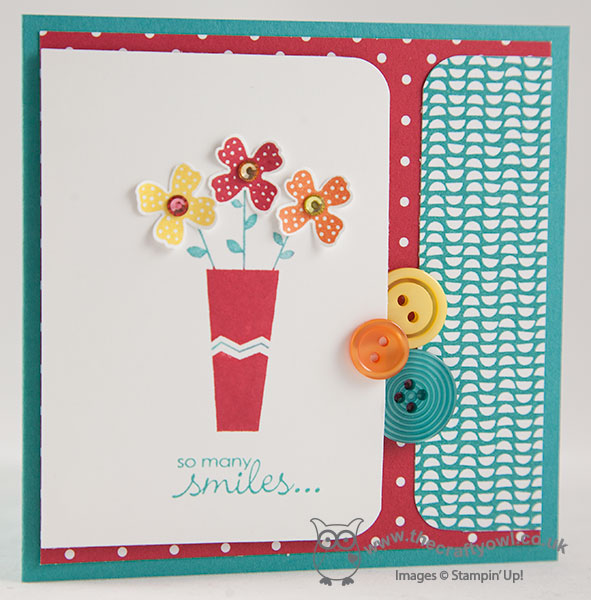
I used Bermuda Bay as the base colour for my card and decided to make a 4" square card for a change. I layered a sheet of Real Red polka dot paper from the Brights paper stack and a piece of Confetti Celebration DSP that features a fun Bermuda Bay design. I stamped the flower vase from Pictogram Punches, having inked it with my Stampin' Write markers to enable me to add the chevron detail on the vase and the flower stems in a different colour to the vase itself, then stamped and punched three flowers, finishing each with a rhinestone in the centre that had been coloured with my Blendabilities marker and adhered the flowers separately using glue dots. After stamping my sentiment from Petite Pairs, this left-handed section was adhered to the front of the card using dimensionals, to allow space for my selection of co-ordinating buttons to sit above and below it as per the sketch design.
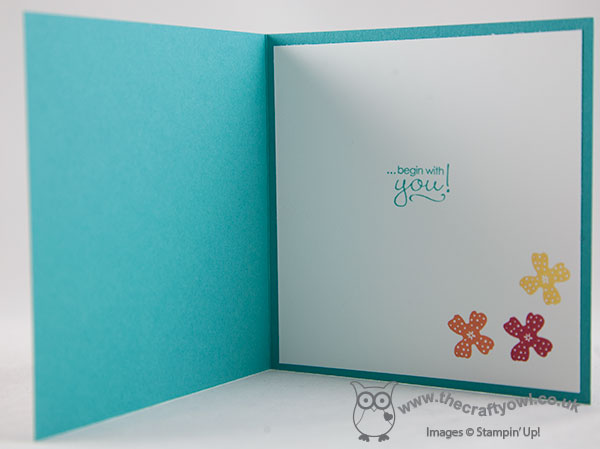
I even remembered to take a photo of the stamping on the inside of my card today:
That's my Colour Me...! card for this week - why not visit the other Colour Me...! designers and check out their takes on this week's colour combination:
We look forward to seeing your subtle creations. Right, i'm off to get some work done before this afternoon's hockey match (observer, not participant!)
Back tomorrow with another project; until then, happy stampin'!
Stampin' Up! Supplies Used:
2fdaabc9-aaf5-48d0-a644-494b14729943|0|.0|96d5b379-7e1d-4dac-a6ba-1e50db561b04
Tags: Shop online, Stampin' Up Card, Stampin' Up Card ideas, Stampin' Up Supplies, Stampin' Up, Pictogram Punches, Itty Bitty Accents Punch Pack, Confetti Celebration, Colour Me...!, Petite Pairs, Blendabilities
Cards | Stamping
by Joanne James21. September 2014 07:00It's Sunday so I'm here with my card for this week's challenge over at The Paper Players, where Jaydee has the following clean and simple challenge for us:

I also used the above sketch from Freshly Made Sketches again for my card this week and this week's card is a lot more 'clean' than last weeks - here is my card:
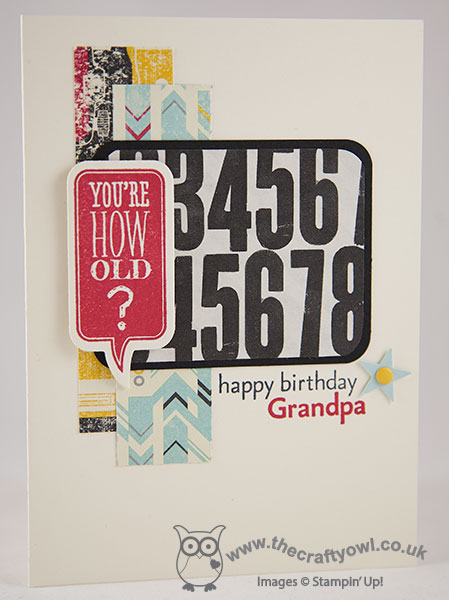
My card is really simple, with a piece of the numbered Typeset paper mounted on Basic Black as the central panel of my card, with a couple of strips of Flashback DSP behind to add some colour and the focal point word bubble 'You're How Old?' stamped in Real Red. I finished my card with the sentiment 'happy birthday Grandpa' (stamped with my vintage 'For My Family' stamp set - a keeper!) and a punched star.
Yesterday was my Dad's 70th birthday and I made this card for him from the children - they think 70 is positively ancient, so the word bubble was entirely appropriate! - however it occurred to me as I typed up my post that not only could you change out the sentiment to just say 'happy birthday' or include the role of any family member (dad, brother, uncle, etc.) this might also work as a fun tongue-in-cheek card with the sentiment as is. So beware any male that feels he's 'over the hill', because one of these cards could be heading your way Grandpa!
Do check out the other design team cards this week; as always, there is some great inspiration and I look forward to seeing your challenge entries in the gallery. Right, I'm off to prepare for Sunday lunch and hopefully enjoy a restful family day before the onset of a new week. Enjoy your weekends everyone!
Back tomorrow with another project; until then, happy stampin'!
Stampin' Up! Supplies Used:
3c67216b-06d0-4efb-9a73-71b4b3181f08|0|.0|96d5b379-7e1d-4dac-a6ba-1e50db561b04
Tags: Just Sayin', First Edition, Flashback, For My Family, Itty Bitty Accents Punch Pack, Candy Dots, corner punch, Shop online, Stampin' Up, Stampin' Up Card, Stampin' Up Card ideas, Stampin' Up Supplies, Typeset, Word Bubbles Framelits
Cards | Stamping
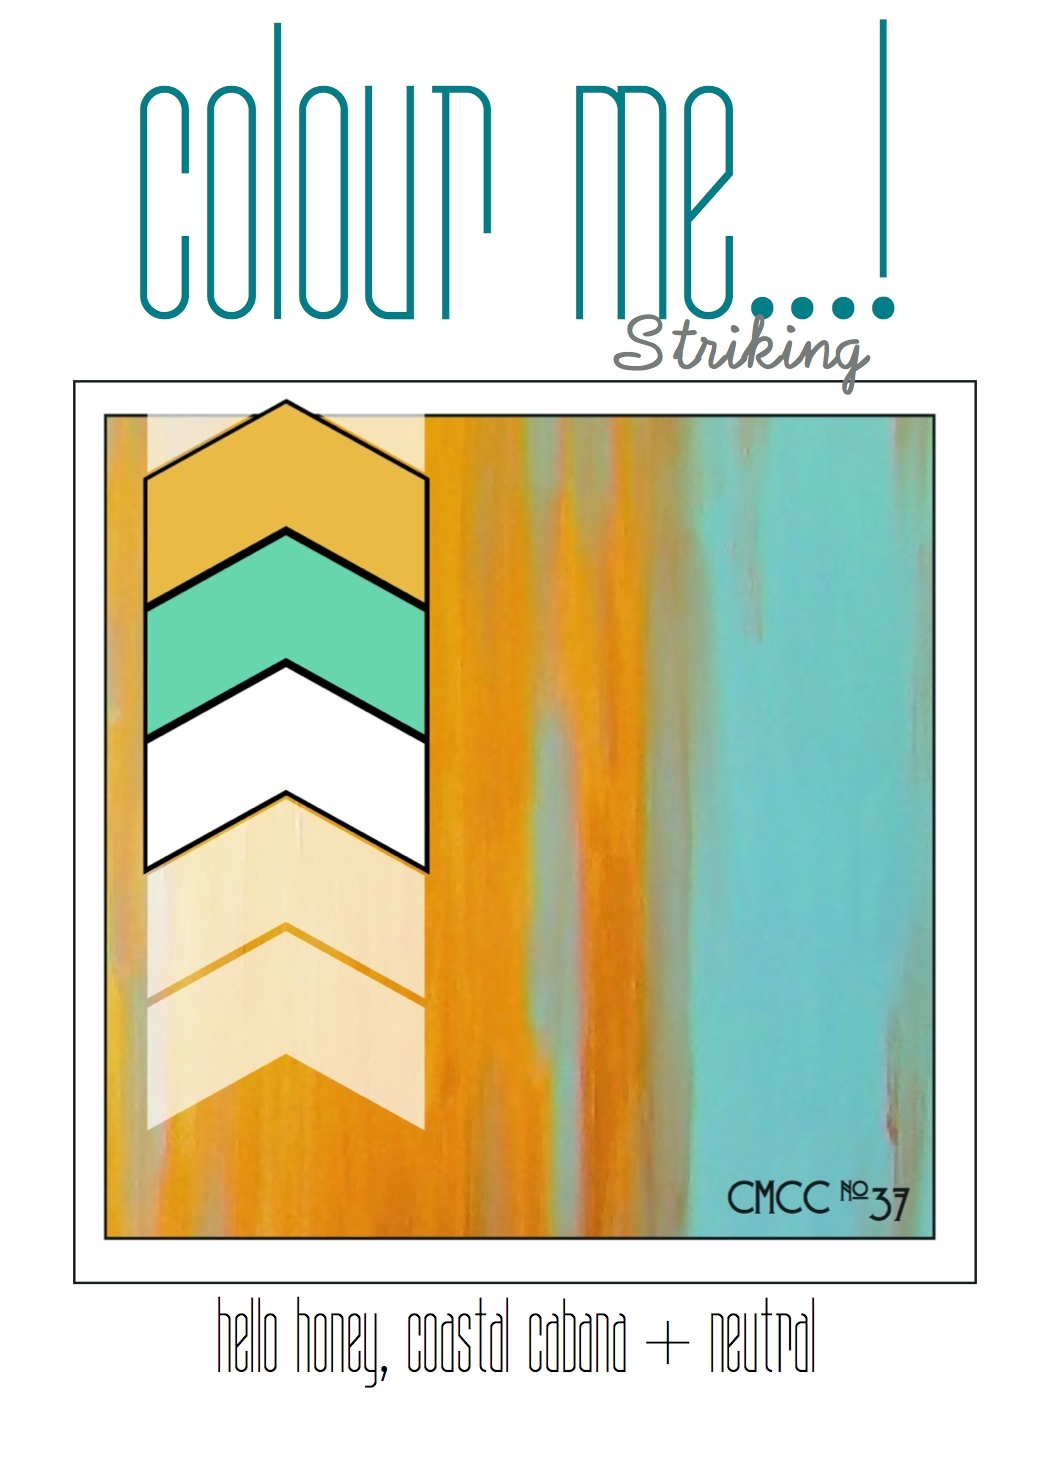
by Joanne James10. September 2014 10:02Here is today's card for this week's challenge over at Colour Me...! where we have a striking colour palette to work with:
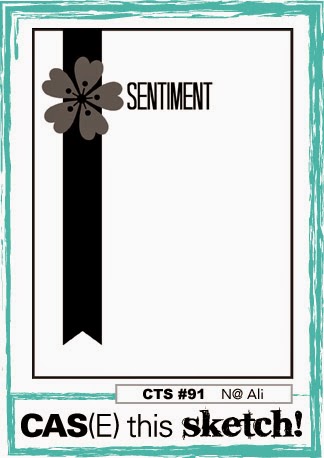
I used this week's layout at CAS(E) This Sketch again for today's card, although interpreted it quite differently to the card I made using this sketch earlier in the week (you can see that card here). I played about with this week's colours for a bit before deciding on the final version of my card - I had lots more layers and DSP galore, but eventually decided that a less fussy layout was in order. Here is my card:
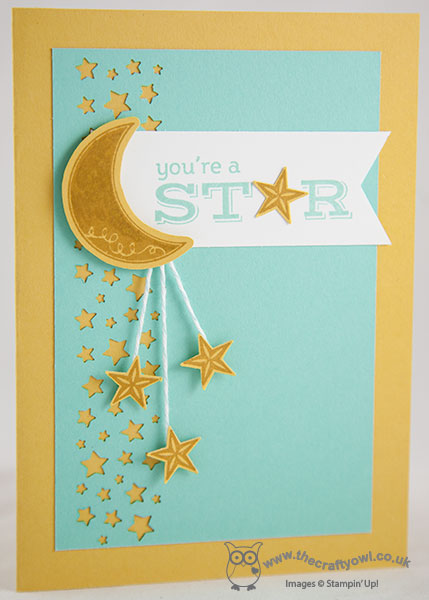
I used Hello Honey for my card base, and matted a piece of Coastal Cabana that I had first punched along the edge with the Confetti Star punch. I can't stop using this punch, the floor of my office is littered with tiny punched stars! I stamped the greeting from Pictogram Punches in Coastal Cabana ink onto a banner of Whisper White and flagged the end with my hexagon punch - so useful for perfectly even banner ends! I then stamped the moon and three stars in Hello Honey onto Hello Honey cardstock and fussy cut the moon and punched out the stars with the co-ordinating punch - easy peasy! I attached the falling stars to the moon using some vintage Pool Party baker's twine (a bit of a cheat, but it added a little more colour than Whisper White twine and against the Coastal Cabana it looks the same colour!) You could achieve the same look by using one of the Coastal Cabana Blendabilities markers to colour some white baker's twine. I attached the shapes to my card using dimensionals for lift, then stamped and punched another yellow star and attached it to the sentiment to tie this in to the rest of my card.
This card is heading for a member of my team who recently achieved a promotion - a fun congratulations card! Why not visit the other Colour Me...! designers and check out their takes on this week's colour combination:
We look forward to seeing your striking creations.
Back tomorrow with another project; until then, happy stampin'!
Stampin' Up! Supplies Used:
by Joanne James15. August 2014 21:00No blog post yesterday as I took the James juniors to the zoo for the day and had a team get-together in the evening and didn't manage to squeeze one in! We had a great day at the zoo and managed to dodge the worst of the rain showers, so all good. Today I'm sharing a quick shaker card designed by Monica Gale that we made at our last quarterly team training day:
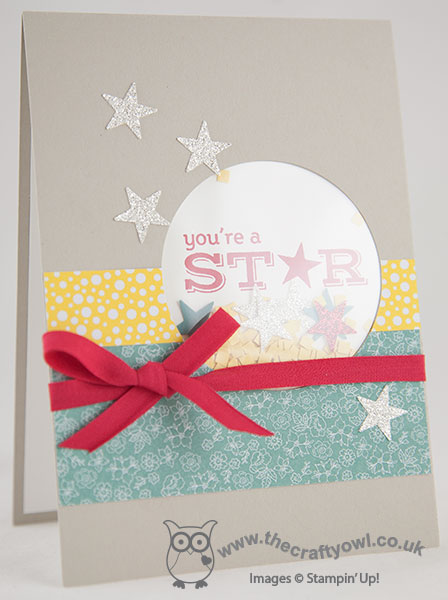
Not the best of photos I'm afraid as I struggled to beat the refection and glare on the window sheet, but hopefully good enough to get the idea. Shaker cards are all the rage at the moment and whilst you can build a window with depth for a card with real 'shake-ability (I'm sure it's a word!), you can also get the effect simply and easily by creating a pocket behind a punched opening and adding just a few elements - I added some glitter stars and square confetti created with my fringe scissors. The front of the card is simply decorated with a few strips of All Abloom DSP, some stars punched from the new Dazzling Diamonds Glimmer paper and a tied bow made with 1/4" Real Red cotton ribbon.
Short and sweet today! Back tomorrow with another project. until then, happy stampin'!
Stampin' Up Supplies Used:
97147742-8c49-4452-a304-7de7cc3e4ecb|0|.0|96d5b379-7e1d-4dac-a6ba-1e50db561b04
Tags: All Abloom, Pictogram Punches, Fringe Scissors, Itty Bitty Accents Punch Pack, Shop online, Shaker cards, Stampin' Up, Stampin' Up Card, Stampin' Up Card ideas, Stampin' Up Supplies, circle punch
Cards | Stamping
by Joanne James5. August 2014 19:54Well, it's been a little colder here in the UK today and we've had a fair amount of rain, which has kept us largely indoors for most of the day, but we made the most of it with some early morning baking (chocolate chip muffins - yum!), an indoor picnic and a pleasant few hours catching up with friends so all in all not a bad Tuesday.
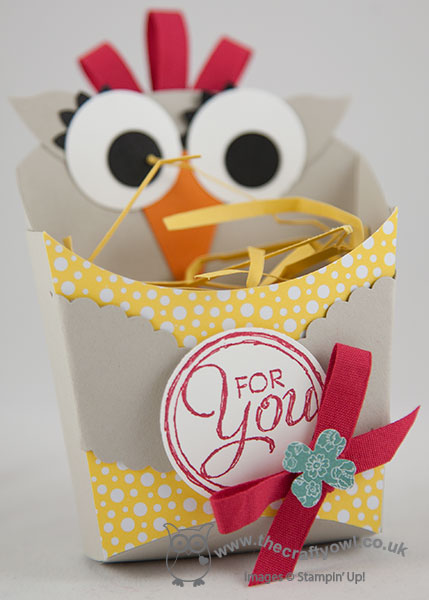
Today I thought I would share another 3D project with you - a cute little owl gift box made using the Fry Box Bigz L Die that we made at our last team training session. Check out this cute little fella:
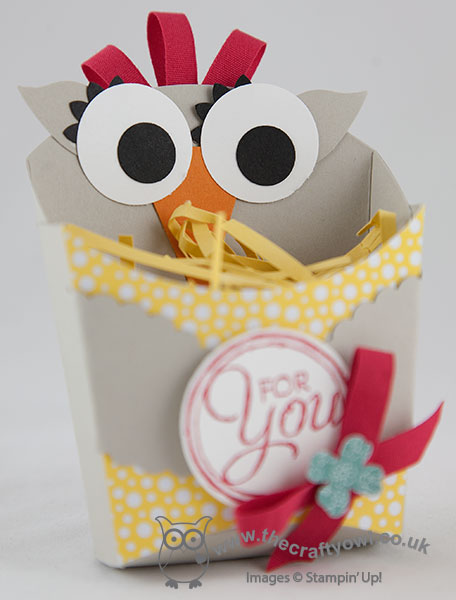
As 'The Crafty Owl', I was always going to like this cheeky chap, but the die itself has so many dress-up possibilities! The owl was so easy to make: the front of the box was covered with a piece of All Abloom DSP, then some black and white circles punched with the 1/2" and 1" circle punches, black eyelashes using the largest flower from the Boho Blossoms punch, ears from the Bird Builder punch and a Pumpkin Pie triangle nose from the Petite Pennants Builder punch then some Sahara Sand Scallop Ovals for wings. Some 1/4" red cotton ribbon was used to create a little plume of feathers and to tie a bow to adorn the 'For You' stamped greeting from the Chalk Talk stamp set, which was finally finished with a punched flower. Some filling was cut from yellow cardstock using the fringe scissors to support the box contents.
These fry boxes are the perfect size for a little gift or a few chocolates - look out for lots more variations on this in future posts.
Back tomorrow with the new weekly deals and my Design Team card for this week's challenge over at Colour Me...!
Until then, happy stampin'!
Stampin' Up! Supplies Used:
20e4e93b-5cc9-4ed2-824e-6c82962164c9|0|.0|96d5b379-7e1d-4dac-a6ba-1e50db561b04
Tags: 3D Projects, boxes, Fry Box Bigz L Die, Chalk Talk, circle punch, Itty Bitty Accents Punch Pack, Scallop Oval Punch, Boho Blossoms, bird builder punch, Petite Pennants Builder, All Abloom, Fringe Scissors, Shop online, Stampin' Up, Stampin' Up Supplies
3D Projects | Boxes