by Joanne James18. February 2014 20:58Good evening blog readers! Today I'm going to share a scrapbook page with you that I made at a recent team training event and designed by the lovely Bekka Prideaux. It features a number of the Sweet Sorbet paper designs and the Petal Parade stamp set - both items that can be yours free during Sale-A-Bration with an order of £45 or more - some new Spring-Summer items and a somewhat overlooked item in the annual catalogue (more on that in a moment). So here is my scrapbook layout:
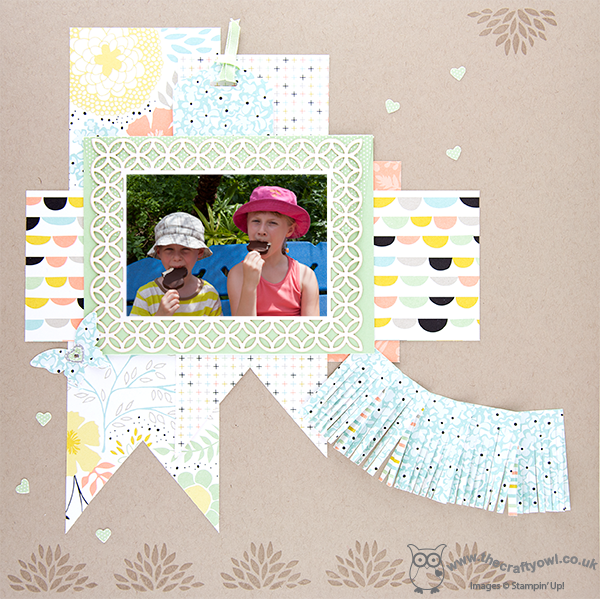
I decided to use one of my summer holiday photos of Rebecca and Ben as the centrepiece; I have so many amazing photographs from our holiday that I have yet to do something with, so this seemed a good opportunity to start. They are participating in one of my favourite activities at a Disney theme park - no not a roller coaster, but the ritual eating of a Mickey ice-cream bar (I am rather partial to these!) - and the concentration on their faces is a concerted attempt to get them eaten before they melt in the extreme heat!
The bright colours and patterns in the papers make a great background for my photo. Did you spot the 'hidden treasure' from the annual catalogue? The photograph is mounted on to one of the Simply Fabulous Simply Sent cards, with another attached to the Scallop tag Topper Punch piece behind for hidden journaling. These cards are great for quick cards but can also be used for journaling or as a photo mount. Lastly, a fringe cut using the new fringe scissors adds texture and draws the eye in to the focal point.
Back tomorrow with another project; until then, happy stampin'!
Stampin' Up! Supplies Used:
by Joanne James17. February 2014 21:26Today I've had the most fun day. I was privileged to be invited to run a Crafty Owl birthday party for a 10 year old and her classmates, which was great fun. We made some wall art and they had a fun time punching shapes and using the Big Shot to create their masterpieces. When I run a craft party, I always create a punch art kit for the party bags so that the children can continue the crafty fun at home. For today's party, the birthday girl loves horses so I knew that a pony needed to feature on my card. I had a quick surf on Pinterest for some general inspiration then set to work creating my card. This is what I came up with:
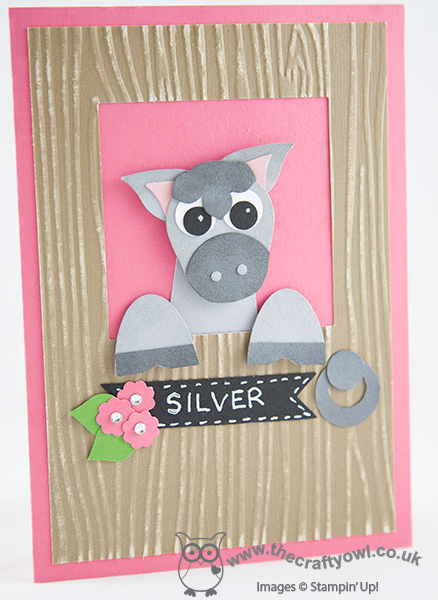
I used a variety of punches to create my card (see full list below) and some Core d'inations cardstock embossed with the woodgrain embossing folder to give texture to my stable door. I've always loved grey horses so made my card with a grey pony, but since my eight year-old informed me that this made it look like a donkey, the kits I made for the party girls all had brown horses to remove any doubt!
The girls loved their kits and I'm sure they will have had as much fun completing them as they did at the party itself. I'm linking today's card up with the challenge over at SUO Challenges where the theme this week is 'Punch Art', so this card fits perfectly.
I ended my day with a trip to the cinema to see the new Lego Movie; it was a great children's movie for half term and fulfilled one of Ben's main aims for the week, so all in all a good day was had by all.
Back tomorrow with another project; until then, happy stampin'!
Stampin' Up! Supplies Used:
45792198-643c-4601-ba20-b3a210ed6332|1|5.0|96d5b379-7e1d-4dac-a6ba-1e50db561b04
Tags: Big Shot, Owl Punch, bird builder punch, Bitty Banners Framelits, Itty Bitty Punches, Woodgrain TIEF, Merry Minis, Children's parties, Shop online, Stampin' Up, Stampin' Up Card, Stampin' Up Card ideas, Stampin' Up Supplies, Petite Petals Punch
Cards | Children's Parties | Host a Party | Punch Art
by Joanne James16. February 2014 20:50I've had a busy but productive day today exhibiting at the Budget Bride Live Wedding Fair at Diana's Health and Fitness Club in Wellingborough. Thank you to all of the lovely brides to be that came to say 'hello' to me in the Ruby lounge today - it was lovely to meet you all and I'm really looking forward to chatting with you again soon to begin the process of turning your stationery dreams into reality. Today I'm sharing one of the table decorations that I made for my exhibition display that received lots of positive feedback today - a birdcage decorated with flowers made with the new Spiral Flower Die:
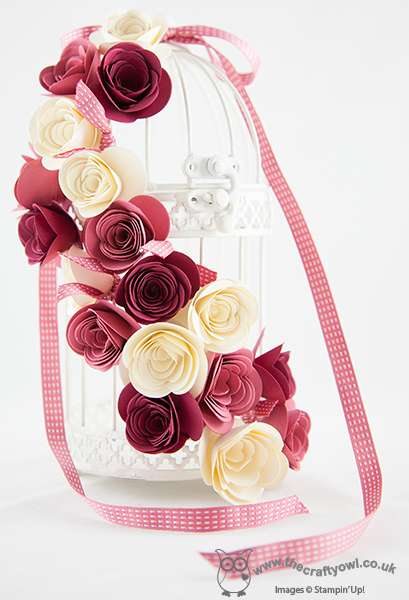
I made these flowers in three co-ordinating colours of cardstock and finished the centre of each flower with a pearl, then added some satin stitched ribbon to finish. You could make something similar in any colour to tie in with your chosen wedding colour scheme - it would make a lovely table centre.
That's all from me today; I am crafting at a children's birthday party tomorrow so will share one of the projects we are doing with you in tomorrow's post.
Until then, happy stampin'!
Stampin' Up! Supplies Used:
by Joanne James15. February 2014 21:50I've had the busiest of days today, dominated by last minute preparations for the wedding fair I am exhibiting at tomorrow, so today I've just got time for a quick post to share with you something I made with another of the items you can receive free with a £45 spend during Sale-A-Bration.
There are two My Digital Studio digital ensembles available as part of this year's Sale-A-bration free gift offering - one of them is the 'Hooray for Parties' set, which includes some great designer templates for invitations, thank yous, treat holders and much more. Here's a party invitation I made with it using the basic layout:
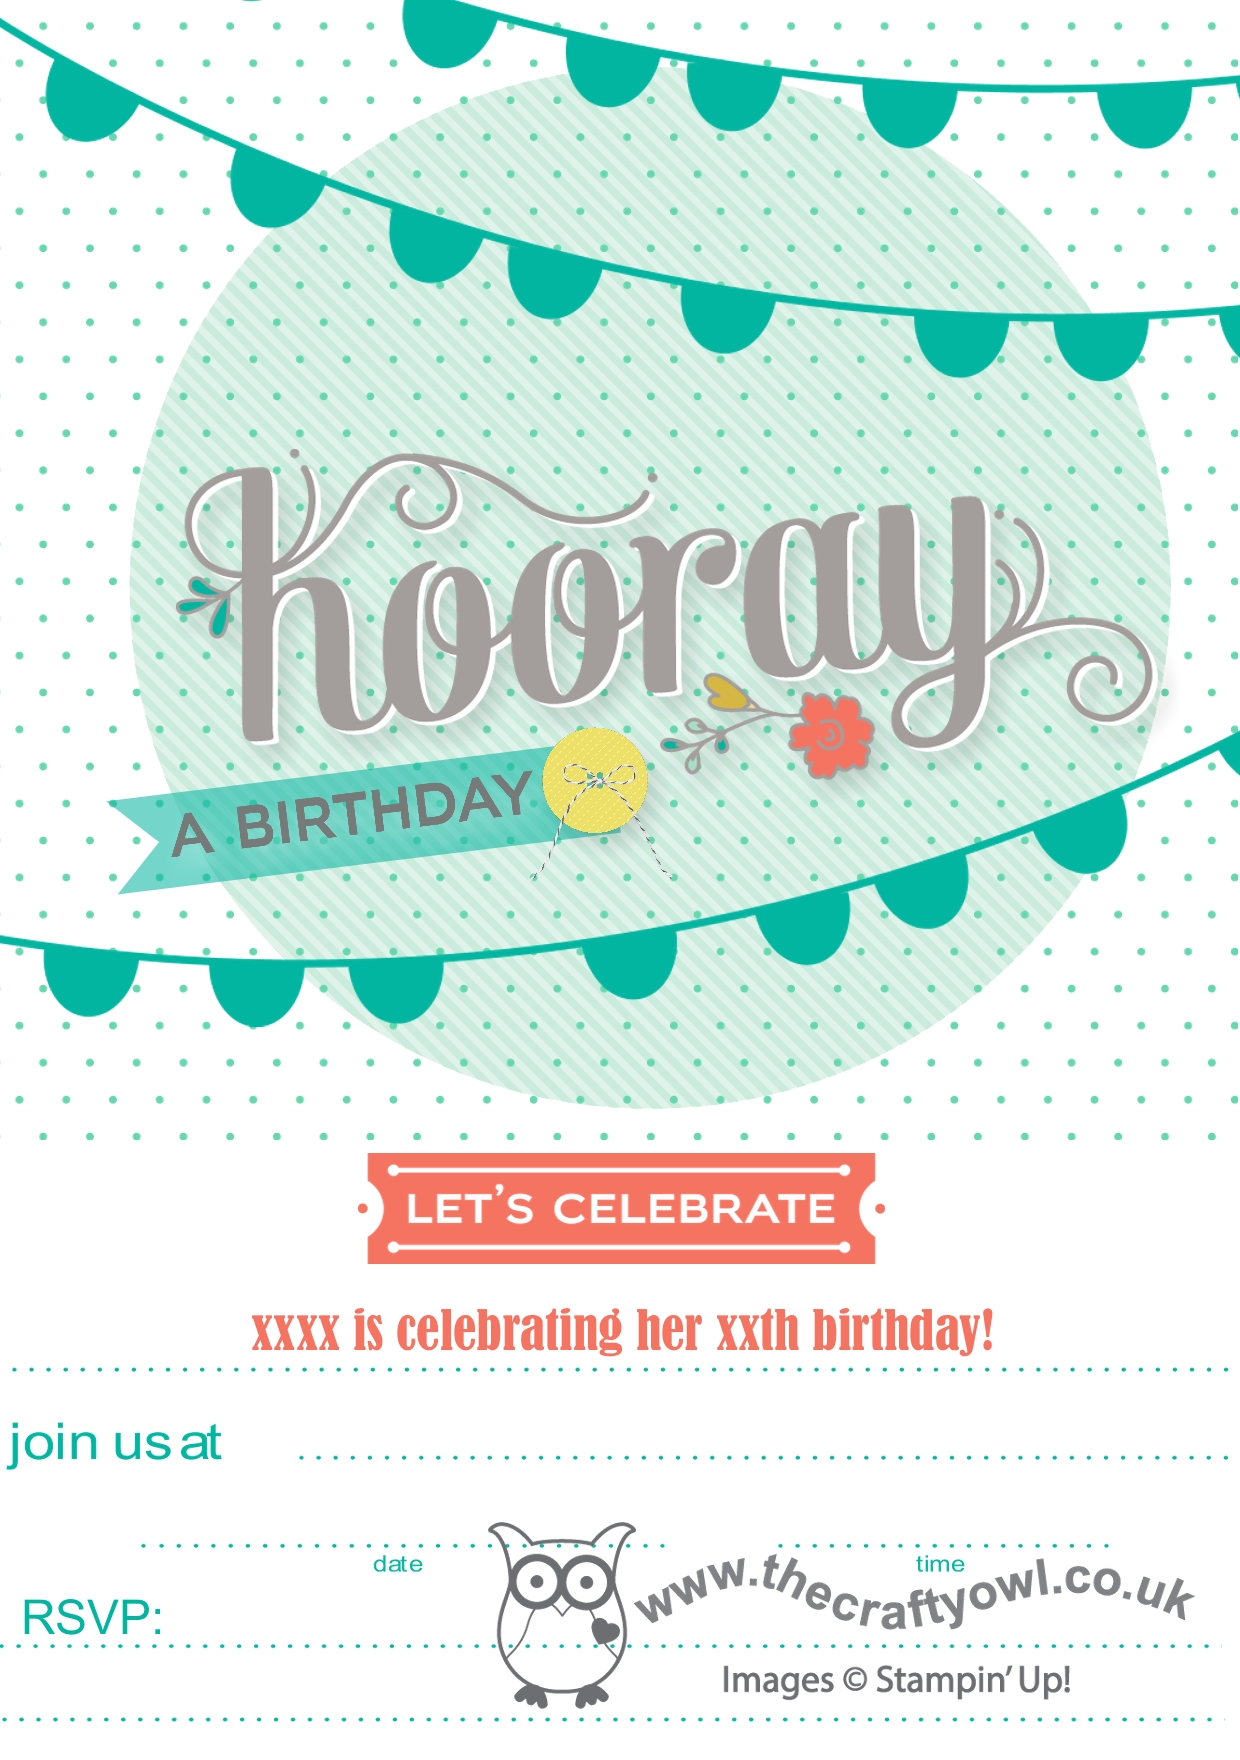
This is a great package if you need to make lots of invitations or party bits and pieces and have limited time - you only need to design once, then can just print out as few or as many as you need. And it can be yours free with a spend of £45 or more during Sale-A-Bration before 31st March.
Another busy day ahead tomorrow; if you're local to me and a bride-to-be, do pop in to the Budget Bride Live Wedding Fair at Diana's in Wellingborough - I'll be there talking to brides about how they can make the wedding stationery of their dreams using Stampin' Up! products and I would love to see you too.
Back tomorrow with another project; until then, happy stampin'!
Stampin' Up! Supplies Used:
by Joanne James13. February 2014 10:54Good morning everyone! Today's blog post could have been titled so many things: 'Yay it's Valentine's Day!', 'Yay it's Friday!', 'Yay it's stopped raining!' - I could go on, but instead I went with 'Yay for Retro Fresh!' as the Retro Fresh DSP is definitely the star of this card. I have used the sketch layout over at Create with Connie and Mary for week 3 of the Spring 2014 Challenge for my card (I love a good sketch challenge!).
I decided to go with a congratulations card, as I seem to be using a lot of these for different things lately and inspired by the DT samples this week I went against my natural instinct and challenged myself to see just how many different designs of Retro Fresh DSP I could use on one card without overwhelming the focal point. Here's my card - can you spot them all?
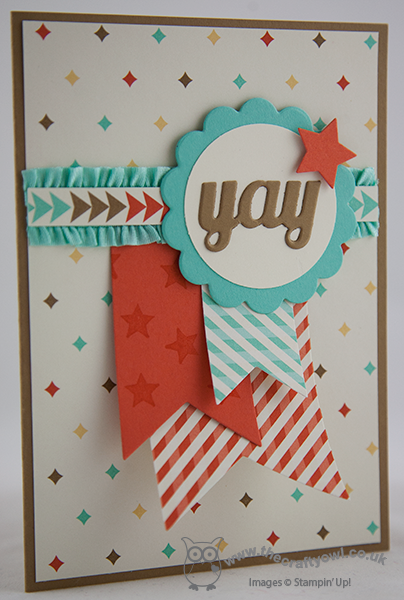
I used four in total, which might not sound like much, but for me that's unusual. Funny thing is, like all of Stampin' Up!'s designer series papers, the Retro Fresh patterns all work really well together, so it works. I decided to keep my focal point sentiment bold and clean, then used striped paper for my banners, broken up with a flag of 'homemade' DSP using Tangerine Tango cardstock randomly stamped with the star from the Banner Blast stamp set. I cut the banners using the new Banners Framelits dies - these are great for perfect banners in a jiffy. I used a thin strip of the arrow paper to draw the eye to the focal sentiment and edged this with some stretch ruffle trim to echo the scalloped circle, then lastly used a light pattern for my base layer. I considered leaving it plain, either just above the horizontal strip or both above and below it, but it was just too bland, so I added yet another pattern to the mix.
So there you have it - yay for Retro Fresh! Sometimes it pays to be a bit more adventurous with your patterned papers and not be afraid of using more than one at a time. Don't forget to hop on over to Create with Connie and Mary to see what everyone else has done with this sketch.
As it is Valentine's Day today, I shouldn't let it pass without a mention; I received the cutest card this morning from the number one man in my life - I'm sharing a picture on my Facebook page, so pop over if you'd like to see and share some love today!
Back tomorrow with another project. until then, happy stampin'!
Stampin' Up! Supplies Used:
by Joanne James12. February 2014 09:56So I didn't quite manage to squeeze in another 'make' for you yesterday, but I'm here bright and breezy (or should that be windswept, given the gales we've had here for the last day or so!) this morning with today's card. Given my recent dalliances with the colour black, I thought I would try something different using black cardstock and one of my most favourite stamps - yes, the Flowerfull Heart (still available to order until Friday if you'd like one - click on the link to my online shop below!) Here is my card:
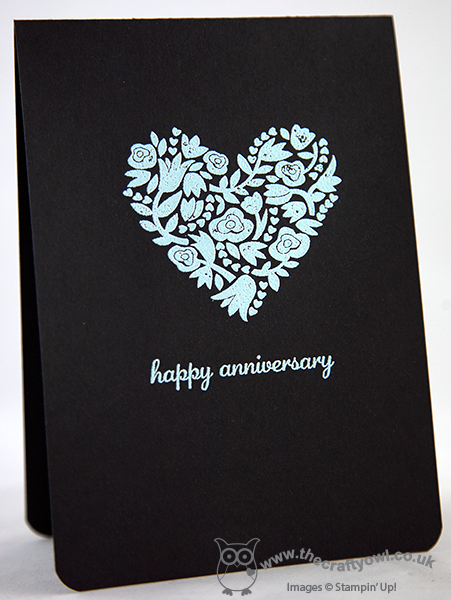
Now, I know you might be thinking "Anniversary card - on black??!" but hear me out! I wanted to use this stamp again with some heat embossing; I toyed with gold (well, it worked pretty well on this card I think) but eventually decided to use Pool Party embossing powder. My colour combination was inspired by one of the DSP patterns in the Sweet Sorbet pack that is available as one of the free Sale-A-Bration gifts currently when you spend £45 or more - the little blue Pool Party flowers with black centres. I would not necessarily have thought about using these colours together had it not been for this paper. A simple sentiment from the 'Express Yourself' hostess set (such a versatile set of greetings in a very usable font, it can be yours when you host a Stampin' Up! party - contact me to book yours) finishes this simple card.
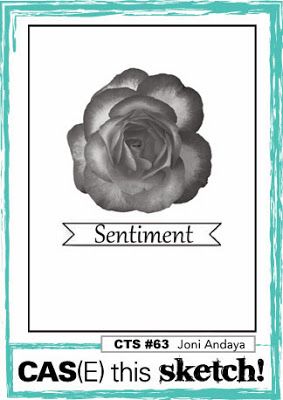
So what do you think - a colour combination that works or one to be avoided, especially on a romantic card? I'd love to know what you think. I'm also linking this card up with the 'One Layer Card - Anything Goes' challenge over at Less is More this week (currently the only card using black for it's 'white space' - should I be worried?!) and CAS(E) This Sketch as my card uses their sketch again:
Funny how you can use the same two starting points, yet end up with two cards that couldn't be more different. Back tomorrow with another project; until then, happy stampin'!
Stampin' Up! Supplies Used:
9fe4b513-b28f-441e-b5cc-fe0fd6c2169c|0|.0|96d5b379-7e1d-4dac-a6ba-1e50db561b04
Tags: Embossing, Flowerfull Heart, Host a Party, Express Yourself, one layer cards, Sale-a-bration 2014, Shop online, Stamp-a-ma-jig, Stampin' Up, Stampin' Up Card, Stampin' Up Card ideas, Stampin' Up Supplies, Anniversary, Weddings
Cards | Host a Party | Promotions | Sale-a-bration | Stamping
by Joanne James12. February 2014 09:08Another early post from me today - makes me look organised, but if you'd witnessed the library book hunt that rampaged through the James household this morning before school, you could be forgiven for thinking otherwise! As promised, today's card uses the same stamp from the 'From This Day Forward' set that I used yesterday, but to give a completely different effect. Here is my card:
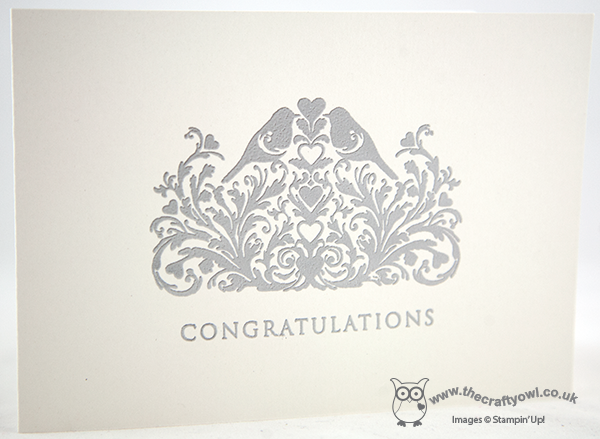
The photograph really doesn't do this card justice (not least because it is so difficult to get a great shot of an almost all-white card!) but up close, this card is really beautiful; I stamped the image and sentiment in Versamark onto Shimmery White cardstock - a lovely cardstock for this kind if project, it is flecked with minute specks of shimmer glitter and catches the light beautifully - and then heat embossed with silver embossing powder to add texture (important when your card is only one layer) and a lovely sheen).
It just goes to show that you don't always need lots of layers to create an impactful card - I'm getting quite into this one layer thing!
I'm going to link up today's card with this week's challenge over at 'Less is More' where the challenge is 'One layer - anything goes' and at CAS(E) this Sketch, as I used this sketch for my layout (turned through 90 degrees).
I'm off to get crafty - lots to do today! I might even pop back later and squeeze in another post.
Until then, happy stampin'!
P.S.: In case you're wondering we found the library book eventually - phew!
Stampin' Up! Supplies Used:
by Joanne James11. February 2014 09:58Good morning lovely blog readers! This morning's card is one I made as an acceptance card for a wedding invitation received recently. I actually had the stamp out on my desk for an alternative card which I will share with you tomorrow, when I decided it might work with this week's colour challenge combination at Pals Paper Arts:
When I originally saw this colour combination I did immediately think 'Valentine' (well, it's that time of year, right?!) Truth is, I've made lots of Valentine's cards already this year and I just don't have that many Valentine's to send them to! Instead, this is what I came up with:
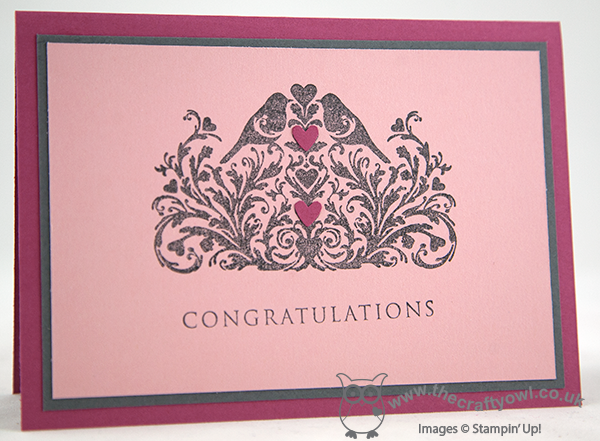
I decided to keep the design quite simple and stamped the image and sentiment in Basic Grey directly onto the Blushing Bride cardstock. I wasn't sure about this beforehand, but it looks so much nicer than on white, which left the image too stark. I quite like the slightly mottled effect of the stamping, which reminds me of stone, however this was more by accident than design - my Basic Grey inkpad is one of my few remaining old style pads and having used it to stamp a solid image, you can really see the difference when compared to the finish of the new foam pads. Needless to say, I have since ordered a new Basic Grey foam pad! I also stamped the image onto a scrap of Rose Red and cut out the two hearts with my paper snips and just paper pieced them in place - none of my myriad of heart punches, stamps or framelits were quite the right shape to take care of this for me. Worth it though, just to give a little 'pop' of colour and bring the colour scheme together.
I hope you like today's card; come back tomorrow to see an alternative card using this same stamp and don't forget to check out the folks over at Pals Paper Arts for more great ideas using this colour combination. Until then, happy stampin'!
Stampin' Up! Supplies Used:
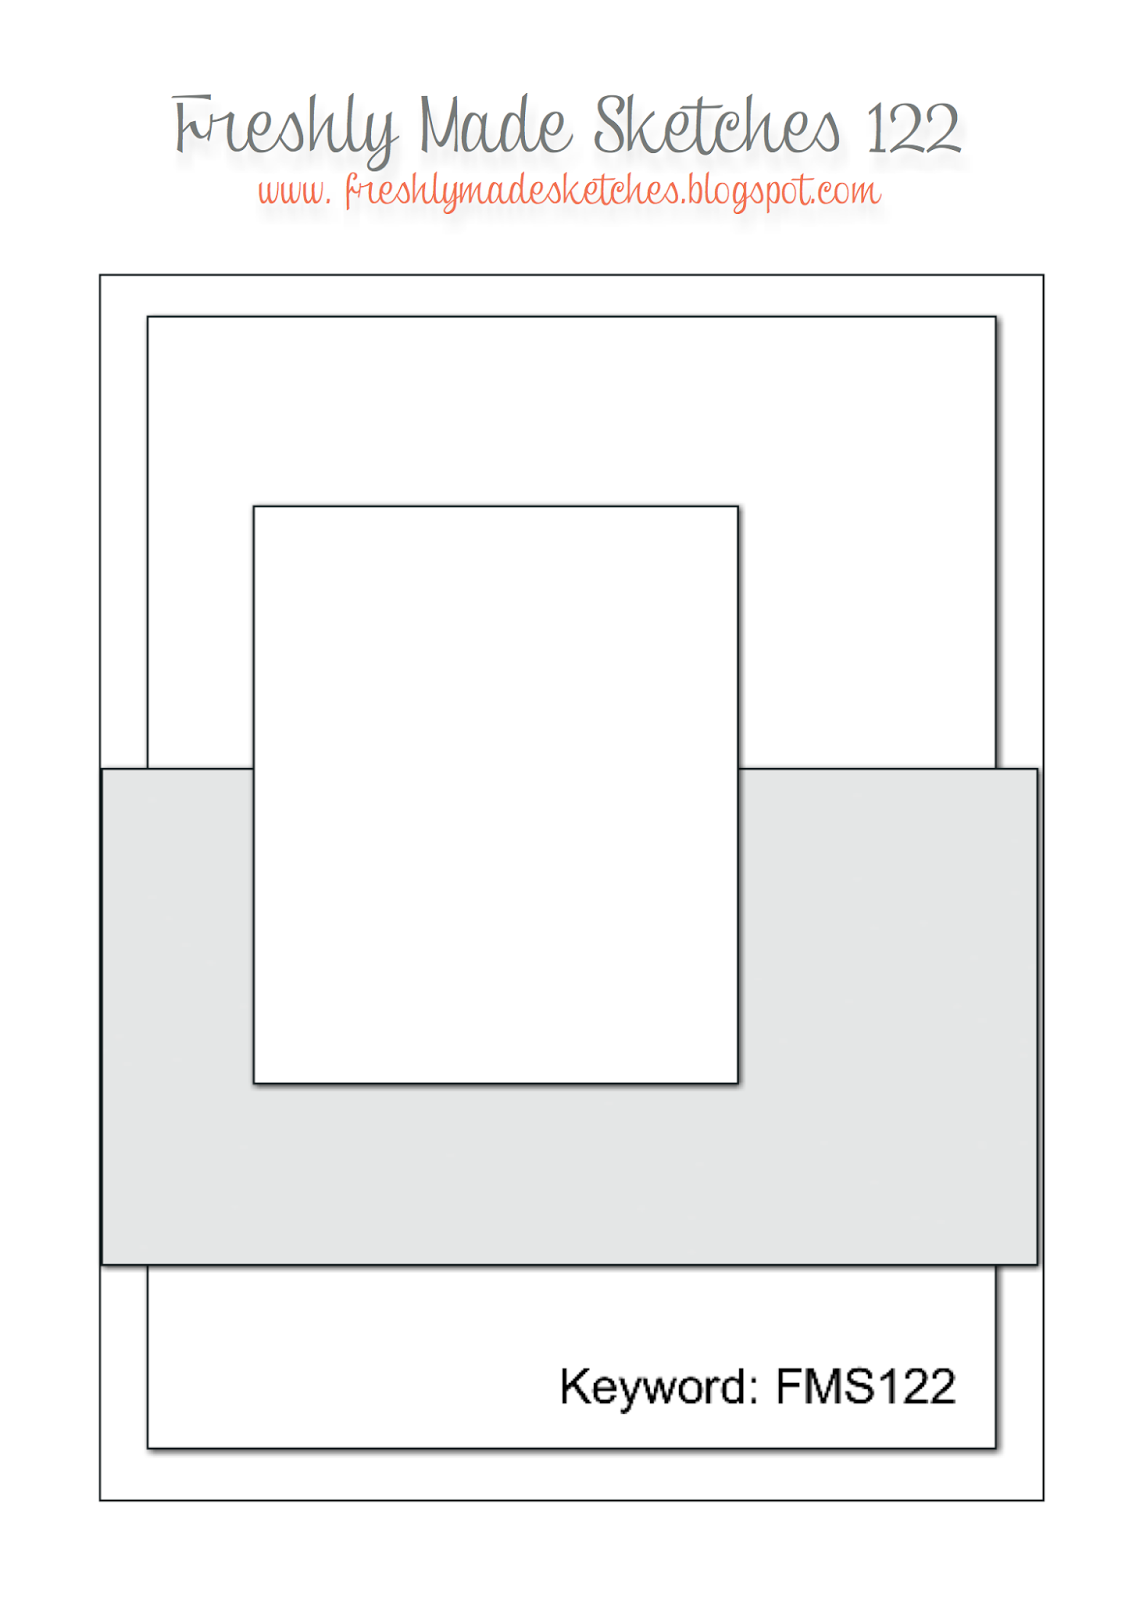
by Joanne James10. February 2014 12:28Today I'm sharing the card that was originally scheduled for yesterday! This card also uses the sketch layout at Freshly Made Sketches this week and I combined it with the colour challenge over at CAS Colours and Sketches this week:
I decided to go with an adult masculine card (it's always good to have a few of these on standby!) and inked up my Simply Sketched hostess set for the focal point of my card:
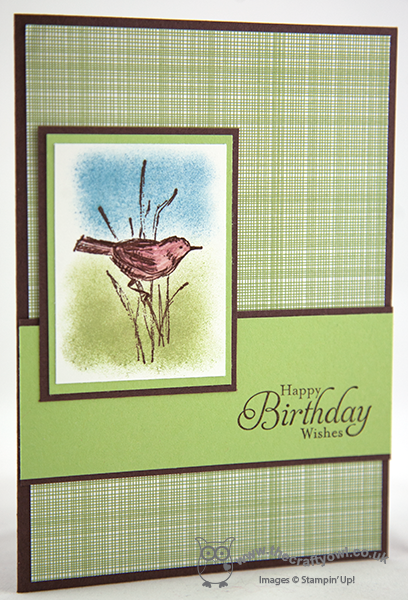
I stamped the little bird in Chocolate Chip ink and coloured him with a Chocolate Chip marker and blender pen, then used the blue and green to create a simple sponged background. I stamped my sentiment from the same stamp set on the front of the layered banner and used some of the Gingham Garden DSP to add interest without making the card too busy. This piece of Pear Pizzazz DSP seemed to be just right for this card, although you could be forgiven for not even knowing it's there as it isn't typical of the bright pink, indigo and yellow designs that are a key feature of this DSP pack.
I really like the understated finish of this card - and the little bird is perfect for a male card. This is the first time I've used the Simply Sketched stamp set and will definitely be making more with it. It has some lovely sketch stamps and three useful sentiments in a font that works with all kinds of cards. As I mentioned above, this set is an exclusive hostess set that can be yours only when you host a Stampin' Up! party. The current Sale-A-Bration promotion is a great time to host a party - not only will you and your party attendees get a free gift for every £45 you spend, but as the hostess you can earn an additional £25 in hostess benefits for qualifying party sales (£250 or more). If you would like to host a Stampin' Up! party, do give me a call or contact me to book a date.
I hope you like today's card; if you would like to see more ideas for using either today's sketch or the colour scheme, do pop by the Freshly Made Sketches and CAS Colours and Sketches blogs to see what the design teams and participants have created.
Back tomorrow with another project; until then, happy stampin'!
Stampin' Up! Supplies Used:
by Joanne James9. February 2014 20:01Today's post has been somewhat hijacked! I know I told you yesterday that this was an ordinary weekend and whilst that still holds true, something special happened today that I want to share with you. So, Rebecca went for her swim squad training this morning as usual but, unbeknown to me, she was given the option post warm-up to attempt her final distance badge - 1 mile (1.6km). Her previous distance badge achieved was for 1000m some 18 months ago, so I was confident she could do it, but 1 mile - it's still a long way, right? Well, she achieved it and was clearly so pleased with herself she phoned me from the car to tell me. As I turned to share with Ben the good, news, he promptly announced "Right Mum, let's go and make a card quickly before she gets home!" So with about 15 minutes to go, we set to work and this is what we came up with:
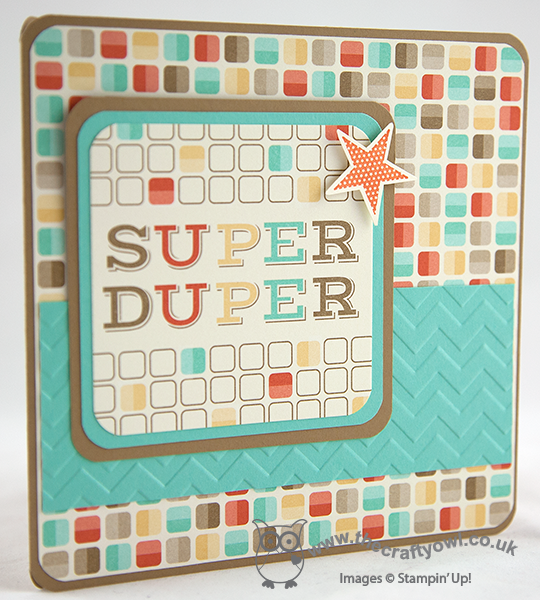
I followed this week's sketch layout at Freshly Made Sketches for my card and made a larger than usual 5 1/2" x 5 1/2" square card to accommodate my journaling tag. I rounded the corners of all my layers using my Envelope Punch Board (love that you can do this!) to echo the shape of the squares on the tag and co-ordinating Retro Fresh DSP. Ben was keen to incorporate swimming into the card (a challenge at short notice!) so we compromised at embossing the Coastal Cabana band with the Chevron Embossing Folder to give the illusion of waves and movement (in an abstract kind of way!) Lastly, I stamped and fussy cut a star and adhered to the corner of the tag with a dimensional because, well, Rebecca is my star! Ben insisted on finishing off by writing a message of congratulations inside in his best joined-up handwriting and we were just finishing up as Rebecca came through the front door.
She loved her card, which seems perfect recognition for such an achievement; I'm not sure I could swim a mile now, let alone when I was 8 years old!
Back tomorrow with the card that would have been posted today, but was deservedly 'bumped'; until then, happy stampin'!
Stampin' Up! Supplies Used: