by Joanne James14. September 2017 21:00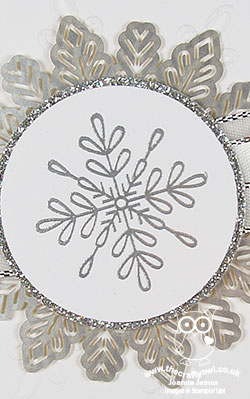
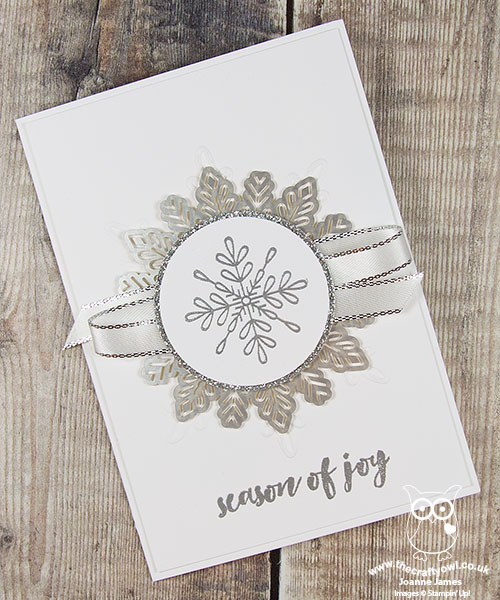
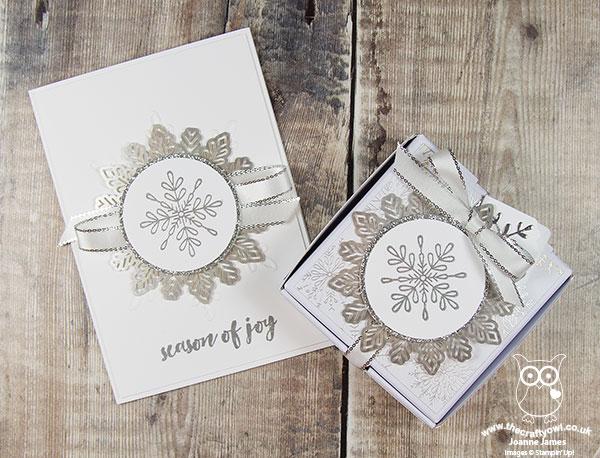
Following yesterday's clean and simple embossed snowflake, I'm following up today as promised with a 'stepped up' version of that card, along with a co-ordinating mini pizza gift box. Let's take a look at today's card:
Here's the low-down on today's card:
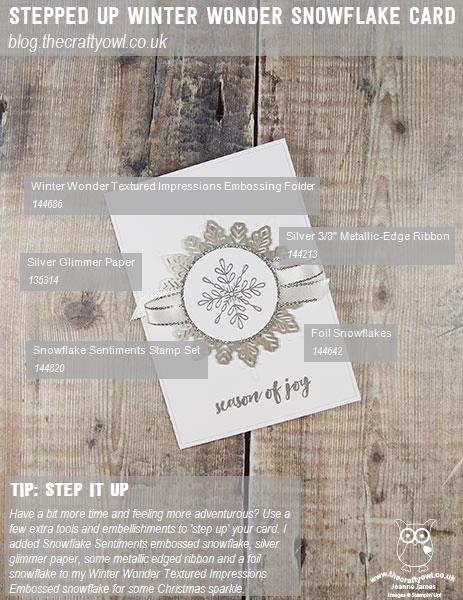
Step It Up - If you have a bit more time and are feeling more adventurous, using a few extra tools and embellishments will allow you to 'step up' your card and create something with a little more depth and detail, whilst still relatively easy to make. Here I added a centrepiece of a stamped and silver embossed snowflake from the gorgeous new Snowflake Sentiments set, backed with a punched circle of silver glimmer paper, some metallic edged ribbon and a foil snowflake for some Christmas sparkle.
Mini Pizza Anyone? - Have you noticed these fabulous little Mini Pizza Boxes on page 44 of the seasonal catalogue? These sturdy white boxes come flat packed for easy storage and are a great size for a few chocolates, notecards or even a cookie - they're foodsafe with a greaseproof lining and perfect for small gifts - and mini pizzas too! I decorated mine with the same embellishments as my card, along with a base of Year Of Cheer Specialty Designer Series Paper:
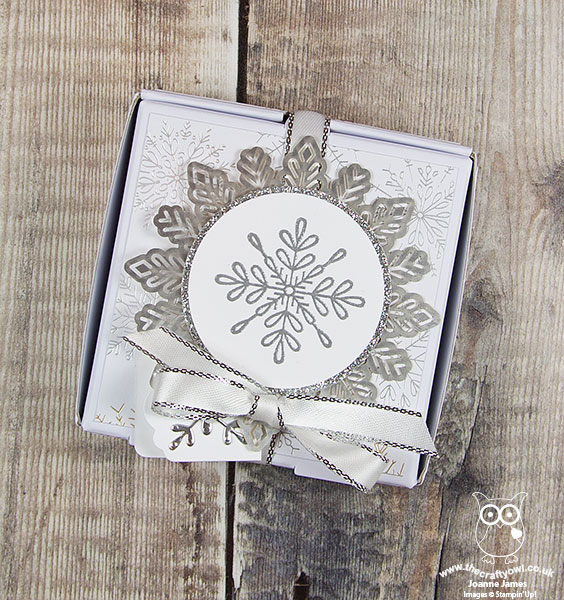
I also added a little tag made from the useful thinlit in the Swirly Snowflakes Thinlits Dies set, decorated with a diecut snowflake.
Here is the visual summary of the key products used on today's project for you to pin for easy reference:
You can see all of my 'How To' summaries on my 'How To - Tips and Techniques' Pinterest board in case you've missed any.
Enjoy your day and I'll be back tomorrow with another project. Until then, happy stampin'!
Stampin' Up! Supplies Used:
by Joanne James13. September 2017 21:00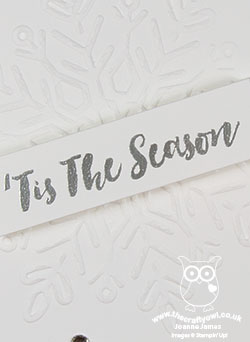
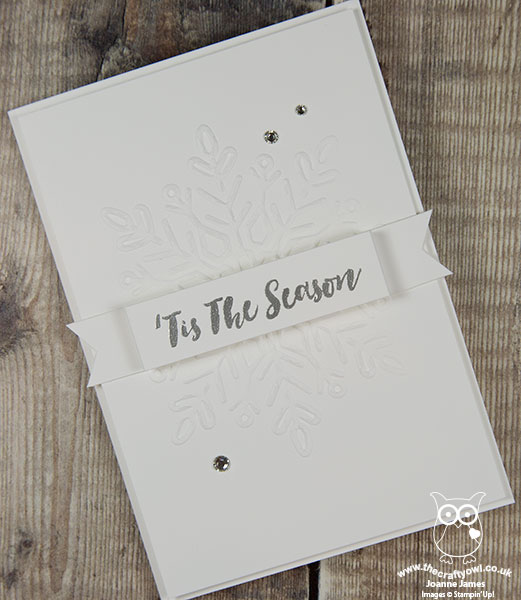
Wednesday already - where does the week go?! I had a technique class yesterday and was out on the rugby touchline for the first game of the season today (a narrow 8-7 defeat, but well-played all round) and have lots of makes to share so thought it was about time I squeezed in a quick blog post! Today I'm sharing a super quick and easy Christmas card that would be perfect for mass production - take a look:
Here's the low-down on today's card:
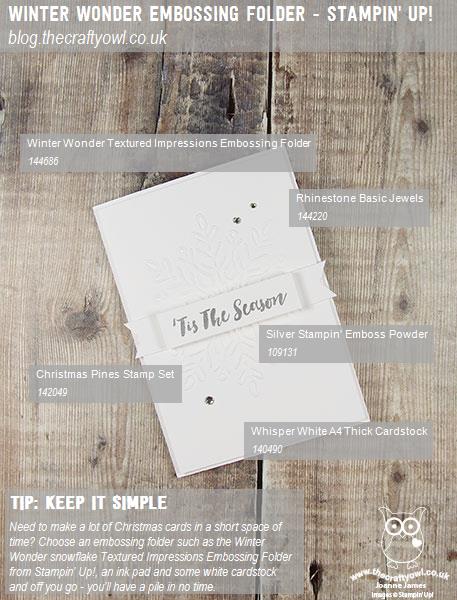
Winter Wonder - It's that snowflake again! Yes, the Winter Wonder Embossing Folder produces such great texture and dimension, it really is a centrepiece in itself.
A White Christmas - A simple design in all-white can be really effective; here I've layered my embossed snowflake panel onto an extra-thick whisper white cardbase for a seamless design.
A Simple Sentiment Banner - To finish, I added a simple sentiment banner, heat embossed in silver. This could just as easily be stamped in a colour of your choice. Equally, I used a sentiment from the 'Christmas Pines' stamp set, but this could be switched out for any similar one-line stamp. I stepped my banner, but it still pushes flat for posting - great for friends and family mailings in the run up to Christmas. A trio of rhinestones for a little festive sparkle complete my card.
Here is the visual summary of the key products used on today's project for you to pin for easy reference:
You can see all of my 'How To' summaries on my 'How To - Tips and Techniques' Pinterest board in case you've missed any.
This card would be great if you want to make a whole bunch of cards in one go, so if you need to make a big dent on your Christmas card making, this could be the card for you!
Enjoy your day and I'll be back tomorrow with another project that also uses the snowflake embossing folder, but is a stepped up version with a matching gift box too. Until then, happy stampin'!
Stampin' Up! Supplies Used:
by Joanne James9. September 2017 16:30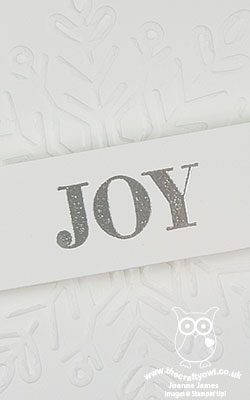
Yay, it's the weekend! I've had a busy week and didn't manage to squeeze in yesterday's blog post following my open house event to celebrate the launch of the new Autumn-Winter catalogue - a big thank you to all the lovely ladies who attended - so I'm back today with the Christmas card I promised for this week's challenge over at Merry Monday - I need to get cracking on building my festive stash:

I had a marathon session this week creating cards using the new snowflake embossing folder and knew that this would be perfect for the challenge - take a look:
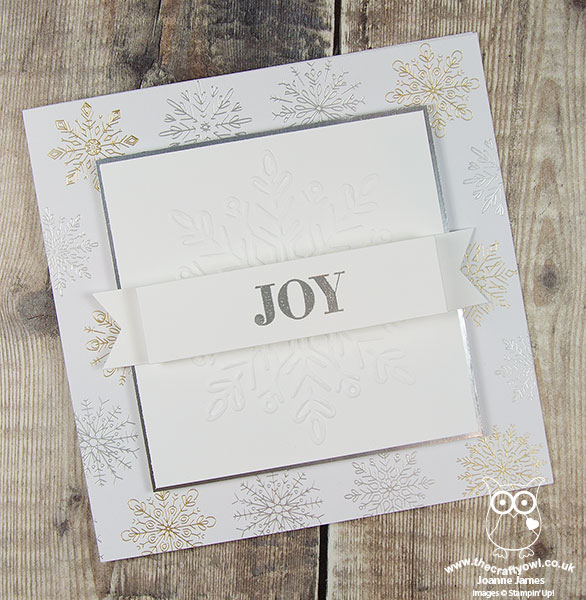
Here's the low-down on today's card:
Year Of Cheer - My card was inspired by the wonderful display of projects on page 36 of the seasonal catalogue featuring the Year Of Cheer Suite - the combination of whites and metallics and intricate foiled papers are perfect for seasonal wintry projects. I particularly love the papers in this suite - the foil patterns are gorgeous and work for lots of occasions, not just Christmas, The snowflake foiled pattern was just the right base for my wintry Christmas card.
A Winter Wonder - I'm generally not big into embossing folders, but there are a few in my collection that are absolute keepers and at this time of year are much loved and used. Two of my long-time favourites are the Woodland TIEF and my all-time favourite Softly Falling however I am pleased to report that the Winter Wonder Textured Impressions Embossing Folder will be completing my trio of festive favourites. This huge single snowflake measures 4" square and makes a real statement on a Christmas card, for sure.
JOY - The 'Cheers to the Year' stamp set that is part of the Year Of Cheer Suite includes the word 'Joy' - although as I don't have this stamp set I substituted with a little more retro rubber today and used a very similar stamp from last year's retired 'Holly Jolly Greetings' stamp set, heat embossed in silver on my folded banner.
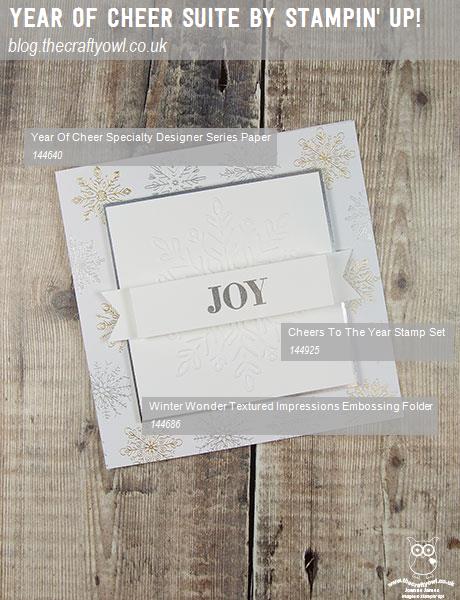
Here is the visual summary of the key products used on today's project for you to pin for easy reference:
You can see all of my 'How To' summaries on my 'How To - Tips and Techniques' Pinterest board in case you've missed any.
I'll be back tomorrow with another project for this week's new challenge over at The Paper Players. Until then, happy stampin'!
Stampin' Up! Supplies Used:
6cf3f6af-9258-47df-af17-47bf7ffce9bc|0|.0|96d5b379-7e1d-4dac-a6ba-1e50db561b04
Tags: Winter Wonder TIEF, Year of Cheer, Holly Jolly Greetings, Christmas, Shop online, Shop Stampin' Up online, Shop Stampin' Up! Online, Stampin' Up, Stampin' Up Card, Stampin' Up Card ideas, Stampin' Up Supplies
Cards | Shop Online | Shop Stampin' Up! Online | Stamping