by Joanne James5. November 2015 08:05
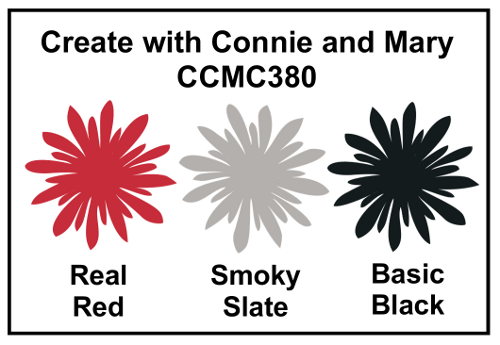
Today it's time for a new challenge over at Create With Connie and Mary and this week we have a great colour challenge for you:
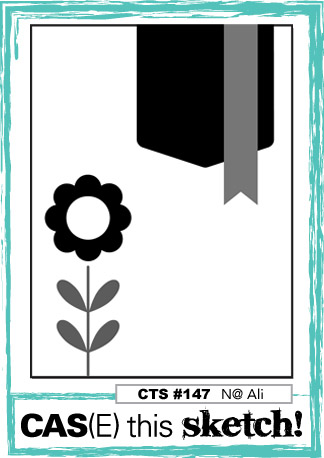
I used the sketch over at CAS(E) This Sketch as the basis for my card today - a largely one layered card, except for the banners and it also showcases a fun new technique:
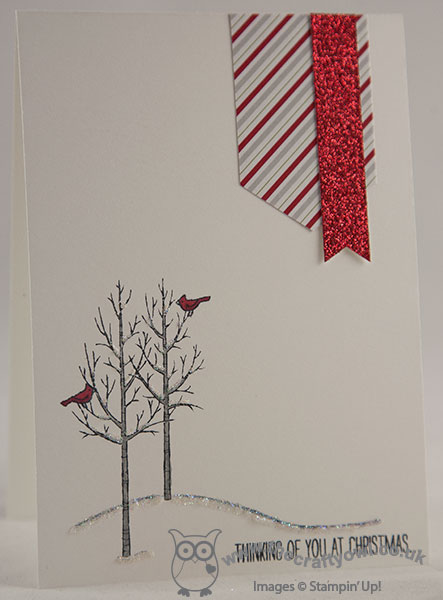
I used extra thick Whisper White cardstock for my base and stamped two of the three trees from the White Christmas stamp set onto the bottom corner of my card in Memento Black. I coloured the trees in with my Smoky Slate Stampin' Write marker and added a couple of cardinals, coloured in Real Red for a little colour. Now for the fun technique! This was shown to me recently by the lovely Monica Gale who used it on a card stamped with the Wonderland set. for the snow on my trees and on the ground, I added a thin line of Tombo glue, then sprinkled this with Dazzling Diamonds glitter and then white embossing powder, then heated it gently with my heat tool. This causes the glue to puff up and produce wonderfully textured and sparkling snow - such a neat effect. To finish my card, I cut a reverse banner using my Triple Banner Punch - I simply fed the paper in from the underside of the punch and used the piece which normally you would throw away - from a scrap of Merry Moments designer series paper that has Real Red and Smoky Slate stripes. Finally to add a little extra sparkle, I added a thin banner of red glimmer paper - I just love this stuff!
I spent ages working up different cards for this week's colours and eventually settled on this one. It's very pretty in real life and has lots of texture for a predominantly white card, but it was incredibly difficult to photograph and I'm not sure that the picture really does it justice.
Do visit the other Design Team members to see how they used this week's challenge colours; there's lots of inspiration over on their blogs too!
Enjoy your day and I'll be back tomorrow with another project; until then, happy stampin'!
Stampin' Up! Supplies Used:
- White Christmas Photopolymer Stamp Set
- Embossing Buddy
- White Stampin' Emboss Powder
- Heat Tool (Uk)
- Dazzling Diamonds Stampin' Glitter
- Multipurpose Liquid Glue
- Merry Moments Designer Series Paper
- Tuxedo Black Memento Ink Pad
- Banner Triple Punch
- Whisper White A4 Thick Cardstock
- Red Glimmer Paper
- Smoky Slate Stampin' Write Marker
- Real Red Stampin' Write Marker
by Joanne James1. December 2014 09:30It's official - today is the first of December, the countdown to Christmas has begun! Day one of the advent calendar has been opened, Charlie the Elf has made his return (pictures on my Facebook page later!) and the start of two of the busiest weeks in the school calendar before the end of term. Before I get to today's card, I just wanted to remind you of the current Stampin' Up! joining offer that ends tomorrow morning - you can read the full details here, but in a nutshell you can sign up for £74.25 and receive £130 worth of products of your choice and 5% cashback on all orders placed during December, not to mention the additional benefits of joining my wonderful team! Why not treat yourself to a bundle of Stampin' Up! goodness as an early Christmas present? Call me if you would like to chat more or better still, click here to sign up today!
Onto today's card - this one uses this week's sketch over at Freshly Made Sketches, where the simple sketch from Jen offers so many creative possibilities:

I decided to go with crisp subtles today - here is my card:
I used Soft Sky for my base and image panel, and matted the panel onto a piece of Whisper White. I stamped a little scene in Memento Black using my 'White Christmas' stamp set, being careful to only partially stamp the horizon line so that I could overlay my snowman in the same layer. By using Soft Sky as my base, I could use my white chalk marker to colour my snowman and add detail to my scene on the trees and ground. With the exception of some Pumpkin Pie marker for the snowman's nose and some detail added to his scarf and hat with my silver marker pen, there is no other colour introduced to my scene. I stamped my sentiment in Versamark and heat embossed it in silver and added a thin silver ribbon and bow trim with a snowflake embellishment to finish. This is such a simple card, yet the silver elements add a subtle shimmer in real life that make it quite pretty.
That's all from me today - I have lots of jobs to do so need to get cracking! Back tomorrow with another project; until then, happy stampin'!
Stampin' Up! Supplies Used:
d2549880-e1a5-4719-9930-f4d0d38ea328|0|.0|96d5b379-7e1d-4dac-a6ba-1e50db561b04
Tags: Cashback Offer, Christmas, Earn Free Product, Earn Extra income, join Stampin' Up, join my team, Shop online, Stampin' Up, Stampin' Up Card, Stampin' Up Card ideas, Stampin' Up Supplies, White Christmas
Cards | Stamping
by Joanne James30. November 2014 07:00It's time for a new challenge over at The Paper Players today and this week the lovely Jaydee has a fun tic-tac-toe challenge for us:
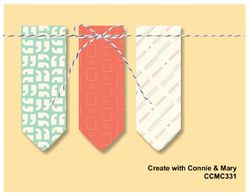
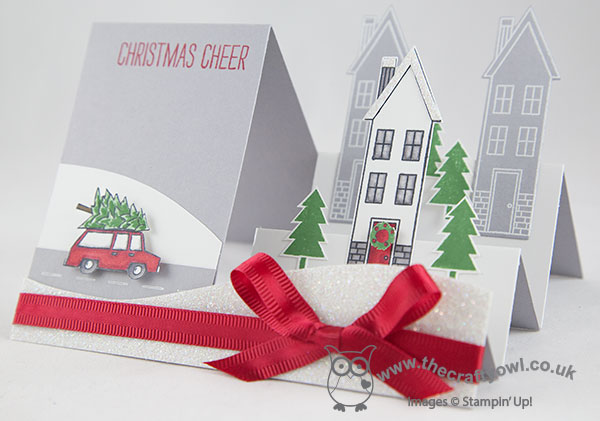
I'm linking up today's card with Merry Monday where the challenge is to use red, green and white on a Christmas card, and Create with Connie and Mary where they have the following sketch layout:

When considering Jaydee's grid I was drawn to the top horizontal line - tree, transport and white - although I ended up completing two more lines too (see if you can work out which ones!). One of the reasons I purchased the 'White Christmas' stamp set was for that cute little car and this is the first time I've used it! Here is my card:
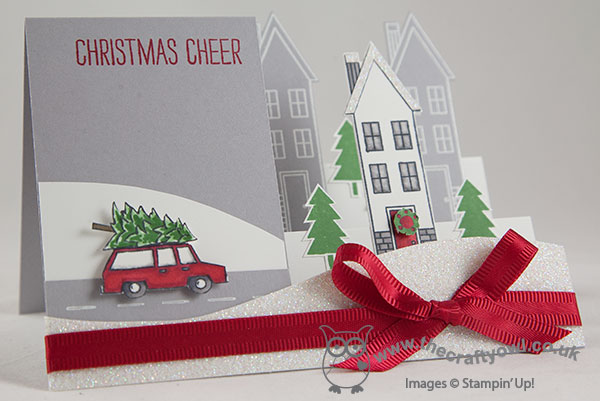
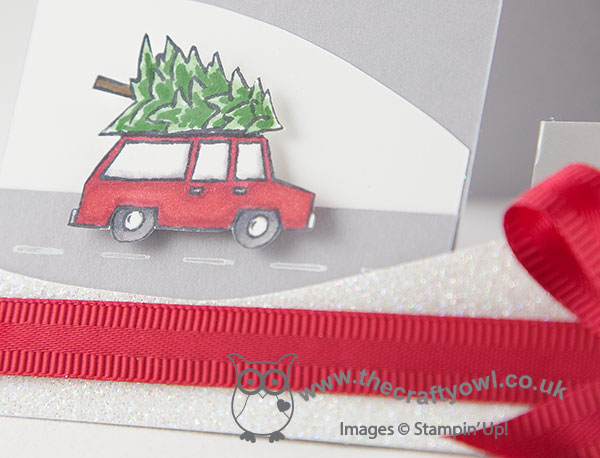
I took some artistic licence with the sketch and turned it upside down and made it into a side stepped card - I think you can see all the elements though. I used Smoky Slate for my card base and having made my folds, I began to customise it. For the main panel, I added a Whisper White snow drift and a road for my car to travel along, then stamped my car, complete with Christmas tree, in Memento Black onto Whisper White, coloured with my Blendabilities and Stampin' Write markers and fussy cut it out and popped it up on dimensionals:
For my stepped side, I added a snow drift of dazzling diamonds glimmer paper at the front, along with a bold satin bow. The house that is the destination for the travelling Christmas tree is on the layer behind, again coloured with Blendabilities and decorated with a mini wreath and some glimmer snow, and a few fir trees. The layer at the rear has a couple more trees and two more houses, this time in Smoky Slate and stamped in Versamark and heat embossed in white, as these houses are in the background of the scene. Here are a couple of additional views from this side of the card:
Here's a close up of the houses:
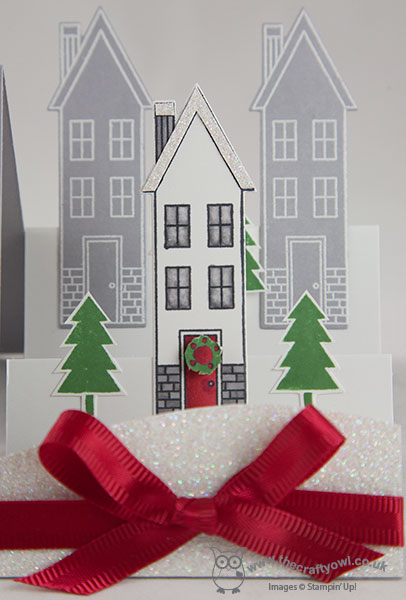
This was a fun card to create and the Holiday Home houses and co-ordinating framelits work really well on a stepped card. This week's tic tac toe challenge offers lots of opportunities to be creative, so be sure to share your creation with us at The Paper Players! Check out what the other designers did as well:
Back tomorrow with another other project; until then, enjoy the rest of your weekend and happy stampin'!
Stampin' Up! Supplies Used:
by Joanne James28. November 2014 21:09It's Friday and the end of the working week - hurrah! Today's card is a triple challenge card; it's not often that happens! I'm using the sketch over at Retrosketches, with this week's Color Throwdown colour palette and the tag and snowman mean it also fits with the challenge over at The Card Concept (clean and layered):
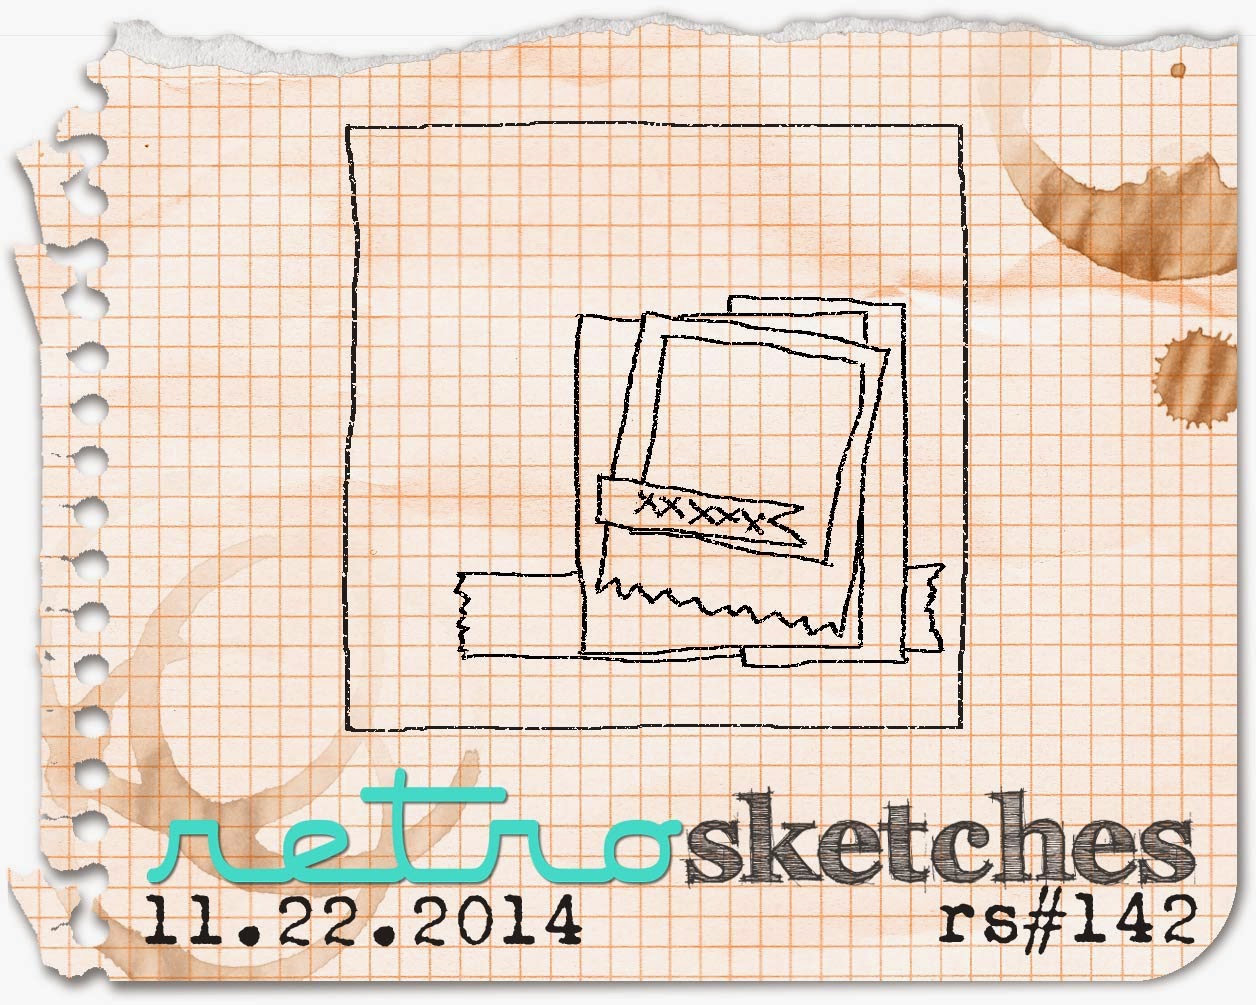
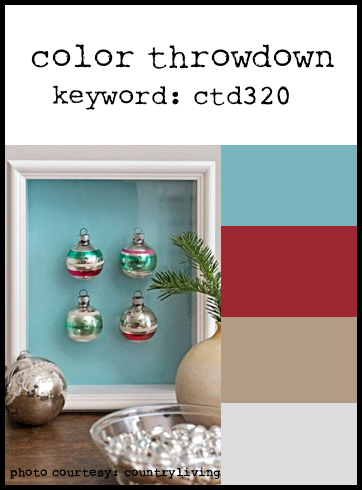
I didn't intentionally set out to create a tag card, but as I was working with the sketch and colour palette, I thought a tag would look quite cute. Here is my card:
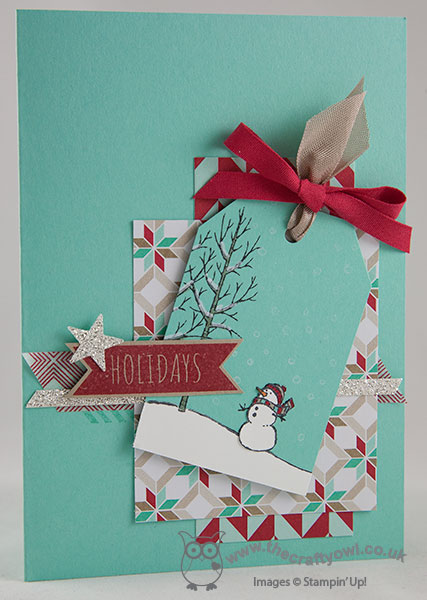
I used Coastal Cabana for my base, stamped one of the Gorgeous Grunge stamps in the same colour across the front and edged this with some red Beach House washi tape. I then layered a couple of pieces of now-retired DSP stack (the colours were perfect for this card and although this was a Spring/Summer paper stack, this pattern has always reminded me of snowflakes), some silver glimmer paper and then my tag. I punched my tag using the angle tag topper punch from Coastal Cabana cardstock, stamped the tree from the 'White Christmas' stamp set onto the tag then stamped it again onto a piece of Whisper White and paper-pieced the snowscape and snowman onto it. I coloured the tree with my Crumb Cake Stampin' Write marker and added some snow with my chalk pen, then added some detail to the snowman with my markers and stamped some snow across the rest of the tag with white kraft ink. I finished my tag with some Crumb Cake seam-binding ribbon and Real Red cotton ribbon tied in a bow, and stamped my Holidays' sentiment in Real Red onto Crumb Cake cardstock and adhered this to my tag, along with a silver glimmer star.
Hope you like today's card; I have a busy weekend of fun and frolics planned, so an early night in store for me!
Back tomorrow with another project; until then, happy stampin'!
Stampin' Up! Supplies Used: