Speedy Belated Birthday Wishes with Amazing Phrasing AYSI277

by Joanne James17. June 2022 12:00

Today I'm sharing my design team card for our new challenge over at As you See It where it's time for a fun speed stamping challenge:


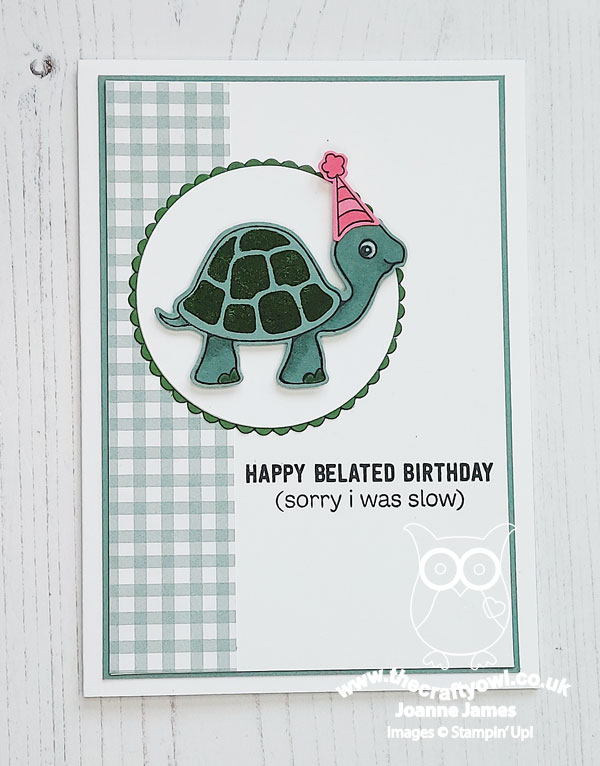
I chose this theme; I can't be the only cardmaker who sometimes realises I'm late, late ... for a very important date, right?! Sometimes the realisation that you need a birthday card super quickly since it should have been received yesterday means speed is of the essence. I have several retired stamp sets that I've kept that are perfect for belated birthday cards; I thought I'd combine one of these with a trio of colours from the Sunday Stamps palette and a sneak peek of a brand new set that can be yours as part of the Sale-A-Bration promotion that runs from 1st July-31st August - take a look:


Here's the low-down on today's card:

The key to a speed challenge is preparation - here's all of my equipment gathered before I started, with my stamp pads open in front of me just out of shot:


I used a combination of layer sizes that I always keep precut to save time and odd scraps from my card box.

Oops! - The stamped sentiments on today's card are from a new set called 'Amazing Phrasing' - free with a £90 purchase during Sale-A-Bration. The set is photopolymer, so really easy to line up without a Stamparatus, which saves time - good when you don't have much of it! 

Simple Layout - My layout is actually cased from a similar card that features in the Sale-A-Bration brochure. Simple layers, cut with a trimmer - no dies required! An added layer of vellum helps soften the stamped background and create focus to the main image:


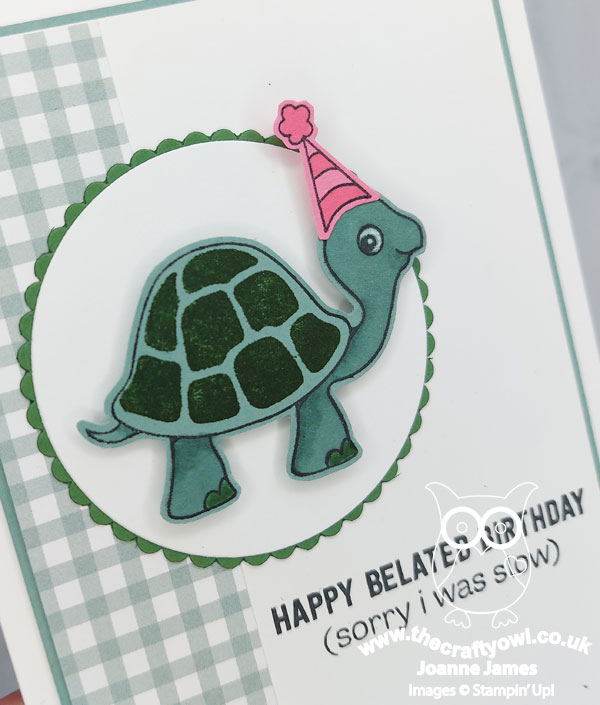
Slowly Does It - I combined this new set with my trusty retired 'Turtle Friends' set and added a simple stamped and punched turtle to the front of my card and carried through the belated theme to the inside of my card with another stamp from this set:


Is my stamping perfect? No; my turtle shell is a little smudged, but I didn't want to redo because of the time constraint but I think it's ok for a speed challenge. And done! How long did it take? I used all of my allotted 10 minutes - I was coming in at about 8 and a half minutes so decided to stamp and fussy cut a party hat for my turtle too!

Here is the visual summary of the key products used on today's project for you to pin for easy reference:


You can see all of my 'How To' summaries on my 'How To - Tips and Techniques' Pinterest board in case you've missed any. 

Here's a summary of our challenge rules:

  • Create any card, scrapbooking page, 3D project or packaging project that fits the challenge.
  • Please include the challenge graphic and link back to the challenge in your blog post. Turn off word verification so we can leave you lots of lovely comments. Make sure you link the post not the whole blog to the Linky. Use #AYSIXXX when uploading to a public gallery.
  • If you’re unsure about ‘the rules’, check the details under the Challenge Guidelines tab on the As You See It Challenge homepage.
  • In a speed stamping challenge, please time yourself and say in your post how long your card took to complete. 
We look forward to seeing your creations in the AYSI gallery.

Enjoy your day; I am spending the day in Bath today; no post from me tomorrow as I'm off to Warwick but I'll be back on Sunday with my project for our new challenge over at The Paper Players. Until then, happy stampin'!


Stampin' Up! Supplies Used:

Table built using Product Table Builder by The Crafty Owl - Independent Stampin' Up! Demonstrator.

Goodbye To Turtle Friends CCS 464

by Joanne James5. April 2022 13:00

It's Tuesday and time for a new challenge over at CAS Colours & Sketches. Bhavya is hosting for the month of April and our first challenge is a colour challenge: 
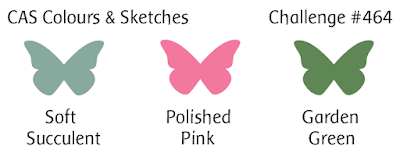
    

For my card today I decided to have one last outing with my retiring Turtle Friends bundle for a fun bleated birthday card - I used the current Inspire.Create sketch for my layout:


Here's the low-down on today's card:

I did add a few layers to today's card, including a strip of Pansy patch gingham, but otherwise was very careful to preserve my 'white space' and keep my design simple. A punched turtle, complete with party hat, was simply stamped and some highlights added with tone-on-tone Blends markers, along with a touch of chalk marker to highlight his eye:

It's always good to have a belated birthday card on hand - for a card maker, I seem to need all too many of these! I love the 'Turtle Friends' set and will be sorry to see it go; the turtle punch is already sold out, but the stamp set is still available as part of the Last Chance Products Promotion; as is the retiring Pansy Patch paper and the chalk marker - a super-useful crafting staple. 

Here is the visual summary of the key products used on today's project for you to pin for easy reference:


You can see all of my 'How To' summaries on my 'How To - Tips and Techniques' Pinterest board in case you've missed any. 

As a reminder, for our colour challenges, you must use all of the stated challenge colours. You may also use neutral colours; however, the challenge colours should be the most noticeable ones featured on your card. We use Stampin' Up! colour names for reference, but you are welcome to use any other companies' products as long as you match the challenge colours as closely as possible.

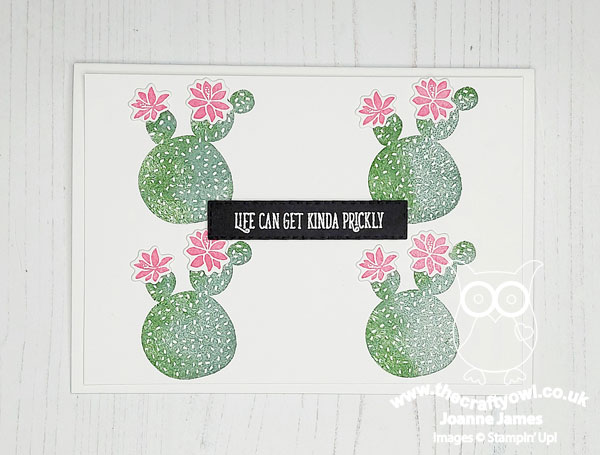
I do have a bonus card for you using today's colours too; I was playing around with the colours and originally made this card, using this week's Paper Craft Crew Sketch and the retired 'Flowering Cactus' bundle:


It is a little more clean and simple than my turtle card to be fair, but I didn't like it as much so moved it to second place - but I thought I'd share it with you anyway! And here's the PPC sketch:


Enjoy your day; I have a mountain of ironing to get through - wish me luck! I'll be back tomorrow with another project. Until then, happy stampin'!


Stampin' Up! Supplies Used:

Table built using Product Table Builder by The Crafty Owl - Independent Stampin' Up! Demonstrator.

A Clean and Simple Celebration

by Joanne James9. March 2022 16:41

Happy hump day! Today I'm sharing a card I made with a few challenges in mind:


The team over at Less Is More are looking for a single word sentiment on a one layer card and I combined this with the current code word of 'hat' over at CASology this month. I was also inspired by Time Out's 8th Birthday celebrations where I used the colours from their badge too for my clean and simple birthday card. Although I'm too late to link up there, I thought you might like to see the badge and colours - my favourite purples! This is the card I came up with - take a look:


Here's the low-down on today's card:

I went with a super-simple 'Celebrate' from the 'Create With Friends' stamp set in Gorgeous Grape and added a party hat coloured with Stampin' Write markers at a jaunty angle to the C - this little gem is to be found in the 'Turtle Friends' set. The two-tone confetti is courtesy of the retired stamp set 'Praiseworthy Prose', which also gave me the perfect greeting for the inside of my card:


And that's my card - stamps, ink and paper, #simplestamping at its best!

Here is the visual summary of the key products used on today's project for you to pin for easy reference:


You can see all of my 'How To' summaries on my 'How To - Tips and Techniques' Pinterest board in case you've missed any. 

Enjoy your day and I'll be back tomorrow with another couple of projects. Until then, happy stampin'!


Stampin' Up! Supplies Used:

Table built using Product Table Builder by The Crafty Owl - Independent Stampin' Up! Demonstrator.

Turtle-y Loved Turtle Friends CCS 436

by Joanne James7. September 2021 13:00

It's Tuesday and time for a new challenge over at CAS Colours & Sketches. The lovely Jenny is hosting this month and our first challenge is a colour challenge: 


For my card today I decided to pair a couple of cute turtle friends for a sweet clean and simple card - take a look:


Here's the low-down on today's card:

I thought the two greens would make great turtle colours and the pink a bright accent, so I stamped a little turtle onto my panel, having first run the bottom edge of the panel through my dots embossing folder, added some grass and hearts and a little bird directly to the base before adding a larger turtle which I coloured and punched out and popped on some dimensionals for added lift:


A super simple little scene with a sweet sentiment that makes this a fun school snack box love note for one of the James Juniors as they are headed back to school this week (obviously with the pink toenails this one is headed to Rebecca - definitely wouldn’t suit Ben’s cool kid status to have pink varnished toenails!!)

Here is the visual summary of the key products used on today's project for you to pin for easy reference:
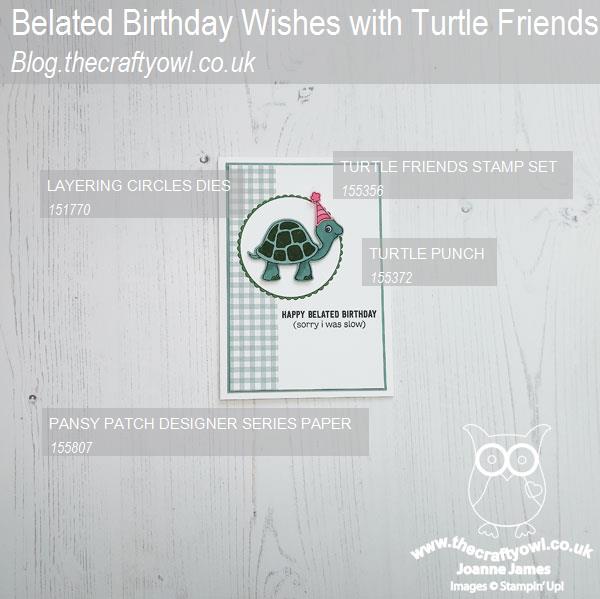
 

You can see all of my 'How To' summaries on my 'How To - Tips and Techniques' Pinterest board in case you've missed any. 

As a reminder, for our colour challenges, you must use all of the stated challenge colours. You may also use neutral colours; however, the challenge colours should be the most noticeable ones featured on your card. We use Stampin' Up! color names for reference, but you are welcome to use any other companies' products as long as you match the challenge colours as closely as possible.

Enjoy your day. Today it’s my birthday so I will be taking it easy (ish!) And definitely partaking in a Colin the Caterpillar birthday cake at tea time - it’s tradition! I'll hopefully be back tomorrow with another project but my laptop is currently with the IT doctor so it might be Thursday until service is temporarily restored (that post is already written and schedule). Until then, happy stampin'!


Stampin' Up! Supplies Used:
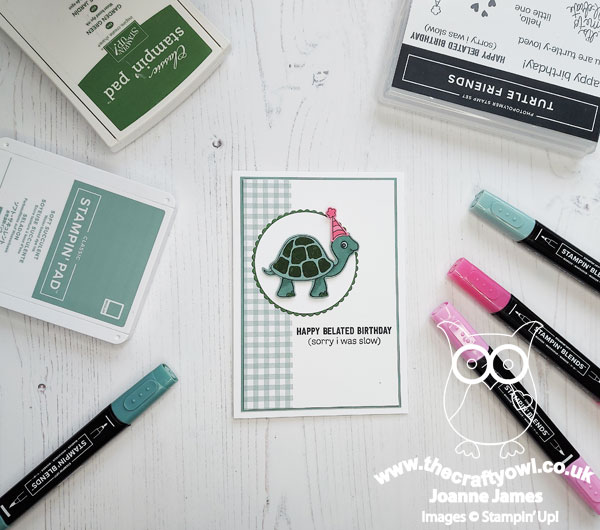
Table built using Product Table Builder by The Crafty Owl - Independent Stampin' Up! Demonstrator.

Current Promotions

Stampin Cut and Emboss

Save up to 30% off on all your favourite kits from 1 to 31 October! 

Click here to see the current kits available and order yours online today.

Join My Team

It's always a great time to join Stampin’ Up! During October you can get even more in your starter kit! New team members can get £160 worth of products for only £99 + free business supplies + free shipping + all the fun being a part of Stampin’ Up! Stampin' Up! has something for everyone: join my growing team and benefit from my support to enjoy Stampin' Up! however you choose.

If you're interested, call me for a chat to understand how I can help you realise your goals. Alternatively, if you have already decided to sign up and you just can't wait, please click here for the link to the online form where you can sign up and order your starter kit right away! 

Shop Online

Access my online shop 24 x 7, 365 days of the year:

Current October hostess code:

4XPEYCB9

Shop Online

Scrapbooking

Stampin' Up! has introduced a new range of 12x12" scrapbooking product and kit - the full range is now available to purchase online. To download a copy of the new digital Scrapbooking Catalogue click here.

Mini Catalogue

BROWSE THE CATALOGUE

'Tis The Season - the new Stampin' Up! Mini Catalogue is here! For more details and to download your copy click here

2024-25 Annual Catalogue

BROWSE THE CATALOGUE

Click on the image to download your copy of the 2024-25 annual catalogue. For a full list of current SU! supplies, go to my online store. If you would like any help or advice, please drop me a line at joanne@thecraftyowl.co.uk or give me a call on 07773 421446 - I'd be happy to help.

Latest Kits!

Stampin Cut and Emboss

The Christmas Ornaments Kit and Card Keeper Kit are the latest kits in the online store - get yours here!

New Online Exclusives

There are new products available exclusively in the online store from 5 November - check them out here.

About Me

Hi I'm Joanne and live in Northampton and when I'm not looking after my husband and two beautiful children, am an avid crafter with a passion for all things Stampin' Up!

I must confess that I have never been a big rubber stamper - until I discovered Stampin' Up! that is. I love the fact that I can get such great results with co-ordinating stamps, inks, papers and punches - the possibilities are endless! Join me on my stamping journey as I share the things I love and be inspired to create amazing things yourself!

Follow Me

Monthly Newsletter

Box Builder

Click the button above to use Box Buster to create your custom box design using the Envelope Punch Board!

Kits Collection Now Available!

Stampin Cut and Emboss

The new Kits Collection from Stampin' Up! is now available!

Click here to see the current kits available and order yours online today.

I Design For


Stampin' Up Stuff

This is my personal blog and is not endorsed by Stampin’ Up! I hope you find it a plentiful source of ideas and personal inspiration but please don't copy my designs for contest submission or use for classes, publication or sale without express permission.