Trimming The Town Christmas Notelets TTT 94

by Joanne James17. December 2020 17:00


It's Thursday and time for a new challenge over at TicTacToe! It's the turn of Team X to host this week and I am our featured designer this week. This is the fun board that we are playing along with: 


I went across the middle row with house-snow-tree and created a trio of festive notecards for you today - take a look:


Here's the low-down on today's cards:

I made a set of notelets similar to these in a case as one of the projects at my Creative Escapes Craft Retreat back in October, and I still had some papers left so I thought I would make a few more. I used a combination of Trimming The Town designer paper, white cardstock, Stitched Shapes Dies and Home Together Dies to create my cards, each one with a snowy tree background, a white snowscape piece and trees and houses in various combinations diecut from the paper to create my little scenes, with each one finished with a sentiment cut from the paper too. Here's each of the cards individually:


A red and green chalet style house:


And lastly a palatial home on a landscape card, complete with porch entrance:


This last card shows lots of detail and layering - check it out:


I just love these cards - and not a stamp in sight! No supplies link today, as these items are no longer available, but I still wanted to share as I had paper to use up and for those of you in a similar position, I hope they give you some creative inspiration! I'm also linking up with the current challenge #GDP271 over at Global Design Project, where their theme is Winter/Holiday.

A tictactoe board offers so many creative possibilities - how does this week's board inspire you? Why not have a go? We would love to see you in the gallery and who knows - you might be selected for Designer's Choice and be eligible to be a guest designer on a future challenge. 

Enjoy your day; I'll be back tomorrow with another project. Until then, happy stampin'!


Merry and Bright Trimming The Town Christmas Card

by Joanne James28. September 2020 11:47

Happy Monday everyone! Today I'm earlier with my blog post as I was determined to be in time to share my card using Jacquie's sketch over at Freshly Made Sketches this week:

Such a great sketch; so simple yet so many ways you could interpret it! I have actually used this sketch twice this week - you will see it again on Thursday in my TicTacToe Design Team challenge card - but for today's card I couldn't resist creating layers and having some fun with one of my favourite Christmas Designer Series Papers - take a look:


Here's the low-down on today's card:

It's All About Trimming The Town - Today's card is very much all about the designer series paper. And as papers go, the Trimming The Town Designer Series Paper really has it all: cosy villages and winter scenes, whimsical homes and co-ordinating images, many of which can be cut out using the Home Together Dies, and two sheets of festive sentiments in a range of European languages. I used the paper for my snowy background, then used my Home Together Dies to cut out two houses, a wreath and a tree to decorate my card. I even fussy cut a sentiment and added this to my snowdrift. 

Layered Landscape - I decided to focus on creating my scene across the horizontal strip that features on Jacquie's FMS sketch, using two separate Whisper White 'snowdrifts' to add structure and form to my landscape, also cut using the Home Together Dies, then tucked my house in between and added my tree and sentiment to the front. This creates lots of interest and dimension, but in a small horizontal space, which keeps the clean feel of my card. You can see the layers better below:


What No Stamping? - Today's card is essentially a 'no stamping' card; I did stamp a sentiment on the inside and wanted to share it with you since the Coming Home stamp set is an image-only set. I have been trawling my other stamp sets for sentiments for house- and home-related greetings, especially because I am using the Trimming The Town Suite for my Creative Escapes Craft Retreat this weekend and I want to be able to share my suggestions with the ladies attending. The greeting I used inside today's card comes from the Poinsettia Place stamp set:

I'll share others as I use them on my cards in the coming weeks. So what do you think of this paper-based card? Does it tick your box? Do let me know in the comments below - I'd love to hear your thoughts. 

Here is the visual summary of the key products used on today's project for you to pin for easy reference:


You can see all of my 'How To' summaries on my 'How To - Tips and Techniques' Pinterest board in case you've missed any. 

Enjoy your day: I'm doing one of my favourite things, making treats to go out in the boxes with my virtual retreat boxes this weekend. I'll be back tomorrow with another project. Until then, happy stampin'!


Stampin' Up! Supplies Used:

Table built using Product Table Builder by The Crafty Owl - Independent Stampin' Up! Demonstrator.

Trimming the Town Horizontal Card Three Ways

by Joanne James24. August 2020 08:00

Another Monday, another week! Lots happening this week so I need to be even more organised that usual! Today I'm sharing a card (or 3!) using this week's sketch over at The Paper Craft Crew:

Remember when I cut up that 12" x 12" sheet of scene DSP from the Trimming The Town pack I cut up to make 4 slimline cards here? I showed you the other 3 smaller pieces of DSP I had leftover and this week's sketch was perfect for me to use these to complete my set of cards. Here is each of my cards in turn:


Card 2:


Card 3 - I flipped the sketch on the vertical for this one as the sentiment worked better on the left side of my framed scene:


Here's the low-down on today's card:

Each of my cards uses a Misty Moonlight card base, with a panel of snowflake paper followed by a piece of the scene, which is framed in a Poppy Parade border cut with the scallop-edged Layered Squares dies. The sentiments have also been cut from the Trimming The Town DSP and popped up on dimensionals, along with a fussy cut tree and also a small ribbon bow on one of my cards:


I did a little stamping on the inside of my card, but the outside was all about snipping with my scissors and some diecut frames - nice and straightforward and I've used my whole sheet of DSP.

Here is the visual summary of the key products used on today's project for you to pin for easy reference:


You can see all of my 'How To' summaries on my 'How To - Tips and Techniques' Pinterest board in case you've missed any. 

Enjoy your day and I'll be back tomorrow with another project. Until then, happy stampin'!


Stampin' Up! Supplies Used:

Table built using Product Table Builder by The Crafty Owl - Independent Stampin' Up! Demonstrator.

Trimming The Town Vertical Slimline Cards Four Ways

by Joanne James3. August 2020 16:33

Today I'm sharing a card - or 4! for this week's fun challenge over at Freshly Made Sketches


Yes the talented Linda Callaghan has left this week's sketch very much open to interpretation - as long as our cards are slimline; how fun! Slimline cards are very much on trend right now and whilst I've created a few horizontal ones recently, I haven't created any vertical ones. So I decided that's where I would start today and in fact, ended up creating 4 - take a look:


I decided to be brave and cut into this fabulous single sheet image from the new 'Trimming The Town' DSP pack that launches in the Autumn-Winter catalogue that launches tomorrow - here's the sheet I'm talking about:


And this is how I cut it:


This gave me 4 vertical slimline pieces and 3 additional pieces from the bottom section, that I will make up and share with you another day. I mounted each of my paper pieces on either Poppy Parade with a Misty Moonlight base, or Misty Moonlight with a Pool Party base. Here is each of the finished cards:

Card one:


Card two:


Card three: 


Card four:


These cards are completely 'no stamping' (on the front at least) - I snipped the sentiments from another of the sheets in this DSP pack, and mounted them on dimensionals as you can see on the photo below:


And that, as they say, is that! The hardest thing was committing to cutting into the sheet of patterned paper! Four cards for my Christmas card stash - how excited are you that the new Autumn-Winter catalogue is launching tomorrow? Only one more sleep to go!

I've had a super busy day so am just squeezing today's post in between last-minute Stampin' up! orders to earn Bonus Days coupons - today is your last day! - and cooking dinner and fixing a bicycle tyre puncture - oh the life I lead! Enjoy your evening and I'll be back tomorrow with another project. Until then, happy stampin'!


Tags: , , , , , , ,

Cards | Shop Online | Stamping

Gift Wrapped Meets Trimming The Town Sneak Peek

by Joanne James26. July 2020 15:00

There are lots of Christmas In July challenges about at the moment so I thought I would combine a couple and squeeze in an extra post today and share a couple of sneak peeks from the upcoming Autumn-Winter Catalogue with you in the process:


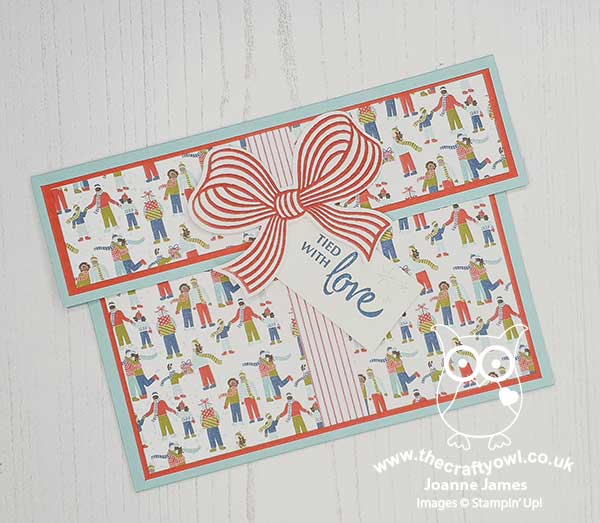
The team over at The Spot are looking for any kind of Christmas card creation and The Card Concept has a great inspiration photo that lead me to take my inspiration from one of the presents under the tree (front row, second from the right) to create a card and a matching gift card holder using some fun new products - take a look:
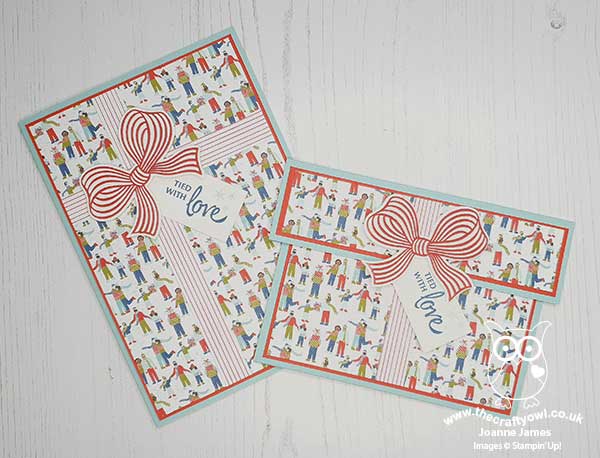
 

Here's the low-down on today's card firstly:
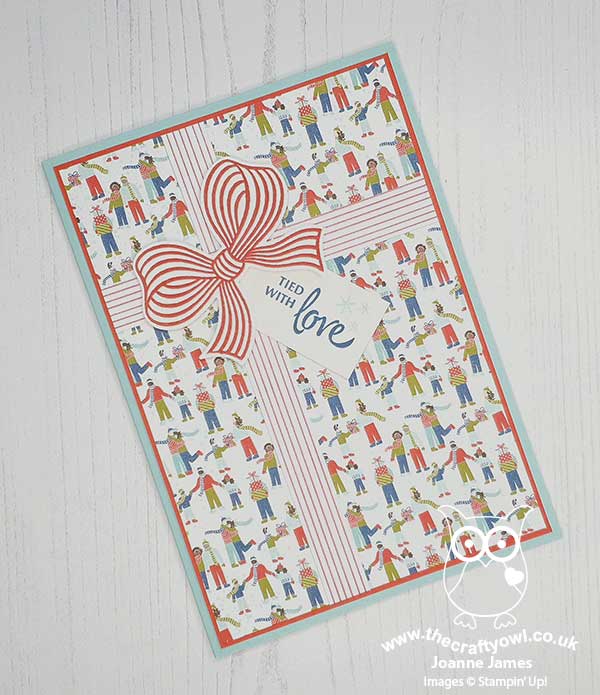
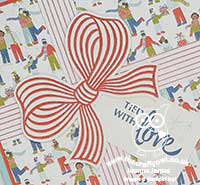
Trimming The Town - The designer series paper that covers the front of my card is from a new pack called 'Trimming The Town' - a pack full of contemporary designs featuring cosy villages and winter scenes. Some are really large and some really small and detailed, like the fun design I used to mimic wrapping paper on my gift parcel card.

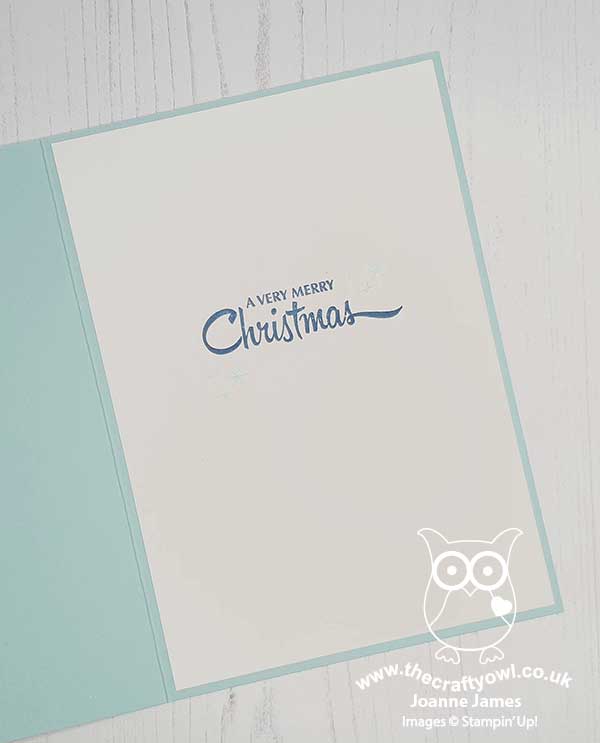
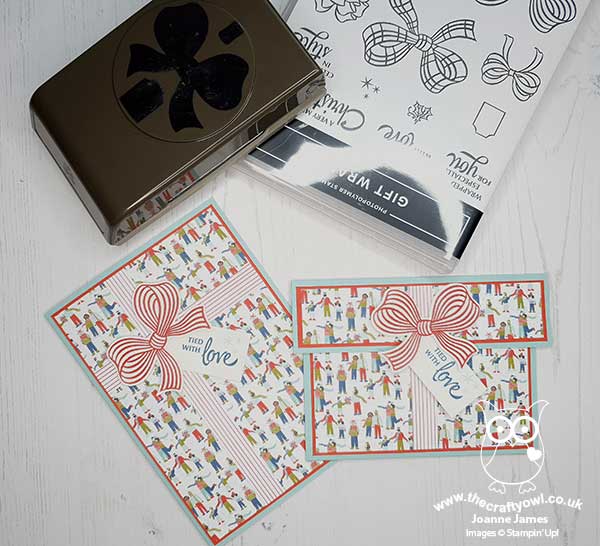
Gift Wrapped Bow (And A Trick) - My bow comes from a new stamp set called 'Gift Wrapped' and is stamped in Real Red on Whisper White cardstock and punched out with the new co-ordinating Gift Bow Builder Punch. I added a handcut tag and some 'ribbon' too - and therein lies the trick! I actually used a current DSP for the ribbon strips that co-ordinate with my bow; can you tell which one? It's actually the reverse of one of the patterns in the Playful Pets DSP pack - isn't that a great shortcut? I added a little more stamping on the inside of my card too:
 

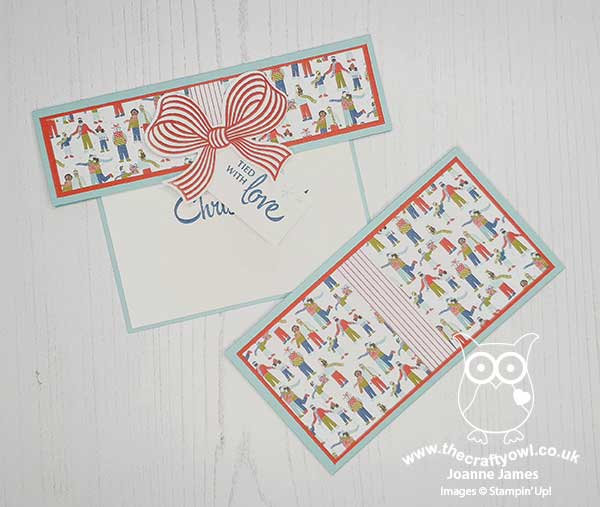
Gift Card Holder - I thought my gift-inspired card would be great to go with a co-ordinating gift-card holder too - I always need a few of these at Christmas time:
I can't take the credit for the design; it's based on one designed by the talented Erica Cerwin of Pink Buckaroo Designs (you can see the measurements for her original project on her blog here). It's a great little make, where the lid pulls out of a sleeve and you can add a message and your chosen gift card:
I think these make a cute pair of projects and are a great start to my Christmas crafting. I'm slowly but surely increasing my Christmas crafting - it always seems harder to do when the sun is shining outside though!

Here is the visual summary of the key products used on today's project for you to pin for easy reference:


You can see all of my 'How To' summaries on my 'How To - Tips and Techniques' Pinterest board in case you've missed any. 

Enjoy your day and I'll be back tomorrow with another project. Until then, happy stampin'!


Stampin' Up! Supplies Used:

To be updated 4th August.
Scrapbooking

Stampin' Up! has introduced a new range of 12x12" scrapbooking product and kit - the full range is now available to purchase online. To download a copy of the new digital Scrapbooking Catalogue click here.

Mini Catalogue

BROWSE THE CATALOGUE

'Tis The Season - the new Stampin' Up! Mini Catalogue is here! For more details and to download your copy click here

Shop Online

Access my online shop 24 x 7, 365 days of the year:

Current September hostess code:

JQEHTZGK

Shop Online

2024-25 Annual Catalogue

BROWSE THE CATALOGUE

Click on the image to download your copy of the 2024-25 annual catalogue. For a full list of current SU! supplies, go to my online store. If you would like any help or advice, please drop me a line at joanne@thecraftyowl.co.uk or give me a call on 07773 421446 - I'd be happy to help.

Join My Team

It's always a great time to join Stampin’ Up! New team members can get £130 worth of products for only £99 + free business supplies + free shipping + all the fun being a part of Stampin’ Up! Stampin' Up! has something for everyone: join my growing team and benefit from my support to enjoy Stampin' Up! however you choose.

If you're interested, call me for a chat to understand how I can help you realise your goals. Alternatively, if you have already decided to sign up and you just can't wait, please click here for the link to the online form where you can sign up and order your starter kit right away! 

Latest Kits!

Stampin Cut and Emboss

The Christmas Ornaments Kit and Card Keeper Kit are the latest kits that will be arriving in the online store later this month - get yours here!

New Online Exclusives

There are new products available exclusively in the online store from 3 July - check them out here.

About Me

Hi I'm Joanne and live in Northampton and when I'm not looking after my husband and two beautiful children, am an avid crafter with a passion for all things Stampin' Up!

I must confess that I have never been a big rubber stamper - until I discovered Stampin' Up! that is. I love the fact that I can get such great results with co-ordinating stamps, inks, papers and punches - the possibilities are endless! Join me on my stamping journey as I share the things I love and be inspired to create amazing things yourself!

Follow Me

Monthly Newsletter

Box Builder

Click the button above to use Box Buster to create your custom box design using the Envelope Punch Board!

Kits Collection Now Available!

Stampin Cut and Emboss

The new Kits Collection from Stampin' Up! is now available!

Click here to see the current kits available and order yours online today.

I Design For


Stampin' Up Stuff

This is my personal blog and is not endorsed by Stampin’ Up! I hope you find it a plentiful source of ideas and personal inspiration but please don't copy my designs for contest submission or use for classes, publication or sale without express permission.