Merry Bold And Bright Modern Christmas Trees FMS610

by Joanne James6. November 2023 09:00

Today I'm sharing a card using Jen T's fabulous layout over at Freshly Made Sketches this week:


This is a sketch with so many possibilities! I decided to make a contemporary Christmas card using one of the Christmas tree designs in the Merry Bold & Bright designer series paper pack - take a look:


Here's the low-down on today's card:

I'm also playing along with my friends at Just Us Girls again this week who have my favourite festive colour combo, red and green, as their inspiration this week. I would ordinarily go with something much more traditional, maybe Real Red and Shaded Spruce (my all-time favourite festive combo!) however the contemporary Christmas tree design in the Merry Bold and Bright designer series paper pack changes things up and pairs Lemon Lime Twist with Poppy Parade and a little white. My card was actually designed around the sentiment in the first instance, as I wanted something that would build across the three strips of the sketch and I love the way the text on the 'Joy to You' stamps gets bolder as it builds. I used both retired Stitched Stars Dies and Stitched Triangle Dies to create my accent trees; you could punch these but I like the addition of the stitched detail:


An unusual colour combination, but I actually rather like it; so much so I made two cards whilst I was at it! Here's a peek at the inside too where I added another of the stamps from the 'Joy To You' set and added a leftover strip of paper to decorate:


Perhaps this one needs a warning on the envelope to wear sunglasses on opening!!

Here is the visual summary of the key products used on today's project for you to pin for easy reference:


You can see all of my 'How To' summaries on my 'How To - Tips and Techniques' Pinterest board in case you've missed any. 

Enjoy your day; I'm having a day of catching up with lots of little jobs today - the sun is shining, so I'm feeling motivated! I'll be back tomorrow with another project. Until then, happy stampin'!


Stampin' Up! Supplies Used:

Table built using Product Table Builder by The Crafty Owl - Independent Stampin' Up! Demonstrator.

Stitched Triangle Dies Glimmer Christmas Tree CCS 495

by Joanne James8. November 2022 13:00

It's Tuesday and time for a new challenge over at CAS Colours & SketchesThis week's challenge is a sketch challenge and Cecile has asked that we overlap two inverted images on a square base:


Feel free to flip or rotate the sketch when making your card - you are also free to use a rectangular base if you'd prefer.

For my card today I did just that as I wanted my triangles to be isosceles as opposed to equilateral (GCSE flashback there!!) in shape. I don't use triangles often and whilst I was sure I wanted to make a Christmas tree from one of them, what to do with the other one? This is where I ended up:


Here's the low-down on today's card:

I used some bright Parakeet Party glimmer paper to create my simple graphic Christmas tree, layering triangles cut from different gradients of colour to add interest. After much internal wrangling, I decided to use a plain white stitched triangle for the mirrored image; I think it works! I added a star to the top of my tree and a wooden pre diecut sentiment, both of which came from the Santa Express Memories and More card pack - I coloured them gold with (retired) gold Encore ink but you could get them same effect by heat-embossing them (I was short on time!) I added some holly made from a couple of diecut leaves from my scrap box and a trio of red rhinestones to balance my design and add a further pop of colour:


A simple sentiment on the inside completes my card. I'm linking today's card up over at Less is More where the challenge is to use two or more colours from the colour wheel - I've used red, yellow-green and green. 

Here is the visual summary of the key products used on today's project for you to pin for easy reference:


You can see all of my 'How To' summaries on my 'How To - Tips and Techniques' Pinterest board in case you've missed any. 

As a reminder, for our colour challenges, you must use all of the stated challenge colours. You may also use neutral colours; however, the challenge colours should be the most noticeable ones featured on your card. We use Stampin' Up! color names for reference, but you are welcome to use any other companies' products as long as you match the challenge colours as closely as possible.

Enjoy your day and I'll be back soon with another project. Until then, happy stampin'!


Stampin' Up! Supplies Used:

Table built using Product Table Builder by The Crafty Owl - Independent Stampin' Up! Demonstrator.

Celebrate Without Flowers And A Cautionary Tale

by Joanne James2. May 2022 17:00

As promised, today I have a second card for you. I started this card on Saturday but only managed to finish it this afternoon. It uses Jen B's fabulous layout over at Freshly Made Sketches and the colours over at Color Throwdown (and was inspired by the geometric triangle pattern on the cushion in the inspo photo too):


Here's my card - take a look:


Here's the low-down on today's card:

At first glance, there really is nothing that remarkable about this card: a simple card base in Bumblebee, a mat in Night of Navy and then a vertical sentiment from the 'Celebrate With Flowers' stamp set in triplicate with a pattern in between formed from some tiny triangles in the challenge colours and diecut with the Stitched Triangle Dies. This card should have been super-simple to execute and the idea came to me in a flash when I saw Jen's sketch; normally I would have chosen one of my (many!) beloved patterned papers for those three shapes, however the stamp set was still on my desk from a previous project and I thought it would be fun to rotate the sketch through 180 degrees and flip the sentiment and decorative elements. Easy, right? Famous last words!! I actually started making two cards, the one you see above and a one layer one, but all in all I must have made about 6 versions, all of which ended up in the dustbin, before I finally finished one. There were mis-aligned sentiments, misaligned diecut borders, changes of cardbase colour, smudged ink - you name it, it happened on this card! Eventually I cut down my one layer version for the above card and added my diecut triangles so that I could at least say I finally finished one!

I think this makes a good clean and simple masculine birthday card, but I can't say I'll be making another one anytime soon - this one may well be unique! The moral of the story here? Well, stick to the sketch and go with your first instinct. Oh and even the most experienced of us cardmakers sometimes fail to get it right first, second ... or even fifth time!


I hope you enjoyed reading about my crafting trials and tribulations! Enjoy your evening and I'll be back tomorrow with another project and links to the new catalogue - woohoo! Until then, happy stampin'!


A Darling Donkey Triangle Trio For PP523

by Joanne James10. January 2021 09:00

Today it's Sunday and time for this week's new challenge over at The Paper Players! It's the turn of the fabulous Ann to host this week and she has an interesting colour challenge for us to work with:
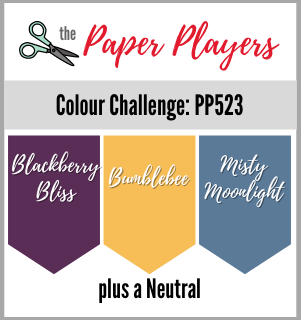
       

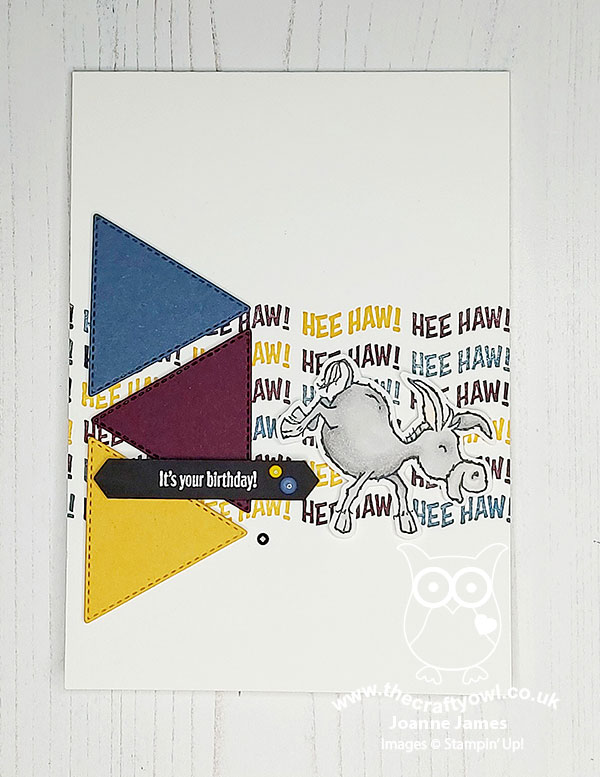
Now I know I said Ann had an 'interesting' colour challenge for us this week ... what I really meant to say was 'incredibly difficult'!! Or at least, it was for me this week! Whilst I don't mind any of these colours in their own, or even paired, as a trio I struggled with them. All three are featured in the new Dandy Garden designer series paper, and usually DSP would be my first port of call for a colour challenge, but the truth is I am not a fan of this pack! Or at least, I should qualify that by saying I'm not a fan of the sides with mixed colours - the monochromatic patterns in this pack are just lovely! Anyway, I had to call in help for this one, both in the form of this week's Paper Craft Crew sketch and a certain James Junior - take a look at what we came up with:
 

Here's the low-down on today's card:

A Trio Of Triangles - I was drawn to this week's PCC sketch with its three triangles, as I had been having a team chat this week with one of my team who has been using her stitched triangles as part of an ongoing challenge and I mentioned that I had bought these before Christmas but not yet used them and I thought the sketch would be a good way to remedy that. The trio would also enable me to work in this week's colours, so provided a great starting point.

A Darling Donkey - I then needed to decide upon my neutral colour; this is where Rebecca, the self-confessed 'brains' behind today's card, suggested I go with grey and a donkey from the super cute 'Darling Donkeys' stamp set, one of the sets that can be yours free with a £45 spend during Sale-A-Bration. So I coloured one of the funny kicking donkeys and fussy cut it out - perfect!

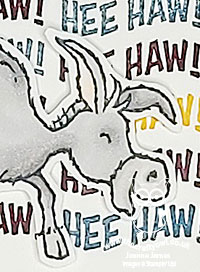
Hinge-Step HeeHaw - Finally, I just had to work out what to do use for the horizontal background panel. I decided to go with a tri-colour sentiment block, made up of alternating colours of 'heehaw!', one of the sentiments in the Darling Donkeys set. I used my Stampuratus and moved the plates up and down the hinge to perfectly space my words to create a seamless flow across the page. The Stamparatus made light work of the stamping, although 'the hands' (Rebecca's reference to my contribution!) were definitely not working as quickly as 'the brain' (apparently, since it was all her idea!!) I finished my card with a birthday sentiment and a trio of enamel dots. 

Despite my initial reservations about this week's colours, I'm actually pretty pleased with the end result. What do you think? Did Team James pull it off?! Do leave me a comment below - I'd love to hear your thoughts. I'll be linking today's card up over at SUO Challenges too where they have 'Designer's Choice' themes this week.

Here is the visual summary of the key products used on today's project for you to pin for easy reference:
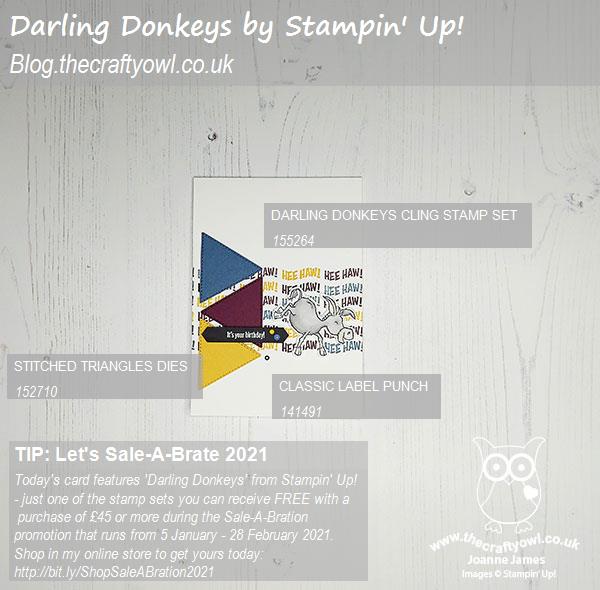
 

You can see all of my Product and 'How To' summaries on my 'How To - Tips and Techniques' Pinterest board in case you've missed any. 

Before you reach for your ink and papers, check out what our amazing team has created to inspire you this week:

Here's a quick recap of our challenge rules:
 
1.  Create a new paper project
2.  Upload your creation to your blog with a link back to us and provide a direct link to the post featuring your challenge submission.
3.  Please link your card to no more than four challenges, TOTAL.
4.  Have FUN!

You can see all of my 'How To' summaries on my 'How To - Tips and Techniques' Pinterest board in case you've missed any. 

Enjoy your day; I'm hoping to do a little crafting and maybe wrap up and brave the elements for a brisk walk - but I'll see what the temperatures are like first! I'll be back tomorrow with another project. Until then, happy stampin'!


Stampin' Up! Supplies Used: 

Table built using Product Table Builder by The Crafty Owl - Independent Stampin' Up! Demonstrator.

Current Promotions

Stampin Cut and Emboss

Save up to 30% off on all your favourite kits from 1 to 31 October! 

Click here to see the current kits available and order yours online today.

Join My Team

It's always a great time to join Stampin’ Up! During October you can get even more in your starter kit! New team members can get £160 worth of products for only £99 + free business supplies + free shipping + all the fun being a part of Stampin’ Up! Stampin' Up! has something for everyone: join my growing team and benefit from my support to enjoy Stampin' Up! however you choose.

If you're interested, call me for a chat to understand how I can help you realise your goals. Alternatively, if you have already decided to sign up and you just can't wait, please click here for the link to the online form where you can sign up and order your starter kit right away! 

Shop Online

Access my online shop 24 x 7, 365 days of the year:

Current October hostess code:

4XPEYCB9

Shop Online

Scrapbooking

Stampin' Up! has introduced a new range of 12x12" scrapbooking product and kit - the full range is now available to purchase online. To download a copy of the new digital Scrapbooking Catalogue click here.

Mini Catalogue

BROWSE THE CATALOGUE

'Tis The Season - the new Stampin' Up! Mini Catalogue is here! For more details and to download your copy click here

2024-25 Annual Catalogue

BROWSE THE CATALOGUE

Click on the image to download your copy of the 2024-25 annual catalogue. For a full list of current SU! supplies, go to my online store. If you would like any help or advice, please drop me a line at joanne@thecraftyowl.co.uk or give me a call on 07773 421446 - I'd be happy to help.

Latest Kits!

Stampin Cut and Emboss

The Christmas Ornaments Kit and Card Keeper Kit are the latest kits in the online store - get yours here!

New Online Exclusives

There are new products available exclusively in the online store from 5 November - check them out here.

About Me

Hi I'm Joanne and live in Northampton and when I'm not looking after my husband and two beautiful children, am an avid crafter with a passion for all things Stampin' Up!

I must confess that I have never been a big rubber stamper - until I discovered Stampin' Up! that is. I love the fact that I can get such great results with co-ordinating stamps, inks, papers and punches - the possibilities are endless! Join me on my stamping journey as I share the things I love and be inspired to create amazing things yourself!

Follow Me

Monthly Newsletter

Box Builder

Click the button above to use Box Buster to create your custom box design using the Envelope Punch Board!

Kits Collection Now Available!

Stampin Cut and Emboss

The new Kits Collection from Stampin' Up! is now available!

Click here to see the current kits available and order yours online today.

I Design For


Stampin' Up Stuff

This is my personal blog and is not endorsed by Stampin’ Up! I hope you find it a plentiful source of ideas and personal inspiration but please don't copy my designs for contest submission or use for classes, publication or sale without express permission.