Poinsettia Double Fan Fold Christmas Card PP519

by Joanne James29. November 2020 09:00

Today it's Sunday and time for this week's new challenge over at The Paper Players! It's the fifth week of the month and the turn of the amazing Anne Marie to host with a fun TicTaToe challenge board for you to work with:
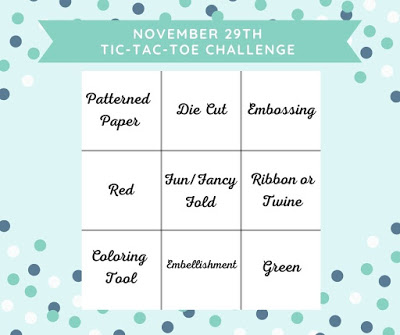
    

I decided to go all-out with a fancy fold card today and originally was aiming for the central column of the board with diecut - fancy fold - embellishment; by the time I'd finished my card, I had inadvertently covered every square except 'colouring tool'! This card (almost!) has it all - take a look:
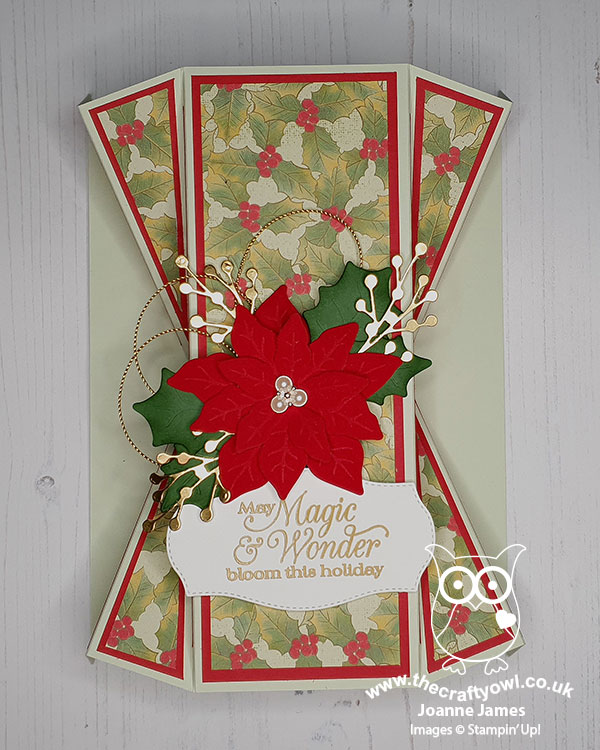
 

Here's the low-down on today's card:

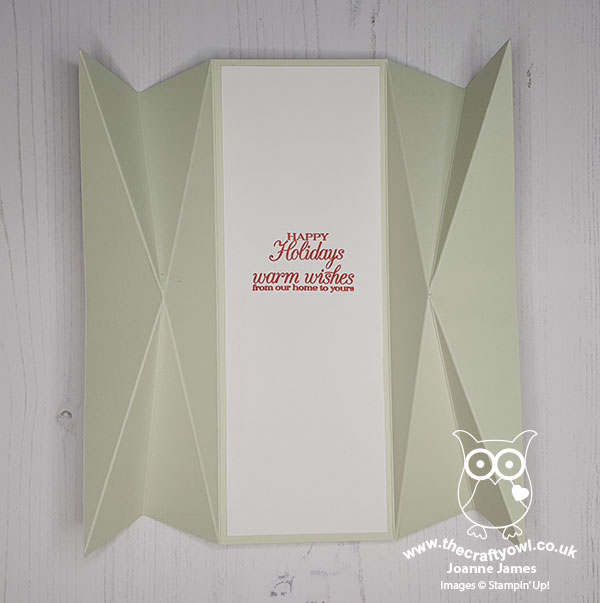
Double Fan Fancy Fold - I chose to make a double fan fancy fold card today as I've seen lots of these doing the rounds this season and for a fancy fold, they really aren't that tricky. I did a little bit of internet searching for a template, but in the end decided to make my own. My card measures 8 1/4" x 9", scored on the vertical at 1 1/2", 3", 6" and 7 1/2" and then scored on the diagonal as shown below. The basic outline is really straightforward - cutting the mats and layers to decorate was a little more time consuming, but worth it as they look lovely when finished. The card then has space on the reverse for the panel that would otherwise have been on the inside:
 

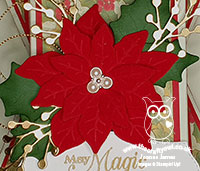
Poinsettia Showcase - I chose my favourite holly paper from the Poinsettia Place pack for my panels and chose to create a single layered poinsettia for my centrepiece. I cut a three layered flower from red velvet paper for my poinsettia using the poinsettia dies and added some holly leaves and gold berry sprigs. The red velvet paper is gorgeous and perfect for a showcase flower such as this - I wish you could feel the texture of it; it embosses beautifully too, as you can see on the close up below:
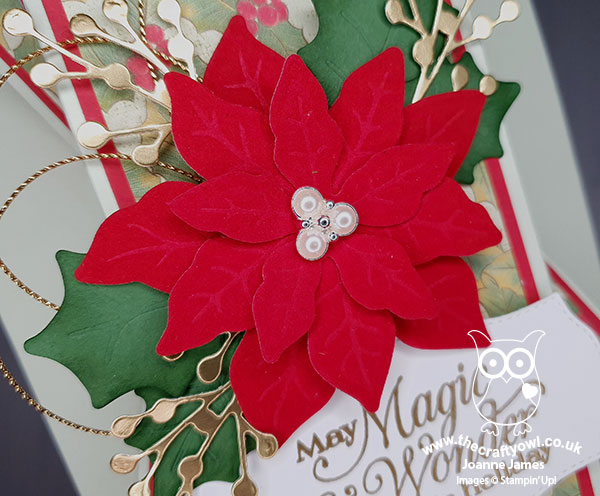
 

Pearls and Shine - I added a beaded pearl embellishment to the centre of my flower for the perfect finishing touch. Combined with the velvet paper, touches of gold foil and twine and gold embossed sentiment, this makes for quite a special Christmas card.

I'm linking my card up over at TGIF Challenges where the theme is 'Have a magical Christmas' (my sentiment was the perfect choice!) and over at SUO Challenges where the theme is also Christmas.

Here is the visual summary of the key products used on today's project for you to pin for easy reference:
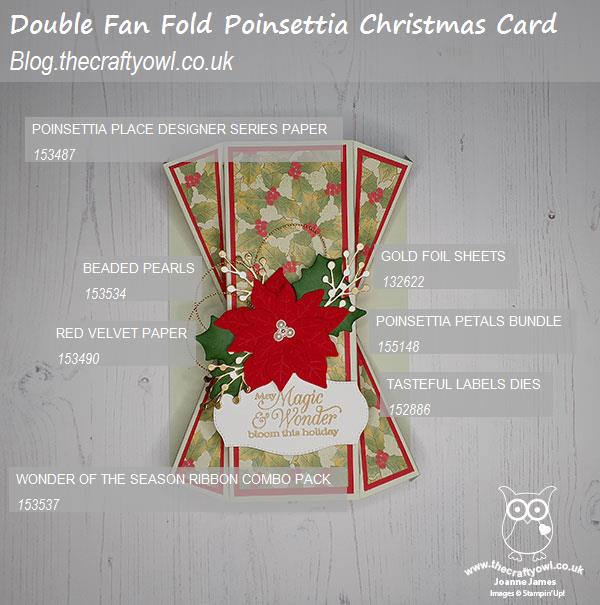
 

You can see all of my Product and 'How To' summaries on my 'How To - Tips and Techniques' Pinterest board in case you've missed any. 

Before you reach for your ink and papers, check out what our amazing team has created to inspire you this week:

Here's a quick recap of our challenge rules:
 
1.  Create a new paper project
2.  Upload your creation to your blog with a link back to us and provide a direct link to the post featuring your challenge submission.
3.  Please link your card to no more than four challenges, TOTAL.
4.  Have FUN!

You can see all of my 'How To' summaries on my 'How To - Tips and Techniques' Pinterest board in case you've missed any. 

Enjoy your day; for the first time ever whilst still in November, I think we are decorating the house for Christmas this afternoon. The James Juniors have been pestering me all week and to be honest I think we could all use a little festive cheer, so decorations it is!  I'll be back tomorrow with another project. Until then, happy stampin'!


Stampin' Up! Supplies Used: 

Table built using Product Table Builder by The Crafty Owl - Independent Stampin' Up! Demonstrator.

Beautiful Boughs and Pine Cones AYSI 237

by Joanne James23. October 2020 12:00

Today I'm sharing my design team card for our new challenge over at As You See It where it's time for my favourite, a sketch challenge:


For my card today I paired an old favourite with some new Christmas papers - a look:


Here's the low-down on today's card:

Beautiful Boughs - The Beautiful Boughs Dies are in the annual catalogue as a carryover from the last Autumn-Winter seasonal catalogue and whilst I don't have the bundled stamp set (hence choosing a greeting from 'Itty Bitty Christmas' for today's card, that most useful of Christmas sentiment sets!) I do love the dies; their beautiful layered detail is great to add bold festive greenery to a project.

Pine Cone Poinsettias - The starting point for today's card was most definitely the designer series paper (no surprises there then!) I decided to use one of the papers that is on offer as part of this month's designer series paper sale (you can read all about that here) so I chose the Poinsettia Place paper pack and a pattern that I haven't yet used featuring pine cones, hence the fit with the Beautiful Boughs dies.

A Slight Confession - Whilst the layout of today's sketch is clearly visible on my card, I chose not to follow the suggested sentiment placement, instead making mine a feature of the circle. This is in part because I was originally going to use an alternative paper and use a diecut flower as the focal point, but in the end changed my mind at the last minute as I wanted to play with a new paper design. Either way, the sketch is a suggestion and does not have to be followed to the absolute letter; as long as the broad elements are visible, artistic licence is welcome!

Here is the visual summary of the key products used on today's project for you to pin for easy reference:


You can see all of my 'How To' summaries on my 'How To - Tips and Techniques' Pinterest board in case you've missed any. 

Here's a summary of our challenge rules:

  • Create any card, scrapbooking page, 3D project or packaging project that fits the challenge.
  • Please include the challenge graphic and link back to the challenge in your blog post. Turn off word verification so we can leave you lots of lovely comments. Make sure you link the post not the whole blog to the Linky. Use #AYSIXXX when uploading to a public gallery.
  • If you’re unsure about ‘the rules’, check the details under the Challenge Guidelines tab on the As You See It Challenge homepage.
We look forward to seeing your creations in the AYSI gallery.

Both of the James Juniors are now officially on half-term for a week; I've spent the last few days enjoying some quality mother-daughter time with Rebecca as Ben was still at school, and tidying up some odds and ends, hence my lack of blog posts. They are both having a 'lazy day' today though so once I've battled my way slowly through the ironing pile, I am hoping to make a card or too later :-) Enjoy your day and I'll be back tomorrow with another project. Until then, happy stampin'!


Stampin' Up! Supplies Used:

Table built using Product Table Builder by The Crafty Owl - Independent Stampin' Up! Demonstrator.

Mini Catalogue

BROWSE THE CATALOGUE

The mini catalogue is now live! Read and download your copy here.

Shop Online

Access my online shop 24 x 7, 365 days of the year:

Current March hostess code:

S9F2XJJW

Shop Online

Join My Team

It's always a great time to join Stampin’ Up! New team members can get £130 worth of products for only £99 + free business supplies + free shipping + all the fun being a part of Stampin’ Up! Stampin' Up! has something for everyone: join my growing team and benefit from my support to enjoy Stampin' Up! however you choose.

If you're interested, call me for a chat to understand how I can help you realise your goals. Alternatively, if you have already decided to sign up and you just can't wait, please click here for the link to the online form where you can sign up and order your starter kit right away! 

Latest Kit!

Stampin Cut and Emboss

The Rock Legend Kit has all you need to make 8 cards with coordinating envelopes. Along with the new Panda Friends Kit, both are available from January 4th for just £14 each - get yours here!

2023-24 Annual Catalogue

BROWSE THE CATALOGUE

Click on the catalogue for a full list of current SU! supplies - if you would like to order any of the items featured, please drop me a line at [email protected] or give me a call on 07773 421446 - I'd be happy to help.

New Online Exclusives

There will be new products available exclusively in the online store from 5 March - check them out here.

About Me

Hi I'm Joanne and live in Northampton and when I'm not looking after my husband and two beautiful children, am an avid crafter with a passion for all things Stampin' Up!

I must confess that I have never been a big rubber stamper - until I discovered Stampin' Up! that is. I love the fact that I can get such great results with co-ordinating stamps, inks, papers and punches - the possibilities are endless! Join me on my stamping journey as I share the things I love and be inspired to create amazing things yourself!

Follow Me

Monthly Newsletter

Box Builder

Click the button above to use Box Buster to create your custom box design using the Envelope Punch Board!

Kits Collection Now Available!

Stampin Cut and Emboss

The new Kits Collection from Stampin' Up! is now available!

Click here to see the current kits available and order yours online today.

I Design For


Stampin' Up Stuff

This is my personal blog and is not endorsed by Stampin’ Up! I hope you find it a plentiful source of ideas and personal inspiration but please don't copy my designs for contest submission or use for classes, publication or sale without express permission.