Cake and Cookies For PP513

by Joanne James18. October 2020 09:00

Today it's Sunday and time for this week's new challenge over at The Paper Players! It's the turn of the queen of diecuts, the lovely Laurie, to host this week and she has a Clean and Simple challenge for you to work with:


REMEMBER THIS IS CLEAN AND SIMPLE WEEK 
 
What do we mean by Clean and Simple?
 
Minimal layers and embellishments
Plenty of open space, aka "white" space
Simple and uncluttered 

I actually have a few cards for you today! First up - cake! A quick review of my stamp collection told me I had no current cake or cupcake stamps - go figure! So I decided to use Linda's sketch over at Freshly Made Sketches this week:

 myI used my current Playful Alphabet Dies, along with some retired Patio Party designer series paper and last year's 'Piece of Cake' stamp set to create a couple of clean and simple cake-themed cards. Here's the first one using the negative space of the diecut letters:


And a close up of that fun sentiment:


And here's the second card, using the same paper and alternative colour base with the actual diecut letters, popped up on foam adhesive sheets:


Both cards finish with this sentiment on the inside:


Perfect for birthdays or other occasions! Here's a picture of them both together:


The Patio Party paper actually dates back to 2013 so I'm thinking there won't be many of you with some of this on your shelves (unless you are a paper hoarder like me!!) so I also made a third card using current products and this week's Global Design Project sketch:

For this card I reached for my 'Nothing's Better Than' bundle and tweaked my sentiment to create a festive cookie card:


I paired my cookies with some festive plaid from the Plaid Tidings DSP pack (15% off in this month's DSP sale!); having photographed my card, I wish I'd added a sprig of holly too (maybe I'll go back and add one on before I send it!) but to be fair this card is less clean and simple than the first two, with a few more layers and elements so probably best I quit when I did!


Here is the visual summary of the key products used on the above project for you to pin for easy reference:


You can see all of my Product and 'How To' summaries on my 'How To - Tips and Techniques' Pinterest board in case you've missed any. 

Before you reach for your ink and papers, check out what our amazing team has created to inspire you this week:

Here's a quick recap of our challenge rules:
 
1.  Create a new paper project
2.  Upload your creation to your blog with a link back to us and provide a direct link to the post featuring your challenge submission.
3.  Please link your card to no more than four challenges, TOTAL.
4.  Have FUN!

You can see all of my 'How To' summaries on my 'How To - Tips and Techniques' Pinterest board in case you've missed any. 

Enjoy your day; we will be having a quiet family day today as we head into the start of the half-term holiday for one of the James Juniors at least (the other has another 4 days of school to go!). I managed to get some crafting done yesterday so will definitely be back tomorrow with another project. Until then, happy stampin'!


Stampin' Up! Supplies Used: 

Table built using Product Table Builder by The Crafty Owl - Independent Stampin' Up! Demonstrator.

Playful Patterns HB2U Birthday Cards

by Joanne James10. August 2020 18:25

Today I'm sharing a couple of cards I made using this week's Freshly Made Sketches layout:

I thought Kim's sketch this week was great with so many possibilities, especially for a patterned paper lover like me! I decided that I would try and be faithful to the diagonal stripes too so reached for my Playful Patterns pack and created a teen-inspired birthday card - take a look:


Here's the low-down on today's card:

I used my Playful Alphabet Dies to create a 'text speak' birthday sentiment and layered them onto a stitched square, using the colours of the designer series paper to determine my colour choices. I then added some simple stamping to the inside of my card:


A few Playful Patterns resin dots complete my card. I liked this card so much, I made another one in a similar colourway using another strip of the same paper:


Here they are together - which colourway do you prefer?


I know this kind of text speak isn't to everyone's taste, but as I find myself making more and more birthday cards for teenagers, I know this will be a top choice when the children go rifling through by box looking for a last-minute card! Here is the visual summary of the key products used on today's project for you to pin for easy reference:


You can see all of my 'How To' summaries on my 'How To - Tips and Techniques' Pinterest board in case you've missed any. 

Another quick Monday post for me as I've been busy today preparing for a milestone birthday of one of the James Juniors tomorrow - more on that later in the week! Enjoy your envening and I'll be back tomorrow with another project. Until then, happy stampin'!


Stampin' Up! Supplies Used:

Table built using Product Table Builder by The Crafty Owl - Independent Stampin' Up! Demonstrator.

A Summer Day At The Beach

by Joanne James6. June 2020 20:49

The weather has been so wet and cold today it has been really miserable! I had a little time this afternoon to squeeze in a quick card and I couldn't resist pulling one of my retired stamp sets off the shelf to make a bright card for a few challenges:

RRCB 136      

 I had been considering what to use for a summer-themed card for Festive Friday, and a retired stamp set that I've had since 2017, Day At The Beach, had just the images that I needed to start ticking off that inspo list! It also means I can link my card up over at RetroRubber too! So armed with the current Fab Friday sketch too I set to work and came up with a colourful summer collage - take a look:


I grabbed a selection of summer stamps and set to work: sunshine, flip flops, ice lollies, beach ball, umbrella, sunglasses, bucket and spade, sunhat - everything you would need for a beach vacation and a bunch of my Blends markers and coloured in my bright pattern. I paired it with a bold, diecut sentiment to finish. A summer beach vacation seems like a distant memory right now, so it was nice to live life through my card for just a little while today.

Here is the visual summary of the key products used on today's project for you to pin for easy reference:


You can see all of my 'How To' summaries on my 'How To - Tips and Techniques' Pinterest board in case you've missed any. 

Enjoy your evening and I'll be back tomorrow with another project. Until then, happy stampin'!


Stampin' Up! Supplies Used:

Table built using Product Table Builder by The Crafty Owl - Independent Stampin' Up! Demonstrator.

Movie-Inspired In-Color Hello Card for AYSI 227

by Joanne James5. June 2020 12:00

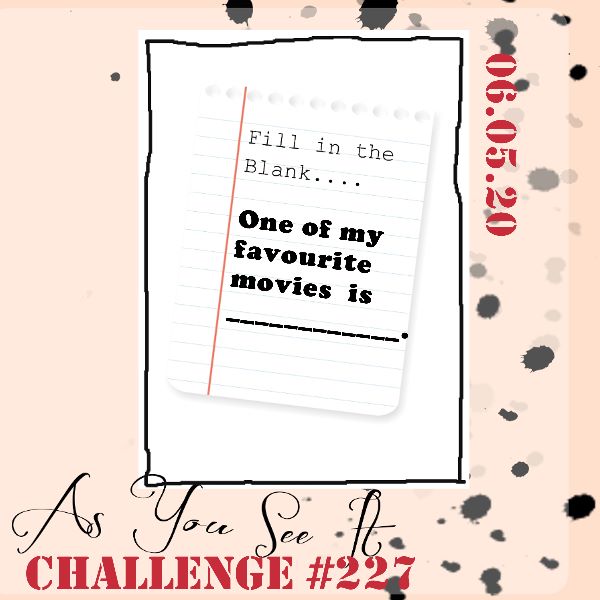
No blog yesterday as I was still super busy with new catalogue launch day activities and making sure that all the bundles were ordered for my online  'Blossoms in Bloom' class on June 15th - there's still time to sign up if you'd like to join me! Today I'm sharing my design team card for our new challenge over at As you See It where it's time for a fun 'fill in the blank' challenge:
 

Like many of the team this week I procrastinated for ages over this card! I love movies and I could think of so many different cards, I struggled to narrow down my ideas. In the end I went with an iconic movie quote from my most favourite movie of all time - take a look:
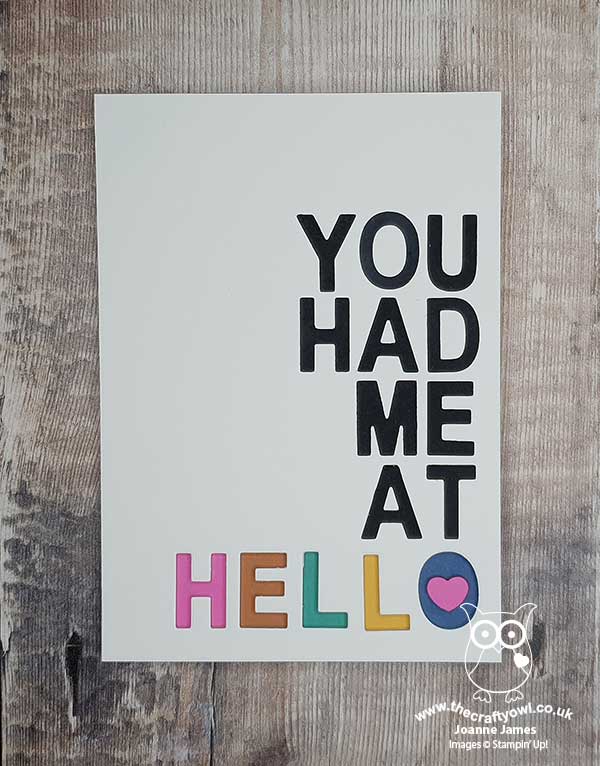
 

Do you recognise it? Yes, it's Renee Zellweger's classic line when her husband, the handsome Tom Cruise, returns from his road trip in the movie 'Jerry Maguire'. This is a movie packed with famous quotes: "Show me the money!" and "Did you know bees and dogs can smell fear?" to name just two. 

I decided to make a bold statement using diecut letters in black for the first part of the quote adhered directly to my card mat, then switched for 'hello' by diecutting this out of the mat itself and then adding snippets of each of the new Stampin' Up! 2020-22 in-colours directly to the cardbase below, and popping the mat up on dimensionals: 
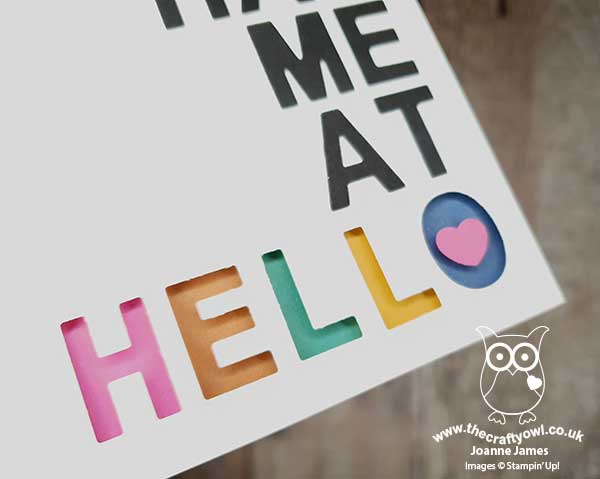
 

I added a little Magenta Madness pink heart to the centre of the 'o', courtesy of the dog builder punch (such a useful little heart!) to complete my card.

I used the retired Little Letters Thinlits Dies to create my card today, but it's a good opportunity to point out that the new Stampin' Up! catalogue has at last a new set of alphabet dies to purchase - something that many of you have missed from the last one, judging by the number of enquiries I get! The new set is called 'Playful Alphabet' (page 178) and is very similar in size and style to the thinlits I used on my card although there are a couple of great additions: duplicate letters for commonly used characters, such as vowels, as well as numbers and a set of characters, including a question mark, accents and a hashtag - and all for a very reasonable price of £32. As such, this is the set I've linked to below should you wish to purchase from my online store and re-create my card.

I don't have a photo of the inside of my card, as I wrote a personal message in it as soon as my card was made. I know my husband will totally 'get' this card as he knows how much I love this card, but I will confirm I did begin my message with another memorable quote from the movie: "You complete me" - it just had to be done! If you haven't seen this movie and have no idea what I'm talking about today, I can highly recommend it; grab your tissues and watch this little  clip, courtesy of movies.com, to whet your appetite: 

 And on that beautiful note - here is the visual summary of the key products used on today's project for you to pin for easy reference:
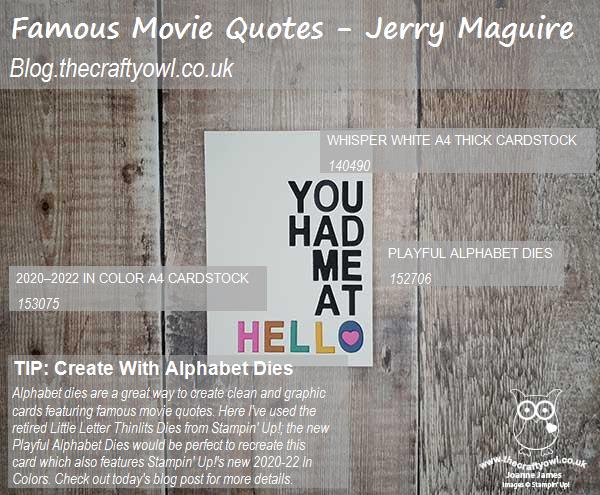
 

You can see all of my 'How To' summaries on my 'How To - Tips and Techniques' Pinterest board in case you've missed any. What is your favourite movie? Do leave me a comment below or better still, make a card to illustrate it and play along with us this week!

Here's a summary of our challenge rules:

  • Create any card, scrapbooking page, 3D project or packaging   project that fits the challenge.
  • Fill in the blanks with the words that are right for you and then create your project with those words in mind. Tell us, in your blog or on your site, what words you used.
  • Please include the challenge graphic and link back to the challenge in your blog post. Turn off word verification so we can leave you lots of lovely comments. Make sure you link the post not the whole blog to the Linky. Use #AYSIXXX when uploading to a public gallery.
  • If you’re unsure about ‘the rules’, check the details under the Challenge Guidelines tab on the As You See It Challenge homepage.

We look forward to seeing your creations in the AYSI gallery.

I am spending this morning in my office, whilst young Master James basks in the glory of CE exam completion and enjoys a 'day of rest', otherwise known as chatting and playing online with his friends, along with virtual pizza night this evening to celebrate. He is back on it next week as he begins what is usually a month of post CE exam fun, not with a week of outward bound activities in the Lake District with his class mates as planned, but instead video production to enable the Year 8 fashion show that they've been busy creating outfits for to happen online. I am off to school this afternoon to collect the 8 foot-high tree that I declined to bring home on the final day of school before lockdown because I couldn't fit it in my car along with all of the school books, files and sports kit and I couldn't believe it would be essential. Clearly I was wrong!!

Enjoy your day and I'll be back tomorrow with another project. Until then, happy stampin'!


Stampin' Up! Supplies Used:

Table built using Product Table Builder by The Crafty Owl - Independent Stampin' Up! Demonstrator.

Mini Catalogue

BROWSE THE CATALOGUE

The mini catalogue is now live! Read and download your copy here.

Shop Online

Access my online shop 24 x 7, 365 days of the year:

Current April hostess code:

VDKNV7BH

Shop Online

Join My Team

It's always a great time to join Stampin’ Up! New team members can get £130 worth of products for only £99 + free business supplies + free shipping + all the fun being a part of Stampin’ Up! Stampin' Up! has something for everyone: join my growing team and benefit from my support to enjoy Stampin' Up! however you choose.

If you're interested, call me for a chat to understand how I can help you realise your goals. Alternatively, if you have already decided to sign up and you just can't wait, please click here for the link to the online form where you can sign up and order your starter kit right away! 

Latest Kit!

Stampin Cut and Emboss

The Rock Legend Kit has all you need to make 8 cards with coordinating envelopes. Along with the new Panda Friends Kit, both are available from January 4th for just £14 each - get yours here!

2023-24 Annual Catalogue

BROWSE THE CATALOGUE

Click on the catalogue for a full list of current SU! supplies - if you would like to order any of the items featured, please drop me a line at [email protected] or give me a call on 07773 421446 - I'd be happy to help.

New Online Exclusives

There are new products available exclusively in the online store from 5 March - check them out here.

About Me

Hi I'm Joanne and live in Northampton and when I'm not looking after my husband and two beautiful children, am an avid crafter with a passion for all things Stampin' Up!

I must confess that I have never been a big rubber stamper - until I discovered Stampin' Up! that is. I love the fact that I can get such great results with co-ordinating stamps, inks, papers and punches - the possibilities are endless! Join me on my stamping journey as I share the things I love and be inspired to create amazing things yourself!

Follow Me

Monthly Newsletter

Box Builder

Click the button above to use Box Buster to create your custom box design using the Envelope Punch Board!

Kits Collection Now Available!

Stampin Cut and Emboss

The new Kits Collection from Stampin' Up! is now available!

Click here to see the current kits available and order yours online today.

I Design For


Stampin' Up Stuff

This is my personal blog and is not endorsed by Stampin’ Up! I hope you find it a plentiful source of ideas and personal inspiration but please don't copy my designs for contest submission or use for classes, publication or sale without express permission.