Dainty Flowers Celebrate You Panel Cards

by Joanne James13. January 2023 12:00

Today I'm sharing my design team card for our first challenge of the new year over at As you See It where it's Jane's turn to host and she has a great sketch challenge for us:


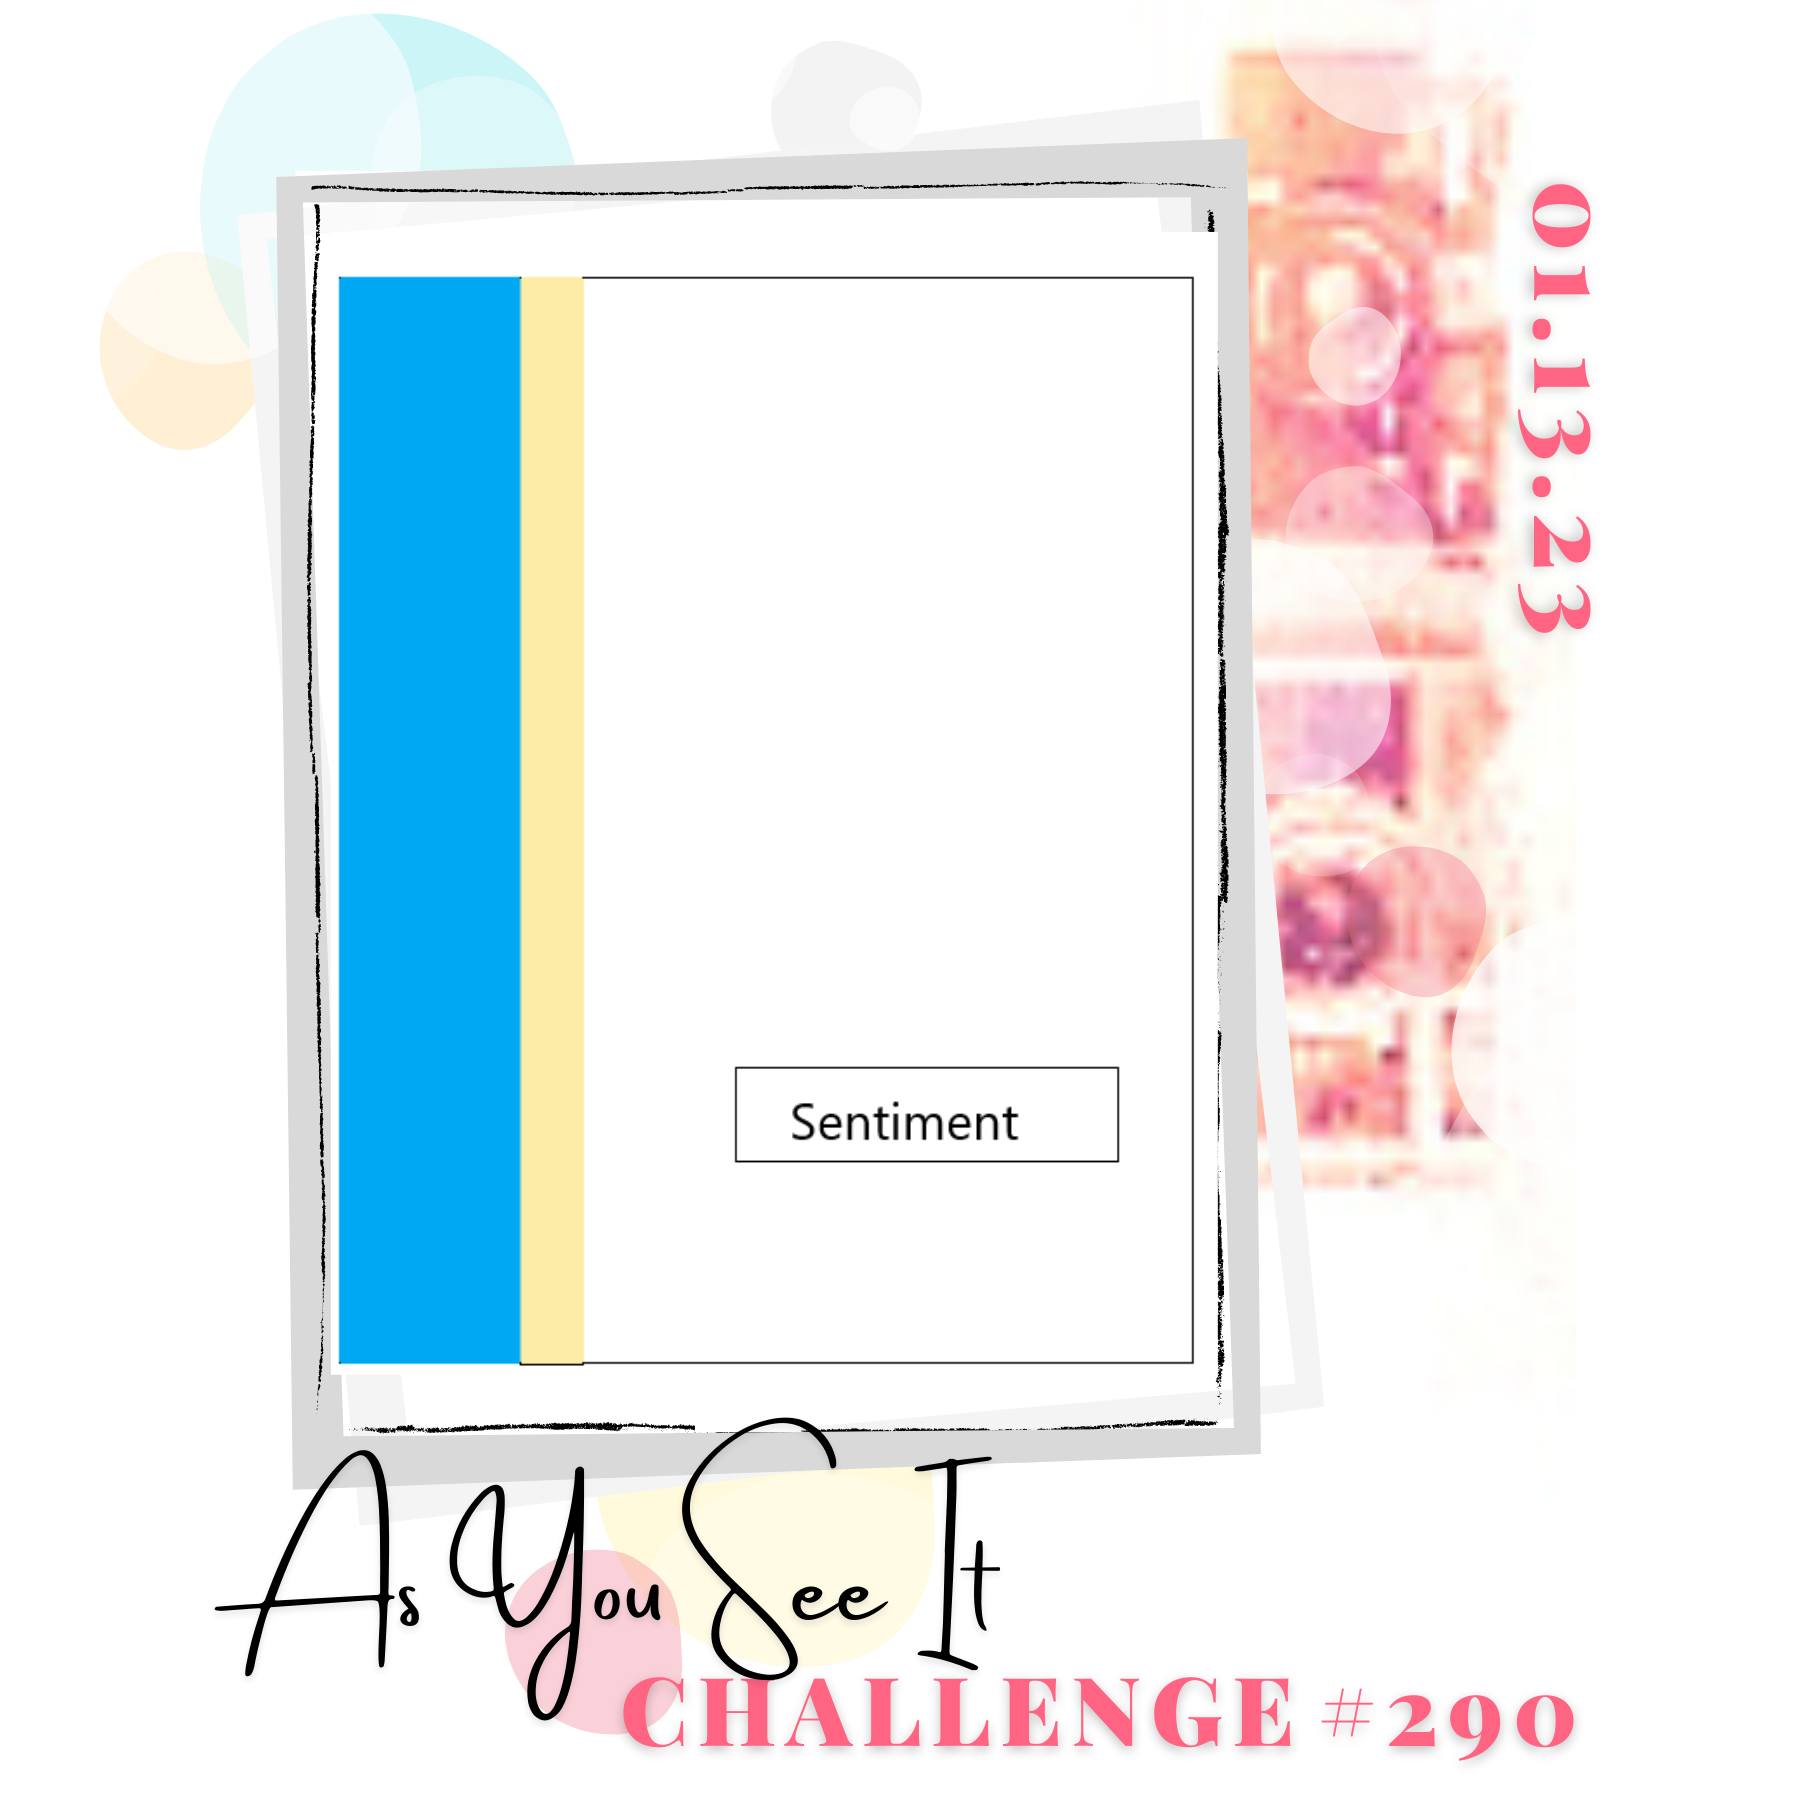
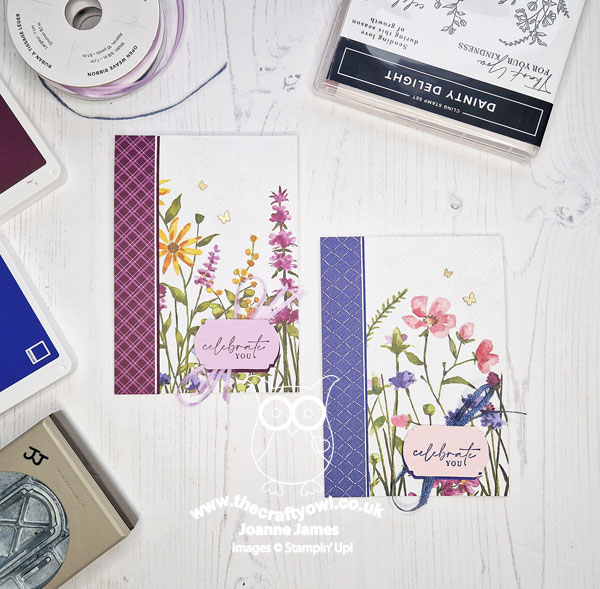
I thought that large panel was crying out to showcase some beautiful designer paper and obviously I have lots to choose from!! I decided to make a couple of cards, both showcasing one of the beautiful designs in the new Dainty Flowers paper pack. Here's the first one:


Here's the low-down on today's card:

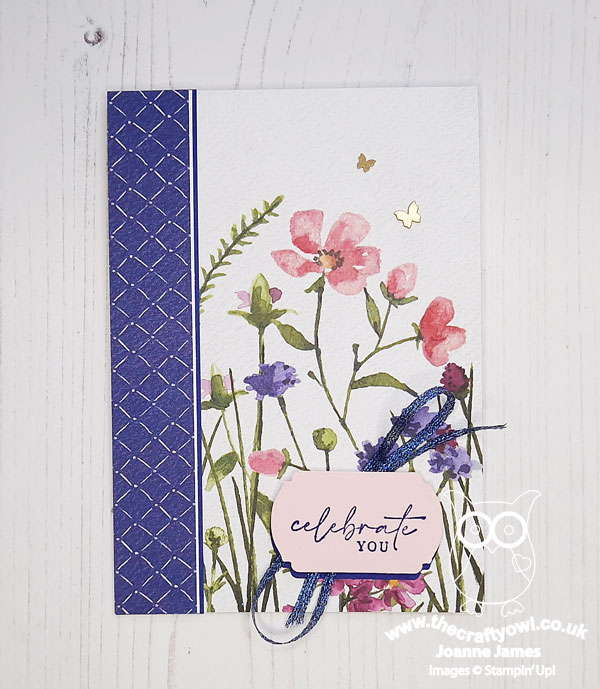
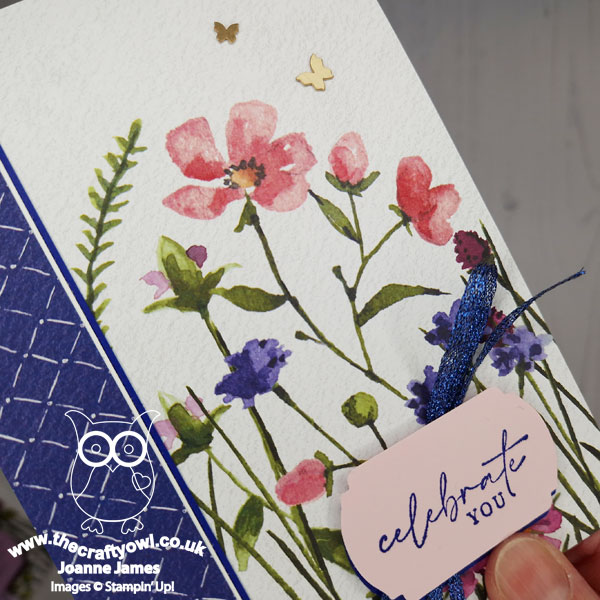
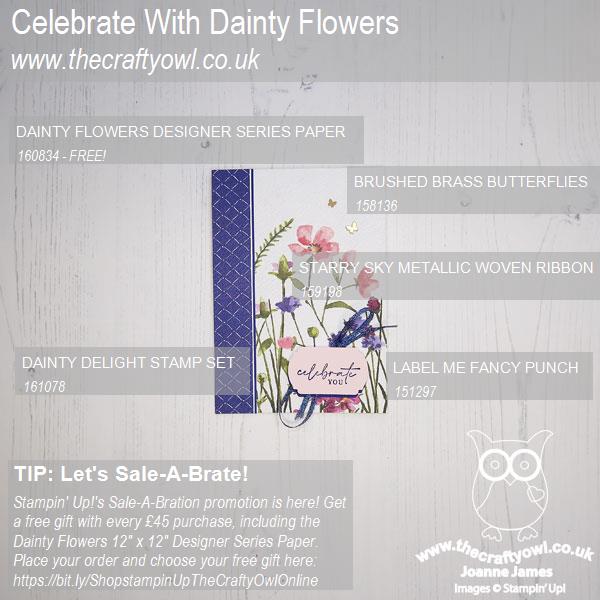
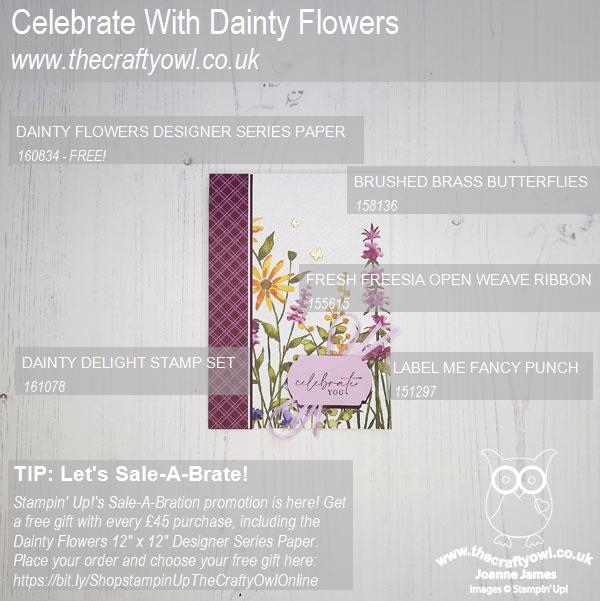
Dainty Flowers - There's a fabulous sheet of paper in the Dainty Flowers pack that has a faux-watercolour print of wildflowers along two sides, which is perfect for cutting into 6 to make multiple cards; this is hat I used for the main panel on my card. I would say it looks like I painted it, but who am I kidding?! I paired it with a contrasting strip in Starry Sky that is another of the patterns in this pack for the card above; for my second card, I picked up the purples and used a piece of Regals DSP in Blackberry Bliss for the border edge:


This paper is beautiful and all the better for being FREE during Sale-A-Bration with any £45 purchase. Gotta love a freebie!

Dainty Delight - The sentiment on both cards is from the Dainty Delight stamp set, part of the Dainty Delight bundle that the paper coordinates with - you can find it on page 55 of the mini catalogue.  

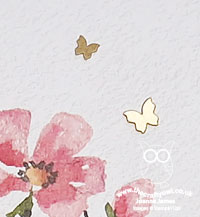
Label Me Fancy - I added my sentiment to a simple punched label courtesy of the Label Me Fancy punch. A simple twist of ribbon and a couple of brushed brass butterflies complete each card. In the photos below you can see the faux texture of the watercolour paper - so realistic:


And here's the purple version:


Here's a photo of both cards together - which one do you prefer? 


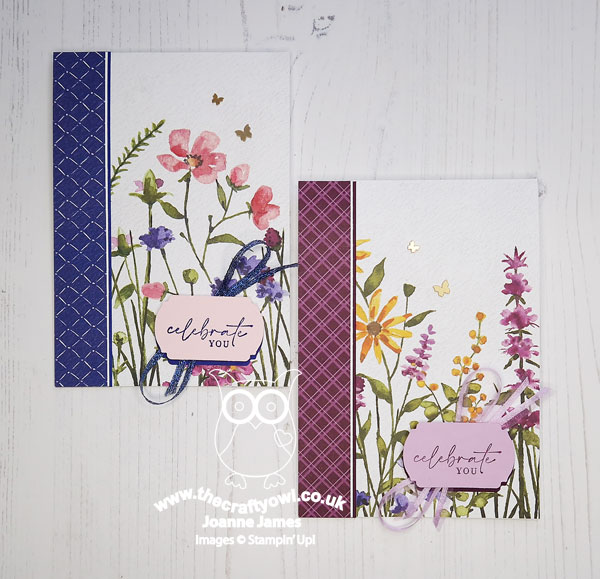
Do leave me a comment below - I'd love to know what you think. I honestly love them both - this paper is so pretty! Very little stamping on today's cards - the paper definitely does all the heavy lifting.

Here is the visual summary of the key products used on today's project for you to pin for easy reference:


You can see all of my 'How To' summaries on my 'How To - Tips and Techniques' Pinterest board in case you've missed any. 

Here's a summary of our challenge rules:

  • Create any card, scrapbooking page, 3D project or packaging project that fits the challenge.
  • Please include the challenge graphic and link back to the challenge in your blog post. Turn off word verification so we can leave you lots of lovely comments. Make sure you link the post not the whole blog to the Linky. Use #AYSIXXX when uploading to a public gallery.
  • If you’re unsure about ‘the rules’, check the details under the Challenge Guidelines tab on the As You See It Challenge homepage.
  • In a sketch challenge, you are welcome to rotate or flip a sketch. You can replace shapes used such as substituting a circle panel for a square panel. However, we must be able to still see the basis of the original sketch in your finished product.
We look forward to seeing your creations in the AYSI gallery.

Enjoy your day; I'm looking forward to hosting an informal open house this morning to share some of my favourite things from Sale-A-Bration and the new mini catalogue - you can be sure today's cards will feature! I'll be back tomorrow with another project. Until then, happy stampin'!


Stampin' Up! Supplies Used:

Table built using Product Table Builder by The Crafty Owl - Independent Stampin' Up! Demonstrator.

Layered With Kindness Birthday Card

by Joanne James12. May 2020 10:00

Today I'm sharing a card using this week's soft colour combo over at Just Add Ink this week:

I thought these muted colours would make for a clean and simple(ish) birthday card using the retiring Layered With Kindness stamp set  - take a look:


Here's the low-down on today's card:

Layered With Kindness - The Layered With Kindness stamp set is one of those that is great for quick cards, both one layer cards and used in conjunction with the co-ordinating punches as I have here to create something with a little more interest and dimension. The images are distinctive stamps so have the illusion of dimension which is great for adding depth. I layered the leaf stems and a few flowers in the challenge colours, before adding my labels. 

Label Me Lovely - and Fancy - Label punches are always useful and both the Label Me Lovely and the Label Me Fancy punches are great with this set which has sentiments designed to fit and can be layered, but also with a variety of other sets too. They are also great for tags for gift packaging, the Label Me Fancy punch in particular, which has a handy slit and hole on either side of the punch to enable you to add thread or ribbon easily. Whilst the stamp set will be leaving us at the end of the month, the punches are here to stay - great news for Christmas packaging! 

Finishing Touches - I added a sprinking of pink sequins, some split ribbon and used my Stampin' Write Rococo Rose marker to add a fine mist of pink splatters across my card front for a trio of finishing touches to my otherwise simple card. 

Here is the visual summary of the key products used on today's project for you to pin for easy reference:


You can see all of my 'How To' summaries on my 'How To - Tips and Techniques' Pinterest board in case you've missed any. 

I am hoping to get some more crafting and class prep done today, including getting ready for tomorrow's demonstration session. We are revisiting Stamparatus techniques this week; yesterday was great and resulted in an afternoon of fabulous creations by the ladies on the call who left fired up and inspired - our group was a hive of activity all afternoon, which left me feeling thrilled that they enjoyed the session so much. I also have some ironing to finish and continue my hunt for an earring I lost on Sunday; I didn't leave the house all day so I know it's here somewhere, but so far no luck! Enjoy your day and I'll be back tomorrow with another project. Until then, happy stampin'!


Stampin' Up! Supplies Used:

Table built using Product Table Builder by The Crafty Owl - Independent Stampin' Up! Demonstrator.

Time For Confetti Birthday Card

by Joanne James25. February 2020 09:00

Today I'm sharing a card that uses both the CAS(E) This Sketch layout and the theme over at Time Out this week:


I have a combination of old and new for my card today! I've been desperately trying to increase my stash of on-hand birthday cards and use up some of my stash of retired designer series paper so the above challenges gave me the perfect opportunity - take a look:


Here's the low-down on today's card:

So Sentimental - I used the 'This calls for confetti!' stamp from the new 'So Sentimental' stamp set as the starting point for today's card, picking up on the theme over at Time Out and paired this with some retired Picture Perfect Party DSP that has a fun scattered confetti photographic print for a fun birthday party vibe - which just so happened to perfectly fit the CAS(E) This Sketch layout too.

Label Me Fancy - I heat embossed my sentiment into silver onto some Pool Party cardstock and punched it out with the new Label Me Fancy punch, and backed it with one in a contrasting colour that I'd split in half so that you can just see a border. I added a tiny piece of retired ribbon from my scrapbox for a little extra detail (this ribbon is currently available on the Clearance Rack if you would like to stock up on a ribbon bargain!). 

Sending You Thoughts - I used the Sale-A-Bration free stamp set, Sending You Thoughts, for the inside of my card, along with a little sprinkle of stamped confetti to finish off my celebratory card:

I also added the offcut of my DSP to the envelope flap for a little extra envelope decoration. So a super simple card that meant I could run off a few to add to my stash of birthday cards for when the James Juniors need one for a friend in a hurry!

Here is the visual summary of the key products used on today's project for you to pin for easy reference:


You can see all of my 'How To' summaries on my 'How To - Tips and Techniques' Pinterest board in case you've missed any. 

So it's Shrove Tuesday today - hands up who's having pancakes for dinner this evening? I have been badgered all the way to school today to make some this evening - but just to whet your appetite, here are some American-style ones I had for brunch at the weekend - can you spot the 'hidden Mickey' (or Minnie, with the bacon bow!) - fellow Disney fans, this one is for you!


They were delicious! Enjoy your day and I'll be back tomorrow with another project. Until then, happy stampin'!


Stampin' Up! Supplies Used:

Table built using Product Table Builder by The Crafty Owl - Independent Stampin' Up! Demonstrator.

Mini Catalogue

BROWSE THE CATALOGUE

The mini catalogue is now live! Read and download your copy here.

Shop Online

Access my online shop 24 x 7, 365 days of the year:

Current March hostess code:

S9F2XJJW

Shop Online

Join My Team

It's always a great time to join Stampin’ Up! New team members can get £130 worth of products for only £99 + free business supplies + free shipping + all the fun being a part of Stampin’ Up! Stampin' Up! has something for everyone: join my growing team and benefit from my support to enjoy Stampin' Up! however you choose.

If you're interested, call me for a chat to understand how I can help you realise your goals. Alternatively, if you have already decided to sign up and you just can't wait, please click here for the link to the online form where you can sign up and order your starter kit right away! 

Latest Kit!

Stampin Cut and Emboss

The Rock Legend Kit has all you need to make 8 cards with coordinating envelopes. Along with the new Panda Friends Kit, both are available from January 4th for just £14 each - get yours here!

2023-24 Annual Catalogue

BROWSE THE CATALOGUE

Click on the catalogue for a full list of current SU! supplies - if you would like to order any of the items featured, please drop me a line at [email protected] or give me a call on 07773 421446 - I'd be happy to help.

New Online Exclusives

There will be new products available exclusively in the online store from 5 March - check them out here.

About Me

Hi I'm Joanne and live in Northampton and when I'm not looking after my husband and two beautiful children, am an avid crafter with a passion for all things Stampin' Up!

I must confess that I have never been a big rubber stamper - until I discovered Stampin' Up! that is. I love the fact that I can get such great results with co-ordinating stamps, inks, papers and punches - the possibilities are endless! Join me on my stamping journey as I share the things I love and be inspired to create amazing things yourself!

Follow Me

Monthly Newsletter

Box Builder

Click the button above to use Box Buster to create your custom box design using the Envelope Punch Board!

Kits Collection Now Available!

Stampin Cut and Emboss

The new Kits Collection from Stampin' Up! is now available!

Click here to see the current kits available and order yours online today.

I Design For


Stampin' Up Stuff

This is my personal blog and is not endorsed by Stampin’ Up! I hope you find it a plentiful source of ideas and personal inspiration but please don't copy my designs for contest submission or use for classes, publication or sale without express permission.