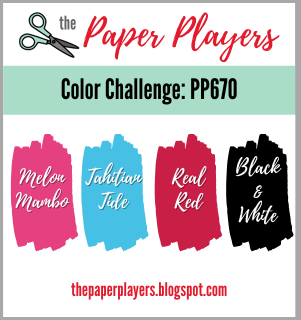
Today it's Sunday and time for this week's new challenge over at The Paper Players! It's the turn of the fabulous Claire to host this week and she has a bright colour challenge for us to work with:
.png)

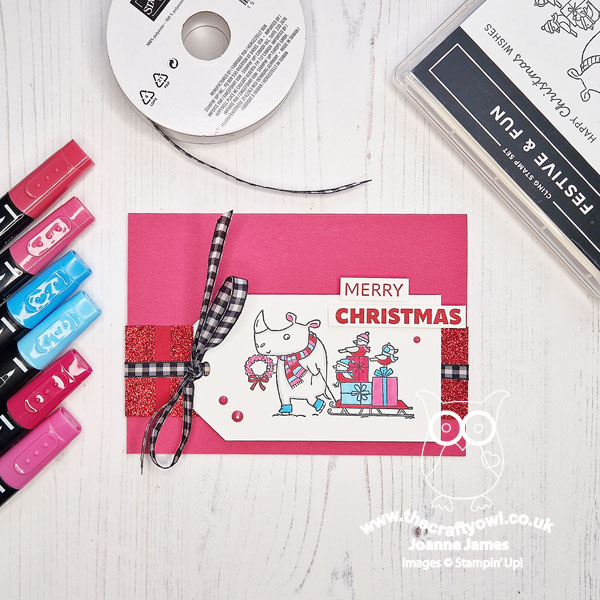
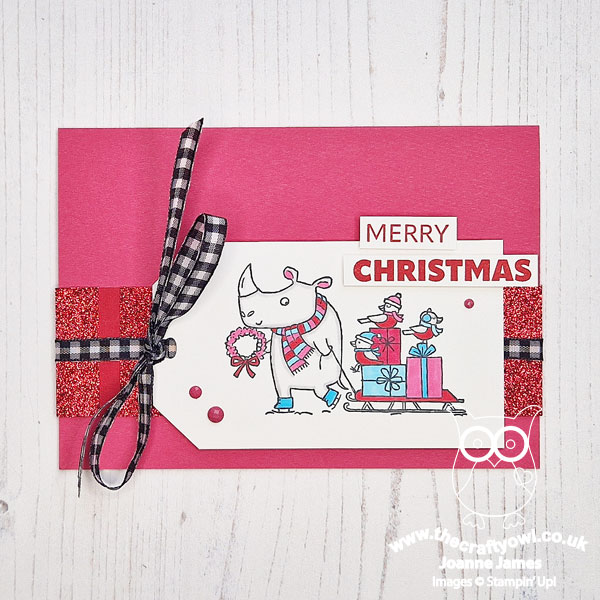
I am still in festive card making mode, so thought I would use these colours for a card to play along with the 'Christmas' theme over at Inspire.Create and the the 'Christmas Animals (with hats)' theme over at Double D Challenges and create another card using the 'Festive & Fun' stamp set - take a look:
Here's the low-down on today's card:
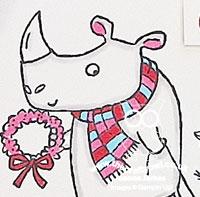
I used a Melon Mambo card base and added a strip of Real Red cardstock that I had added some strips of (retired) red glimmer paper to, then set about creating my Christmas tag. I decided to use the fun image of the rhino pulling a sleigh full of Christmas gifts and robins, and created my tag by just snipping off the corners of my rectangle - no die required! I added just a hint of the three main challenge colours to my design using my Stampin' Blends markers; slightly unconventional, but I think it works?
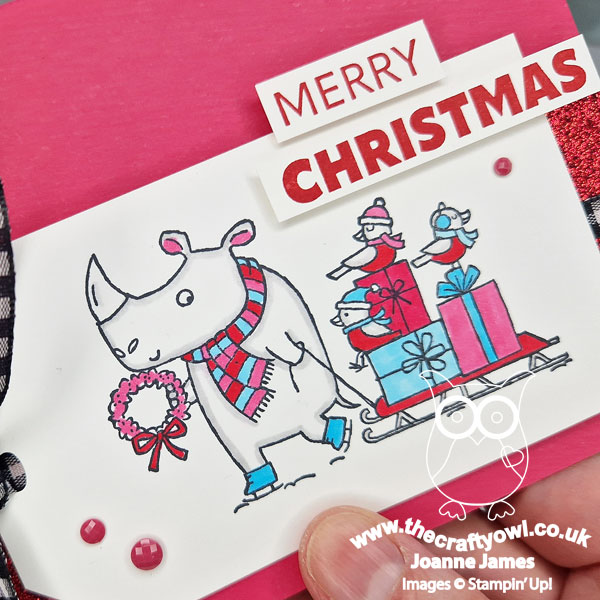
I added a trio of enamel dots and a sentiment fussy cut from the 'Merry Christmas To You' stamp set, before incorporating my black and white with my trusty gingham ribbon, wrapped around the card and tied to my tag with a bow. Such a bold colour scheme was asking for a similarly bold sentiment inside my card too:

What do you think? I really rather like these colours for a Christmas card - it's fun to ring the changes with an unconventional colour palette. Are you done with your Christmas card making yet? I've written most of mine now, so any more Christmas makes will be heading into the 2024 pile!
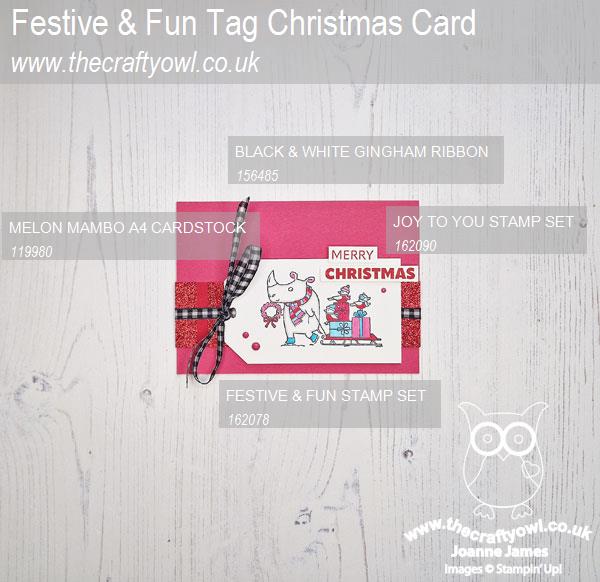
Here is the visual summary of the key products used on today's project for you to pin for easy reference:
You can see all of my Product and 'How To' summaries on my 'How To - Tips and Techniques' Pinterest board in case you've missed any.
Before you reach for your ink and papers, check out what our amazing team has created to inspire you this week:
The Paper Players Design Team
Here's a quick recap of our challenge rules:
1. Create a new paper project
2. Upload your creation to your blog with a link back to us and provide a direct link to the post featuring your challenge submission.
3. Please link your card to no more than four challenges, TOTAL.
4. Have FUN!
This will be our last Paper Players challenge of the year, and is also the time when we say goodbye to our wonderful 2023 guest designers, Suzy, Fran and Tara. Ladies you have been amazing - we will miss you! We have some exciting new guests lined up for 2024, so keep an eye out on The Paper Players blog for a future announcement!
Enjoy your day; I am recovering from the festivities of last night's office Christmas party (Jason's, not mine!) and we are collecting the eldest of the James Juniors from university, having just completed her first term - that just flew by! I will also be packing for a last minute pre-Christmas vacation - more on that another time! So all in all, a busy day. I'll be back soon with another project but until then, happy stampin'!
Stampin' Up! Supplies Used: