Gorgeously Made Masked Friendship Card TTT 220

by Joanne James3. August 2023 17:00

It's Thursday and time for a new challenge over at TicTacToe! It's the turn of Team X to host this week and the lovely Vicky is our featured designer this week. This is the fun board that we are playing along with: 


I went down the final column with ink blending/blues and greens/gems and had a go at creating a masked and blended background to highlight the foliage stamps in the Gorgeously Made bundle - take a look:


Here's the low-down on today's card:

I've been working a lot with the Gorgeously Made bundle lately as I've been working through ideas to include in this month's Gorgeously Made Create With Joanne and Jan Tutorial Bundle and this is one the ideas that I was experimenting with that didn't make it into the tutorial itself. I was inspired by the sketch over at Sunday Stamps and whilst ordinarily I would have gone with a large diecut sentiment, I decided to turn the sketch on its head and go for something vertical that used one of the small sentiments in the set, but in a way that highlighted it in an unusual way. When using a bundle for the first time, I like to consider less obvious ways to use it and this card includes one of those. Instead of adding the sentiment to my card by stamping it onto white cardstock, diecutting and adding with dimensionals, I created four label pieces from diecut masking paper and positioned these down the middle of my white panel. I then blended my trio of blue and green inks and stamped my foliage on top of my blended background, going off the edge and over the masked areas - I recommend you use your Stamparatus for this so that you get a good strong black image. When complete, I removed the masking paper labels to leave four white apertures that I could then stamp my sentiment into:

I added a sprinkling of coloured gems that picked up the colours of my blended background, but if you don't have coloured gems that match you chosen background colours, you can custom colour clear rhinestones with Stampin' Blends in corresponding colours. So what do you think of today's card? This is a good way of minimising layers and a neat way to use label dies in a creative way and this style of card would work in other colourways too.


Remember if you would like more ideas of ways to use the Gorgeously Made bundle, if you purchase the bundle from either myself if you're in the UK and Europe (or Jan if you're based in New Zealand) during either August or September, you will receive a copy of our tutorial bundle with instructions for four projects and access to our exclusive customer Facebook Group - for more details read about it in yesterday's post here.

Here is the visual summary of the key products used on today's project for you to pin for easy reference:


You can see all of my Product and 'How To' summaries on my 'How To - Tips and Techniques' Pinterest board in case you've missed any. 

A tictactoe board offers so many creative possibilities - how does this week's board inspire you? Why not have a go? We would love to see you in the gallery and who knows - you might be selected for Designer's Choice and be eligible to be a guest designer on a future challenge. 

Enjoy your day; I'll be back tomorrow with another two projects; in addition to my fortnightly Festive Friday post, I am also the Guest Designer over at CAS On Friday. Until then, happy stampin'!


Stampin' Up! Supplies Used: 

Table built using Product Table Builder by The Crafty Owl - Independent Stampin' Up! Demonstrator.

Charming Landscapes Magic Is In The Air Christmas Pair AYSI 279

by Joanne James15. July 2022 12:00

Today I'm sharing my design team card for our new challenge over at As you See It where it's time for a colour challenge, with this week's colour palette chosen by me:
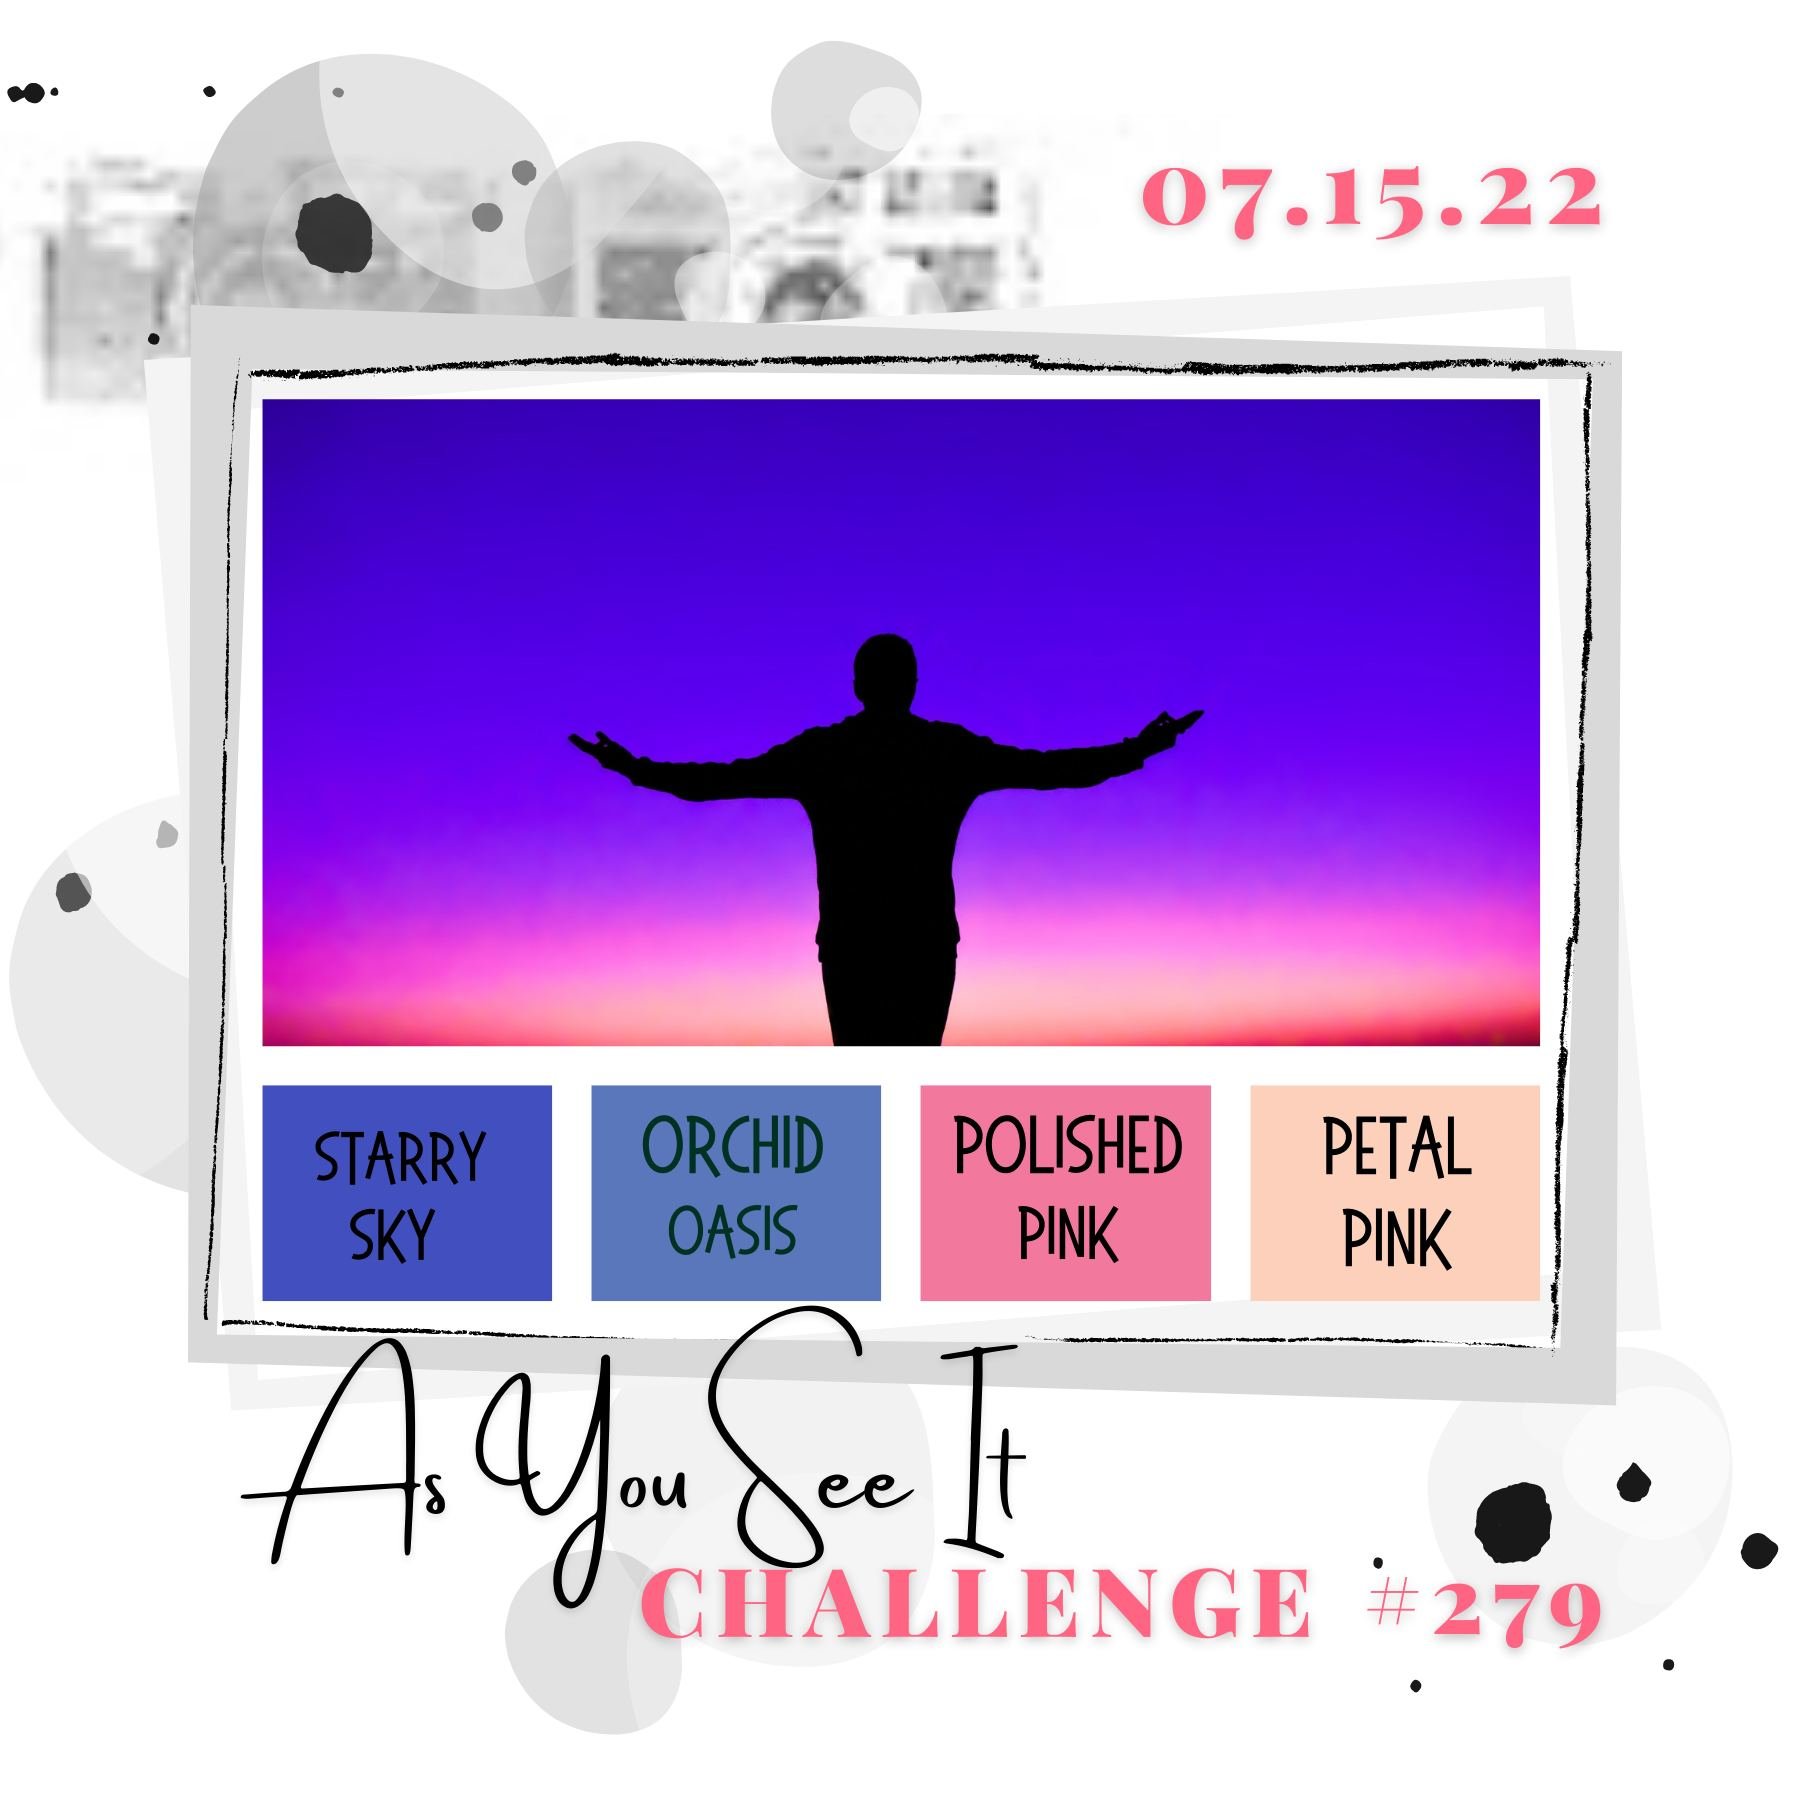
 

I loved the sky in the inspiration photo, so thought I would try and recreate it on a couple of Christmas cards. I grabbed my ink pads and blending brushes, along with some new embossing folders and this is what I came up with - take a look:
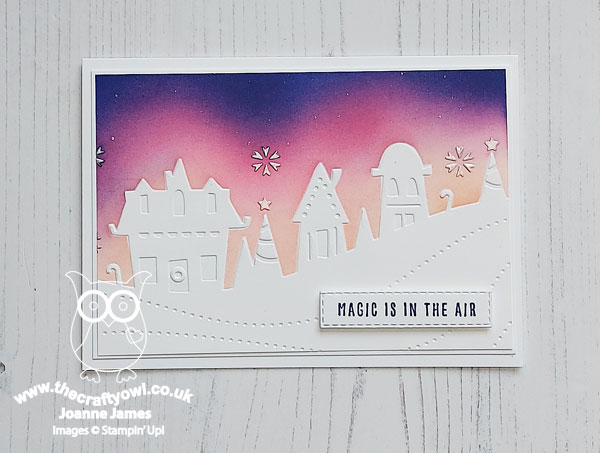
 

Here's the low-down on today's card:

Charming Landscapes - Both of today's cards feature a panel embossed with each of the new Charming Landscapes embossing folders. These folders are great for adding embossed background layers to your cards, but I wanted to pair them with a bold, blended sky and make them the main feature. One includes a mountain scene, the other a village scene - I couldn't decided which one to use so having started with the village scene, I decided to create a second one using the mountain scene too:
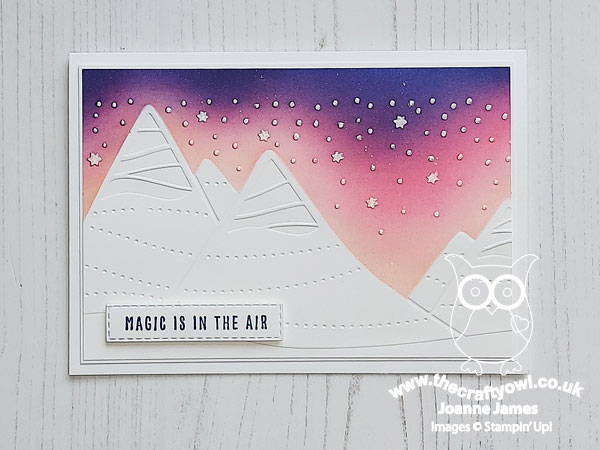
 

Blended Sky - I used all four of the challenge colours to create my blended sky, starting with the lightest colour pink then progressing to the darkest blues. To pick out the snowy/starry details of the embossing across the sky, I them too a dry aquapainter and painted each of the embossed elements with some (retired) Frost White shimmer paint; if you don't have any of this, you could use a white craft re-inker or even the new pearlised enamel effects on page 59 of the seasonal catalogue. This was a time-consuming process, but so worth it to pick out the detail. I also flicked the sky with my clear Wink of Stella pen for a subtle extra sparkle:
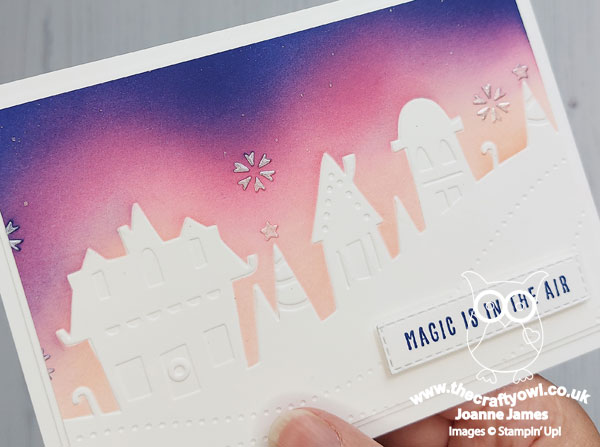
 

Aren't these skies just so pretty?
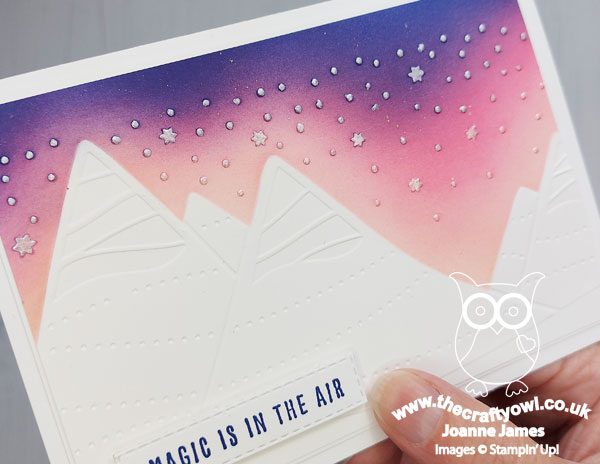
 

Masking Magic - In order to keep my blended colour to the sky portion of my scene only, I created masks for each embossing folder, by running it through my Big Shot with some acetate window sheet and using a scissors to cut around the mountains/houses. I attached each to my white embossed cardstock and held in place before adding my ink colours, then removed when complete. These can be easily cleaned and re-used, which is a good job; I like these cards so much I can't wait to create more using different colour combinations. I added a simple sentiment from the 'Christmas To Remember' stamp set and another to the inside of my card to finish. Here are both of my cards together - which one do you prefer?
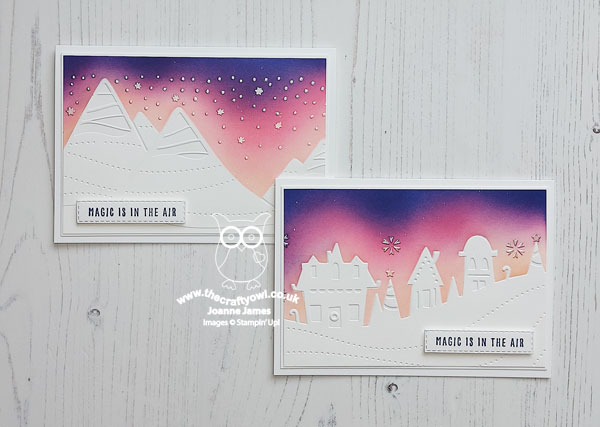
 

Do leave me a comment below - I'd love to hear your thoughts.

Here is the visual summaries of the key products used on today's projects for you to pin for easy reference:
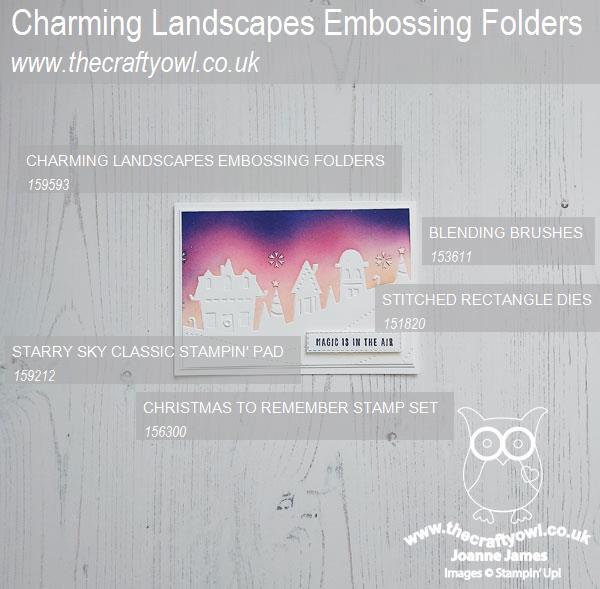
 

And the second one:
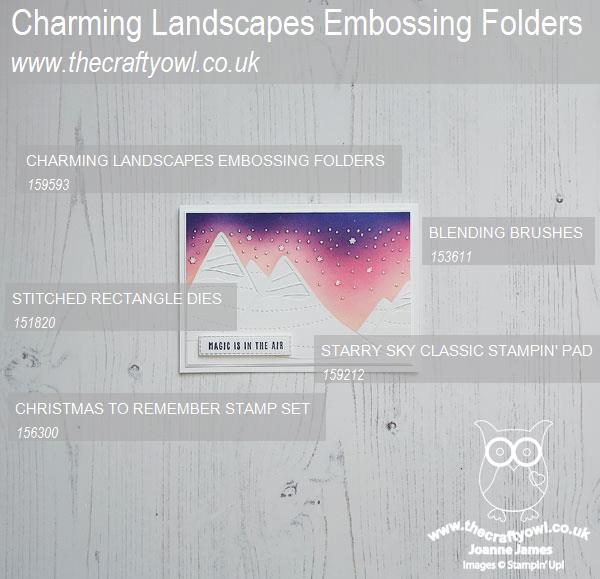
 

You can see all of my 'How To' summaries on my 'How To - Tips and Techniques' Pinterest board in case you've missed any. 

I was a little concerned that the team wouldn't take to my choice of colours this week, but I can honestly say they've outdone themselves - you should definitely check out their cards this week. 

Here's a summary of our challenge rules:

  • Create any card, scrapbooking page, 3D project or packaging project that fits the challenge.
  • Please include the challenge graphic and link back to the challenge in your blog post. Turn off word verification so we can leave you lots of lovely comments. Make sure you link the post not the whole blog to the Linky. Use #AYSIXXX when uploading to a public gallery.
  • If you’re unsure about ‘the rules’, check the details under the Challenge Guidelines tab on the As You See It Challenge homepage.
  • In a colour challenge, black or other neutral can be used in outlines and sentiments but no other colours should be included. Stampin’ Up colours are used for reference but colours that are a close match are welcome.
We look forward to seeing your creations in the AYSI gallery.

Enjoy your day and I'll be back tomorrow with another project. Until then, happy stampin'!


Stampin' Up! Supplies Used:
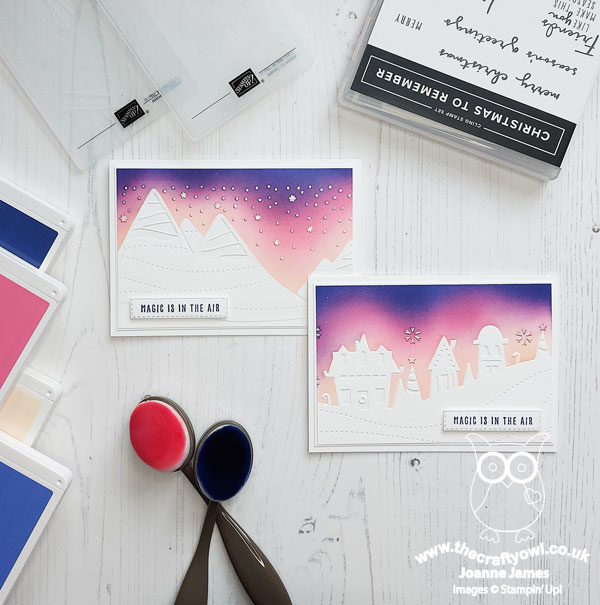
Table built using Product Table Builder by The Crafty Owl - Independent Stampin' Up! Demonstrator.

Mini Catalogue

BROWSE THE CATALOGUE

The mini catalogue is now live! Read and download your copy here.

Shop Online

Access my online shop 24 x 7, 365 days of the year:

Current April hostess code:

VDKNV7BH

Shop Online

Join My Team

It's always a great time to join Stampin’ Up! New team members can get £130 worth of products for only £99 + free business supplies + free shipping + all the fun being a part of Stampin’ Up! Stampin' Up! has something for everyone: join my growing team and benefit from my support to enjoy Stampin' Up! however you choose.

If you're interested, call me for a chat to understand how I can help you realise your goals. Alternatively, if you have already decided to sign up and you just can't wait, please click here for the link to the online form where you can sign up and order your starter kit right away! 

Latest Kit!

Stampin Cut and Emboss

The Rock Legend Kit has all you need to make 8 cards with coordinating envelopes. Along with the new Panda Friends Kit, both are available from January 4th for just £14 each - get yours here!

2023-24 Annual Catalogue

BROWSE THE CATALOGUE

Click on the catalogue for a full list of current SU! supplies - if you would like to order any of the items featured, please drop me a line at [email protected] or give me a call on 07773 421446 - I'd be happy to help.

New Online Exclusives

There are new products available exclusively in the online store from 5 March - check them out here.

About Me

Hi I'm Joanne and live in Northampton and when I'm not looking after my husband and two beautiful children, am an avid crafter with a passion for all things Stampin' Up!

I must confess that I have never been a big rubber stamper - until I discovered Stampin' Up! that is. I love the fact that I can get such great results with co-ordinating stamps, inks, papers and punches - the possibilities are endless! Join me on my stamping journey as I share the things I love and be inspired to create amazing things yourself!

Follow Me

Monthly Newsletter

Box Builder

Click the button above to use Box Buster to create your custom box design using the Envelope Punch Board!

Kits Collection Now Available!

Stampin Cut and Emboss

The new Kits Collection from Stampin' Up! is now available!

Click here to see the current kits available and order yours online today.

I Design For


Stampin' Up Stuff

This is my personal blog and is not endorsed by Stampin’ Up! I hope you find it a plentiful source of ideas and personal inspiration but please don't copy my designs for contest submission or use for classes, publication or sale without express permission.