Happy Saturday everyone! A mix of old and new today and not a card but some cute packaging which is perfect for this week's Global Design Project challenge:

Many of my readers know that the James family are keen vegetable growers and we have a small kitchen garden which keeps us supplied with fresh vegetables through the summer months. We also have a collection of fruit trees and last year for the first time I started making my own jam. one of my James Juniors is an absolute jam addict - given the choice, Ben would live on jam on toast - so much so, that his big sister once declared we should have called him 'Jam-in-Ben' rather than 'Ben-jam-in', something that sticks to this day!
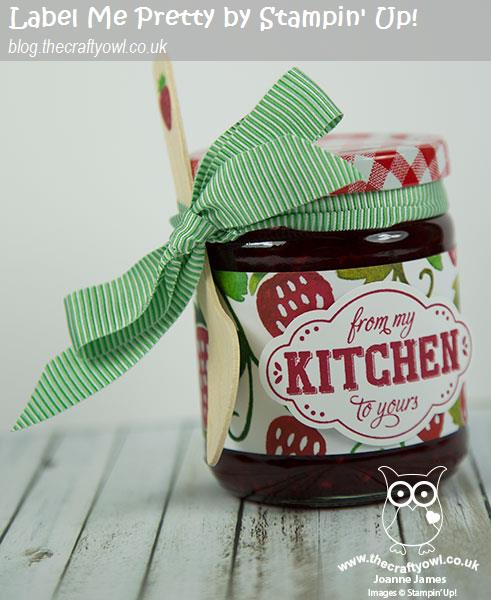
Anyway, I digress - making my own jam is a great way to make the most of our fruit and meet demand. I also love to give it away as a gift occasionally too and that's where today's project comes in; whilst Ben is all about the jam itself, if I'm gifting it I like to pretty up the packaging somewhat and there is a stamp set in the new catalogue that is perfect for me - take a look:

Here's the low-down on today's card:
Label Me Pretty - The new 'Label Me Pretty' stamp set is just perfect for me and anyone else how likes to preserve or cook and pretty-up their gifts for giving; the label I've used today works for any kind of produce. The set includes lots of other stamps too, that would work for other types of gift giving or on cards too - look out for more featuring those another day. Wondering how I got it so beautifully cut out too? That would be the co-ordinating Pretty Label Punch - love this! I will have my jams labelled in no-time!!
Fruit Stand - I paired my label with a band of strawberry-patterned Fruit Stand paper; a great pack with images of apples, pears lemons and peaches too. This is retiring 31 May though so if you want to add this to your jam jars you need to stock up soon!
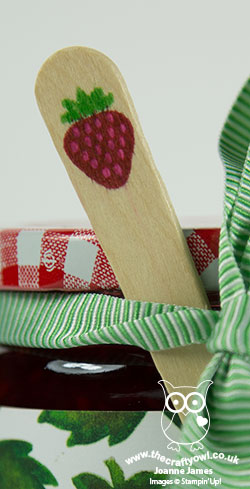
Add A Spoon - Lastly, I wanted to add a little something to my jar and added a little wooden spoon, stamped with a strawberry from the 'Cool treats' stamp set. This is a simple way to add a 'wow' to a plain spoon - and in the words of Ben, a great way to enable someone to tuck in to their jam as soon as they receive it! I simply tied it to my jar using some of the retiring Cucumber Crush 5/8" mini-striped ribbon - here's a close up of my spoon detail:
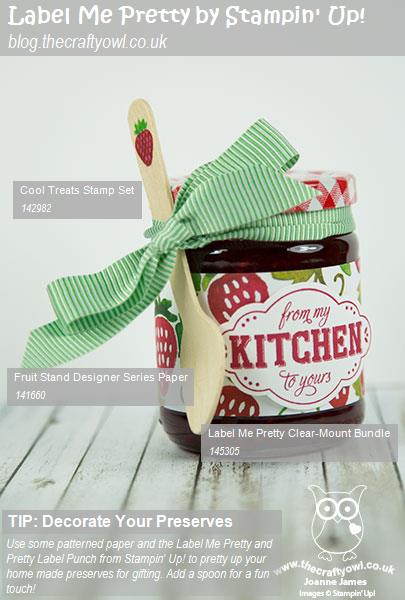
Here is the visual summary of the key products used on today's project for you to pin for easy reference:
You can see all of my 'How To' summaries on my 'How To - Tips and Techniques' Pinterest board in case you've missed any.
Given the recent addition of four chickens to the James Household, my next challenge is to use some of our eggs to create homemade lemon curd, one of Rebecca's favourite treats. Watch this space for some lemon-inspired packaging at some point later in the year! Oh and if Stampin' Up! could provide some raspberry-patterned paper it would also be much appreciated!!
I'll be back tomorrow with another project for this week's new challenge over at The Paper Players. We have a busy day today - Rebecca has a big swimming meet and is racing all day (at the time of writing, she has already achieved two 100m personal bests for her breaststroke and individual medley, so that is great news) and Ben has a football-themed birthday party to attend followed by his swimming lesson. Enjoy your day and until tomorrow, happy stampin'!
Stampin' Up! Supplies Used: