Frosted Medallions Snowflake

by Joanne James4. December 2016 09:00

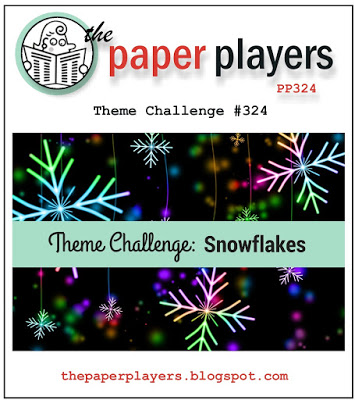
It's Sunday and time for a new challenge over at The Paper Players! It's the turn of our fearless leader the wonderful Nance to host this week and she has a fun wintery theme to get your creative juices flowing:


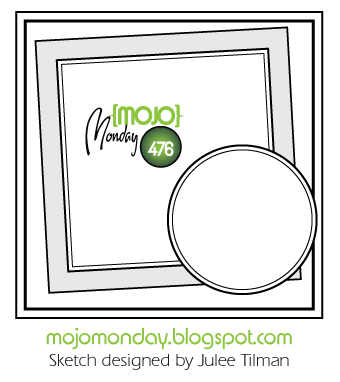
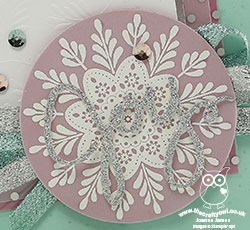
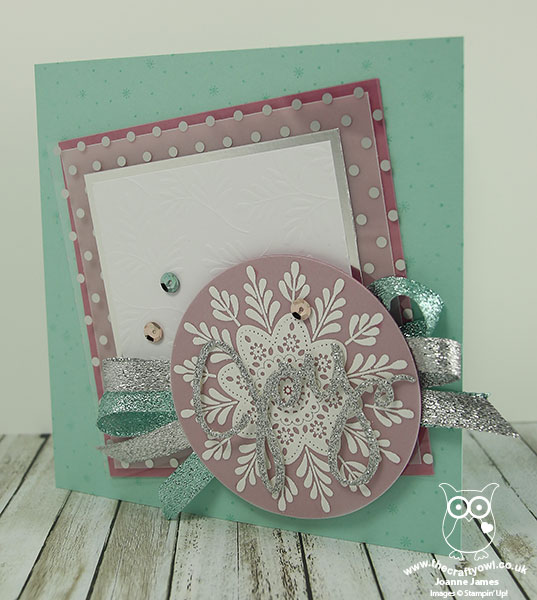
Use a snowflake (or two!) on your card. I decided that I wanted to feature the large frosted medallion snowflake from the stamp set of the same name on my card this week and this week's Mojo Monday sketch gave me the perfect layout - here's my card:


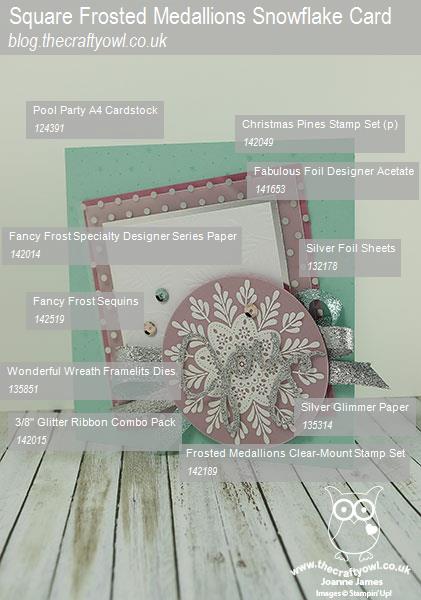
Here's the low-down on today's card:

All About The Layers - My card this week has 9 layers in total, rather a lot even by my standards! Can you spot them all? They are, in order: Pool Party card base, Sugarplum square panel, vellum square, Fabulous Foil Designer Acetate, silver foil, Fancy Frost Specialty DSP, Sweet Sugarplum circle, a vellum circle with the frosted medallion stamped in Versamark and heat embossed in white and lastly the word 'joy' cut out of silver glimmer paper with my Wonderful Wreath framelits. A lot of layers indeed, yet I think they all play a part in contributing to the balance of the card design.

Glitter, Glitter - I used lots of elements to add sparkle to my card, from the Fabulous Foil Acetate, to the glimmer paper and sprinkle of Fancy Frost sequins, along with a rather fancy bow in silver (current) and Pool Party (retired) glitter ribbon beneath my snowflake. This card is definitely not practical for posting, but will make a nice special one to be hand delivered. The snowflake/glitter combination means I am linking up with CAS-ual Fridays too where these are both the order of the day!

A Contemporary Colour Combination - you may recognise my colour combination this week as the one our very own lovely Nance used for her pines card last week - you can see her card here. This isn't a colour combination I would ordinarily choose for a Christmas card, and I did start out using just white, silver and Sweet Sugarplum, but I felt it needed something more. I decided to add in the Pool Party as it looked so great on Nance's card and voila - an altogether brighter card, so thank you Nance! If you like this colour combination, feel free to save it:


So only one main snowflake on my card, but it is a big one! That said, I did use the snowflake background stamp from the Pretty Pines stamp set on my card base to add a little background decoration, so there are lots more there too!

Here is the visual summary of the key products used on today's project for you to pin for easy reference:


You can see all of my 'How To' summaries on my 'How To - Tips and Techniques' Pinterest board in case you've missed any. 

Before you reach for your ink and papers, check out what our amazing team has created to inspire you this week:

The Paper Players Design Team
 
 
Here's a quick recap of our challenge rules:
 
1.  Create a new paper project
2.  Upload your creation to your blog with a link back to us and provide a direct link to the post featuring your challenge submission.
3.  Please link your card to no more than four challenges, TOTAL.
4.  Have FUN! 


I look forward to seeing what you create with our theme this week. We are off for our usual Sunday morning of sport, followed by a spot of lunch and then we are going to watch a basketball game this afternoon - go Northampton Neptunes!

Enjoy the rest of your weekend as it will be over all too quickly; I'll be back soon with another project; until then, happy stampin'!


Stampin' Up! Supplies Used:

Table built using Product Table Builder by The Crafty Owl - Independent Stampin' Up! Demonstrator.

Framed All is Calm Advent Calendar Using Tiny Treat Boxes

by Joanne James4. November 2014 23:00

A late post from me today as I've spent a lovely day crafting with friends, followed by James family piano lessons this evening (3 out of 4 of us are learning!) so have only just got around to it. Our craft session was fun - we finished off some projects we started a little while ago, which always gives a good sense of achievement. With Christmas creeping ever closer, today I thought I would share with you the advent calendar I made for the James juniors, which is a case of a project by the lovely Julie Kettlewell. I love the Tiny Treat Boxes in this year's Stampin' Up! seasonal catalogue, which are of course perfect for making advent calendars. The sample in the catalogue shows just how easy it is to make something to a basic design, however having seen Julie's project a little while ago - you can see her original project here - I knew I wanted to create something similar. So without further ado, here is my framed advent calendar in all its glory:

Isn't it beautiful?! It is framed in a 20" frame/50cm, so is a substantial piece in terms of size and it makes a real statement. I chose to make mine using the All is Calm Speciality Designer Series Paper, here are some close ups:

This is the central panel, with a sentiment stamped using the Epic Alphabet and some trees punched using the Tree Punch and decorated with some frosted sequins.


Each of the boxes is covered on 5 sides using the All is calm DSP, then a number label made from a layered section using a 1 3/4" scalloped circle punch and a 1 3/8" circle punch, and numbers cut out of Dazzling Diamonds Glimmer Paper using the Perfect Print Numbers Bigz Die and the Big Shot.

This is a great project to showcase all of the lovely papers within the All is Calm DSP stack.

I adhered my boxes so that the flaps would open upwards and put my numbers in order from one through twenty four, however you could 'mix and match' if that's more your style. Each pack of treat boxes contains 25 boxes, so you have one spare to package an extra special treat for Christmas Day if that's your thing. I'm really pleased with how my calendar turned out and am busy acquiring lots of little treats to fill my boxes for the month of December. I can see this project becoming a real heirloom piece that we bring out year after year.

Hope you like today's project; back tomorrow with the new Wednesday Weekly Deals and my Design Team post for this week's challenge over at Colour Me...! Until then, happy stampin'!


Stampin' Up! Supplies Used:

Table built using Product Table Builder by The Crafty Owl - Independent Stampin' Up! Demonstrator.


Mini Catalogue

BROWSE THE CATALOGUE

The mini catalogue is now live! Read and download your copy here.

Shop Online

Access my online shop 24 x 7, 365 days of the year:

Current April hostess code:

VDKNV7BH

Shop Online

Join My Team

It's always a great time to join Stampin’ Up! New team members can get £130 worth of products for only £99 + free business supplies + free shipping + all the fun being a part of Stampin’ Up! Stampin' Up! has something for everyone: join my growing team and benefit from my support to enjoy Stampin' Up! however you choose.

If you're interested, call me for a chat to understand how I can help you realise your goals. Alternatively, if you have already decided to sign up and you just can't wait, please click here for the link to the online form where you can sign up and order your starter kit right away! 

Latest Kit!

Stampin Cut and Emboss

The Rock Legend Kit has all you need to make 8 cards with coordinating envelopes. Along with the new Panda Friends Kit, both are available from January 4th for just £14 each - get yours here!

2023-24 Annual Catalogue

BROWSE THE CATALOGUE

Click on the catalogue for a full list of current SU! supplies - if you would like to order any of the items featured, please drop me a line at [email protected] or give me a call on 07773 421446 - I'd be happy to help.

New Online Exclusives

There are new products available exclusively in the online store from 5 March - check them out here.

About Me

Hi I'm Joanne and live in Northampton and when I'm not looking after my husband and two beautiful children, am an avid crafter with a passion for all things Stampin' Up!

I must confess that I have never been a big rubber stamper - until I discovered Stampin' Up! that is. I love the fact that I can get such great results with co-ordinating stamps, inks, papers and punches - the possibilities are endless! Join me on my stamping journey as I share the things I love and be inspired to create amazing things yourself!

Follow Me

Monthly Newsletter

Box Builder

Click the button above to use Box Buster to create your custom box design using the Envelope Punch Board!

Kits Collection Now Available!

Stampin Cut and Emboss

The new Kits Collection from Stampin' Up! is now available!

Click here to see the current kits available and order yours online today.

I Design For


Stampin' Up Stuff

This is my personal blog and is not endorsed by Stampin’ Up! I hope you find it a plentiful source of ideas and personal inspiration but please don't copy my designs for contest submission or use for classes, publication or sale without express permission.