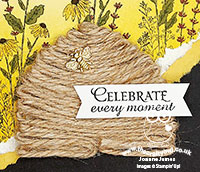
Dragonfly Garden Floating Frame Technique

by Joanne James24. May 2021 20:37

Happy Monday everyone! Today was class day so my day has been a busy one. I'm just popping in to share a couple of my class cards that I made using this week's Color Throwdown colours:

We were using the Dragonfly Garden stamp set and co-ordinating Dragonflies punch and one of the things I wanted to do today was to teach my class ladies how to create a card using the 'floating frame' technique. So this actually means I have two cards for you! Here's the first one: 


And here's the second one, featuring the outer frame element:


 Here's the low-down on today's card:

Floating Frames - The floating frame technique is really easy to create with a few basic tools: some 'Press and Seal' food wrap or similar, a framelit - I used my Rectangle Stitched Framelits Dies - and lots of dimensionals! You simply stamp and punch/diecut your images, lay them out, cover with Press and Seal, trim to frame size and cut out your central piece, before adhering dimensionals to the back of the diecut pieces and adhering to your chosen card base. Finally you remove the Press and Seal and your floating shapes remain in place. 

Dragonfly Garden - I used a combination of large punched dragonflies in the three challenge colours and interspersed them with smaller white ones to fill in the gaps. The dragonflies are a great shape and size for a floating frame as they are easily identifiable even when only partially visible:


Frame It - For the central portion, I added a rectangular border and heat-embossed sentiment:

Lastly, here's a photo of both cards together - which one do you prefer?


I think I like the one with the central detail and coloured frame best, but I like the other one too - it's a tough call!

Here is the visual summary of the key products used on today's project for you to pin for easy reference:


You can see all of my 'How To' summaries on my 'How To - Tips and Techniques' Pinterest board in case you've missed any. 

Enjoy your evening and I'll be back tomorrow with another project. Until then, happy stampin'!


Stampin' Up! Supplies Used:

Table built using Product Table Builder by The Crafty Owl - Independent Stampin' Up! Demonstrator.

Dragonfly Garden Meadows and Bees TTT114

by Joanne James20. May 2021 17:00

It's Thursday and time for a new challenge over at TicTacToe! It's the turn of Team X to host this week and I am your featured designer this week! This is the fun board that I came up with for us to play along with: 
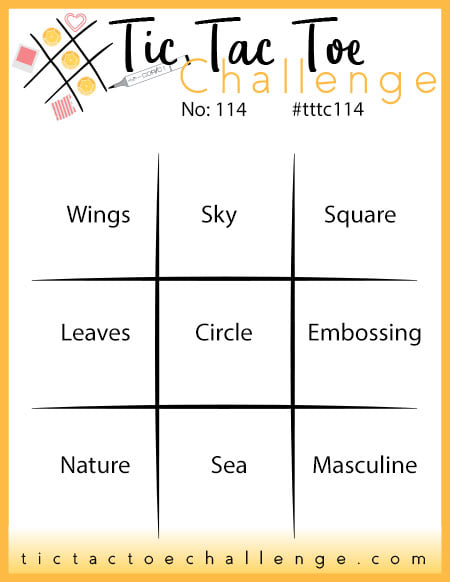
    

So many ways that I could have gone with my board this week, but I eventually settled with the first column and wings/leaves/nature as the basis for my card. I was also inspired by the wonderful inspiration photo over at The Card Concept this week in more ways than one - more on that below! Firstly, here's the card I came up with - take a look:
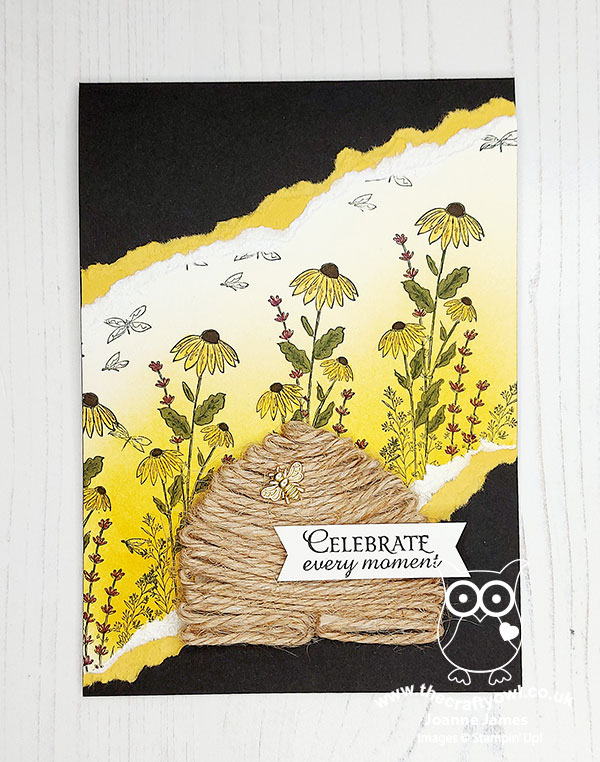
 

Here's the low-down on today's card:

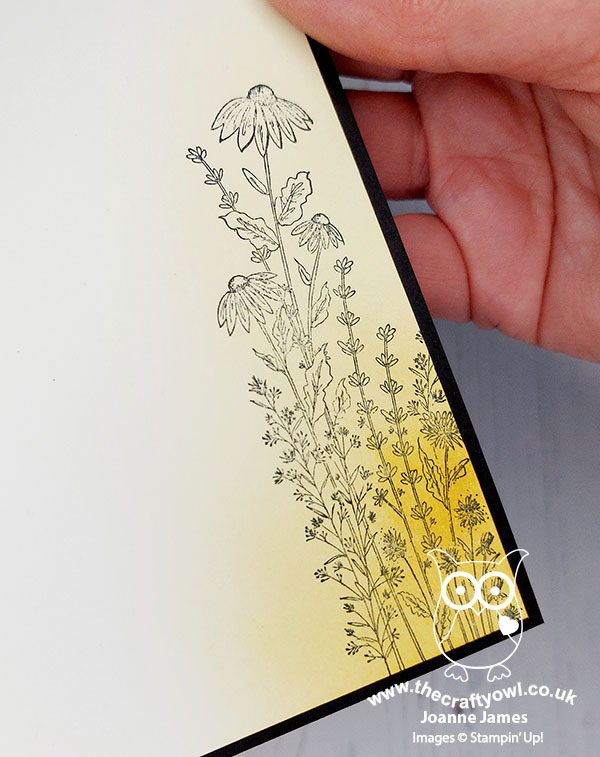
Dragonfly Garden - I have a class with the Dragonfly Garden bundle next week so have been working a lot with this set in recent weeks and I thought it would be perfect to create a meadow-style background for my beehive today. I stamped the long florals in a repeating pattern and then blended a trio of yellow inks across my panel, before tearing my edges and adding some additional colour to the flowers with my Stampin' Blends, reflecting the yellow black-eyed susans and the purple florals in the Card Concept photo (leaves and nature on the TTT grid - check!). I also added some outline blooms and a little ink blending to the inside of my card:
 

A Skep For A Bee - In addition to the florals, I was draw to the skep and the bee-decorated plates in the inspiration photo. Skeps are traditionally made of straw, so I used a retired die from the Detailed Bee Dies set to create an outline, covered it in a self-adhesive sheet then took some retired jute twine and created my very own rustic-looking skep. Of course I couldn't have a skep without a bee - and a beautiful gold bumblebee trinket was the perfect finishing touch (and gave me 'wings' for my grid)! Whilst bee skeps are often seen in kitchen/ceramic/artistic designs, did you know in many countries it's actually illegal to keep bees in skeps? This is because the bees cement their combs inside their skeps and they can't be removed and inspected for diseases. In addition, when the beekeeper removes the honey the bees are either killed or made homeless, which isn't the case with more modern box hives; so keeping skeps as a decorative feature seems much more sensible!
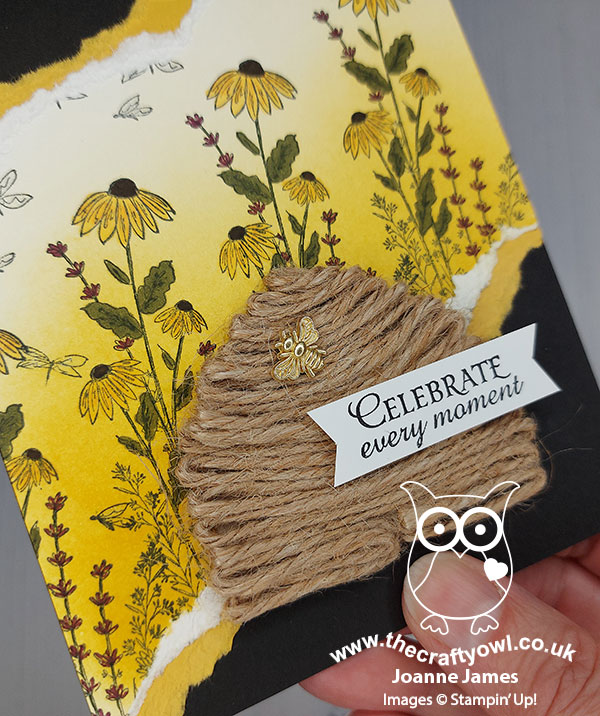
 

A Change In Style - My regular readers will now that this card is something of a departure from my usual clean and layered style. The ink blending, torn edges, textured dimensional skep and bee make my card much more 'shabby chic' (there are some great design definitions over on the Card Concept website which I highly recommend you check out if you're interested in this kind of thing). So what do you think - did I pull it off? Whilst this is a little different for me, I did have a lot of fun working outside of my comfort zone for a little while.

Here is the visual summary of the key products used on today's project for you to pin for easy reference:
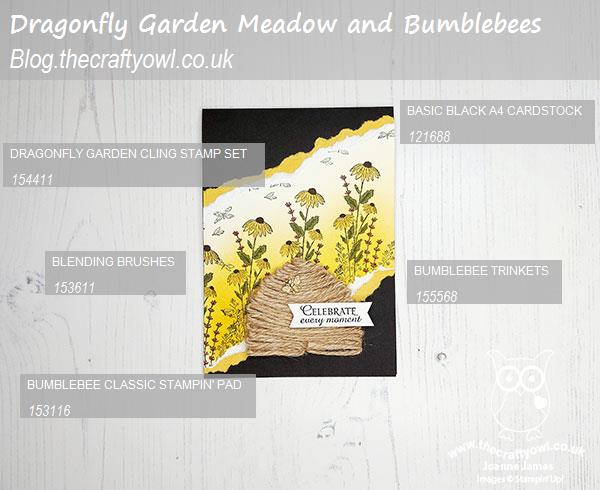
 

You can see all of my Product and 'How To' summaries on my 'How To - Tips and Techniques' Pinterest board in case you've missed any. 

A tictactoe board offers so many creative possibilities - how does this week's board inspire you? Why not have a go? We would love to see you in the gallery and who knows - you might be selected for Designer's Choice and be eligible to be a guest designer on a future challenge. 

Enjoy your evening; I'll be back tomorrow with another project. Until then, happy stampin'!


Stampin' Up! Supplies Used: 

Table built using Product Table Builder by The Crafty Owl - Independent Stampin' Up! Demonstrator.
 
I got Top 3 Honourable Mention for this card over at The Card Concept!

Scrapbooking

Stampin' Up! has introduced a new range of 12x12" scrapbooking product and kit - the full range is now available to purchase online. To download a copy of the new digital Scrapbooking Catalogue click here.

Mini Catalogue

BROWSE THE CATALOGUE

'Tis The Season - the new Stampin' Up! Mini Catalogue is here! For more details and to download your copy click here

Shop Online

Access my online shop 24 x 7, 365 days of the year:

Current September hostess code:

JQEHTZGK

Shop Online

2024-25 Annual Catalogue

BROWSE THE CATALOGUE

Click on the image to download your copy of the 2024-25 annual catalogue. For a full list of current SU! supplies, go to my online store. If you would like any help or advice, please drop me a line at joanne@thecraftyowl.co.uk or give me a call on 07773 421446 - I'd be happy to help.

Join My Team

It's always a great time to join Stampin’ Up! New team members can get £130 worth of products for only £99 + free business supplies + free shipping + all the fun being a part of Stampin’ Up! Stampin' Up! has something for everyone: join my growing team and benefit from my support to enjoy Stampin' Up! however you choose.

If you're interested, call me for a chat to understand how I can help you realise your goals. Alternatively, if you have already decided to sign up and you just can't wait, please click here for the link to the online form where you can sign up and order your starter kit right away! 

Latest Kits!

Stampin Cut and Emboss

The Christmas Ornaments Kit and Card Keeper Kit are the latest kits that will be arriving in the online store later this month - get yours here!

New Online Exclusives

There are new products available exclusively in the online store from 3 July - check them out here.

About Me

Hi I'm Joanne and live in Northampton and when I'm not looking after my husband and two beautiful children, am an avid crafter with a passion for all things Stampin' Up!

I must confess that I have never been a big rubber stamper - until I discovered Stampin' Up! that is. I love the fact that I can get such great results with co-ordinating stamps, inks, papers and punches - the possibilities are endless! Join me on my stamping journey as I share the things I love and be inspired to create amazing things yourself!

Follow Me

Monthly Newsletter

Box Builder

Click the button above to use Box Buster to create your custom box design using the Envelope Punch Board!

Kits Collection Now Available!

Stampin Cut and Emboss

The new Kits Collection from Stampin' Up! is now available!

Click here to see the current kits available and order yours online today.

I Design For


Stampin' Up Stuff

This is my personal blog and is not endorsed by Stampin’ Up! I hope you find it a plentiful source of ideas and personal inspiration but please don't copy my designs for contest submission or use for classes, publication or sale without express permission.