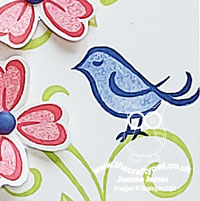
Simple Stamping With In Colours And Sentimental Swirls

by Joanne James30. May 2022 08:00

Happy Monday everyone! Today I'm sharing a card that uses the sketch layout over at Hand Stamped Sentiments that showcases four out of the 5 new in-colours - perfect for the challenge over at Colour Inkspiration CI#122 too:

    May be an image of text that says "Sweet Sorbet intts Parakeet Party COLOUR InSPRTN #122 CHALLENGES aht Tahitian of Tide 3 least at Choose Orchid Oasis n Starry Sky"

I decided to start the week with some #simplestamping using a set that is perfect for the beginner stamper and the banner on the HSS layout was the ideal place to showcase it - take a look:


Here's the low-down on today's card:

Sentimental Swirls The 'Sentimental Swirls' stamp set was inspired by our very first £1m sales achiever in the UK, Sam Hammond. It comprises a basic swirl, with additional swirls, leaves, flowers, a bird, a butterfly and some simple, sentiments perfect for the most popular types of cards - birthdays, thank yous and general hellos. The set has endless creative possibilities and as it's photopolymer, it's really easy to line up the images or the infills. I created a leafy swirl that fills my banner and stamped a bird onto one of the vines, before adding my flowers and sentiment separately. I also added a little extra decoration to the inside of my card:
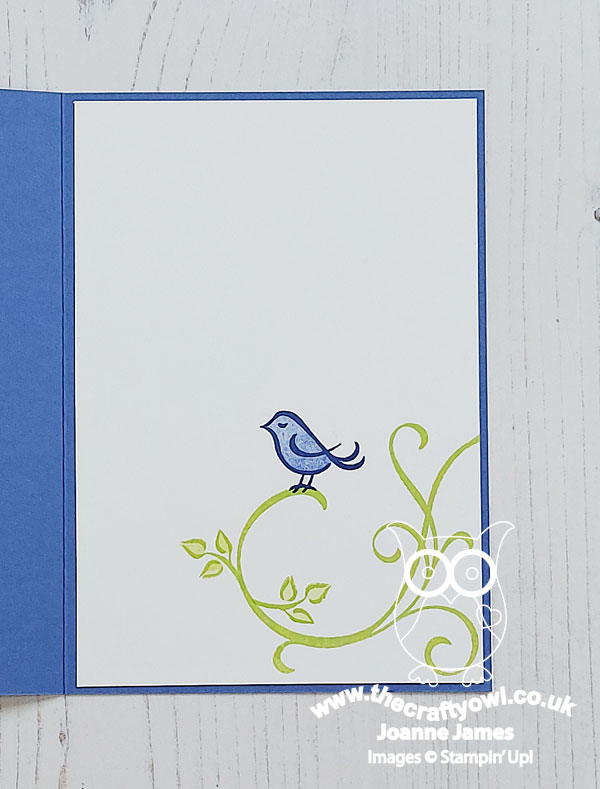
 

Step It Up With Punch Co-ordination - Sentimental Swirls is great for one layer stamping, but it's also easy to step up your designs by using the Flowers and Leaves punch from the annual catalogue, which punches out one of the flowers in the set. That's what I did on my card, adding some Orchid Oasis enamel dots to the centres and curving the petals slightly with my bonefolder before adding my flowers to my card:
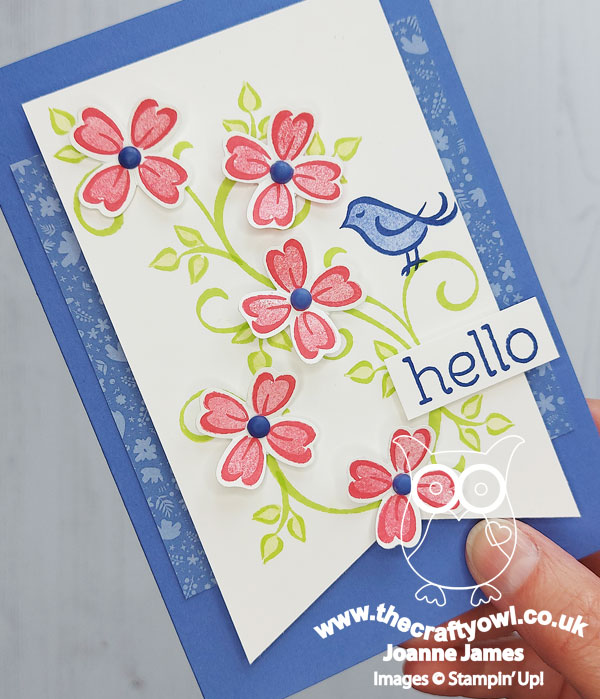
 

I used a panel of in-colour designer series paper in a floral design behind my banner for a touch of extra detail.

An Added Extra - I also used this set for some thank you cards to pop in with some recent customer orders and for the bag tags. The smaller flower in the set also co-ordinates with the flower of the (now retired) Strawberry Builder Punch - you can see that on the tags below:
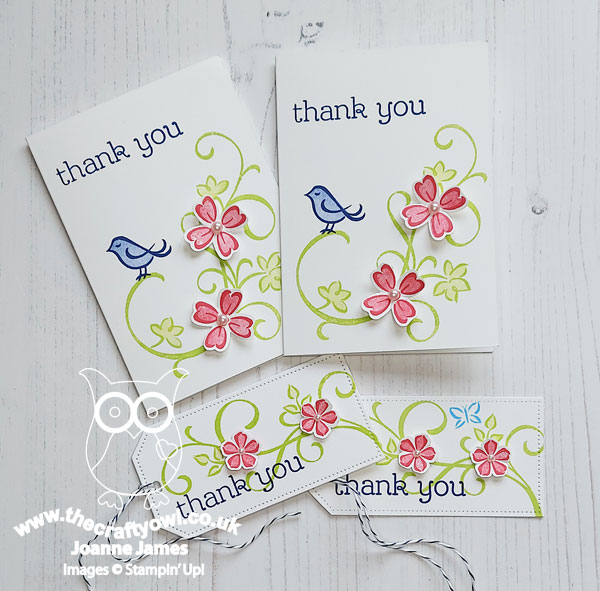
 

So if you already have this punch in your collection, you will have even more creative possibilities available to you with this set.

Here is the visual summary of the key products used on today's project for you to pin for easy reference:
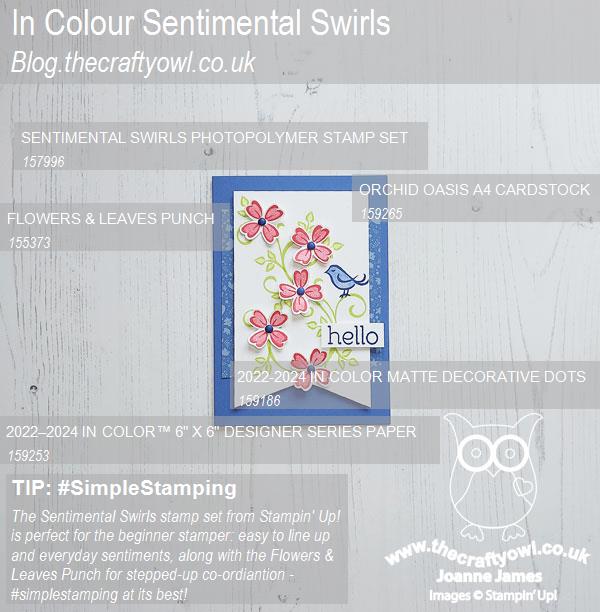
 

You can see all of my 'How To' summaries on my 'How To - Tips and Techniques' Pinterest board in case you've missed any. 

Sentimental Swirls is such a great set for simple cards that can be easily stepped up by adding in a punch (or two). It's in the January-June mini catalogue and whilst I've had it since I made my pre-order, I haven't shown it on my blog until now - which is a shame, as it's a great set that didn't carry over to the new annual catalogue, so you only have until the end of June to get your hands on it. The good news though is that on Wednesday this stamp will hit the Last-Chance list so you will be able to pick it up for just £14.70 - that's a 30% discount on the catalogue price, bargain!

I love the way that the in-colours coordinate so well together too; today's card features all of them except Tahitian Tide (you can glimpse a butterfly in this colour on one of my tags if you need a quick fix!)
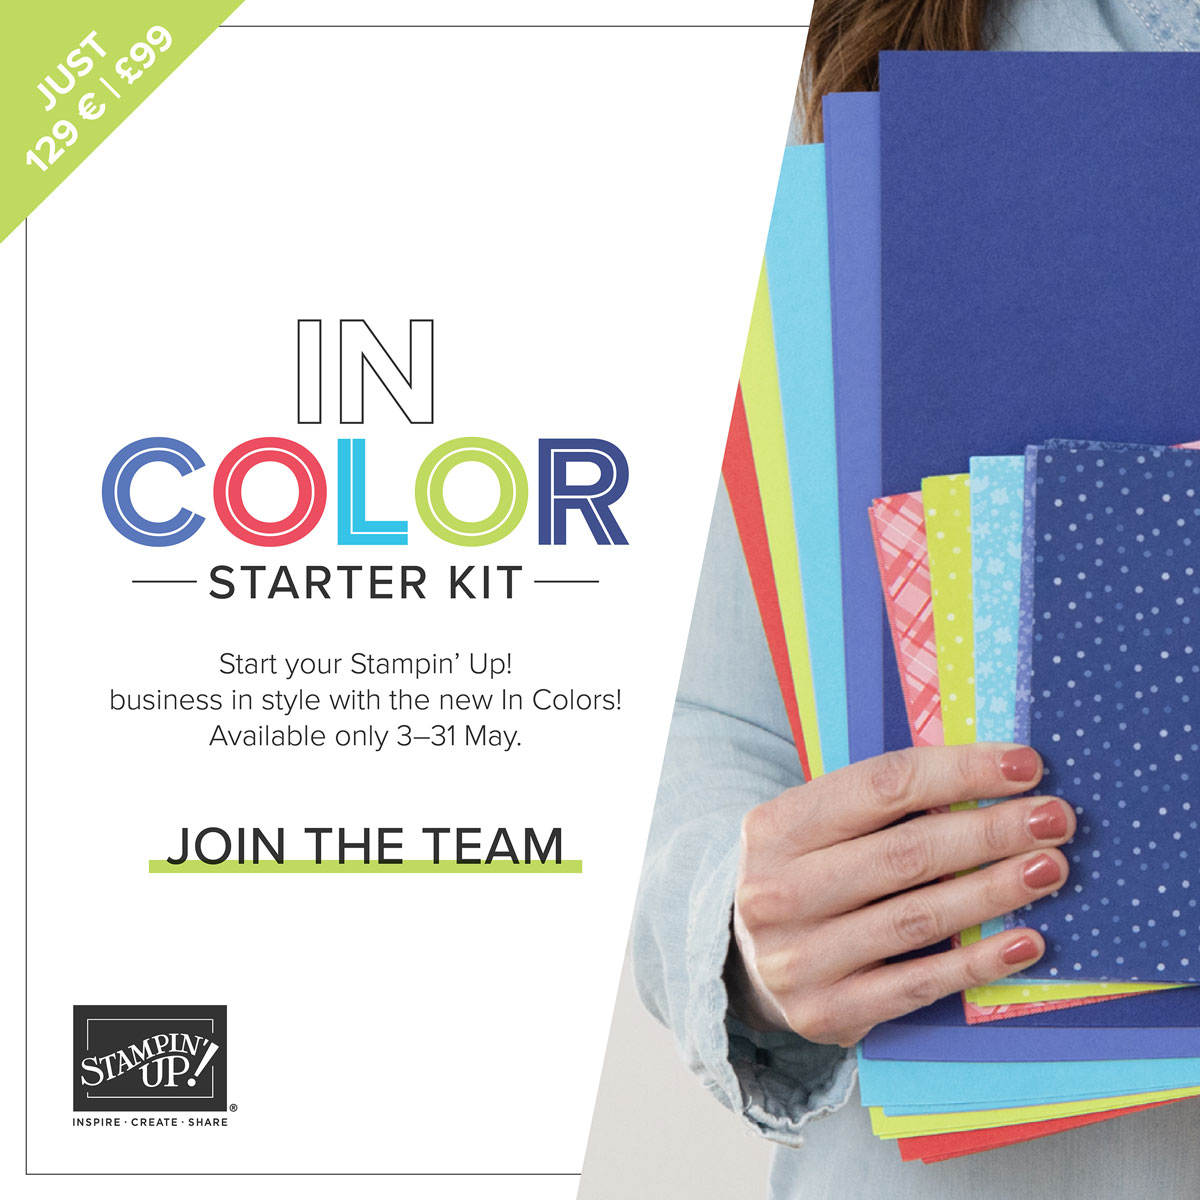
 

A quick reminder that the current joining promotion that features an in-color kit in addition to the £130 of product of your choice - and all for £99 - closes tomorrow. Read all about it here if you'd like a reminder - I would love to welcome you to my team. Alternatively, I still have places left in my current in-colour club - details on the same link above.

Enjoy your day and I'll be back tomorrow with another project. Until then, happy stampin'!


Stampin' Up! Supplies Used:

Table built using Product Table Builder by The Crafty Owl - Independent Stampin' Up! Demonstrator.

#SimpleStamping on Saturday with Waves of Inspiration

by Joanne James23. April 2022 18:58

Hi everyone! I have a quick post today following on from yesterday's post showcasing the wave in the 'Waves of Inspiration' stamp set. I mentioned in yesterday's post that this wave would make a great #SimpleStamping card so today I wanted to show you a pared-down, basic example of that using this week's Freshly Made Sketches layout courtesy of the lovely Kim:


And here's my #SimpleStamping card:


I used the same broad layout for yesterday's card (Kim's sketch is a favourite layout of mine that I often come back to) but for today's card I was completely faithful to it. I stamped my wave using my Stamparatus to build up my layers of ink colour and cropped it for fit the centre of my card. I matted it with a thin border in Night of Navy and added a birthday sentiment from the same set that I trimmed to fit:


A stamp, inks and paper; just 6 items - nothing else required! Clean and uncluttered - just my thing!

Here is the visual summary of the key products used on today's project for you to pin for easy reference:


You can see all of my 'How To' summaries on my 'How To - Tips and Techniques' Pinterest board in case you've missed any. 

Enjoy your day and I'll be back tomorrow with another project for our new challenge over at the Paper Players where I am the hostess. Until then, happy stampin'!


Stampin' Up! Supplies Used:

Table built using Product Table Builder by The Crafty Owl - Independent Stampin' Up! Demonstrator.

A Clean and Simple Celebration

by Joanne James9. March 2022 16:41

Happy hump day! Today I'm sharing a card I made with a few challenges in mind:


The team over at Less Is More are looking for a single word sentiment on a one layer card and I combined this with the current code word of 'hat' over at CASology this month. I was also inspired by Time Out's 8th Birthday celebrations where I used the colours from their badge too for my clean and simple birthday card. Although I'm too late to link up there, I thought you might like to see the badge and colours - my favourite purples! This is the card I came up with - take a look:


Here's the low-down on today's card:

I went with a super-simple 'Celebrate' from the 'Create With Friends' stamp set in Gorgeous Grape and added a party hat coloured with Stampin' Write markers at a jaunty angle to the C - this little gem is to be found in the 'Turtle Friends' set. The two-tone confetti is courtesy of the retired stamp set 'Praiseworthy Prose', which also gave me the perfect greeting for the inside of my card:


And that's my card - stamps, ink and paper, #simplestamping at its best!

Here is the visual summary of the key products used on today's project for you to pin for easy reference:


You can see all of my 'How To' summaries on my 'How To - Tips and Techniques' Pinterest board in case you've missed any. 

Enjoy your day and I'll be back tomorrow with another couple of projects. Until then, happy stampin'!


Stampin' Up! Supplies Used:

Table built using Product Table Builder by The Crafty Owl - Independent Stampin' Up! Demonstrator.

Your Last Chance To Sale-A-Brate With Awesome Otters!

by Joanne James26. February 2022 20:00

I've spent a lovely day outside in the fresh air today watching back-to-back hockey matches, still chilly but with glorious sunshine - at last! So I've a super quick post today to share a clean and simple card that uses the colours over at Sunday Stamps and the sketch challenge over at AAA Cards:


I went for the middle rectangle of the nine grid split and chose a cute party-going otter as my favourite animal (of the moment!) as he won't be around for much longer - take a look:


Here's the low-down on today's card:

The Sunday Stamps challenge is entitled 'Winter Blues' but there's nothing sad about today's card! This cute little otter is from the 'Awesome Otters' stamp set: I stamped him and added a party hat from the same set and coloured him with a selection of Stampin' Blends markers (added below, plus a retired Coastal Cobana set) before finishing with a simple sentiment:


The 'Awesome Otters' stamp set is one of a number of items that can be yours FREE with a £45 purchase during Stampin' Up!'s current Sale-A-Bration promotion. If it's still on your wish list, you have until next Monday when the promotion ends to order yours before it's gone forever. Just click on the links below to go to my online store to get yours - remember to add the current host code for a special thank you from me.

Here is the visual summary of the key products used on today's project for you to pin for easy reference:


You can see all of my 'How To' summaries on my 'How To - Tips and Techniques' Pinterest board in case you've missed any. 

Enjoy your evening and I'll be back tomorrow with another project. Until then, happy stampin'!


Stampin' Up! Supplies Used:

Table built using Product Table Builder by The Crafty Owl - Independent Stampin' Up! Demonstrator.

Save 15% on In The Wild Designer Series Paper and More AYSI254

by Joanne James9. July 2021 12:00

Today I'm sharing my design team card for our new challenge over at As you See It where it's time for a sketch challenge:


I thought the layered rectangles of this sketch provided the perfect opportunity to showcase some designer series paper - especially since lots of those in the annual catalogue are currently available at 15% off - so I had a look through my collection and settled on something wild for you today - take a look:


Here's the low-down on today's card:

In The Wild And A DSP Paper Sale - Between July 1st and August 2nd, a number of the designer series papers in the annual catalogue are available at 15% off. As a reminder, here's a snapshot of all those that are discounted:


Lots to choose from! I chose to feature the 'In The Wild' papers on my card today. I don't have any of the other products in this suite, but I think the papers are great for snipping. I used two different patterns for my rectangles and then fussy-cut a co-ordinating tiger for my feature shape - isn't he so majestic-looking? 


You Got This - I decided my brave tiger would make a good thinking of you/encouragement card, so paired it with the sentiment 'You can do this' from the stamp set 'Forever Fern'. I think it works. When perusing my stamp shelf, I found a few other stamps that would work well with the animals in this set too; you don't always need all of the items in a suite to complete a card, you just need to get creative!

A Paper Trick - I have one last trick to share with you on my card today: when fussy-cutting shapes from designer series paper, don't disgard any shapes that are incomplete. I used one of the tigers on the edge of my paper to decorate the inside of my card; his position looks just like I intended him to be 'off the page', whereas the reality was my tiger only had half a body in the first place!


This is a great #SimpleStamping card that uses stamps, ink, cardstock and makes a feature of the designer series paper in a number of creative ways. 

Here is the visual summary of the key products used on today's project for you to pin for easy reference:


You can see all of my 'How To' summaries on my 'How To - Tips and Techniques' Pinterest board in case you've missed any. 

 So what will you make with our sketch this week? Will you be stocking up on designer series paper whilst you can save - for those paper-addicts among us (yes, I'm one!) there's no better time than the present!

Here's a summary of our challenge rules:

  • Create any card, scrapbooking page, 3D project or packaging project that fits the challenge.
  • Please include the challenge graphic and link back to the challenge in your blog post. Turn off word verification so we can leave you lots of lovely comments. Make sure you link the post not the whole blog to the Linky. Use #AYSIXXX when uploading to a public gallery.
  • If you’re unsure about ‘the rules’, check the details under the Challenge Guidelines tab on the As You See It Challenge homepage.
  • In a sketch challenge, you are welcome to rotate or flip a sketch. You can replace shapes used such as substituting a circle panel for a square panel. However, we must be able to still see the basis of the original sketch in your finished product.
We look forward to seeing your creations in the AYSI gallery.

Enjoy your day and I'll be back tomorrow with another project. Until then, happy stampin'!


Stampin' Up! Supplies Used:

Table built using Product Table Builder by The Crafty Owl - Independent Stampin' Up! Demonstrator.

Stampin' Up!'s New Kits Collection is Here!

by Joanne James1. June 2021 18:50

As if the launch of the January-June mini catalogue retiring list and a creative post wasn't enough for you today, I also have more great news - Stampin' Up!'s new line of all-inclusive craft kits launches to customers today! Designed to be the perfect introduction to paper-crafting, the Kits Collection by Stampin’ Up! is great for the beginner crafter or the crafter on the go.

You can now go online and choose from a variety of affordably priced, versatile kits for multiple occasions. Whatever your skill or experience, the kits are designed for you, the customer, to be in control and and choose the kit experience that is most comfortable for you. 

Kits are all-inclusive, pre-cut, and ready to use with complete step-by-step instructions; plus, new kits will be added to the online store regularly, so remember to check back often! The following kits are currently available in the online store: 


Kit prices range from just £11.25 to £18 each - why not head on over to the online store and check them out? Happy shopping!

Tags: , , , , , ,

Gifts | Shop Online | Shop Stampin' Up! Online

Good Morning Magnolia #SimpleStamping Thank You Card AYSI 247

by Joanne James2. April 2021 13:00

Today I'm sharing my design team card for our new challenge over at As you See It where it's time for a speed challenge:


I pass a beautiful magnolia tree on my school run each day that has just come in to bloom and that totally inspired me to use one of my retiring stamp sets and this week's Color Throwdown colours for today's speedy blossom - take a look:


Here's the low-down on today's card:

Good Morning Magnolia - I decided to go big and bold with my quick card today and I used the large single magnolia flower from the 'Good Morning Magnolia' stamp set for my card today. This allowed me to minimise my stamping and spend my time adding colour to my magnolia blossom. The other thing I love about this stamp set is the sentiments; my simple 'thanks' finishes with beautiful wording inside too:


Speedy Colouring - Even with only one bloom, 10 minutes still isn't long for colouring! I focused my efforts on the petals themselves, adding Melon Mambo to the outer petals and a combination of Flirty Flamingo and a little extra Melon Mambo to the insides. I didn't add any colour to my leaves, just giving them a quick swipe with a blender pen. I love that the Very Vanilla base adds a warmth to the card that you wouldn't get with white:


#SimpleStamping - This card is all about the stamps, ink and paper: simple layering, no fancy die cutting and one focal image, with a simple sentiment. By keeping things simple, they can be quick too! 

Here is the visual summary of the key products used on today's project for you to pin for easy reference:


You can see all of my 'How To' summaries on my 'How To - Tips and Techniques' Pinterest board in case you've missed any. 


Here's a summary of our challenge rules:

  • Create any card, scrapbooking page, 3D project or packaging project that fits the challenge.
  • Please include the challenge graphic and link back to the challenge in your blog post. Turn off word verification so we can leave you lots of lovely comments. Make sure you link the post not the whole blog to the Linky. Use #AYSIXXX when uploading to a public gallery.
  • If you’re unsure about ‘the rules’, check the details under the Challenge Guidelines tab on the As You See It Challenge homepage.
  • In a speed stamping challenge, please time yourself and say in your post how long your card took to complete. 
We look forward to seeing your creations in the AYSI gallery.

Enjoy your day and I'll be back tomorrow with another project. Until then, happy stampin'!


Stampin' Up! Supplies Used:

Table built using Product Table Builder by The Crafty Owl - Independent Stampin' Up! Demonstrator.

#SimpleStamping With A Touch Of Ink To Brighten Your Day

by Joanne James18. January 2021 12:38

Today I have a couple of cards to share, the first one is this one that I made using Linda's fabulous sketch over at Freshly Made Sketches this week and the Color Throwdown colour palette: 


Linda's sketch is a keeper so I just had to play along and those bright colours were perfect for lifting my spirits as I looked out at yet another grey sky on Saturday morning. I thought I would break out one of my new Sale-A-Bration free sets for some super simple stamping - take a look:


Here's the low-down on today's card:

Today's card is so easy to recreate: the 'A Touch of Ink' stamp set, yours FREE with a Stampin' Up! purchase of £90 or more during Sale-A-Bration, is a two-step stamp set that contains outlines and infills and lots of great sentiments. I stamped the leaves in Granny Apple Green directly onto my stitched rectangle of basic white cardstock and added some flower heads in Melon Mambo, that I had stamped onto a scrap piece and roughly cut by hand (the outline and infills don't line up directly so are great for beginners or quick cards - no need to be super-accurate!), giving them a bit of a crumple before adding them to my card. I finished the centres of these with a few basic pearls, then added a fussy cut hummingbird, stamped in all three challenge colours (I inked my stamp up using a sponge dauber) and popped this up on dimensionals, adding a liberal brushing of clear Wink of Stella for some subtle sparkle. And that's it - stamps, ink and paper (save the stitched rectangle detail, which you could easily forgo). #SimpleStamping - there's nothing to it! 

Here is the visual summary of the key products used on today's project for you to pin for easy reference:


You can see all of my 'How To' summaries on my 'How To - Tips and Techniques' Pinterest board in case you've missed any. 

I love this colour combo and used my retired Blueberry Bushel ink and cardstock as my blue as I wanted something vibrant (and hence why it isn't listed below). Did you know today is know as 'Blue Monday', unofficially the most depressing day of the year when we are all suffering our post-Christmas blues? In the current lockdown here in the UK there is certainly lots to make us feel fed up; I am still trying to look on the bright side though and will be sending this card to someone today to let them know I am thinking of them and hopefully brighten their day too!

Enjoy your day; I have lots on but will be back later as I have another card to share. Until then, happy stampin'!

Stampin' Up! Supplies Used:

Table built using Product Table Builder by The Crafty Owl - Independent Stampin' Up! Demonstrator.

Life Is Beautiful New Home Card

by Joanne James12. August 2020 21:00

Today I'm sharing a card using the current Fab Friday sketch and this week's palette over at Color Throwdown:


I procrastinated over this sketch for some time - should I showcase some patterned paper? In the end my need for a new home card led me to create a great #SimpleStamping card using nothing more than stamps, ink and paper - take a look:


Here's the low-down on today's card:

Life Is Beautiful - The tree and sentiment on today's card come from the new stamp set 'Life Is Beautiful', inspired by Million Sales Achiever LeeAnn Greff. This is a lovely set with the ability to dress the tree for all seasons. I chose to use the CTD fresh, summery colours along with the cute bird house and bird pair from the set for my card. 

Welcome Home -  I thought the bird house would make this a perfect set for a 'new home' card. I needed one for a dear friend of mine who has left her life in London where she has lived for some 20 years to return to Wales and the town where we grew up. I used a sentiment on the inside of my card from a retired set because 'welcome home' seemed appropriate:


#SimpleStamping - I decided not to use any framelits or diecuts on today's card as I wanted to give an example of #SimpleStamping with nothing more than stamps, ink and paper. I really love the result - sometimes less really is more! 

Here is the visual summary of the key products used on today's project for you to pin for easy reference:


You can see all of my 'How To' summaries on my 'How To - Tips and Techniques' Pinterest board in case you've missed any. 

Enjoy your evening and I'll be back tomorrow with another project. Until then, happy stampin'!


Stampin' Up! Supplies Used:

Table built using Product Table Builder by The Crafty Owl - Independent Stampin' Up! Demonstrator.


Black and White You're One in A Melon Cute Fruit

by Joanne James1. August 2020 20:00

Today I'm sharing a card that uses the current Colour Inkspiration challenge colour palette and the photo and sketch inspiration over at Fusion:

Image may contain: indoor, text that says "#82 CHAIALU CHALT Just Jade Melon Mambo Whisper White Basic Black"   

I spotted that cute little melon in the Fusion photo and immediately thought of the Colour Inkspiration colours and how combining the two could make a fun fruity card:


Here's the low-down on today's card:

Cute Fruit - I used my 'Cute Fruit' stamp set again to create my melon slices and stamped that fun punny sentiment in white on my horizontal black panel. I fussy cut the melon segments to allow them to be popped up on dimensionals.

#SimpleStamping - The 'Cute Fruit' stamp set features in the Stampin' Up! beginner's brochure and is great for those new to stamping. It makes easy one layer cards, but can also be easily 'stepped up' with some designer series paper and a little fussy cutting as I've done here. And everyone knows someone who is 'one in a melon', right?! 

A Little Extra Detail - I could have stopped there, but I found some retired raindrop epoxy shapes in my stash that I thought would be great to highlight the melon seeds. I coloured them black with my Blends marker and added them to the spaces outlined on the stamped image - I think the added shine and detail adds a nice extra little 'something':


If you don't have any of these in your stash you could always make some with a fine tip glue pen.

Here is the visual summary of the key products used on today's project for you to pin for easy reference:


You can see all of my 'How To' summaries on my 'How To - Tips and Techniques' Pinterest board in case you've missed any. 

Yesterday was a scorcher here in the UK and thankfully today was a little cooler so enabled me to run without flaking out in the heat first thing and then get a few gardening jobs done. It was even cool enough for me to spend a little time in my craft room! Following brunch, young Master James spent the day at the lake with one of his friends, waterskiing, jetski riding and bouncing on inflatables. He had a ball and will I'm sure sleep well tonight! I hope you have enjoyed your day and I'll be back tomorrow with my card for our new challenge at The Paper Players. Until then, happy stampin'!


Stampin' Up! Supplies Used:

Table built using Product Table Builder by The Crafty Owl - Independent Stampin' Up! Demonstrator.

2025-26 Annual Catalogue

BROWSE THE CATALOGUE

Click on the image to download your copy of the 2025-26 annual catalogue. For a full list of current SU! supplies, go to my online store. If you would like any help or advice, please drop me a line at joanne@thecraftyowl.co.uk or give me a call on 07773 421446 - I'd be happy to help.

Shop Online

Access my online shop 24 x 7, 365 days of the year:

Shop Online

Join My Team

It's always a great time to join Stampin’ Up! Between 6-31 May, new team members can get £170 worth of products for only £99 + free business supplies + free shipping + all the fun being a part of Stampin’ Up! That's an extra £40 of product - FREE! Stampin' Up! has something for everyone: join my growing team and benefit from my support to enjoy Stampin' Up! however you choose.

If you're interested, call me for a chat to understand how I can help you realise your goals. Alternatively, if you have already decided to sign up and you just can't wait, please click here for the link to the online form where you can sign up and order your starter kit right away! 

Latest Kits!

Stampin Cut and Emboss

The Sending A Smile Kit and The Beautiful Blues Kit are the latest kit additions to the online store - get yours here!

New Online Exclusives

There are new products available exclusively in the online store from 6 May - check them out here.

About Me

Hi I'm Joanne and live in Northampton and when I'm not looking after my husband and two beautiful children, am an avid crafter with a passion for all things Stampin' Up!

I must confess that I have never been a big rubber stamper - until I discovered Stampin' Up! that is. I love the fact that I can get such great results with co-ordinating stamps, inks, papers and punches - the possibilities are endless! Join me on my stamping journey as I share the things I love and be inspired to create amazing things yourself!

Follow Me

Monthly Newsletter

Box Builder

Click the button above to use Box Buster to create your custom box design using the Envelope Punch Board!

Kits Collection Now Available!

Stampin Cut and Emboss

The new Kits Collection from Stampin' Up! is now available!

Click here to see the current kits available and order yours online today.

I Design For


Stampin' Up Stuff

This is my personal blog and is not endorsed by Stampin’ Up! Stampin' Up! is a registered trademark of Stampin' up! Inc. I hope you find my blog a plentiful source of ideas and personal inspiration but please don't copy my designs for contest submission or use for classes, publication or sale without express permission.