Forever and Always With Love VIntage Heart

by Joanne James10. February 2021 22:30

Today I'm sharing a quick card that I made at the weekend for the current challenge over at Inspired By this week where they have the most beautiful vintage linen hearts in their inspiration photo:

Despite my vast collection of patterned paper, I couldn't find anything with a ditsy floral pattern for my hearts in the same colourway as the inspiration photo, so instead I chose a retired pattern (apologies I cannot remember the name) went for a co-ordinating colour palette and built up from there - take a look:


Here's the low-down on today's card:

I used my Forever and Always dies again and paired them with the hearts from the Stitched Be Mine Dies to create my heart, with a subtle embossed top piece to mimic the linen look of the hearts in the photo:


A few additional flowers, pearls and a double linen bow all add to the vintage feel. A rather unconventional colour palette for a Valentine's card, but this card would work as well to send anyone a heartfelt message at any time, I think.

Here is the visual summary of the key current products used on today's project for you to pin for easy reference:


You can see all of my 'How To' summaries on my 'How To - Tips and Techniques' Pinterest board in case you've missed any. 

Enjoy your evening and I'll be back later in the week with another project. Until then, happy stampin'!


Stampin' Up! Supplies Used:

Table built using Product Table Builder by The Crafty Owl - Independent Stampin' Up! Demonstrator.

Bermuda Bay Oh So Ombre Valentine Darling Donkey CCS 406

by Joanne James9. February 2021 13:00

It's Tuesday and time for a new challenge over at CAS Colours & Sketches. This week's challenge is a sketch challenge and Julie has asked that we use the following layout:


Feel free to flip or rotate the sketch when making your card. For my card today I chose to use two of my favourite Sale-A-Bration free gifts - take a look:


Here's the low-down on today's card:

Darling Donkey - Yes, the sweet donkey is here, this time bearing gifts, or more specifically the gift of love with a single red rose - how romantic! Is there anything cuter than a donkey at Valentine's, I wonder?! With only another 5 days to go until the day itself, I thought I would take the opportunity to make another card for one of my loved ones. I'm also linking up with the ladies over at Just Us Girls again as 'Valentine' is their word of the week.

Oh So Ombre - I backed my oval with a panel of patterned Oh So Ombre paper - another Sale-A-Bration freebie that I can't get enough of! My card today is uncluttered and clean, although the reduction in white space does leave me sailing close to the wind as far as our challenge CAS rules are concerned. So if you are reading this and considering playing along, you have been warned! 

Still Time To Sale-A-Brate - If either of the above products are on your wish list, you still have another 3 weeks to go before the current Sale-A-Braiton promotion ends. That is a month earlier than usual though, so bear this in mind and be sure to place your order in good time. Links to the online store are included below or get in touch if you would like me to place your order for you.

Here is the visual summary of the key products used on today's project for you to pin for easy reference:


You can see all of my 'How To' summaries on my 'How To - Tips and Techniques' Pinterest board in case you've missed any. 

Enjoy your day; I'm hoping to complete the second room on my current house decorating quest, so that I can spend the rest of the week getting up straight and having a good tidy up. Why is it that the minute I start decorating anywhere, the rest of the house seems to descend into disorganised chaos?! Does that happen in your house too? I'll be back tomorrow with another project. Until then, happy stampin'!


Stampin' Up! Supplies Used:

Table built using Product Table Builder by The Crafty Owl - Independent Stampin' Up! Demonstrator.

Pastel Hearts Three For Three - Another Snailed It Notecard

by Joanne James8. February 2021 09:33

Happy Monday everyone! I'm still decorating so another quick clean and simple card from me today and another play for the challenges over at Color Throwdown and CASology:


Yes, three for three! My third (and final!) card using this week's pastels over at the Color Throwdown, having decided to use them for my Paper Players card yesterday and my notecard on Saturday. As promised here's the second notecard I made, in a similar vein to Saturday's card, this time featuring the dicut envelope from the Snail Die set:


Here's the low-down on today's card:

I diecut four envelopes, one in each of the CTD challenge colours, and glued each of them closed. I added them to the edge of my plain white notecard, again stamping my sentiment from the set 'A Little Lace' in Basic Grey. I added a teeny-tiny white resin heart to the flap of each of them for a sweet finishing touch: 


Here is the visual summary of the key products used on today's project for you to pin for easy reference:


You can see all of my 'How To' summaries on my 'How To - Tips and Techniques' Pinterest board in case you've missed any. 

Another quick and easy CAS notecard! If you like today's CAS creation, do check out both yesterday's and Saturday's cards for a variation on my 'pastels and hearts' theme.

Enjoy your day and I'll be back tomorrow with another project. Until then, happy stampin'!


Stampin' Up! Supplies Used:

Table built using Product Table Builder by The Crafty Owl - Independent Stampin' Up! Demonstrator.

Love Hearts Wreath Builder Pastel Valentine PP527

by Joanne James7. February 2021 09:00

Today it's Sunday and time for this week's new challenge over at The Paper Players! It's the turn of the fabulous Anne Marie to host this week and she has a fun theme challenge for you to work with:


I'm not generally into pale colours but I was really drawn to the pastels over at the Color Throwdown challenge this week, and was also inspired by their photo of those old-time Love Hearts sweets to make another Valentine card and create some love hearts of my own - take a look:


Here's the low-down on today's card:

Today's card has no stamping at all! I decided to use a slimline card layout and create a layered square in each of the CTD challenge colours, using one each of a scallop-edged square, stitched square and a diecut heart from the Wreath Builder Die set. Each square is so simple, yet the detail of each of the diecut pieces is what makes this card so pretty:

A quartet of pastels that look good enough to eat! In additon to playing over at Color Throwdown, I'm also linking up over at Just Us Girls where their word this week is 'Valentine'. 

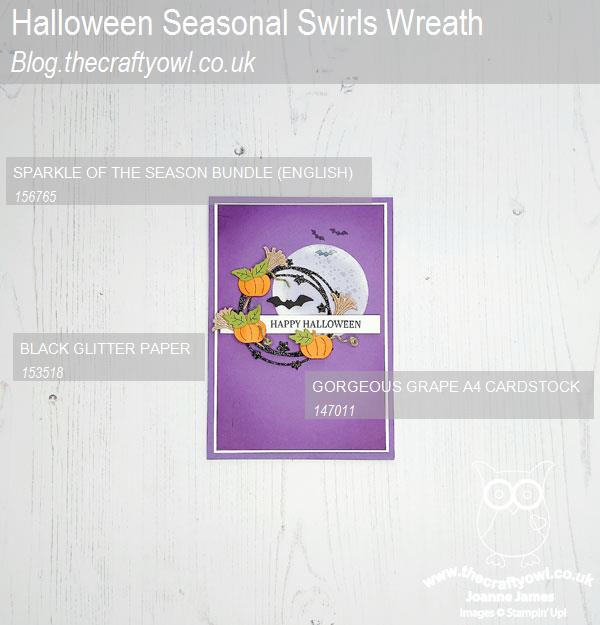
Here is the visual summary of the key products used on today's project for you to pin for easy reference:
 

You can see all of my Product and 'How To' summaries on my 'How To - Tips and Techniques' Pinterest board in case you've missed any. 

Before you reach for your ink and papers, check out what our amazing team has created to inspire you this week:

Here's a quick recap of our challenge rules:
 
1.  Create a new paper project
2.  Upload your creation to your blog with a link back to us and provide a direct link to the post featuring your challenge submission.
3.  Please link your card to no more than four challenges, TOTAL.
4.  Have FUN!

You can see all of my 'How To' summaries on my 'How To - Tips and Techniques' Pinterest board in case you've missed any. 

Enjoy your day; I've been decorating so am hoping to get a little more done today. Whilst the James Juniors are still hoping for snow, it's looking less and less likely. The arrival of the 'Beast From The East Mark Two' is threatening to push daytime temperatures below zero, so unless there's the opportunity to build a snowman, I'll be staying safely indoors! I'll be back tomorrow with another project using these colours. Until then, happy stampin'!


Stampin' Up! Supplies Used: 

Table built using Product Table Builder by The Crafty Owl - Independent Stampin' Up! Demonstrator.


Snailed It Pastel Happy Mail Notecard

by Joanne James6. February 2021 22:46

Today I'm sharing a quick clean and simple card for the challenges over at Color Throwdown and CASology:


I was really drawn to the pastels of the Color Throwdown palette this week and having decided to use them for my Paper Players card tomorrow (you'll have to come back in the morning to see that one!) I ended up making two more cards using the same colours. Here's the first one:


Here's the low-down on today's card:

I stamped eight tone-on-tone envelopes from the 'Snailed It' stamp set and diecut them using the co-ordinating die, then layered them in two columns onto a white raised scalloped stitched rectangle. My sentiment is stamped in grey and from the set 'A Little Lace', where I masked off the last part of the sentiment to suit my card. How sweet are those little pieces of colourful happy mail:


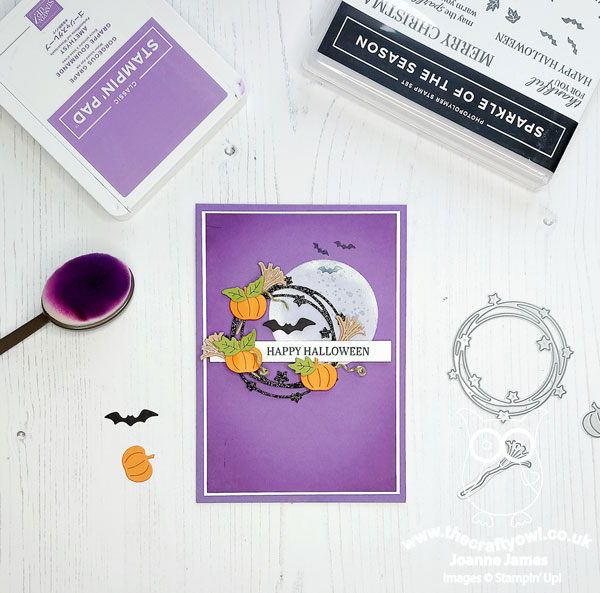
Here is the visual summary of the key products used on today's project for you to pin for easy reference:


You can see all of my 'How To' summaries on my 'How To - Tips and Techniques' Pinterest board in case you've missed any. 

A quick and easy CAS notecard! Tomorrow's card uses these colours again and I will share my third card that features them on Monday.

Enjoy your evening and I'll be back tomorrow with another project. Until then, happy stampin'!
 

Stampin' Up! Supplies Used:

Table built using Product Table Builder by The Crafty Owl - Independent Stampin' Up! Demonstrator.

A Walk In The Woods For AYSI 243

by Joanne James5. February 2021 13:00

Happy Friday everyone! Today I'm sharing my design team card for our new challenge over at As you See It where we have a colour challenge for you this week:


I don't mind admitting these colours threw me for a loop initially - all I could see were elephants, donkeys and apples! Anyway, having seen the card that my teamie Jane made this week, I decided I just needed to have a trawl through my stamp collection and see what I could come up with. I found my 'Walk In The Woods' stamp set and decided the palette would work perfectly for some toadstools - take a look at what I came up with:


Here's the low-down on today's card:

This week's card is definitely 'less is more': I stamped the cluster of toadstools initially in Sahara Sand and coloured the image with my water painters for a little no-line watercolouring. Once dry, I decided that the simple image looked a little flat, so overstamped the outline again in Basic Grey, which added in some much needed detail:


A heat-embossed sentiment in white on Basic Grey and some (retired) Poppy Parade chunky twine bow ties the image in with my mat and card base and completes my card.

Here is the visual summary of the key products used on today's project for you to pin for easy reference:


You can see all of my 'How To' summaries on my 'How To - Tips and Techniques' Pinterest board in case you've missed any. 

Here's a summary of our challenge rules:

  • Create any card, scrapbooking page, 3D project or packaging project that fits the challenge.
  • Please include the challenge graphic and link back to the challenge in your blog post. Turn off word verification so we can leave you lots of lovely comments. Make sure you link the post not the whole blog to the Linky. Use #AYSIXXX when uploading to a public gallery.
  • If you’re unsure about ‘the rules’, check the details under the Challenge Guidelines tab on the As You See It Challenge homepage.
  • In a colour challenge, black or other neutral can be used in outlines and sentiments but no other colours should be included. Stampin’ Up colours are used for reference but colours that are a close match are welcome.

Enjoy your day and I'll be back tomorrow with another project. Until then, happy stampin'!


Stampin' Up! Supplies Used:

Table built using Product Table Builder by The Crafty Owl - Independent Stampin' Up! Demonstrator.

A Clean and Simple Dandelion Trio For The Final CAS(E) This Sketch CTS#405

by Joanne James3. February 2021 07:00

Today I'm sharing a card for the final challenge over at CAS(E) This Sketch:

I'm so sad this challenge is ending! I thought this sketch was a tricky one, and I did take quite a liberal interpretation, but since it was the very last one I couldn't not play along. After much consideration, I decided to go with dandelions for my card - take a look:


Here's the low-down on today's card:

A Dandelion Trio - I've both a trio of dandelions and a trio of dandelion products on today's card! The first is the beautiful Dandelions 3D embossing folder from the main catalogue. This embossing folder is the makings of a card in itself and I thought the positioning of the dandelion seed heads worked really well for the tag elements of the sketch - just check out the detail:


I addition to the embossed dandelions, Once I'd added my strip of DSP (more on that in a moment) I added a scored line at the edge of the paper to tie it into my embossed design, which you can just see on the photo above. A small and subtle detail, but it really adds to the finished appearance of the card.

Dandy Garden - I decided I needed something to represent the vertical element of the sketch, so decided that some of the dandelion-patterned paper from the Dandy Garden DSP pack in the current mini catalogue woould do the trick. I used a strip of white and Bumblebee for my first card, then I also made a second card and used a strip of the Calypso Coral design. On both cards I used a circle punch to remove a semi-circle so that my strip fit around my embossed dandelion head:


My customes and team know how much I have a love-hate relationship with the dandelion designs in the Dandy Garden DSP pack; I am not keen on the bold designs of proper yellow dandelions in this pack (they realy are just weeds, right?!) but I do love the reverse patterns that depict the more whispy dandelion seed heads that I've used here. Here's a shot of each of the cards together - which one do you prefer?


Dandelion Wishes - Finally, I paired my embossed design and DSP border with a heat-embossed sentiment from the 'Dandelion Wishes' stamp set - the third dandelion element. I also used the dandelion stamp in this set to add some decoration to the inside of my card:


I added a trio of faceted gems to the front to complete my card. So what do you think - did I do the final CAS(E) This Sketch justice? I hope so.

Here is the visual summary of the key products used on today's project for you to pin for easy reference:


You can see all of my 'How To' summaries on my 'How To - Tips and Techniques' Pinterest board in case you've missed any. 

Enjoy your day and I'll be back tomorrow with another project. Until then, happy stampin'!


Stampin' Up! Supplies Used:

Table built using Product Table Builder by The Crafty Owl - Independent Stampin' Up! Demonstrator.


A Tricolour Birthday Card Approaching Perfection CCS 405

by Joanne James2. February 2021 13:00

It's Tuesday and time for a new challenge over at CAS Colours & Sketches. Julie is hosting this month and our first challenge of the month is a colour challenge: 


These colours were a bit of a challenge for me originally but I thought they would work well for a birthday card for a teenage boy - and I always need those! I decided to showcase another free Sale-A-Bration stamp set today - take a look:


Here's the low-down on today's card:

'Approaching Perfection' is another of the stamp sets that you can get for free with a Stampin' Up! order of £45 or more during Sale-A-Bration - and you still have another month to take advantage of this promotion! Full of fun birthday sentiments, it is perfect for clean and simple cards. I used my Stamp-a-ma-jig to create an outer border of multi-coloured candles on my base, then add a stitched square featuring my sentiment to the centre, fussy cutting the 'news flash' so that I could highlight it in red - reminiscent of a red-top tabloid:


I'm also joining in with the current challenge over at Less Is More where they are looking for 'things in a row' - in addition to the rows of candles on my card, I decorated the flap of my envelope to match too:


A detail that might be wasted on the average teenage boy to be fair, but it made me happy! This is a great set for #SimpleStamping - you could easily forgo the stitched diecut. All you need is stamps, ink and paper - #SimpleStamping at its best!

Here is the visual summary of the key products used on today's project for you to pin for easy reference:


You can see all of my 'How To' summaries on my 'How To - Tips and Techniques' Pinterest board in case you've missed any. 

As a reminder, for our colour challenges, you must use all of the stated challenge colours. You may also use neutral colours; however, the challenge colours should be the most noticeable ones featured on your card. We use Stampin' Up! color names for reference, but you are welcome to use any other companies' products as long as you match the challenge colours as closely as possible.

Enjoy your day and I'll be back tomorrow with another project. Until then, happy stampin'!


Stampin' Up! Supplies Used:

Table built using Product Table Builder by The Crafty Owl - Independent Stampin' Up! Demonstrator.

Life Is A Beautiful Journey World Map Card

by Joanne James1. February 2021 12:00

Happy Monday everyone! So no snow here over the weekend in the UK, much to the disappointment of the James Juniors, but more than enough rain - with more on the way! So I'm staying away from the flood waters and dreaming of distant shores today with a card inspired by the inspiration photo over at The Card Concept that also uses the sketch over at Fusion:


As much as I love the Fusion inspiration photo, I wanted to use the sketch to create a Clean and Layered card using some rather neglected annual catalogue supplies for The Card Concept - take a look:


Here's the low-down on today's card:

World of Good - I chose to break out some of the World of Good papers for today's card, which reminded me of the colours and textures in the CC inspiration photo. Having chosen a piece of embossed map paper for my main panel, I then used this as the basis for the colour scheme for the rest of my card. 

Beautiful World - There isn't a huge amount of stamping on today's card, since it's the diecuts and paper that takes centre stage. That said, the sentiment, detail for the base of my globe and the detail inside my card are all courtesy of the 'Beautiful World' stamp set, which is about travel in the traditional sense but also personal journeys, which is where I went with my card today. You can see how the sentiment finishes inside my card below:


World Map Dies - I decided to pick up on the gold embossed detail of my paper by using a golden globe (not of the acting award kind!) as the focal point for my card. I backed this with a vellum panel, as I didn't want to detract from that wonderful map paper. I adhered my globe to it, then added glue to the reverse of the vellum where the globe was to enable me to add this to my card base without seeing any adhesive through the vellum. 


Here is the visual summary of the key products used on today's project for you to pin for easy reference:


You can see all of my 'How To' summaries on my 'How To - Tips and Techniques' Pinterest board in case you've missed any. 

Enjoy your day and I'll be back tomorrow with this week's card for our new colour challenge over at CAS Colours & Sketches. Until then, happy stampin'!


Stampin' Up! Supplies Used:

Table built using Product Table Builder by The Crafty Owl - Independent Stampin' Up! Demonstrator.


Berry Blessings For You PP526

by Joanne James31. January 2021 09:00

Today it's Sunday and time for this week's new challenge over at The Paper Players! It's the fifth Sunday of the month so the lovely Laurie is hosting this week and she has a fun tic-tac-toe challenge board for us to work with:


I used Julee's current Mojo Monday sketch as the basis for my card and went top left to bottom right on the diagonal across the board with die cut-embossing-blue for another fruity card for you this week - take a look:


Here's the low-down on today's card:

Berry Blessings - Today's card is all about the free - free product that is! Both the stamp set and the designer series papers on today's card are part of the Berry Blessings bundle that is one of the free products available with a Stampin' Up! order of £90 or more during Sale-A-Bration. I love the designer papers that feature both the blueberries and raspberries in the bundled stamp set and also the strawberries from the Sweet Strawberry bundle - fruity patterns and also some fabulous checks and plaid. This card is all about the blues and greens, so I chose two plaids that would co-ordinate with my blueberry focal point. They just so happen to also be perfect for Stesha's takeover at TGIF Challenges this week where they are all about the plaid too. I also used the stamp set for the sentiment and a little extra stamping on the inside of my card too:


Stitched Shapes - The layers of Julee's sketch allowed me to fully indulge of my love of stitched shapes: rectangles for the background and then a circle as the base for my fussy cut berries. These are my most used of all my dies and the circles are for sure a staple - I just love the way they elevate a humble shape into something just a little bit more.

It's In The Details - I did a lot of fussy cutting on my berries and leaves, so wanted to add only a few extra small details. The embossing that completes my tic-tac-toe line is both dry embossing using my favourite Subtles folder on the white layer, and a white heat-embossed sentiment on my blue sentiment banner. I also added a simple white twine bow (with my banner that makes my two things from the Just Add Ink list this week) and a single pearl to the centre of my blue flower. You can see those finishing touches better below:


I really love how this card came together. Pacific Point was one of the first ink pads I ever bought when I started stamping, yet it isn't a colour I use often now so it was great to get it out for this card. I love that most of the rest of the product that I used was free - links to the store below if you'd like to snap up this bundle too!

Here is the visual summary of the key products used on today's project for you to pin for easy reference:


You can see all of my Product and 'How To' summaries on my 'How To - Tips and Techniques' Pinterest board in case you've missed any. 

Before you reach for your ink and papers, check out what our amazing team has created to inspire you this week:

Here's a quick recap of our challenge rules:
 
1.  Create a new paper project
2.  Upload your creation to your blog with a link back to us and provide a direct link to the post featuring your challenge submission.
3.  Please link your card to no more than four challenges, TOTAL.
4.  Have FUN!

You can see all of my 'How To' summaries on my 'How To - Tips and Techniques' Pinterest board in case you've missed any. 

Enjoy your day; we were forecast more snow here in the UK this weekend, but yesterday both James Juniors were disappointed to find temperatures had plummeted but it was more like freezing rain than snow. Today they will be hoping for the proper white stuff so that we can build another snowman! If not, we have some cooking to do and we might even get cracking on a knitting project that we've been promising to start for a while. I'll be back tomorrow with another project. Until then, happy stampin'!


Stampin' Up! Supplies Used: 

Table built using Product Table Builder by The Crafty Owl - Independent Stampin' Up! Demonstrator.

New Online Exclusives

There are new products available exclusively in the online store from 5 November - check them out here.

Latest Kits!

Stampin Cut and Emboss

The Layered Landscapes Kit and Nature's Paintings Kit are the latest kits in the online store - get yours here!

Shop Online

Access my online shop 24 x 7, 365 days of the year:

Current November hostess code:

9NKXDTTR

Shop Online

Mini Catalogue

BROWSE THE CATALOGUE

'Tis The Season - the new Stampin' Up! Mini Catalogue is here! For more details and to download your copy click here

Scrapbooking

Stampin' Up! has introduced a new range of 12x12" scrapbooking product and kit - the full range is now available to purchase online. To download a copy of the new digital Scrapbooking Catalogue click here.

2024-25 Annual Catalogue

BROWSE THE CATALOGUE

Click on the image to download your copy of the 2024-25 annual catalogue. For a full list of current SU! supplies, go to my online store. If you would like any help or advice, please drop me a line at joanne@thecraftyowl.co.uk or give me a call on 07773 421446 - I'd be happy to help.

Join My Team

It's always a great time to join Stampin’ Up! New team members can get £130 worth of products for only £99 + free business supplies + free shipping + all the fun being a part of Stampin’ Up! Stampin' Up! has something for everyone: join my growing team and benefit from my support to enjoy Stampin' Up! however you choose.

If you're interested, call me for a chat to understand how I can help you realise your goals. Alternatively, if you have already decided to sign up and you just can't wait, please click here for the link to the online form where you can sign up and order your starter kit right away! 

About Me

Hi I'm Joanne and live in Northampton and when I'm not looking after my husband and two beautiful children, am an avid crafter with a passion for all things Stampin' Up!

I must confess that I have never been a big rubber stamper - until I discovered Stampin' Up! that is. I love the fact that I can get such great results with co-ordinating stamps, inks, papers and punches - the possibilities are endless! Join me on my stamping journey as I share the things I love and be inspired to create amazing things yourself!

Follow Me

Monthly Newsletter

Box Builder

Click the button above to use Box Buster to create your custom box design using the Envelope Punch Board!

Kits Collection Now Available!

Stampin Cut and Emboss

The new Kits Collection from Stampin' Up! is now available!

Click here to see the current kits available and order yours online today.

I Design For


Stampin' Up Stuff

This is my personal blog and is not endorsed by Stampin’ Up! I hope you find it a plentiful source of ideas and personal inspiration but please don't copy my designs for contest submission or use for classes, publication or sale without express permission.