Dragonfly Dreams Layered Dragonfly Card for #GDP083 And A New Class To Go

by Joanne James20. April 2017 20:54

Today I'm sharing a card for this week's challenge over at The Global Design Project where it's all about the sparkle and bling:

I immediately thought 'glimmer paper' for this challenge, but ended up creating a card that had plenty of shine from the copper elements and my glimmer sparkle was somewhat understated - take a look:


Here's the low-down on today's card:

Copper Trio - Most of the shine on my card comes from the trio of copper elements I've used for the mat, dragonfly and sentiment: copper foil, copper embossing powder and copper metallic thread. These co-ordinate beautifully with the white and Blushing Bride elements elsewhere on my card and definitely add a luxurious feel.

A Glimmer Of Dragonflies - I created a collection of silhouetted dragonflies by using one of the Detailed Dragonfly Thinlits to create a stencil that I then used to sponge my central panel with some Blushing Bride ink. Did you know that the collective term for a group of dragonflies is generally acknowledged to be a 'cluster', but in some circles it is also believed to be a 'glimmer' or a 'beauty'? How lovely is that?

Farewell, Blushing Bride Glimmer - Finally I layered my large diecut dragonfly, using a base of Blushing Bride Glimmer Paper, then vellum and finally copper foil. The angle of the photo doesn't reveal much of the soft pink glimmer paper and it is much easier to see all three layers distinctly in real life - it adds a subtle sparkle that ties in with the sponged panel perfectly. Blushing Bride Glimmer Paper is another of those products on the retirement list that will be leaving us by the end of May but would be easy to overlook, so if you need to stock up be sure to do so whilst stocks last.

This is one of the cards that I designed for my recent Dragonfly Dreams Technique class that featured a variety of ink techniques using this set and I think has to be my favourite of the trio. I'm so glad that this stamp set and framelits are carrying over into the new annual catalogue, although this will be without the 10% bundle saving for purchasing both items together. I will be running this technique class again in person on Monday 3rd July if you live in or around Northampton and would like to attend; however I also have a special offer for anyone who purchases the Dragonfly Dreams bundle through my online store before the 31st May - you will receive this class as a 'Class To Go' with the materials, full written instructions and accompanying step-by-step video tutorials FOR FREE in the post following your purchase (please remember to quote the current hostess code in the sidebar in order to qualify).

Here is the visual summary of the key products used on today's project for you to pin for easy reference:
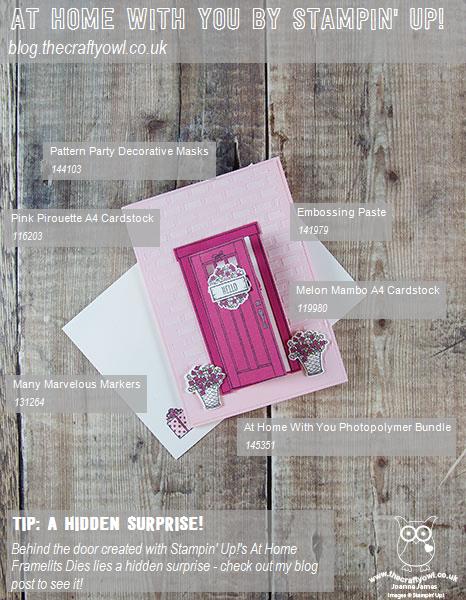
 

You can see all of my 'How To' summaries on my 'How To - Tips and Techniques' Pinterest board in case you've missed any. 

I'll be back tomorrow with another project. Until then, happy stampin'!


Stampin' Up! Supplies Used:

Table built using Product Table Builder by The Crafty Owl - Independent Stampin' Up! Demonstrator.


Paper Aeroplanes - You've Got Mail

by Joanne James1. August 2016 08:00

Happy Monday everyone! Week 2 of the long school summer holiday! I managed to get some quality craft time over the weekend, so have a few things to share with you this week. The first is a card for this week's CASology challenge:

This week's cue card is 'journey'. I've been having fun playing along with this challenge when I can as it's a great opportunity both to hone my CAS card style and have fun, as there are often numerous ways the cue card can be interpreted. The design team are also awesome with amazing cards each week - you should definitely check them out! So with 'journey' it didn't take me long to get to thinking about transport, but I still managed to make a slightly quirky interpretation; take a look:


Here's the low-down on today's card:

Is it a star? No it's a plane! - I decided to go with a simple notecard and paper aeroplane for my card today. It reminded me of my schooldays, when I spent far too much time sending notes across the classroom to my class mates via this mode of transport. But I digress! My paper aeroplane today comes from the 'Shooting star' stamp set and is easily cut out with the co-ordinating Sliding Star Framelit Dies. I added a dotted trail using a retired stamp from the 'Cool Kid' set, but you could just as easily hand draw this in with your Basic Black Stampin' Write marker.

Airmail Border - I decided that I would use an airmail-type border around the edge of my notecard base to tie in with the postal theme, but on hunting for a suitable stamp that would give me the alternating red, white and blue stripes I was looking for and failing to come up with anything suitable, I decided instead to use my retired striped stencil and sponge in the alternating colours to create my border. It worked a treat! Here's a picture showing you how I did it:


Just A Note - Despite the simplicity of my notecard, I managed to use three stamp sets! My third set is 'Picture Perfect' and this is where I found my simple sentiment to finish my card. I stamped it in Pacific Point and finished with a Real Red enamel shape heart to complete my visual triangle.

Here is the visual summary of the key products used on today's project for you to pin for easy reference:


You can see all of my 'How To' summaries on my 'How To - Tips and Techniques' Pinterest board in case you've missed any. 

A fun notecard that would be useful for any little notes that you want to send. I might actually use this card to send a note to one of my blog friends who lives across the pond - it seems a fitting card for that kind of journey!

That's all from me today; I have a child-free day today as I am attending a business function; the James Juniors are looking forward to spending the day with Granny and Ollie dog, as he is on vacation with her whist my brother-in-law and his family are holidaying abroad. I'll be back tomorrow with another project and news of the new Thoughtful Branches set that will be available to order; until then, happy stampin'!


Stampin' Up! Supplies Used:

Table built using Product Table Builder by The Crafty Owl - Independent Stampin' Up! Demonstrator.

From Land To Sea Turtle One Layer Card

by Joanne James15. May 2016 09:00

It's Sunday and time for a new challenge over at The Paper Players! It's the turn of my good friend LeAnne to host our challenge this week and she has a fun clean-and-simple theme for you to play along with:


For my card this week I wanted to use my 'From Land To Sea' stamp set. I bought this set for the turtle - I love turtles! - but to date have only used the lighthouse stamp, so this week's challenge gave me the opportunity to change that. The ladies over at Less is More have a one layer challenge with the theme 'At Sea' so I'm linking my card with them too, along with the challenge over at Just Add Ink where the theme is 'masking'. I've a new product 'sneak peek' for you today as well! Without further ado, here is my card:


This isn't the first card I made for this week's challenge: I remembered 'wild animal' but forgot 'clean and simple' on my original card, so I will share that one with you later. As far as this card goes though, I just love it! Here's the low-down on how I created my card:

Sea-faring Turtle - Turtles are the one species of sea creature that has always captivated me. I have spent many hours BC (before children!) scuba diving in the warm waters of the Caribbean and nothing ever thrilled me more than to come across a turtle in its natural habitat. They really are so graceful and fascinating to observe. I stamped my turtle in Archival Black ink, once directly onto my extra-thick Whisper White card base, and again onto a post-it note. I cut the second one out and used it as a mask to cover the one on my card base, whilst I sponged in the sea behind. 

Swirly Scribbles Stencil - Secondly, the 'sneak peek'! I made a stencil with the wavy die in the new Swirly Scribbles Thinlits set from the forthcoming new annual catalogue by cutting one and then placing across a masked rectangle behind my turtle. With my turtle masked, I sponged through the stencil with Pool Party, Bermuda Bay and Island Indigo inks to create the seascape and then removed both the stencil and turtle mask and coloured my turtle with inks and a blender pen.

A Teeny Tiny Sentiment - To finish my card, I added a sentiment from the Teeny Tiny Sentiments set. This stamp set has a great variety of sentiments for each and every occasion that are suitably small and work perfectly with this layout. I chose my sentiment with the recipient of my card in mind; we haven't had a diving holiday with our good friends Cathy and Andy in such a long time, so this card is perfect to send to them to remind them that one day we will all dive together again!

Here is the visual summary of the key products used on today's project for you to pin for easy reference:


You can see all of my 'How To' summaries on my 'How To - Tips and Techniques' Pinterest board in case you've missed any. 

Before you reach for your ink and papers, check out what our amazing team has created to inspire you this week:

The Paper Players Design Team
 
 
Here's a quick recap of our challenge rules:
 
1.  Create a new paper project
2.  Upload your creation to your blog with a link back to us and provide a direct link to the post featuring your challenge submission.
3.  Please link your card to no more than four challenges, TOTAL.
4.  Have FUN! 


I look forward to seeing your wild animal CAS creations this week. We have double basketball today: training this morning them both James Juniors are playing at a tournament this afternoon - on opposing teams! One is playing for school and the other for club, so that should be interesting!!

Back tomorrow with another project; until then, happy stampin'!


Stampin' Up! Supplies Used:

Table built using Product Table Builder by The Crafty Owl - Independent Stampin' Up! Demonstrator.

Time for a Cupcake Party!

by Joanne James21. April 2016 08:05

Today it's time for a new challenge over at Create With Connie and Mary and this week we have a great sketch for you:


I decided to use the 'Cupcake Party' stamp set for both the greeting and embellishment on my card today, with some splashes of gold and an interesting co-ordinating background:


Cupcake Party - I haven't used this stamp set and punch in a while - and now they are both going away! I decided to use some bright orange frosting to contrast with the blues of my card - and added a Bermuda Bay candle with a gold Wink of Stella flame. If either of these items are on your wishlist, snap them up from the online store before it's too late. 

A Happy Pattern - I've been intrigued for a while that one of the stencils in the Happy Patterns pack co-ordinates perfectly with the cupcake case in the cupcake Party stamp set. I sponged my background in Pool Party onto my Pool Party card base to create a co-ordinated yet subtle background.

Splashes of Gold - My card features quite a few gold elements for sparkle and shine today: a gold foil frame for my ombre sentiment (inked with Island Indigo, Bermuda Bay and Pool Party markers), gold Wink of Stella for my candle flame, some gold metallic thread and a sprinkle of gold sequins. On this card all that glitters most certainly is gold - I think it adds to the party feel!

Here is the visual summary of the key products used on today's project for you to pin for easy reference:


You can see all of my 'How To' summaries on my 'How To - Tips and Techniques' Pinterest board in case you've missed any. 

Do visit the other Design Team members to see how they interpreted this week's sketch; there's lots of inspiration over on their blogs too!

Enjoy your day and I'll be back tomorrow with another project; until then, happy stampin'!


Stampin' Up! Supplies Used: 

  • Cupcake Party Wood-Mount Stamp Set
  • Cupcake Builder Punch
  • Sponge Daubers
  • Happy Patterns Decorative Masks
  • Tags & Labels Framelits Dies
  • Tangerine Tango Classic Stampin' Pad
  • Bermuda Bay Classic Stampin' Pad
  • Bermuda Bay A4 Cardstock
  • Pool Party Classic Stampin' Pad
  • Pool Party A4 Cardstock
  • Whisper White A4 Cardstock
  • Metallics Sequin Assortment
  • Gold Metallic Thread
  • Gold Foil Sheets
  • Island Indigo Classic Stampin' Pad

Doodling with Dots Decorative Mask For A Teacher Thank You Card

by Joanne James7. July 2015 08:00

Today I have a card using the sketch challenge over at Paper Craft Crew and the colours over at Pals Paper Arts as the inspiration for my teacher thank you card:

Paper Craft Crew Card Sketch 151. #stampinup #papercraftcrew   PPA 258 Jul. 2

Now I know I entered a teacher thank you card into last week's challenge over at Pals Paper Arts (if you missed it you can see that card here) but what can I say - I need lots of them! I love the bright colour combination here so took the opportunity to do a little doodling - take a look:

I used Night of Navy for my card base which measures 5 3/4" x 5 3/4" and matted a strip of Cucumber Crush striped envelope paper with a strip of Watermelon Wonder cardstock. For my central panel, I embossed a piece of Whisper White with the large polka dot embossing folder for added texture, although difficult to see in the photograph, and then overlaid this with my circle stencil and used my Watermelon Wonder Stampin' Write Marker to doodle an apple shape. I added my stem and leaves freehand and finished with a navy seam binding ribbon bow, some Cucumber Crush lace trim and a trio of white candy dots. I finished with the thank you sentiment from the 'Tin of Cards' stamp set - this is such a great set, I've used it lots already and haven't even made my tin of cards yet!! - stamped in Night of Navy on Watermelon Wonder, and finished with a juicy green apple punched using my tree builder punch. 

I think the colours of this card really pack a punch and my non-standard card size meant a custom envelope would be the order of the day. What better way to finish than with a co-ordinating envelope made from the gorgeous new Cucumber Crush envelope paper? This lightweight paper makes beautifully crisp envelopes and with the aid of my trusty Envelope Expert from The Crafty Owl it was easy to work out what size paper and punch markings I required (9 1/4" and 4 5/8" respectively, in case you were wondering!)

I hope you like today's card; I'll be back tomorrow with a new set of Wednesday Weekly Deals and another project for you. Until then, happy stampin'!


Stampin' Up! Supplies Used:

Table built using Product Table Builder by The Crafty Owl - Independent Stampin' Up! Demonstrator.


Roses are Pink...Two-for-One Valentine's Cards

by Joanne James10. February 2015 08:00

Today I have not one but two cards for you! Both cards fit this week's colour challenge over at Pals Paper Arts, where there is a gorgeous colour palette to work with this week:

I absolutely love this colour combination and couldn't wait to create something pink and pretty with it. Here is my first card:

I layered the colours in two sections and in the central section used one of the lovely rose die cut panels from the Artisan Embellishment kit as a stencil and stencilled the roses in the two shades of pink, adding in touches of Basic Grey for the flower leaves. These die cuts are so beautiful - it's a shame there are only two in the kit! Here's a close up of the sponged area:


The form of the roses is just so pretty I think and looks really beautiful. I added a bow in luxurious silver satin ribbon and stamped my sentiment on the wide mat layer of Pink Pirouette, stamped in Versamark and heat embossed in pewter. This card is full of romance, but I think it would work equally well as a birthday card.

My second card today uses exactly the same colour palette, but is altogether a more clean and simple affair. This week the team over at Less is More is celebrating its 4th birthday and have a colour challenge of 'pink and grey'. Here is my card for this week's challenge:

My card started out as a two-tone pink and grey affair, with an inlaid split sentiment - I die cut the word 'love' using my Little Letters thinlits, then did the same with the cardstock the other way around top and bottom in order that I could paper-piece the reverse colours into the negative space. The more I looked at it though, the more it needed a little something else - I toyed with a scrap of Rose Red that sat on my desk leftover from the first card and the addition of the tiny heart with a tiny sparkle was just what it needed. You can see the detail of the die cut and inlaid letters below:

Congratulations to Chrissie and the team on their 4th birthday - you are an awesome bunch who run a most successful weekly challenge and are truly an inspiration. 

I'll be back tomorrow with another card; until then, happy stampin'!


Stampin' Up! Supplies Used:

Card 1: 

Table built using Product Table Builder by The Crafty Owl - Independent Stampin' Up! Demonstrator.
 
Card 2:
 
Table built using Product Table Builder by The Crafty Owl - Independent Stampin' Up! Demonstrator.

Spring Banner Class

by Joanne James23. March 2014 18:16

This morning I held one of my weekend project classes. They generally last longer than my monthly card classes and are a great opportunity to do something different and a little more involved. Following a successful class last December to make festive Christmas banners (you can read more about that and see our wonderful creations here), at the request of a few of the ladies who attended I decided to hold one to make a Spring/Easter banner with the other half of our banner kits. I chose a colour scheme that would compliment that of the Burlaps and Blooms wreaths that several of us made at my last weekend project class - you can see my finished wreath here. So here is my completed banner:

I chose to feature the word 'Spring' on my banner, as I am intending to leave it up to decorate for a while, but some of the ladies in my class made one that featured the word 'Easter'. We stencilled our backgrounds and letters using the now retired Build a Banner stencil kit in Daffodil Delight, Tangerine Tango and Pool Party with lettering in Smoky Slate.

The banner is decorated with flowers made with the Spiral Flower Originals Die and punched and die-cut butterflies. Here are some close ups of the individual banner pieces - this is the first piece, with a layered butterfly with a lightly embossed layer and some tiny ones punched out with the Itty Bitty Butterfly punch: 

Here's a close-up of one of the letters, along with a couple of the spiral flowers; a single yellow flower and a two-tone blue flower, finished with some Smoky Slate leaves cut out with the Secret Garden framelits:

This one has a So Saffron single flower and a two-tone one in Tangerine Tango and Crisp Cantaloupe, finished with an extra-large pearl, along with a bitty blue butterfly:

My banner simply served as inspiration and as is often the way with this kind of class, everyone makes theirs slightly differently and adds their own unique touch. If you hop on over to my Facebook page, you will be able to see the finished banner that Julie, one of the lovely ladies who attended the class made - different to mine, yet equally gorgeous!

If you live in Northampton and would like to join any of my card or project classes, check out my schedule of forthcoming classes here or contact me for more information.

Back tomorrow with a card to share; until then, happy stampin'!


Stampin' Up! Supplies Used:

Table built using Product Table Builder by The Crafty Owl - Independent Stampin' Up! Demonstrator.


Mini Catalogue

BROWSE THE CATALOGUE

The mini catalogue is now live! Read and download your copy here.

Shop Online

Access my online shop 24 x 7, 365 days of the year:

Current April hostess code:

VDKNV7BH

Shop Online

Join My Team

It's always a great time to join Stampin’ Up! New team members can get £130 worth of products for only £99 + free business supplies + free shipping + all the fun being a part of Stampin’ Up! Stampin' Up! has something for everyone: join my growing team and benefit from my support to enjoy Stampin' Up! however you choose.

If you're interested, call me for a chat to understand how I can help you realise your goals. Alternatively, if you have already decided to sign up and you just can't wait, please click here for the link to the online form where you can sign up and order your starter kit right away! 

Latest Kit!

Stampin Cut and Emboss

The Rock Legend Kit has all you need to make 8 cards with coordinating envelopes. Along with the new Panda Friends Kit, both are available from January 4th for just £14 each - get yours here!

2023-24 Annual Catalogue

BROWSE THE CATALOGUE

Click on the catalogue for a full list of current SU! supplies - if you would like to order any of the items featured, please drop me a line at [email protected] or give me a call on 07773 421446 - I'd be happy to help.

New Online Exclusives

There are new products available exclusively in the online store from 5 March - check them out here.

About Me

Hi I'm Joanne and live in Northampton and when I'm not looking after my husband and two beautiful children, am an avid crafter with a passion for all things Stampin' Up!

I must confess that I have never been a big rubber stamper - until I discovered Stampin' Up! that is. I love the fact that I can get such great results with co-ordinating stamps, inks, papers and punches - the possibilities are endless! Join me on my stamping journey as I share the things I love and be inspired to create amazing things yourself!

Follow Me

Monthly Newsletter

Box Builder

Click the button above to use Box Buster to create your custom box design using the Envelope Punch Board!

Kits Collection Now Available!

Stampin Cut and Emboss

The new Kits Collection from Stampin' Up! is now available!

Click here to see the current kits available and order yours online today.

I Design For


Stampin' Up Stuff

This is my personal blog and is not endorsed by Stampin’ Up! I hope you find it a plentiful source of ideas and personal inspiration but please don't copy my designs for contest submission or use for classes, publication or sale without express permission.